by Marcela M. | Jul 4, 2012 | Blog, Europe, Main courses, Recipe Box, Recipes, Salads and dips, Savories, Travel, Uncategorized
Good afternoon dear friends!
I hope you are having a lovely week! I hadn’t planned to take time off blogging but life took over my plans, and I had to attend to more urgent matters, which is why these recipes are being published late.I had originally planned to bring them to you on Monday the 18th of June (which was the official publication day for savory recipes at Circulo Whole Kitchen) but, as mentioned above, it was not possible. I didn’t want to miss the opportunity of publishing them, however because June’s proposal is very special to me, and because all flavours are summery and ideal for barbecues and outdoor entertaining.
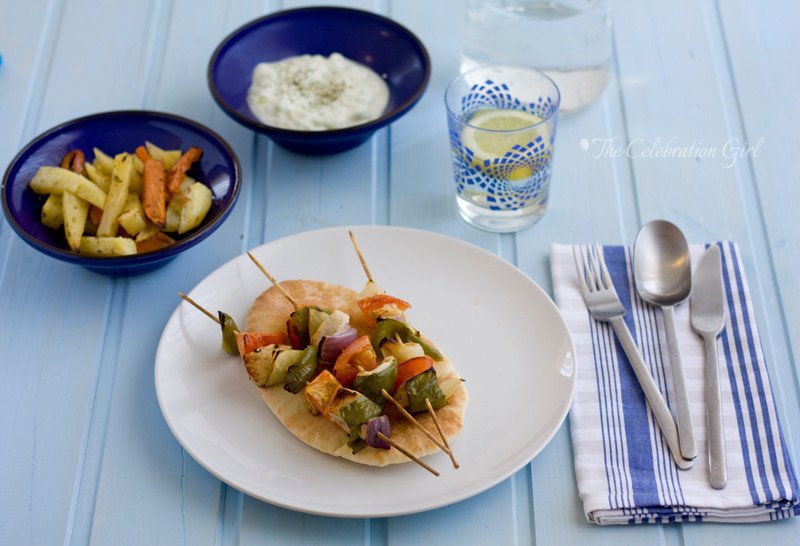
During the month of June, Circulo Whole Kitchen’s savory proposal included three recipes which constitute a traditional Greek meal…and since I live in Greek Cyprus, they are a big part of my life and of my memories of this place . I have already shared one of these recipes with you, that of Tzaziki salad, and for the rest of the menu (which even included freshly baked pitta bread!), I used flavour combinations and marinades that I learnt here. It is my way of bringing you a part of my newly adopted culture, and my children’s first one.
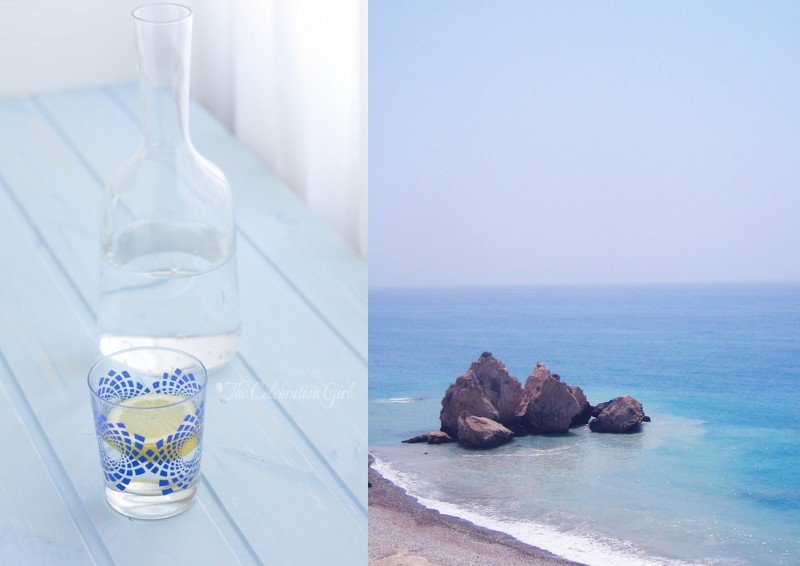
The first time I came to Cyprus was in August 2007, to visit my husband. At the time, I was still working in Ivory Coast (where we had met), and he had arrived to Nicosia a month before. I was meant to join him by the end of the year but we didn’t want to spend 6 months apart, so I took 10 days of vacations and came to see him during the summer. During weekdays, when he was at work, I would stroll the empty streets (Nicosia is a ghost city in August) and, on weekends, we would travel around the island, to get to know our new home. We visited Paphos, Limassol, Larnaca, Aphrodite’s birth place, Kakopetria and other places in between and we were captivated by the calm, quiet, leisure-like mood of the island.
An important part of exploring a new place is, of course, tasting its food, and some of the foods we tasted were the ones that are the object of this post. Now, I had tasted souvlaki before, of course. We call them brochettes in Argentina, using the french word, and I had also had them as kebabs in Ivory Coast (called after their arabic denomination, which means “roast meat”) but the difference lied in the sauces used for marinating them. Until then, I was used to simply brushing meat and vegetables in olive oil and adding rosemary or thyme, or just lemon, and here were marinades that involved wine, cinnamon, yogurt, and french fries served with oregano. I was fascinated and remember scribbling the ingredients mentioned in the menu in paper napkins to try to emulate the recipes at home.
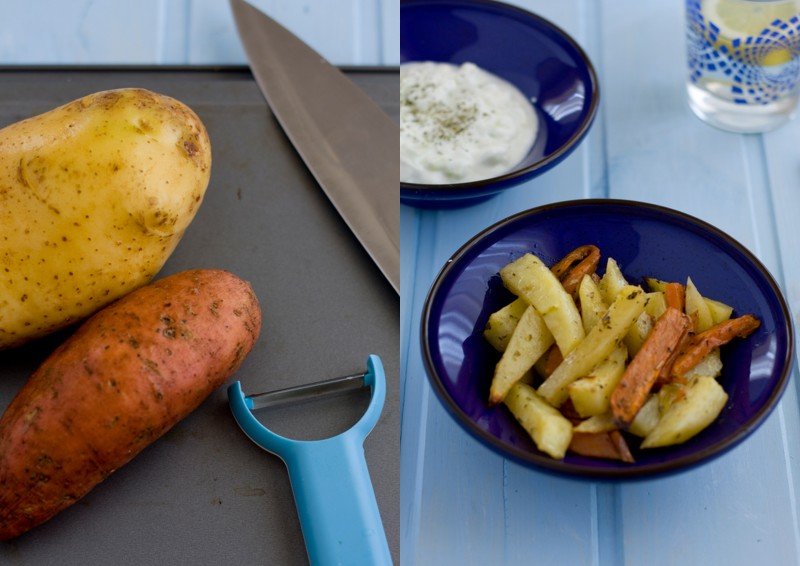
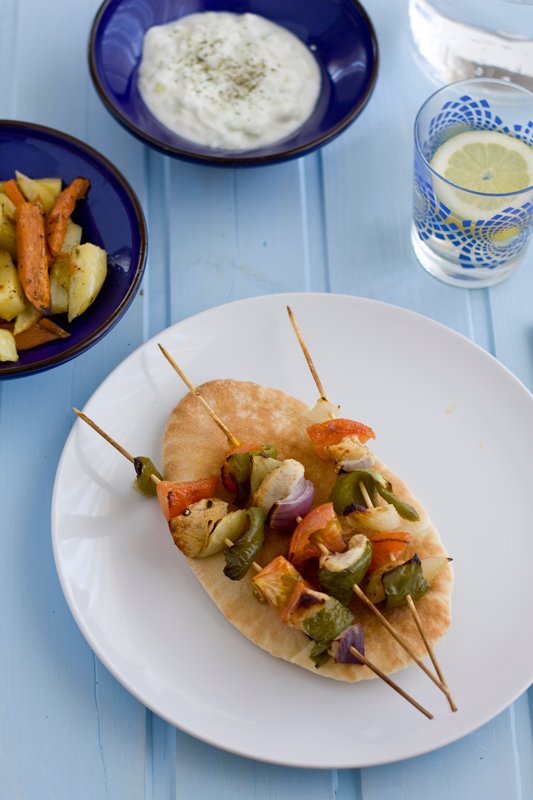
It is through experimenting with the recipes and comments generously provided to me by the people that came into my life since I arrived to Cyprus that I ended up with the chicken marinade for this souvlaki. I accompanied them with traditional tzatziki (using the recipe that my sister in law shared with me many years ago), and with oven- roast mixed potatoes, brushed in olive oil and sprinkled with oregano. For the pitta bread, I used the recipe provided by Circulo Whole Kitchen.
Here are the recipes:
Souvlaki:
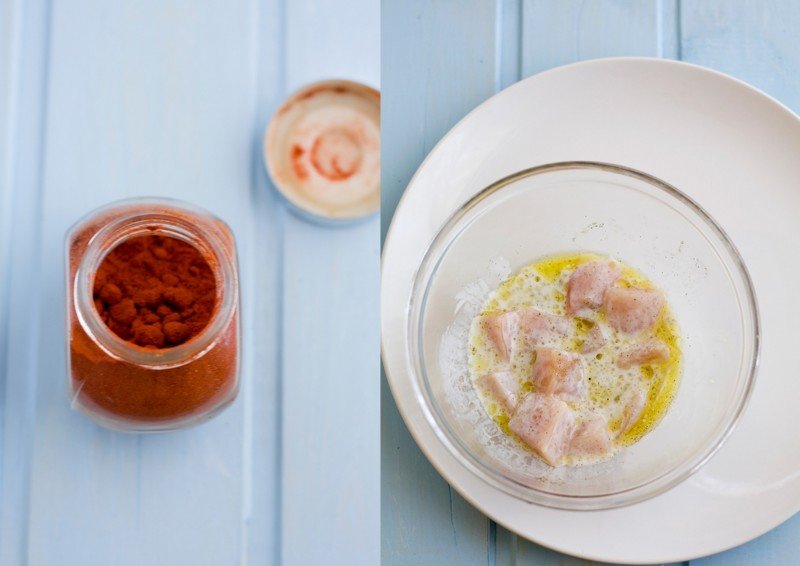
Ingredients (for 8 sticks): 3 tablespoons greek yogurt, 3 tablespoons olive oil, 1 clove of garlic, crushed, 2 teaspoons paprika, salt and pepper to taste, 1 big chicken breast, 1/2 green pepper, 1 tomato, 1/2 red onion, 1/2 white onion, .
Preparation:
1) Mix yogurt, olive oil, garlic, paprika, salt and pepper in a bowl. Dice the chicken breast and add the pieces to the yogurt marinade. Cover with cling film and leave in the refrigerator a minimum of 5 hours (preferably overnight).
2) Dice the vegetables and set aside. Remove the marinating chicken from the refrigerator and start assembling the souvlaki, mixing meat and vegetables. Place them side by side on a baking dish brushed with olive oil and pour any remaining marinade over them.
3) Grill or cook in the oven until ready.
Pitta bread:
Ingredients: 500 grs all purpose flour, 2 teaspoons salt, 2 tablespoons olive oil, 240 ml warm milk, 240 ml warm water, 25 grs fresh yeast.
Preparation:
1) Mix flour and salt. Set aside.
2) Mix milk and water and pour over the yeast, mixing until dissolved
3) Add the the liquid mix to the flour and incorporate. Work the dough thoroughly, until really smooth and soft (this is important! do not skip this step!)
4) Form a ball of dough, place in bowl, cover with cling film and let it rest until it doubles its volume.
5) Flour the counter, put the dough on it, and pat it against the counter a couple of times, in order to remove air.
6) Cut the dough in small portions, cover with a kitchen towel and let them rest for about 15 minutes, in a warm place.
7) Once the small portions of dough have risen, roll them to give them a circular shape, until they are 1/2 cm thick. Place them in baking sheets, cover them and let them rise again.
8) Once risen, cook in a hot oven (220C) for about 6-10 minutes. They should not brown, only be crispy on the outside. Store them one on top of the other, covered with a kitchen towel for maximum freshness.
Oven-roast mixed potatoes:
Ingredients: 1 big potato and 1 big sweet potato, olive oil, oregano
Preparation:
1) Peel and cut the potatoes alongside (as if you were making French fries)
2) Place them on a roasting pan, and brush them with olive oil.
3) Mix salt with one tablespoon of oregano and sprinkle over the potatoes. Cook in the oven until just tender.
Tzaziki (originally published in this post)
Ingredients: 1 cucumber, 1 clove of garlic, greek yogurt and a little bit of parsley for garnishing.
Preparation:
1)Cut the cucumber into thin slices, and then chop them finely. Place them in a bowl.
2)Chop a clove of garlic (or half, if you are not a very garlicky person) and add it to the cucumber.
3) Add greek yogurt (500 ml) and mix well.
4) Chop a few parsley leaves to garnish.
Con sabor latino...
Buenas tardes queridos amigos!
Espero que esten pasando una hermosa semana! No había planeado tomarme vacaciones del blog y tardar tanto en publicar pero la vida se interpuso en mis planes y tuve que ocuparme de asuntos más urgentes, motivo por el cual estas recetas se publican recien hoy. Mi idea original era publicar este post el 18 de junio (ups!), que era el día oficial de publicación de las recetas del Circulo Whole Kitchen, pero, como mencioné anteriormente, lamentablemente ésto no fue posible. Elijo publicarlas, sin embargo, aún cuando haya pasado tanto tiempo, porque la propuesta del Circulo Whole Kitchen para el mes de junio tiene una importancia especial para mí, y porque todos los sabores incluidos son muy veraniegos, ideales para asados y reuniones al aire libre.
En el mes de junio,el Circulo Whole Kitchen nos invitó a preparar tres recetas tradicionales griegas…y como yo vivo en la parte griega de Chipre, estas recetas forman parte de mi vida diaria, y estos sabores forman parte de los recuerdos de esta tierra adoptiva que llevaré conmigo a donde vaya. Una de estas recetas (la de tzaziki), ya la compartí con ustedes en ESTE POST, pero la repito aquí para que no tengan que andar buscando en los archivos (aunque buscar en fácil ahora, no? 😉 Para el resto del menú, utilicé combinaciones de sabores y marinadas que aprendí aquí. Esta es mi forma de acercarles una partecita de mi cultura de adopción- y la primera de mis hijos.
La primera vez que vine a Chipre fue en agosto de 2007, para visitar a mi marido. En ese tiempo yo aún estaba trabajando en Costa de Marfil (donde nos habíamos conocido) y él había llegado a Nicosia un mes antes. Ya habíamos decidido que yo me le uniría aquí definitivamente a fines de ese año, pero 6 meses nos parecía demasiado tiempo para estar separados, así que yo vine a visitarlo durante 10 días en el verano para acortar el tiempo a la distancia. En esas vacaciones comenzamos a conocer la isla. Los días de semana, mientras él trabajaba, yo paseaba por las calles desoladas de Nicosia (que es una ciudad fantasma en agosto!) y, los fines de semana, explorábamos el que sería nuestro nuevo hogar. Así visitamos Pafos, Larnaca, Limassol, la roca donde nació Afrodita, Kakopetria y otros lugarcitos, y quedamos cautivados por el animo veraniego, calmado, tranquilo de la isla.
Una parte importante de explorar un lugar desconocido es, claro está, probar sabores nuevos, y algunos de esos sabores nuevos para mí son los que incluyo en este post. No, no es que haya probado souvlakis por primera vez en este viaje, de hecho en Argentina los llamamos brochettes (usando la palabra francesa) y tambien los había comido en Costa de Marfil (donde los llaman kebabs, usando la palabra árabe, que significa “carne asada”), pero la diferencia estaba en los condimentos utilizados y en la forma de emplearlos. Antes de venir a Chipre, cuando yo hacía brochettes no marinaba la carne, sólo la pincelaba en aceite de oliva y espolvoreaba romero o tomillo o, simplemente, limón…y de pronto aquí me encontraba con marinadas que utilizaban vino, canela, yogurt, paprika y las papas fritas se servian espolvoradas con oregano. Estaba fascinada con los nuevos descubrimientos culinarios, y anotaba los ingredientes que leía en los menus en servilletas de papel para hacer pruebas en casa, e intentar emular las recetas.
La marinada que usé en estos souvlaki de pollo fue producto, justamente, de esos experimentos nacidos de los comentarios generosos y de las recetas que me brindaron personas que aquí conocí. Los serví sobre pan de pitta casero y los acompañé con la tradicional tzaziki (hecha con la receta de mi cuñada) y con papas y batatas rostizadas al horno, pinceladas en aceite de oliva y espolvoreadas con sal oreganada. Espero que les gusten!
Aqui estan las recetas:
Souvlaki:
Ingredientes (para 8 palitos) : 3 cucharadas de yogurt griego, 3 cucharadas de aceite de oliva, 2 diente de ajo machucado, 2 cucharadas de te de paprika, sal y pimienta a gusto, 1 pechuga de pollo grande, 1/2 pimiento morrón verde, 1 tomate, 1/2 cebolla colorada, 1/2 cebolla blanca
Preparacion:
1) Mezclar en un bowl yogurt, aceite, ajo y paprika. Cortar el pollo en cubos y agregar a la marinada de yogurt. Cubrir con papel film y dejar reposar en la heladera un mínimo de 5 horas (preferentemente toda la noche)
2) Una vez transcurrido el tiempo indicado, cortar los vegetales en cubos y retirar el pollo de la heladera. Armar los souvlaki cuidando de intercalar distintas verduras con la carne. Una vez armados, colocarlos en una placa para horno pincelada con aceite de oliva y verter encima todo restante de marinada.Llevar a horno mpderado a fuerte hasta que estén cocidos.
Pan de pitta (receta de Circulo Whole Kitchen)
Ingredientes: 500 gr de harina, 2 cucharaditas de sal, 2 cucharadas de aceite de oliva, 240 ml. de leche tibia, 240 ml. taza de agua tibia, 25 gramos de levadura fresca
Preparación:
1) Poner en un bol la harina junto con la sal.
2) Mezclar la leche con el agua e incorporarla a la levadura mezclando hasta disolverla. Agregar esta mezcla a la harina, poco a poco, junto con el aceite de oliva e ir mezclando hasta que esté todo el líquido incorporado.
3) Formar una masa y comenzar a trabajarla en forma continua hasta que esté bien lisa y suave. Es importante que la masa esté bien amasada.
4) Colocarla en un recipiente y cubrirla con un plástico y dejarla levar hasta que doble su volumen.Una vez levada la masa se vuelca sobre una mesa enharinada.
5) Desgasificar la masa y cortar en porciones que se dejan descansar sobre una superficie enharinada y cubiertos con un paño. Preferentemente en un lugar cálido. Esto hará que nuestro pan leve en aproximadamente 10 a 15 minutos.
6) Se toma cada porción y se estira de medio centímetro de espesor en forma circular o alargada. Se van depositando en placas limpias, se cubren con un paño y se dejan levar nuevamente.
7) El secreto de estos panes es cocinarlos en un horno a una temperatura alta , unos 220º, para que se inflen y formen corteza pero sin color, deben quedar blancos. Los dejamos hornear durante unos 6 a 10 minutos.
8) Para conservarlos blandos se apilan unos sobre otros en caliente y se cubren con un paño, o plástico.
Mix de papas y batatas oreganadas al horno:
Ingredientes: 1 papa grande común, 1 batata, aceite de oliva para pincelar, oregano para espolvorear
Preparacion:
1) Cortar las papas en bastones, como si fueran papas fritas.
2) Colocar las papas en una fuente de horno y pincelar con aceite de oliva.
3) Mezclar la sal con una cucharada de oregano y espolvorear sobre las papas. Cocinar en horno moderado hasta que esten tiernas.
Tzaziki:
Ingredientes: 1 pepino, 1 diente de ajo (o medio, si no quieren espantar vampiros ;), yogurt griego (o yogurt natural, si no encuentran), perejil para espolvorear arriba antes de servir
Preparación:
1) Cortar en pepino en rodaja bien finitas, y luego picarlo hasta que quede chiquito.
2) Picar el diente de ajo muy finito.
3) Agregar el yogurt y mezclar bien.
4) Antes de servir, picar unas cuantas hojas de perejil y espolvorearlas encima.
I hope you like these recipes!
What is the dish that spells summer to you?
PS: Happy 4th of July to all my American followers! May you be enjoying a wonderful day with family and friends!
by Marcela M. | Jun 25, 2012 | Blog, Cakes, Mousses and ice cream, Recipe Box, Recipes, Sweets, Uncategorized
Good morning dear friends! I hope you had a lovely weekend.
Summer arrived in Nicosia all of a sudden and, in a way took me by surprise. We had had a relatively mild Spring until a couple of weeks ago and, as the end of June started to approach, temperatures began to rise and rise and we are now averaging 35 C every day, with peaks of 41C. These are the usual Summer temperatures around here, so we have developed a few strategies for coping with the heat. These involve light clothing, frequent showers, lots of lemonade and -you guessed it- avoiding to turn the oven on as much as possible.
This is why, when Circulo Whole Kitchen proposed to its members to prepare a charlotte for the June challenge, I was thrilled: here was a dessert I had never attempted to make, relatively easy, and that required no baking! Perfect!
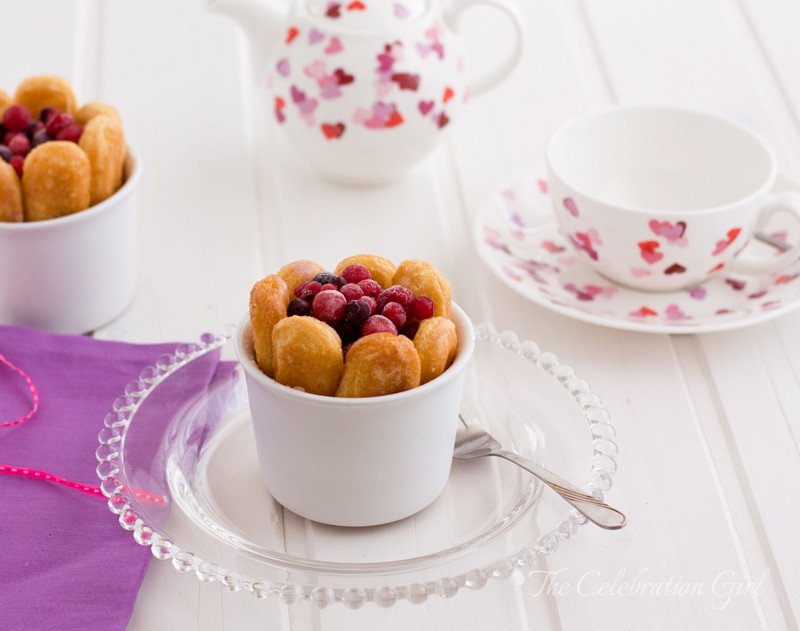
Charlotte is a very simple dessert, which knows different variations: the cake mold lining can be made with ladyfingers, swiss roll or sponge cake, and the fillings may include fruit purée, mousses or custard. The recipe I chose to prepare in this occasion (inspired by this one) uses ladyfingers, and is filled with a combination of red fruits mousse ( made with fruit purée, whipped cream and gelatin) and white chocolate mousse (made with melted white chocolate, whipped cream and gelatin). Its preparation takes approximately 15 minutes and needs to be chilled for about 5 hours before serving.
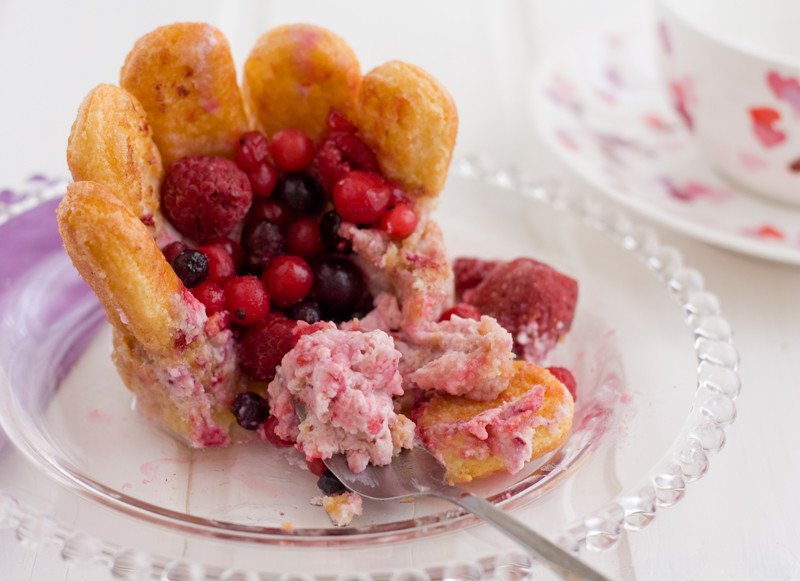
Since this was my first time making it, my charlotte doesn’t look as perfect as I would have liked it to. This is because of two reasons: 1)I over-dipped the cookies in syrup, which made them too soft, and it was therefore difficult for them to keep their shape. 2) I lined the bottom before the sides, so the bottom of the side cookies was too wet and the cookies tended to open when removed from the mold. So now I know better! The next time I will barely dip the cookies and I will make sure that the sides are line first. I hope that with these tips your own charlottes will come out perfect!
Despite these setbacks, I am quite happy with these charlottes because they passed the taste test (which, I believe, is the most important one when it comes to food!). They are a simple, delicious dessert, that looks pretty and is ideal for summer entertaining.
Here is the recipe;
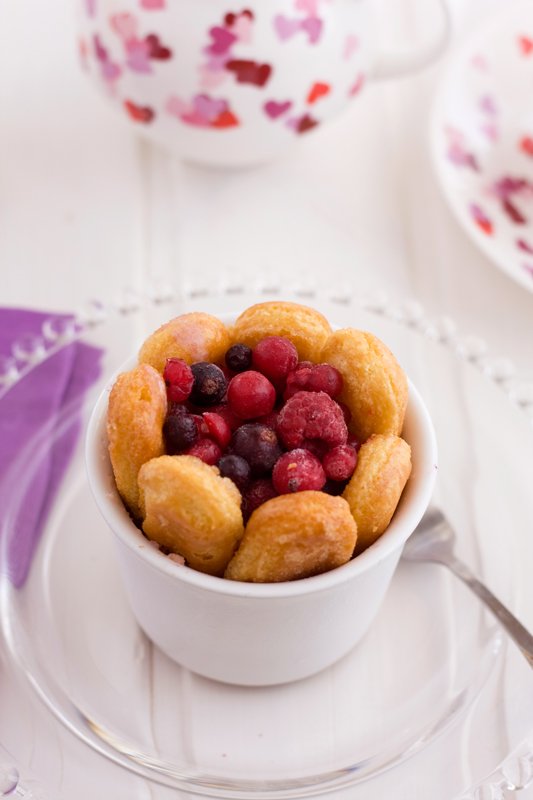
Red fruits and white chocolate charlotte
Ingredients:
– 1 pack of ladyfingers (or enough to completely cover sides and bottom of a 6 inch cake pan or 6 ramequins)
– sugar syrup, made with 100 grs of sugar, covered with water and put to boil for a few minutes. You may flavour the syrup with dessert wine, like oporto or marsala, or even with coffee or orange juice and zest (depending of the flavour of the charlotte itself).
– 150 grs white chocolate, melted and cooled to room temperature
-150 grs red fruits (I used a frozen berry mix, that I defrosted in the refrigerator)
– 1 envelope of unflavoured gelatin
– 100 ml of heavy cream
– 4 tablespoons of icing sugar
Preparation:
1) Prepare the sugar syrup. Slightly dip enough ladyfingers and line a mold of the desired size with them.
2) Dissolve the gelatin in half a cup of warm water. Add 1/4 cup of cold water to cool it down. Divide in half. Set aside.
3) Melt the white chocolate and let it cool.
4) Wash the red fruits (I used a mixture of cranberries, blueberries, raspberries and strawberries) and process them (you may use a blender for this purpose). Pass the resulting purée through a sieve and set aside the pieces that were too big.
5) Whip the heavy cream together with the icing sugar, until firm (“en chantilly”). Divide in two and set aside.
6) Mix the red fruits pulp with half the whipped cream, with circular movements. Add half the gelatin and mix it in, slowly. Set aside.
7) Mix the melted and cooled white chocolate with the remaining half whippedcream. Add the gelatin and mix it in, slowly. Set aside
8) At this point you will have two mousses, and you can do two things: 1) Fill the lined pan with the red fruits mousse, let it cool for a few minutes in the refrigerator, add a layer of ladyfingers and then add the white chocolate mousse, or 2) Fill the lined pan with the red fruits mousse and, then, add the white chocolate mousse in the middle and draw designs with a skewer to marble it.
9) Leave in the refrigerator for 4 to 5 hours, unmold and serve with red fruits on top ( don’t worry, it comes out of the pan easily!)
Con sabor latino
Buenos días queridos amigos! Espero que hayan pasado un hermoso fin de semana!
El verano llegó a Nicosia de repente y me tomó por sorpresa. Hasta ahora veníamos teniendo una primavera con temperaturas moderadas pero,a medida que junio comenzó a llegar a su fin, éstas comenzaron a ir en aumento y ahora estamos con un promedio de 35C diarios, con picos de 41C. Estas son temperaturas comunes durante el verano chipriota, asi que a estas alturas ya hemos desarrollado algunas estrategias para hacer frente a tremendo calor, que incluyen ropa liviana, ducharnos varias veces por día y-como se imaginarán- evitar a toda costa encender el horno.
Por este motivo, me alegré cuando ví que Circulo Whole Kitchen proponía como receta dulce para el mes de junio una charlotte, postre que nunca había preparado antes, relativamente sencillo y que no requería cocción! Perfecto!
La Charlotte es un postre sencillo, del cual existen muchas variantes, que van desde el tipo de galletas con el que se cubre el molde en el que se lo realiza (vainillas, pionono, o torta esponjosa), hasta el relleno (que puede consistir en puré de frutas, mousses diversas o crema. La receta que yo elegí en esta ocasión (inspirada en esta) utiliza vainillas y un relleno compuesto de dos mousses: una de frutos rojos (yo utilicé arandanos, frambuesas, grosellas y frutillas, procesados, y mezclados con crema chantilly y gelatina sin sabor) y otra de chocolate blanco (hecha a base de chocolate derretido, crema chantilly y gelatina sin sabor, para darle consistencia). La preparación lleva tan sólo 15 minutos, pero requiere reposo en la heladera/refrigerador por aproximadamente 5 horas.
Como ésta era mi primera vez haciendo este postre, mis charlottes no lucen todo lo perfectas que me hubiera gustado. Esto se debe a dos motivos: 1) Exageré al remojar las vainillas en almibar y quedaron demasiado blandas, lo que complicó que mantuvieran la forma y 2) Recubrí con vainillas el fondo del molde, antes que los lados, entonces las vainillas que se encontraban a los lados se humedecieron demasiado con las mousses en la parte de abajo y tendieron a abrirse al desmoldarlas. Lo bueno es que ya aprendí que para la próxima tengo que mojar apenas las galletas y poner primero las galletitas de los costados. Espero que estos datos les sirvan a ustedes para poder alcanzar la perfección de entrada!
Igualmente, a pesar de estos errores, estoy muy conforme con el resultado de este postre porque de gusto estaban riquísimas (y, en definitiva, eso es lo que importa cuando se trata de comida, verdad?) Ademas son sencillas, deliciosas y lucen bonitas y son ideales para eventos de verano.
Así que sin más, esta es la receta. Espero que les guste!10
Charlotte de chocolate blanco y frutos rojos
Ingredientes:
-1 paquete de vainillas (o las que sean suficientes para recubrir el o los moldes que vayan a usar. El relleno es suficiente para un molde de 15. 4 cms, o 6 ramequins)
– almibar, hecho con 100 grs de azucar, recubierta con agua y llevada a fuego por unos minutos (que no se pase, que no quieres hacer caramelo!)
– 150 grs de chocolate blanco derretido y enfriado (tiene que estar a temperatura ambiente)
– 150 grs de frutos rojos
– 1 sobre de gelatina sin sabor
– 100 cm3 de crema de leche
– 4 cucharadas de azucar impalpable
Preparación:
1) Prepare el almibar. Coloque el azucar en un jarro, recubra con agua y lleve a fuego por unos minutos, hasta que la mezcla espese ligeramente. Remoje las vainillas en el almibar y recubra con las mismas el molde a utilizar.
2) Derrita el chocolate a baño maría (o en el microondas, si tiene uno). Deje enfriar hasta que quede a temperatura ambiente.
3) Procese los frutos rojos en la procesadora o licuadora. Pase el puré por un tamiz hasta obtener la pulpa.
4) Bata la crema de leche a punto chantilly con el azucar impalplable. Divida en dos partes iguales y reserve.
5) Disuelva la gelatina sin sabor en media taza de agua caliente. Agregue 1/4 taza de agua fria para bajar la temperatura. Divida en dos y reserve.
6) Mezcle la pulpa de frutos rojos con la mitad de la crema chantilly y, una vez bien incorporado, agregue la mitad de la gelatina sin sabor. Reserve
7) Mezcle el chocolate blanco con la mitad de chantilly restante, e incorpore luego la gelatina sin sabor que había reservado.
8) Rellene el/los moldes con mousse de frutos rojos. A continuación, tiene dos opciones; 1) Colocar el molde en la heladera unos minutos (hasta que tome un poco de consistencia) y a continuacion, agregar una capa de vainillas y luego la mousse de chocolate blanco o 2) Una vez rellenado el molde con la mousse de frutos rojos, agregar la mousse de chocolate blanco inmediatamente en el centro y luego hacer dibujos con un palito de brochette, para marmolarla.
9) Coloque el/los moldes en la heladera/refrigerador por 4 a 5 horas. Desmolde y sirva con frutos rojos (no se preocupe, se desmolda super facilmente!)
I hope you’ll like it!
See you later this week!
by Marcela M. | Jun 1, 2012 | Blog, Uncategorized
Good evening dear friends!
I am so happy to finally be able to show you the blog’s new face. After working on it for over two months, and exchanging 98 emails with adorable Jessica the day has come to see all those ideas come to life!
Let me recap a little bit how this all began. As I mentioned in this post, ever since the time I started this blog, I wanted to make it pretty but lacked the knowledge and resources to do so. Back in March I got really lucky and won a blog makeover for a basic wordpress design package by Jessica Sims. I had seen the announcement in Makin’Cute blogs and, after checking Jessica’s website and portfolio, I decided to participate.
I should probably tell you right now that I had no expectation to win, because I have never won anything in my life. I wanted it badly, but I never thought it could happen. I subscribed to Jessica’s facebook page and one day, to my surprise, she announced that I had won! I had been saving some money towards a new blog design for some time, so I asked Jessica whether I could upgrade to the Extreme WordPress Design Package, and to my delight, she accepted. I put my ideas together, filled the necessary form, made the 1st payment and Jessica got to work! She prepared mock designs, we went back and forth with ideas, colours, little tweaks here and there and, this week, it was ready!
As you most probably have already noticed, we introduced many changes, and not only cosmetic ones. Yes, the colours are different, the pictures are bigger and there are cute icons everywhere. But that is not all: all posts have been classified, categorized and subcategorized to make the blog more user-friendly. There is now a homepage, which displays the most recent posts from the blog’s main categories, so that you have a clear idea of what’s new and whether you may have missed a post. The pages on the menu above store all posts from each category, organized chronologically. And there is also a “Recipe Box”, organized with index cards, where all recipes are stored with a thumbnail photo and a link to the post where they were published so that they are easy to locate.
We also added an amazon store (as part of Amazon.com’s associates programme), where I have listed the products I use and love, as well as the books that inspire me. I will complete the listings in the following days, and I will keep it updated regularly, so that if you want to know what precise product I used for a post, you can find it easily. I have also listed my photography equipment because I keep getting questions about it! I will explain a bit about how I use it in the new “photography” section, in the upcoming weeks.
In addition to all of this, from this post on, this blog will be bilingual. Every post will be written in English and Spanish, which is my mother tongue. I had always wanted to do it but, with my old theme, it looked messy. Jessica has now made it possible (isn’t she a real angel?). If you are a Spanish speaker, just scroll down until the end of each post and the translation will be there.
So, browse around and make yourselves comfortable, grab some cake and a cup of tea, relax on the couch, listen to some music. I’ll come back on Monday with the first recipe of this new era: the most delicious cheesecake of all!
Have a wonderful weekend!
Con sabor latino…
Buenas noches queridos amigos!
Estoy inmensamente feliz de que finalmente haya llegado el momento de mostrarles la nueva cara del blog. Luego de trabajar en el nuevo diseño durante más de dos meses e intercambiar 98 emails con Jessica (la diseñadora), finalmente ha llegado el día de ver todas esas ideas en práctica!
Recapitulemos un poco: Como les había comentado en este post, desde que comencé a escribir este blog deseaba que fuera bonito, pero no tenía ni los conocimientos técnicos ni el dinero para lograrlo. En marzo de este año, tuve muchisima suerte y gané un pack de diseño basico de Jessica Sims Design. Yo había visto el anuncio del sorteo en la página web de Makin Cute Blogs y, luego de visitar la página web y el portfolio de Jessica, me había decidido a participar.
Quiero aclarar en este preciso momento que yo no tenía la más mínima esperanza de ganar el sorteo porque nunca he ganado nada en mi vida! Lo deseaba muchisimo pero no creía que fuera posible. Me suscribí a la página de facebook de Jessica porque me gustaba su trabajo y, cual no seria mi sorpresa cuando un día vi que había ganado! Como había estado ahorrando dinero desde hacia ya un tiempo para poder afrontar un nuevo diseño, le pregunté a Jessica si podía hacer un upgrade y pagar la diferencia que había con el pack de diseño extremo y, para mi alegrón, ella dijo que sí! Junté mis ideas, envié el formulario de diseño, hice el primer pago y Jessica puso manos a la obra. Preparó bocetos, fuimos y volvimos con ideas, colores, y ajustes varios y, finalmente, esta semana, el diseño estuvo terminado!
Como seguramente ya se han dado cuenta, los cambios son numerosos, y no son sólo cosmeticos. Sí, la paleta de colores es distinta, las fotos son mucho más grandes y hay íconitos por todos los rincones. Pero eso no es todo: todos los posts han sido clasificados, categorizados y subcategorizados para que el blog sea más amigable para el visitante. Hay una pagina de inicio donde van a encontrar los posts más recientes de las categorias principales, para que puedan saber rápidamente qué hay de nuevo y si se perdieron algún post. Las páginas del menu principal (arriba) almacenan todos los posts de esa categoría, ordenados cronológicamente. Todas las recetas estan ordenadas, ademas, en una “caja de recetas” con indices, una fotito y un link al post en el que fueron publicadas, para que sea fácil localizarlas.
Tambien incorporamos una tienda amazon (dentro del programa de asociados de amazon.com), donde encontrarán listados de todos los productos que uso y que me gustan, incluyendo aquellos libros que me inspiran. En los proximos días terminaré de ponerla al día, y la actualizaré periodicamente, asi pueden encontrar cualquier producto que les haga falta rapidamente (compren o no en la tienda, lo importante para mi no es eso sino que tengan la información). Dentro de la misma tienda he incorporado también mi equipo fotográfico, porque recibo muchas preguntas acerca del mismo! En las proximas semanas explicaré un poco cómo lo uso en la nueva sección “photography”.
Además de esto, a partir de este post, este blog va a ser bilingue. A partir de ahora, todos los posts serán escritos en inglés y castellano. En realidad esto es algo que siempre quise hacer pero no se veía bien con el diseño anterior. Jessica hizo posible cumplir este deseo ( ¿no es un angel?). Así es que, queridos amigos hispanoparlantes, de ahora en más sólo tendrán que llegarse a este rincón al final de cada post, donde los estará esperando la traducción (no literal) correspondiente.
Ahora den una vuelta, ponganse cómodos, tomen un pedazo de torta y una taza de té, relajense en el sillon, escuchen algo de música, estan en su casa. Yo estaré de regreso el lunes con la primer receta de esta nueva etapa: ¡¡la cheesecake más deliciosa de todas!!
¡Que pasen un hermoso fin de semana!
by Marcela M. | May 25, 2012 | Blog, Cakes, Recipe Box, Recipes, Sweets, Uncategorized
Good morning dear friends!
Today I bring you another recipe from Circulo Whole Kitchen. As I mentioned in my post from last week, this month I started participating in the culinary challenges proposed by Whole Kitchen Magazine, and their sweet suggestion for May 2012 was the ultra popular zebra cake.
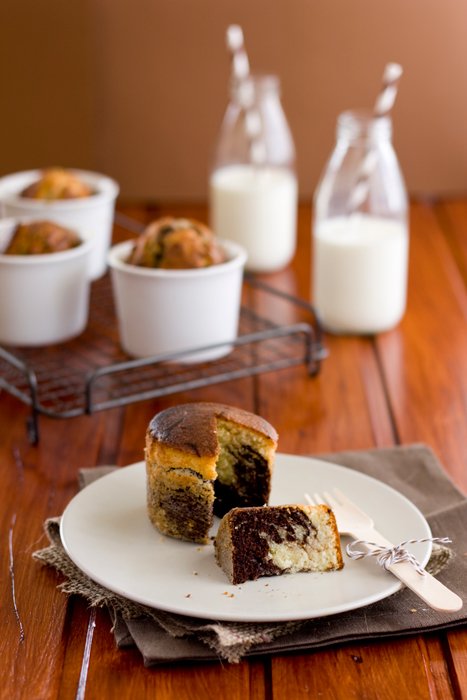
The zebra cake is, basically, a vanilla and chocolate cake, marbled to resemble the stripes of a zebra. This is achieved by putting the batter in the pan one or two spoons at a time, alternating colours. When looked from the top, the cake looks like a succession of circles, but when cut in slices, the zebra stripes appear, making it an instant hit with children- and with adults!
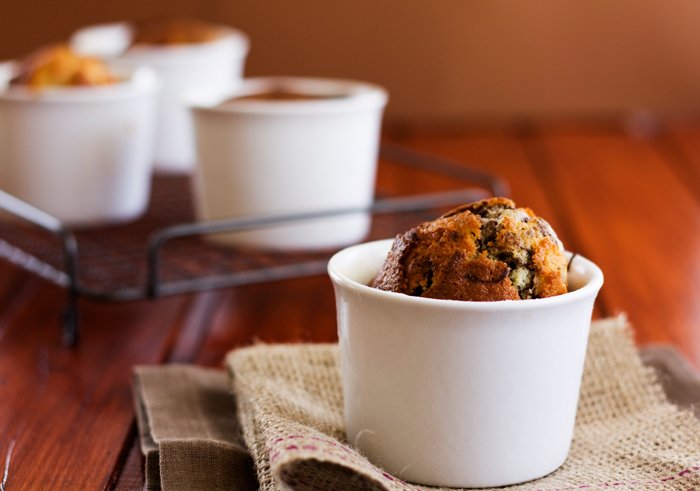
In this occasion, I used the recipe provided to us by Whole Kitchen and followed the directions exactly, because I am always happy to try ones, but know that since the effect is mainly visual, you can simply use your favourite vanilla cake recipe, divide the batter in two, add two tablespoons of cocoa (I prefer dark cocoa) to one half, and go ahead with the method for placing the batter in the pan, as you would with this one. And you could even use a boxed cake or change flavours and colours!
This recipe is a very nice one, though, and I encourage you to try it. It is a simple cake, with a spongy texture (because the eggs are beaten with the sugar until white, which makes them fluffy) and not overly sweet. It makes a nice everyday coffee cake, but if you are making it for a child’s party, you could also cover it in chocolate ganache, or cover the sides with peanuts (as Kim did here, for example, and then the zebra stripes could come out as a surprise! The cake’s pattern would be perfect for birthday themes such as Safari, Young Explorers, Animals, Madagascar (the movie) or Africa.
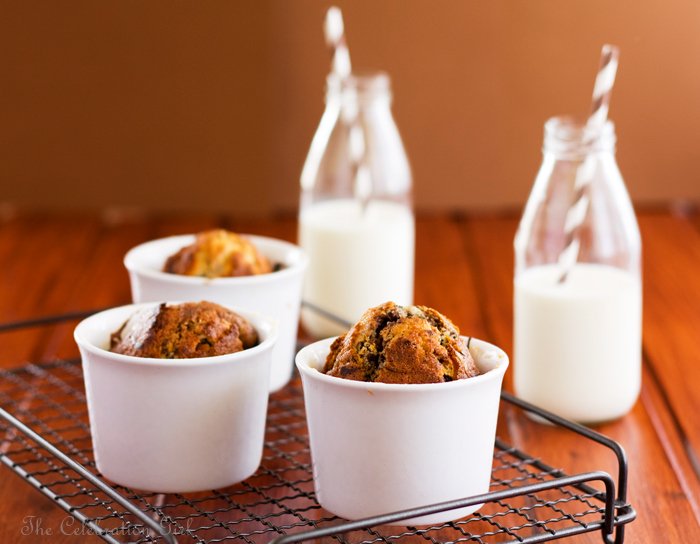
The only variation I introduced to the original one, was the size of the pan: instead of baking my zebra cake in a normal sized pan, i did it in small ramequins. I like to bake cakes in small containers so that I can freeze those that will not be eaten immediately without losing freshness. This batter is enough for a 9 inch pan, or for 6 ramequins (mine are from Ikea). I do have to point out, though, that the effect of the zebra stripes is less noticeable when baked in small pans, as you can see from my pictures. So, if you want the full wow effect of the zebra stripes, it is probably better to stick to the traditional size.
Here is the recipe I used:
Ingredients
4 large eggs
250 grs sugar
250 ml milk
250 ml sunflower oil
300 grs all-purpose flour
1 tablespoon baking powder
2 tablespoons cocoa powder
Preparation
Oil and flour a cake pan and pre-heat the oven to 180C.
Beat sugar and eggs until white and fluffy. Add oil and beat until well-integrated, and then add milk slowly, beating all the time.
In a different container, mix flour and baking powder. Whisk to integrate.
Add dry to wet ingredients in three times, integrating well before each new addition.
Separate the batter in two and add cocoa powder to one half.
Assemble the cake by pouring the batter in the center of the pan, using an ice cream scoop, alternating colours ( two scoops of vanilla batter, one scoop of cocoa batter, two scoops of vanilla batter, and so on).
Bake for 40 minutes at 180 C.
Note: If you change the size of the pan, remember that the oven times change as well! My mini cakes only took 18 minutes to be ready!
I hope that you like it! Have you ever made a zebra cake before?
Have a nice weekend!
by Marcela M. | May 18, 2012 | Blog, Main courses, Recipe Box, Recipes, Savories, Uncategorized
Good morning dear friends! Are you ready for the weekend?
Today I bring you a post with a delicious recipe that I discovered through Whole Kitchen cooking club, El Circulo Whole Kitchen.Whole Kitchen Magazine provides two recipes to its members every month ( one sweet and one savory), and the savory proposal for May 2012 was fish cakes.
I immediately liked the idea because, even though we live on an island, I have found it hard to incorporate fish into our diet, particularly that of our children. When I read the recipe for these fish cakes, I loved how versatile it was: I could shape them in different ways to make them more attractive for Luka and Zoe, and I could sneak in vegetables (Yes, I do that, I have picky eating toddlers!). The recipe also suits very well Cyprus lovely Spring weather, and it was perfect for a quick-lunch at the balcony, after the children came back from nursery school.
Whole Kitchen provided us with two different recipes: one from Jamie Oliver, which called for salmon and potatoes, and the other one from Trotamundos, which called for white fish, beans and potatoes. I decided to make my variation and used white fish fillets, potatoes, and butternut squash for a sweeter taste.
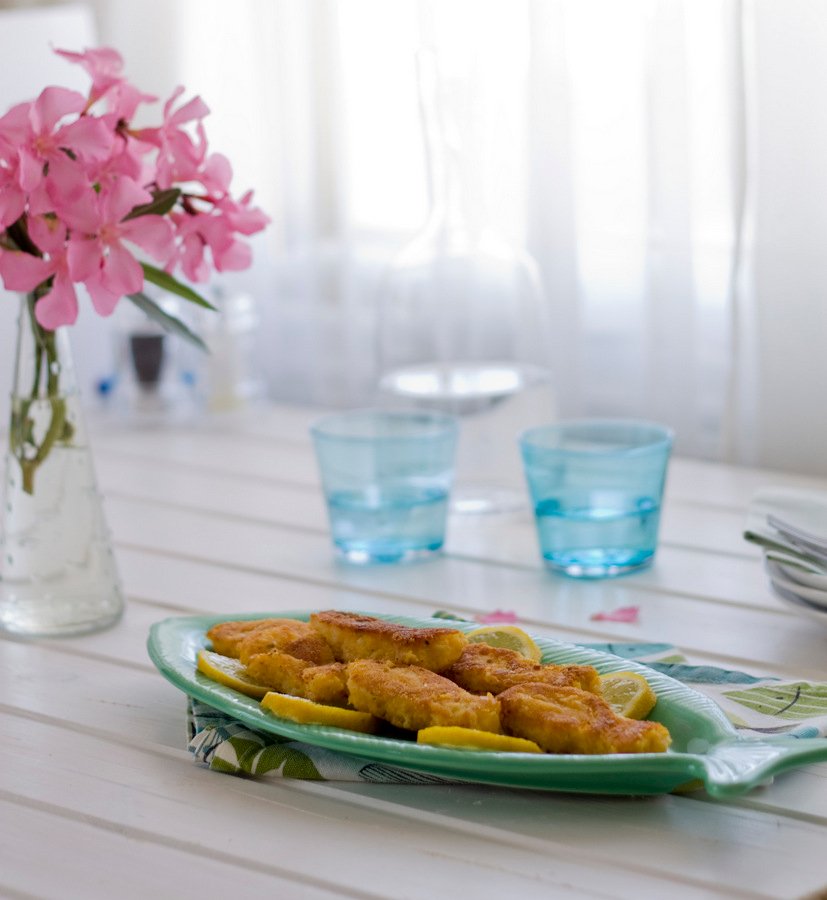
These fish cakes are really, really simple to make and they require very few ingredients: all you need is fish, potatoes and squash, plus one egg and a bit of flour and bread crumbs for assembling them, that’s all. The procedure couldn’t be easier but it may take a bit of time if you decide to give them a specific shape, as I did. First, you need to boil or steam the vegetables until very tender. In the meantime, cook the fish in the oven for about 10 minutes, drizzled with olive oil and covered in aluminum foil. Once everything is cooked, you simply have to mash the vegetables, add the fish and a bit of parsley (or other spice of your own preference) shape the cakes, flour them and fry them in just a bit of oil.
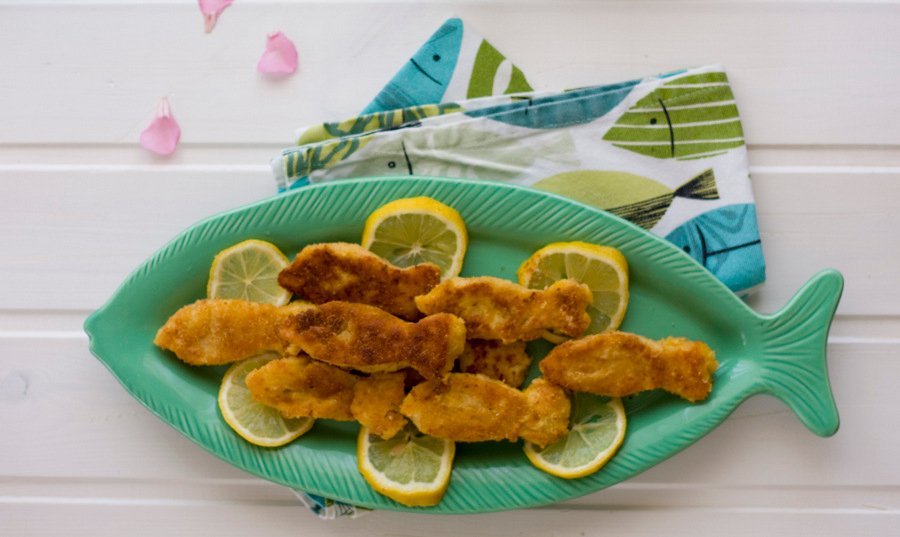
As I mentioned, I did not make these cakes round, as it is traditional. Instead, since I was going to be serving them to my children, I decided to use a fish-shaped cookie cutter to make them more enticing.
In order to give them this shape, I covered a cookie sheet with foil, extended the preparation on top, covered it with more foil and put the sheet in the fridge for half an hour, for it to get some consistency. After this time, I took it out and started cutting little fish with my cutter and placing them on a plate. Once I was done, I put the fish cakes back in the fridge for another half an hour. This is necessary for them not to lose their shape when you flour them.
After half an hour, I took the fish cakes out of the fridge, floured them (passing by flour, egg and bread crumbs) and fried them in just a tiny bit of oil, until golden. The next time I make them I will try to bake them in the oven, but since this was the first time, I decided to stick to the traditional cooking methods. Frying them makes them crispy on the outside while remaining soft on the inside – and they are just delicious!
I also decided to keep the flavours simple, so that the sweetness of the squash would be palpable, and therefore used as condiment only a bit of parsley, salt and pepper. You could be more adventurous, and try to add other spices either in the main mixture or by flavouring the bread crumbs with lemon zest or a Provençal mix (garlic and parsley), for example.
Fish cakes are traditionally accompanied by French fries, but I decided to go for a healthier option and opted for a quick, simple salad of cucumbers and cherry tomatoes instead. While I like to eat fried food on occasions, I don’t have a big resistance to it, and I find that I can tolerate them better if I eat them with fresh vegetables. I am a big fan of salads all year-long, but I must confess that I could pretty much live on them during the warmer months!
Here’s the recipe:
Ingredients:
– 3 fish fillets
– 2 medium-sized potatoes
– 5 slices of butternut squash
– Parsley, salt and pepper to taste
– Flour
– breadcrumbs
-Oil for frying
Preparation:
– Dice potatoes and squash and put in a saucepan, cover with water and bring to the boil until tender.
– Put the fish fillets in an oven tray, add salt and pepper and drizzle with olive oil. Cover with aluminum foil and cook for about 10 minutes.
– Mash the potatoes and squash. Crumble the fish fillets and add them to the vegetable purée. Add salt and pepper to taste and parsley, if desired.
– Shape small cakes with the help of your hands, place them on a tray, and put them in the fridge for half an hour. If you want to give the cakes a cookie cutter shape, extend the mixture on an oven tray covered in foil, put it in the fridge for half an hour, and only after this use the cookie cutter.
– Slightly beat one egg. Remove the cakes from the fish, flour them, dip them in egg, and pass them by bread crumbs so that these stick to them.
– Put a bit of oil in a frying pan and, once heated, add the fish cakes, until golden on both sides. Serve.
I hope you’ll like them!
Have a great weekend!
by Marcela M. | May 16, 2012 | Blog, South America, Travel, Uncategorized
Good morning friends! I hope you are having a wonderful week!
This is the last post on Argentinian sweets…well, not the very last one I will write, because I plan to bring you some recipes, but the last one of this introductory series. Starting from the next post, I will resume my regular posting of recipes, crafts and party ideas.
This post does not have many pictures and the ones it has were taken on the streets of Buenos Aires, whenever I could find local vendors selling the things I wanted to talk to you about ( this is just to show you how popular they are). Two extremely popular cakes are missing from the pictures, but I will provide you with links that have beautiful pictures, so that you can have an idea of what it is I am describing.
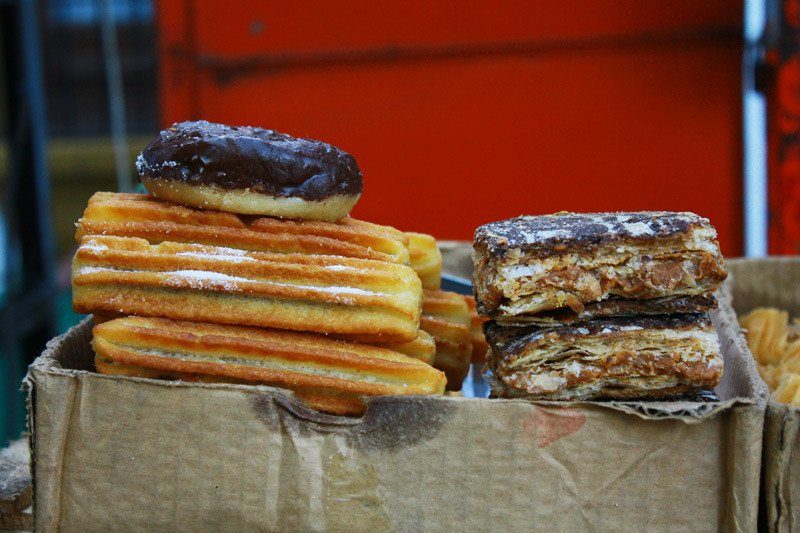
Let’s begin with a Latin American classic: churros! We used to eat them to accompany hot chocolate on winter days, home-made by my mother or my grandmother (who even had a “churrera”, which is the cylinder shaped machine to make churros with the traditional scalloped border). When I visited Punta del Este, in Uruguay, I tasted them filled with dulce de leche or chocolate for the first time. Later, chocolate, dulce de leche or cream filled churros became very common in Argentina as well, and now we can say they have become a popular favourite.
Milhojas de dulce de leche (pictured next to the churros, above, and here) is none other than a “dulce de leche thousand layer cake”: a cake made with layers of “hojaldre” (which is similar to puff pastry) stuck together with lots and lots of dulce de leche repostero and covered in either dark chocolate or poured fondant (more commonly, the former). It is a traditional cake for birthdays and small versions can be bought at almost any bakery.
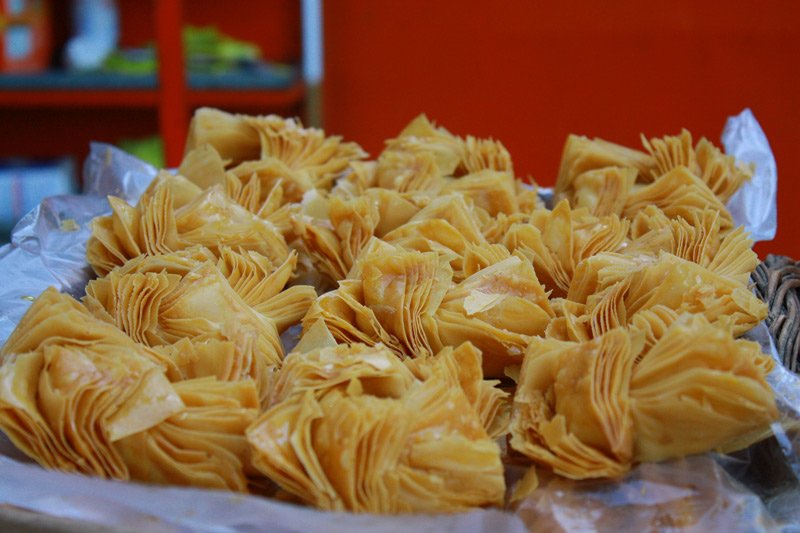
Pastelitos (pictured above) are the sweets that are traditionally eaten during national holidays (25th of May, Argentina’s first national government day, and 9th of July, Argentina’s Independence day). They are made with a variation of puff pastry and traditionally filled with quince spread or sweet potato marmalade, though it is also possible to find them filled with (you guessed it!) dulce de leche or dulce de leche and walnuts. Once they are assembled, they are deep fried in either oil or grease, until golden.
Other two VERY popular cakes are Rogel Cake and Chocotorta. Rogel cake is made layering sheets of cake of a texture similar to the one of alfajor santafesino with dulce de leche repostero, and topped with Italian Meringue. It is extremely sweet, but delicious!
Chocotorta is a childhood classic which dates from the 1970’s, when a popular plain chocolate cookie brand (chocolinas) boosted its sales by advertising a simple cake that kids could do themselves using said cookies, because no baking was involved. The cake is made by layering chocolinas with dulce de leche (of course) mixed with cream cheese (queso blanco/fromage blanc), and it tastes delicious after 24 hours in the fridge, because the cookies fully absorb the filling and they become unrecognizable. Some people dip the cookies to moisten them more, either in coffee, syrup or dessert wines such as marsala or oporto. The cake is commonly covered with the same dulce de leche and cream cheese mix, and topped with chocolate swirls or simply cocoa. The cake is so popular that restaurants started serving it (see this article on the best chocotortas in Buenos Aires restaurants, for example) and couples started requesting it as wedding cake.
I hope that you enjoyed this series of posts on Argentina’s food culture. In the next post we will go back to our regular themes: recipes, parties and crafts.
Have a wonderful day!


