by Marcela M. | Apr 8, 2013 | Blog, Gluten Free, Main courses, Recipe Box, Recipes, Savories
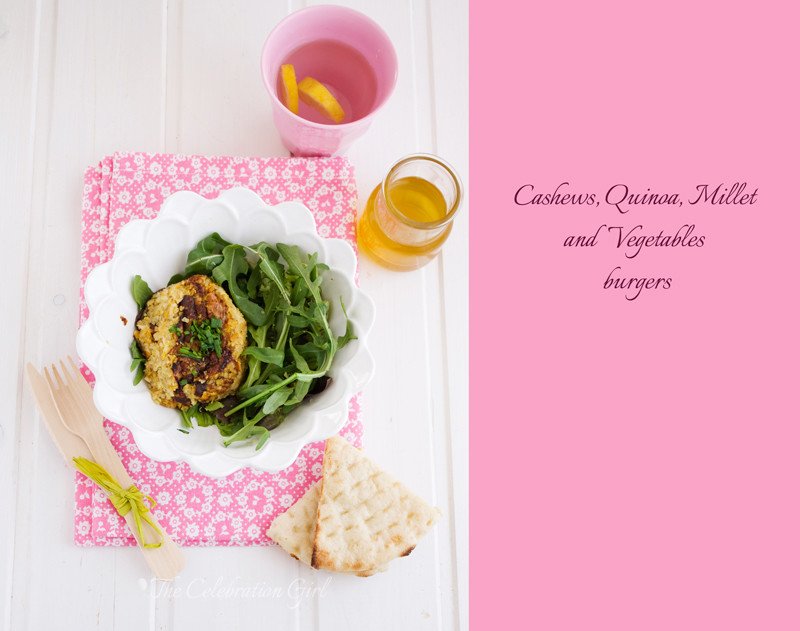
Ever since I stopped eating meat*, about 12 years ago, I had been looking for a delicious veggie burger recipe, one that I would actually crave and not just eat because I had made a whole batch. Early on, I adapted my mum’s recipe for soy burgers and that became my go-to recipe, but I wanted one that would use more vegetables and different grains, to add variety.
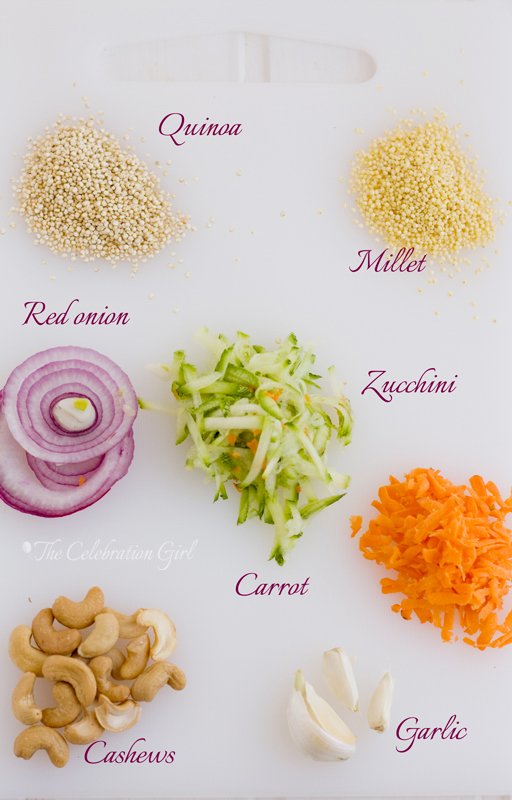
A few months ago, when browsing recipe books, I came across a couple of recipes that seemed interesting but they each had ingredients that either I don’t like or can’t eat (such as cheese). So I decided to do some mix and match and came up with this recipe after a couple of tries.
As you can see from the ingredient list below, these burgers don’t take any eggs, cheese, or dairy. To bind the ingredients, I used chia seeds hydrated 2 tablespoons of water for a few minutes, before adding them to the preparation. You will probably also notice that I didn’t use any breadcrumbs or flour to shape them which is why they are not the traditionally perfectly round burgers that you may be used to seeing. If you prefer perfectly shaped burgers, add a little of the flour of your choice.
One word of caution regarding this recipe: even though it doesn’t use flours, this is not a recipe that is 100% safe for people with celiac disease, because it uses onions and garlic, to which many celiac people have intolerance to. So, if you are making this for a friend with celiac disease, make sure that you omit those ingredients!
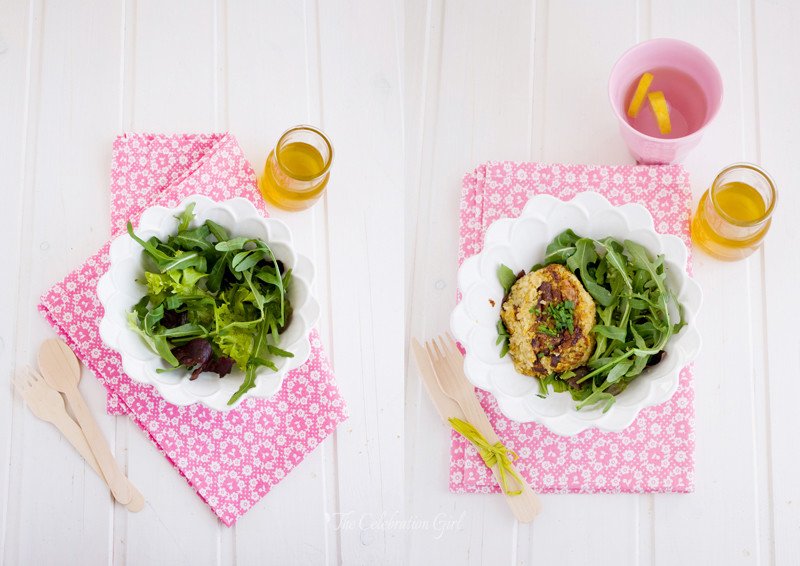
Here is the recipe:
Cashew, quinoa, millet and vegetables burgers
Ingredients: 1 big zucchini, 1 big carrot, 1 big red onion, 1 garlic clove, 50 grs quinoa, 50 grs millet, 2 tablespoons chia seeds, 2 tablespoons water, 50 grs toasted cashews.
Preparation:
1) Fill a saucepan with water and bring it to the boil. Add the quinoa and millet and cook until ready (you can see a video from Sarah Britton, on how to cook quinoa HERE). Strain and reserve.
2) Slice the onion, chop the garlic, shred the carrot and zucchini. Put a tablespoon of oil in a skillet or frying pan and stir-fry the onion and garlic until transparent, then add the rest of the vegetables and let them cook for a few minutes, until tender.
3) Process the cashew nuts until finely chopped (but don’t turn them into flour!).
4) Add the cashews to the vegetables and stir-fry them together for a couple of minutes. Remove from the heat.
5) Add the strained quinoa and millet, as well as the chia seeds, salt and pepper, and mix well.
6) Take the mixture using a spoon and press them to shape them. Refrigerate the burgers until time cook them.
7) Heat a tablespoon of oil in a frying pan and cook them for about 15 minutes, watching them carefully and turning them halfway through the cooking time.
I hope you like this recipe!
Do you like veggie burgers? If you do, do you have a favorite recipe that you would like to share with us in the comments?
Con sabor latino….
Desde que dejé de comer carne, hace ya 12 años, había estado buscando una receta de hamburguesas vegetales que me encantara, una receta tan deliciosa que me diera antojo comerla. Tenía en mi repertorio una receta de hamburguesas de soja, adaptada de la de mi mamá, pero quería incorporar a mi repertorio una versión que utilizara más vegetales y granos diferentes, para así poder aportar variedad a mi dieta.
Hace unos meses, mirando libros de recetas que tengo en casa, encontré un par que me parecieron interesantes, pero todas tenían ya sea algo que no me gustaba o algo que no puedo comer (como el queso). Así que decidí experimentar por mi cuenta y terminé con esta receta que hoy les traigo, y que me encanta.
Como pueden ver en la lista de ingredientes de más abajo, esta versión de hamburguesitas vegetales no usa huevos, ni leche, ni queso. Para ligarlas, utilicé semillas de chia hidratadas en dos cucharadas soperas de agua durante un par de minutos. Si se fijan en los ingredientes, tambien notarán que tampoco utilicé harina ni pan rallado, motivo por el cual no tienen la forma redondita de las hamburguesas comerciales. Si ustedes prefieren que las suyas tengan una forma perfecta, agreguen un poquito de su harina preferida.
Antes de dejarlos con la receta, les hago una pequeña advertencia: a pesar que estas hamburguesas no utilizan harina, no son aptas para celíacos porque utilizan cebolla y ajo, dos ingredientes a los que muchos celíacos presentan intolerancia. Por ello, si van a realizarlas para un amigo que tengan esta condición, omitan estos ingredientes de la preparación!
Aquí está la receta:
Hamburguesas vegetales con castañas de cajú, quinoa y mijo
Ingredientes: 50 grs de quinoa, 50 grs de mijo, 1 zucchini grande, 1 zanahoria grande, 1 cebolla colorada grande, 1 diente de ajo, 50 grs de castañas de cajú tostadas, 2 cucharadas de semillas de chia, 2 cucharadas de agua.
Preparación:
1) Colocar agua en una olla, y llevar a ebullición. Agregar la quinoa y el mijo y cocinar a fuego lento. (AQUI tienen un video que enseña a cocinar quinoa). Colar y reservar.
2) Cortar la cebolla, picar el ajo, rallar la zanahoria y el zucchini. Colocar una cucharada de aceite en una sartén y, cuando esté caliente, saltar la cebolla y el ajo en el mismo hasta que queden transparentes. Agregar el resto de las verduras y cocinar hasta que estén tiernas (tardará solo unos minutos porque están ralladas)
3) Procesar las castañas de cajú en trocitos pequeños, pero con cuidado de no transformarlas en harina.
4) Agregar las castañas a los vegetales y saltarlas en las sarten junto con los mismos, un par de minutos. Retirar la sarten del fuego.
5) Agregar la quinoa, el mijo, las semillas de chía, sal y pimienta a gusto y mezclar bien.
6) Con la ayuda de una cuchara, formar bolitas y aplastarlas para que tomen forma de hamburguesas. Reservar en la heladera hasta que vayan a ser cocinadas.
7) Calentar una cucharadas de aceite en una sarten, y dorar las hamburguesas en la misma, por alrededor de quince minutos cuidando que no se quemen, y dándolas vuelta a la mitad de la cocción.
Espero que les guste esta receta!
Cuentenme: ¿Les gustan las hamburguesas vegetales? ¿Tienen una receta favorita que les gustaría compartir con nosotros en los comentarios?
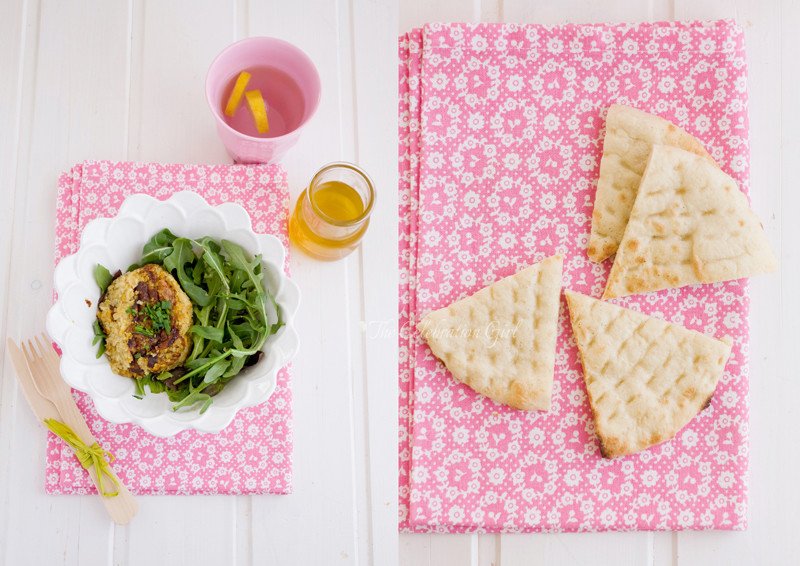
* I normally eat meat about three times a year, to accompany my husband.
by Marcela M. | Mar 17, 2013 | Blog, Gluten Free, Main courses, Recipe Box, Recipes, Savories
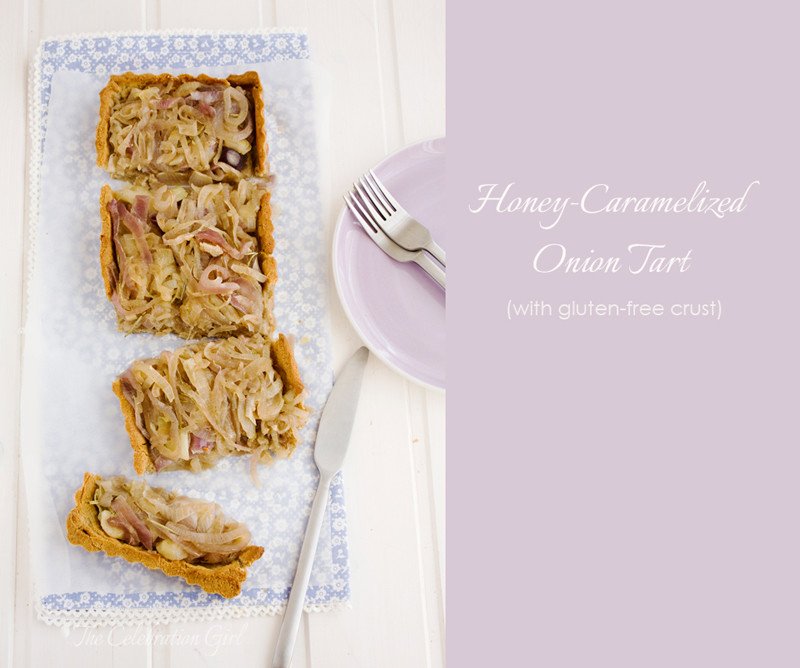
This week was a hectic and intense one, difficult at times, tiring at moments, empowering and happy at others. You know the ones: weeks of mixed emotions, lots to do and little sleep. We all have them, right? I know we do.
Last Tuesday night, after a couple of particularly intense days, I posted on the blog’s facebook page about it, mentioned that I needed chamomille tea to unwind and asked friends to share the strategies that they used to relax during or after difficult times. Most mentioned cooking and baking, some mentioned reading or painting mandalas, having a cup of tea, and sharing times with family or others that they love. I had only mentioned tea in my post, because it is what I was planning to do right away, but the reader’s beautiful responses left me reflecting about my own resources, my own set of grab and go strategies that have helped me during difficult times and the ones that, until today, I had only shared with those who know me well in my personal life, or who have specifically requested my help. Some of those practices (such as baking, watching a selection of my favorite feel good movies like Amélie or silly ones like Zoolander (it always makes me laugh so hard!), having a nice cup of tea) were put in place during happy times and took a whole different meaning during the bad ones; some others I discovered when things were already tough and I was desperately looking for means to stop me from drowning, and have stayed with me, as a core part of my life, ever since. This is the case of meditation and yoga.
The first time I remember hearing about yoga I was 17 years old. Our high school literature professor used to mention that he practiced yoga and meditation and I became curious about them but, back home, back then, yoga was considered an “exotic” discipline and it was not easy to find where to practice. Life continued, time went by, I tried a class at a local gym when I was 21 but run out of money at the end of the first month, and didn’t continue. Then, one day, when I was in the middle of one of the most difficult times in my life, I met the husband of one of my best friend’s on the street and he mentioned that he was going to an amazing yoga class, merely 3 blocks away from my house. I hadn’t thought about yoga in years and I was not looking for a class at the time but I somehow knew it was what I needed. I signed up for the class and fell completely in love with yoga. It was not the asanas, or the pranayams or the meditation…it was all of it together, it was how I felt during the practice but mostly how I felt (as a whole person) after them, the calmness, the peace, the grounding it brought into my life and that I had never experienced before.
I left Argentina the following year, first for Spain and shortly after for Ivory Coast. I bought yoga books and CDs and tried for a while to keep up with a regular home practice, but couldn’t. I didn’t know how, and it always seemed that there was something more important that I just had to do before or that I didn’t feel in quite the right mood…and then, as time went by, I ended up never finding the right time and never getting into the right mood. I knew I needed it, I missed it so much and yet, and yet…there was always an excuse. Excuses are ok under normal circumstances but one thing I discovered during those days is that, when everything around us seems to be falling apart, when are exposed to extreme suffering, poverty, chaos and fear, excuses have the potential to be truly damaging. Excuses, in those circumstances, prevent us from seeking that which we truly need, prevent us from connecting to our bodies, our minds and our souls, from finding the necessary calm and ease that is needed in order to do our work and live our life in a way that is healthy, sustainable and useful for those we are meant to serve. Despite my excuses, I knew I had to change and, by the time I arrived in Cyprus, on 24 December 2007, I was craving yoga. But before I could find a yoga class near my home, I got pregnant with Luka and Zoe and went into bed rest. And then they were born and I couldn’t find the time to attend a class anymore-or anyone to take care of them while I did, for that matter.
Then one day, when browsing the web in search for an article about Indian UN peacekeepers who were teaching yoga to kids in the Iraeli/Lebanese border, I came across Marianne Elliott’s blog, then called Zen Peacekeeping, and I was hooked. I read one blog post after another, feeling a connection that I had rarely felt before with anyone I had read online. There was a person I could identify with, someone who had been through similar experiences and who had come out of them with similar conclusions as myself. Her articles on yoga and body shame, yoga and real life, her whole series on self care , especially her article on why kindness (and not will power) is key to starting a healthy habit, her articles on courage, and even the ones on using twitter for good -and avoiding twitter overwhelm- all rang a bell and said things I wanted to express, better than I ever could.
And Marianne taught online yoga courses for those who, like me, wanted to establish a home yoga practice, but didn’t know how to get started.
I didn’t sign for her courses right away, because I was getting better at finding excuses (I had years of practice by now). Instead, I waited, and waited, and waited until I almost collapsed from anxiety and exhaustion.
I finally signed up after I saw a video when Marianne announced her course on 30 days of yoga for people who are too busy to do yoga. Do you identify with the title? Yes, so did I. I felt that I couldn’t commit to a full 90 minute class, not even to a 45 minute class…but I could commit, I needed to commit to as little as 5 minutes of yoga every day, 5 minutes of self care, 5 minutes just for myself, 5 minutes doing something I loved but had forgotten how to do.
If you are wondering how an online yoga course works, here is how it does now:

Back then, when I first did it, the interface was different, but basically there are videos with the practices (which you can download and keep forever), daily emails, a Facebook group, conference calls, Marianne’s assistance whenever this is needed and, in some cases, a beautiful ebook at the end of the 30 days. Not very different from any other online course you may have done in any other discipline. (What makes the courses different is Marianne’s kindness, but I’ll talk to you about that later).
So I made my commitment to myself, and I started the practices, as sent by Marianne and as recommended by her. The first week, nothing happened. “Where’s the calmness I am supposed to be feeling?????” , I kept thinking, because I was, if anything, more anxious than before. The second week, came the tears. The minute I would step on the rug where I used to practice yoga, I would start crying and I wouldn’t stop until after savasana. The practices were short, 10 minutes only, but something inside of me was being released. I cried all second and third week and then, on the fourth and last week, I started to feel at peace.
I still felt too busy for anything longer, but Marianne’s courses had shown me that I was never too busy to so some yoga and that any yoga was better than none. I had the videos, I had the emails, I had the proof, so I renewed my commitment and maintained my routine, of doing at least 10 minutes of yoga everyday and not beating myself up if that was all the yoga I could do. And it continued to work, to be what I needed. When I felt that I needed some more, I would combine the videos or double the number of sets of each practice. I felt at ease with my routine and I was happy.
Then, at the beginning of 2012, when our world fell apart, and I started feeling again like I had no time to sit on the mat, this time I knew (having practiced long enough the year before) that what I needed was, in fact, the exact opposite: I needed more yoga. So I registered for Marianne’s standard 30 days of yoga course (She also has courses for Beginners and classes of Curvy Yoga) and I committed to 45 minutes practices, 4 times a week.
Why am I talking to you about yoga and my experience today? Why am I talking to you about Marianne? Because this year I want to share with you everything that is good in my life, all the resources that have worked for me in the past, and that continue to support me in many ways. I wanted to share this with you so that you could get to know Marianne and her work, which I greatly admire . More importantly, I want to share Marianne’s courses with you because they have supported not only me, but also my children, who love the short routines of Busy Yoga and practice them on their own (please turn off the volume if you don’t to hear Luka and me singing Elmo’s songs while Zoe practices yoga in the video). I want to share her courses with you because they are the only ones to which I have been able to commit consistently and for a long period of time, and I want to do it because I know how important this can be and what a difference it can make to one’s life.
I want to share this with you because I know how easy it is to fall off the self care wagon and how damaging this can be. I want to share Marianne’s courses with you because, after I fell off, I needed a course rooted on kindness towards myself and others to get back on track, and because this may be your case too.
I wanted to share this with you today because Marianne’s latest edition of her yoga courses start tomorrow and I will be in them, again, and because it occurred to me that, perhaps, you may need something like what she offers, and you would like to join me there as well. And finally, I wanted to share this with you today to let you know that I know how it feels to let go of our good habits, to struggle to keep up with what is good for us, but that is never too late to get back on track.
Please, share with me in the comments below: which practices are essential to your well being? Do you also struggle to find time for them?
Now, while we talk, let’s cook something yummy, shall we?
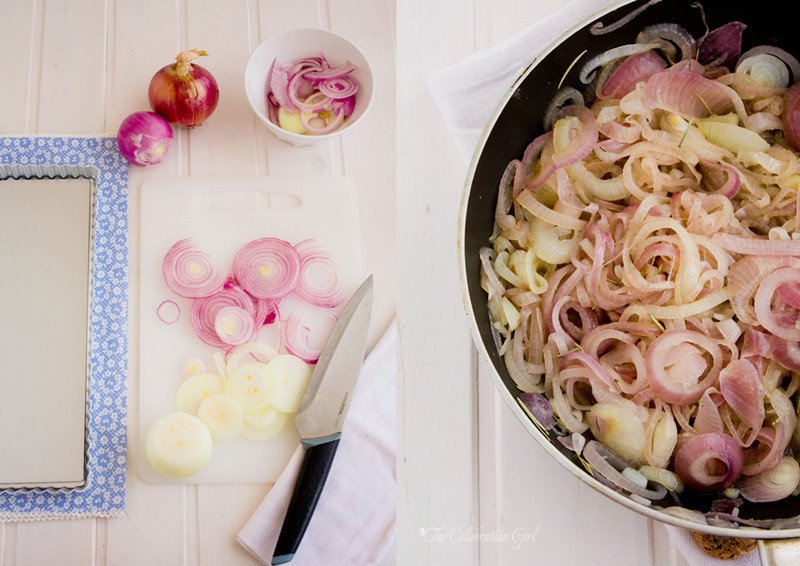
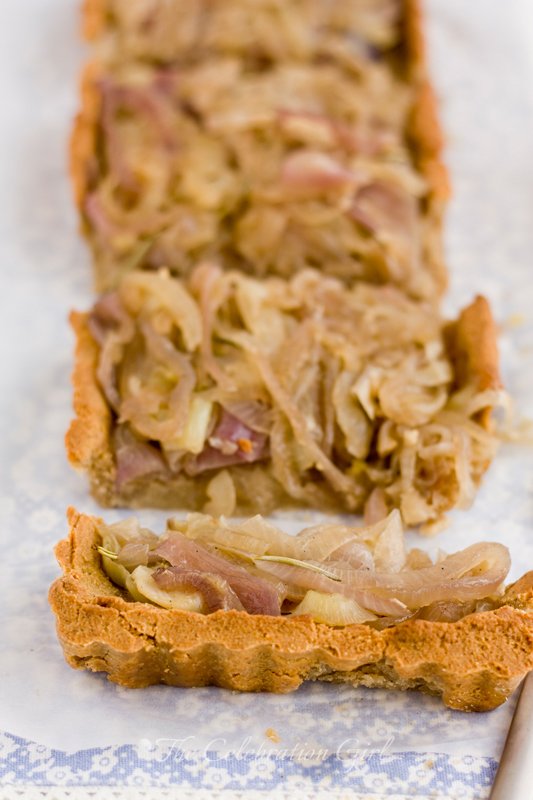
I made this tart a couple of weeks ago, on one of those lovely early Spring days that are so beautiful in Cyprus. Last December, my husband bought me Aran Goyoaga’s new book, Small Plates and Sweet Treats: My Family’s Journey to Gluten-Free Cooking, (which is one of the most beautiful cook books that I have ever seen) and I started looking forward to experimenting with gluten free cooking. I was so eager to start trying her recipes that, on the day of our wedding anniversary (January 26th), we traded our traditional fondant au chocolat, for Aran’s Almond butter, chocolate and beet molten cakes -and I believe these will be our new anniversary staple dessert.
I was a little bit scared of gluten free savory food, so it took me a while longer to begin experimenting with the small plates part of the book. I can find my way pretty easily around desserts and I have a natural instinct for knowing how to adapt sweet recipes, but I can’t really say the same about tart crusts, crackers, breads and other savory food. But I felt encouraged by the molten cakes’ success and I decided to try to make this tart (which is a classic at my home) with a gluten free & vegan crust (adapted from the one in Aran’s Zucchini,quinoa and goat cheese tart, if you have the book)
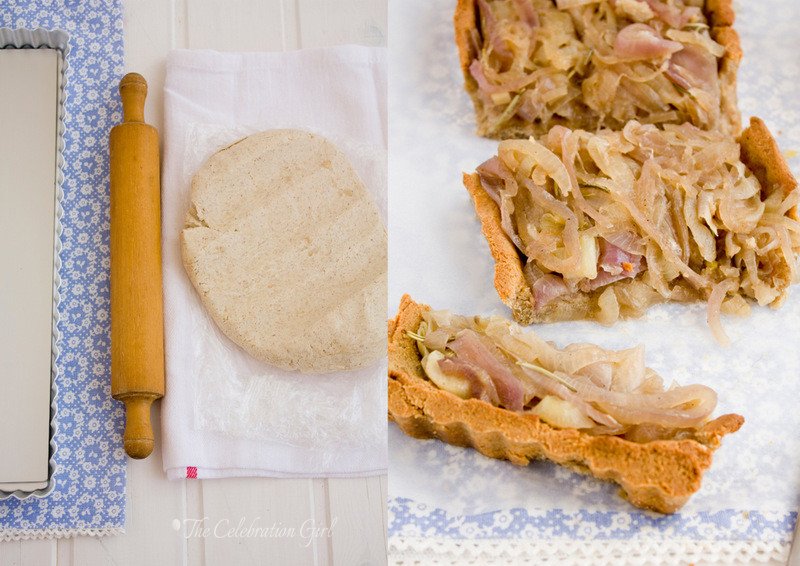
The preparation of the crust is fairly simple, but it takes a bit of time, because it has to be chilled twice and cooked for quite some time. I must also confess that, when I saw its texture, I freaked out: It felt like clay! I went ahead and put it in the oven because of how much I admire Aran’s work, but it was honestly a leap of faith- I was convinced I had made a mistake along the way and that it was going to turn out absolutely inedible. Fortunately for me, my fears were unfounded, based only on my lack of knowledge of gluten free cooking, and the crust turned out to be delicious. More importantly, this crust and the molten cakes got me hooked on experimenting with different flours (it’s so creative!), so you can expect more gluten free recipes in the future.
One word of caution regarding this crust, before leaving you with the recipe: You will want to respect the refrigerating times and make sure that it cooks well before adding the onion. The crust is delicious if it’s crispy but not so much if it isn’t, so bake it long enough before adding the filling to make sure that the bottom is crispy as well. Remember that, once you add the onion filling, the baking times are very reduced, so the crust will need to be ready before this happens or it will turn soggy. And we don’t want that to happen!
Now without further ado, here is the recipe:
Honey-caramelized onion tart, with gluten free crust
Ingredients:
For the crust: 60 grs buckwheat flour, 70 grs hazelnut flour, 140 grs quinoa flour, 140 grs brown rice flour, 1 teaspoon nutmeg, salt to taste, 120 ml olive oil, 250 ml cold water.
For the filling: 3 red onions, 3 yellow onions, 2 tablespoons honey, 2 tablespoons warm water, 1 tablespoon rosemary or thyme, vegetable oil of your choice.
Preparation:
1- Prepare the crust: Put all flours in the food processor and pulse a few times to air them. Add nutmeg, salt, olive oil and cold water and pulse until the dough comes together. Remove from the food processor, wrap it in foil and place in the refrigerator to chill for 1/2 hour.
2- Remove the dough from the refrigerator, and roll it on the counter (previously dusted with your favorite gluten free flour). Cover your desired tart mold with it, pinch it with a fork and place it in the refrigerator for another 30 minutes.
3- Pre heat the oven at 200C. Remove the tart mold from the refrigerator, cover with baking paper and add pie weights or dry beans (I used alubia beans) so that the dough doesn’t rise much in the oven. Bake the crust for 20 minutes.
4- Remove the beans or weights and continue baking for another 20 minutes, until golden. When ready, remove the crust from the oven and let it chill, but leave the oven on.
5- Prepare the filling: Peel and slice the onions. Put 3 tablespoons of oil in a frying pan and sautée the onions in it. Add rosemary, salt and pepper and let cook for about 5 minutes. Once the onions are tender and start to turn golden, add the honey (which must be liquid), mixed with two tablespoons of warm water. Stir and let it simmer for another 5 minutes.
6- Add the onion filling to the crust and place the tart again in the hot oven, for a final 5 minutes. Serve hot.
Have a beautiful week!
by Marcela M. | Oct 8, 2012 | Blog, Main courses, Recipe Box, Recipes, Savories, Uncategorized

Most of my childhood memories seem to be highly sensorial and related to nature, and many, many of them are related specifically to food.
When I was growing up, we used to spend our Summers and our weekends (during the rest of the year) in a house located in the hills of Córdoba, my home province. The house, which was big enough to host cousins and other relatives who visited us every vacation, was settled in a small commune where all neighbours knew each other and where all children were friends.The garden that surrounded it had a swimming pool and trees that we would climb in the hot summer afternoons, and even an orchard with red and white plums, peaches, apricots, quinces, apples and walnut trees.
My memories of those times are deeply marked by that house: the cold shock of the first splash in the pool, the sound of shared laughter and of our dog’s noisy bark (he hated it when we jumped into the pool and even fell into the water a couple of times, while chasing us) . I remember the warmth of the towels in which my mom would wrap us after the last swim of the day, the roughness of the branches of the magnolia tree that was our hideout, and the wonderful smell of its flowers, carried inside the house by the early morning breeze.
Foodwise, I was, back then, an extremely picky eater who would only taste two fruits (apples and bananas) so I did not take advantage of our orchard as I should have. But I still remember the exuberant, beautiful look of the baskets full of produce, how their smell filled the kitchen, especially in the mornings, and how the fruits felt in my small hands when peeling them for making huge quantities of jams and marmalades, that would then be gifted to friends and stored for the winter months. I remember how, in January, we used to buy watermelons and cantaloupes by the side of the road, when coming from the city, and how my father’s fingers would get full of pink sticky juice while eating them at the garden table, after siesta, and the delicious taste of the afternoon’s chocolate milk and cookies, which filled my empty stomach after hours of swimming, running and playing.
Autumn memories, in turn, bring back the smell of freshly sharpened pencils, the sound of dead leaves crunching under my shoes, the weird texture of the spider web paper that we used to protect school books, the perceived freezing cold of our bedsheets at night, and the welcomed warmth of blankets and covers.
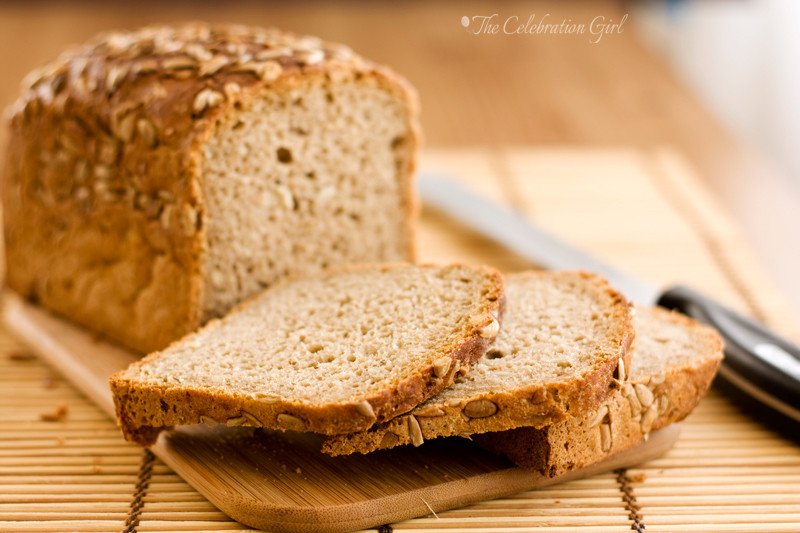
Autum was back to school time, so our time in the country side was limited to weekends, and from those days, I remember the apples fallen all around the orchard trees, the fun of cracking walnut shells, and the trips to the communal fig tree, to collect fruit for conserves (we used to make jars of figs in syrup). I remember the home-made bread that we would buy by the side of the road, in the same small shops where we bought watermelons and cantaloupes in summer time and, most of all, I remember soup.
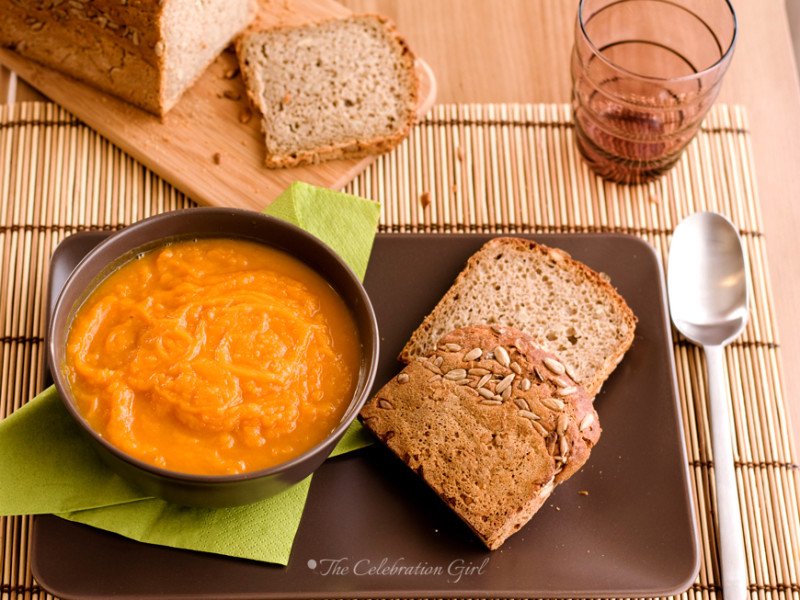
In those early years of my life, my family had a tradition: every Sunday evening, when we returned from the country side, my father and my mother would make soup while we watched V alien invasion. I remember that soup as the perfect one, because it was full of flavours I loved: leek, onions, butternut squash or pumpkin (depending on what we could get), potatoes, carrots and green beans. I don’t remember whether other vegetables were included because, being the picky eater that I was, I probably left those uneaten if there were, but it doesn’t matter. The vegetables were roughly chopped, and cooked in vegetable stock for what seemed like ages for my hungry young self and, once ready, we would eat it with bread (often, the remains of the home-made bread bought on the road).
These are the flavours present in the soup that I bring you today except, this time, I omitted peas and potatoes and I processed all ingredients, once cooked, for a smoother feel. The result is a hearty soup which, I hope, will bring you warmth in the cold days to come.
Here is the recipe (for 2 persons):
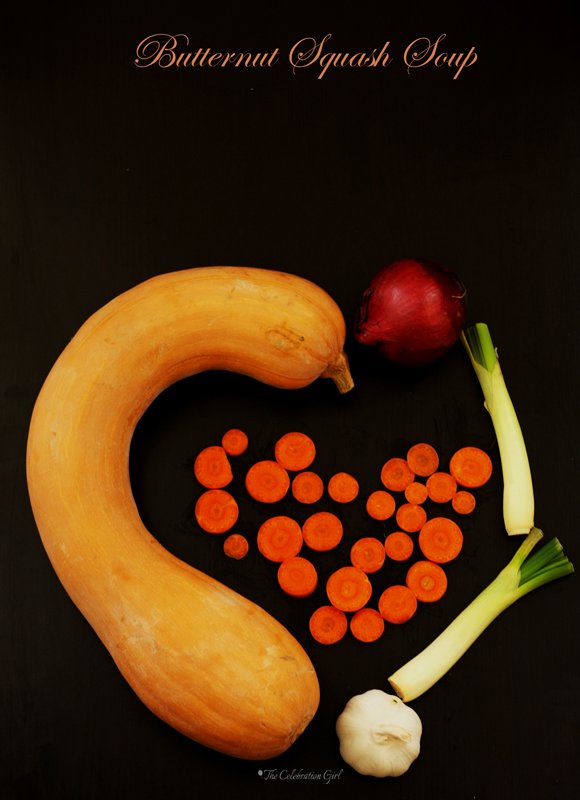
Ingredients: 4 thick slices of butternut squash, 1/2 red onion. 1 leek, 2 carrots, 1 garlic clove, 1 tablespoon of olive oil, 1 tablespoon of dried vegetable stock.
Preparation: 1) Dice onion, pumpkin slices and leek. Crush the garlic clove and slice the carrots, then cut each slice in fours. 2) Put olive oil in a saucepan and, once it is warm, add onion and garlic and leave until golden (stirring with a wooden spoon so that they don’t burn) 3) Add the rest of the vegetables and cover with water mixed with the vegetable stock. 4) Cover the saucepan, turn the heat to minimum and let it simmer for 30-40 minutes, or until the vegetables are soft. 5) Once the soup is ready, turn off the heat and process with an immersion food processor. If you don’t have an immersion food processor, let the soup cool down, transfer to the bowl of a regular food processor, process, and then re-heat for a few minutes before serving.

Con sabor latino…
Mis recuerdos de la infancia son sumamente sensoriales y relacionados con la naturaleza y, muchos de ellos, están especificamente ligados a la comida.
Cuando yo era niña, solíamos pasar los veranos, y los fines de semana (durante el resto del año), en una casa que se encontraba en las sierras de Córdoba, mi provincia natal. La casa, que era lo suficientemente grande para alojar primos y demás parientes que nos visitaban cada año, estaba ubicada en una pequeña comuna donde todos los vecinos se conocían y todos los niños eramos amigos. El jardín de dicha casa, que era grande, tenía una pileta de natación y arboles a los que trepábamos para guarecernos del calor de las tardes de verano, y hasta una quinta de árboles frutales que incluía ciruelos blancos y rojos, durazneros, quinotos, nogales, membrillos y manzanos.
Mis recuerdos de ese tiempo están muy marcados por esa casa: el shock helado del primer chapuzón en la pileta, el sonido de la risa compartida y del ladrido ruidoso de nuestro perro (que odiaba que nos lanzáramos a la pileta y, por eso, nos perseguía desde el borde- y que hasta se cayó al agua más de una vez). Recuerdo la calidez de las toallas con que mi mamá nos envolvía por la noche, cuando terminábamos de nadar y jugar, la aspereza de las ramas de la magnolia donde solíamos escondernos, y el aroma maravilloso de sus flores (aún mis preferidas), que inundaba la casa, traído por la brisa de la mañana.
En lo que hace a la comida, en ese entonces yo era mañosísima y sólo probaba dos frutas (manzanas y bananas), por lo que no aprovechaba como hubiera debido la abundancia de la quinta. Pero, a pesar de ello, aún recuerdo la exuberancia de los canastos llenos de frutas, cómo sus aromas inundaban la cocina, sobre todo por la mañana, y las texturas diferentes en mis pequeñas manos, al pelar las distintas frutas para hacer toneladas de mermeladas y jaleas que luego regalaríamos a amigos, y guardaríamos en frascos para el invierno. Recuerdo cómo, en enero, solíamos comprar sandías y melones al costado de la ruta, y cómo las manos de mi padre se llenaban de ese jugo pegajoso y rosado , al comerlos después de la siesta; y recuerdo el sabor delicioso de la leche chocolatada y las galletitas de la merienda, que llenaban mi estómago hambriento despues horas de nadar, correr y jugar.
Mis recuerdos del otoño por su parte, tienen el aroma de lápices nuevos, el sonido de las hojas muertas crujiendo bajo mis zapatos, la extraña textura del papel araña con el que forrábamos libros y cuadernos, el frío helado de las sábanas, al entrar a la cama por la noche, y la bienvenida calidez de las colchas y frazadas que nos abrigaban.
El otoño era una epoca escolar, así que nuestro tiempo en el campo se limitaba a los fines de semana y, de esos días, recuerdo las manzanas caidas alrededor de los árboles de la quinta, lo divertido que era romper cascaras de nueces , y los viajes a la higuera comunal para buscar frutas suficientes para preparar tarros de higos en almibar. Recuerdo el pan casero que comprábamos al costado de la ruta (en los mismos puestos que vendían sandías y melones durante el verano) y, por sobre todas las cosas, recuerdo la sopa.
En esa primera infancia, mi familia tenía una tradición: cada domingo por la noche, al regresar del campo, mi mamá y mi papá preparaban una sopa mientras nosotros (mi hermano y yo) veíamos V invasión extraterrestre. Recuerdo esa sopa como la perfección absoluta, porque incluía todos mis sabores preferidos: puerros, cebollas de verdeo, calabaza o zapallo (lo que encontráramos), cebollas, papas, zanahorias y arvejas. A decir verdad, no recuerdo si había algún otro ingrediente porque como era muy mañosa, si lo había, seguramente no lo habré comido! En la sopa de mi infancia, estos ingredientes eran cortados en cubos y se los cocinaba en un caldo de verduras por lo que, en mis recuerdos de niña hambrienta, parecían añares y, una vez lista, solíamos comerla acompañada con pan (generalmente el mismo pan casero que había sobrado del campo).
Estos son los sabores que están presentes en esta sopa que hoy les traigo. Esta vez, sin embargo, omití papas y arvejas y licué los ingredientes, una vez cocidos, para darle una textura cremosa. El resultado es una sopa sustanciosa, que espero les brinde calor en los fríos días por venir.
Aqui está la receta:
Ingredientes: 4 rodajas gruesas de calabaza, 1 puerro, 1/2 cebolla colorada, 2 zanahorias, 1 diente de ajo, 1 cucharada de aceite de oliva, 1 cucharada de caldo de verduras disecado.
Preparación: 1) Corte en cubos la calabaza, el puerro y la cebolla. Machaque el ajo y corte las zanahorias en rodajas, y luego cada rodaja en 4 pedazos 2) Ponga el aceite de oliva en una olla, y agregue la cebolla y el ajo, cocinandolos hasta que estén dorados (revuelva con cuchara de madera para que no se quemen). 3) Agregue el resto de las verduras y cubra con agua, en la que habrá disuelto previamente el caldo. 4) Cubra la olla, ponga el fuego a mínimo y deje cocer por 30 a 40 minutos, o hasta que las verduras estén tiernas. 5) Una vez cocidos los ingredientes, retire la olla del fuego y, usando una procesadora de mano, procese los ingredientes hasta que esten disueltos. Si no tiene procesadora de mano, deje enfriar la sopa, coloquela en el bowl de una procesadora tradicional, procese y luego caliente nuevamente antes de servir.
May you have a wonderful week! I’ll come back on Thurday with a surprise I hope you will like!
Que tengan una semana maravillosa! El jueves estaré de vuelta con una sorpresa que espero que les guste!
by Marcela M. | Jul 4, 2012 | Blog, Europe, Main courses, Recipe Box, Recipes, Salads and dips, Savories, Travel, Uncategorized
Good afternoon dear friends!
I hope you are having a lovely week! I hadn’t planned to take time off blogging but life took over my plans, and I had to attend to more urgent matters, which is why these recipes are being published late.I had originally planned to bring them to you on Monday the 18th of June (which was the official publication day for savory recipes at Circulo Whole Kitchen) but, as mentioned above, it was not possible. I didn’t want to miss the opportunity of publishing them, however because June’s proposal is very special to me, and because all flavours are summery and ideal for barbecues and outdoor entertaining.
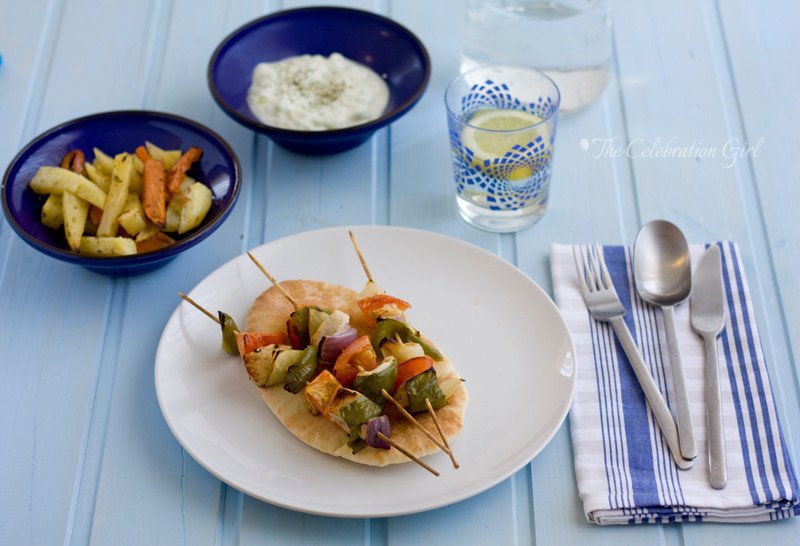
During the month of June, Circulo Whole Kitchen’s savory proposal included three recipes which constitute a traditional Greek meal…and since I live in Greek Cyprus, they are a big part of my life and of my memories of this place . I have already shared one of these recipes with you, that of Tzaziki salad, and for the rest of the menu (which even included freshly baked pitta bread!), I used flavour combinations and marinades that I learnt here. It is my way of bringing you a part of my newly adopted culture, and my children’s first one.
The first time I came to Cyprus was in August 2007, to visit my husband. At the time, I was still working in Ivory Coast (where we had met), and he had arrived to Nicosia a month before. I was meant to join him by the end of the year but we didn’t want to spend 6 months apart, so I took 10 days of vacations and came to see him during the summer. During weekdays, when he was at work, I would stroll the empty streets (Nicosia is a ghost city in August) and, on weekends, we would travel around the island, to get to know our new home. We visited Paphos, Limassol, Larnaca, Aphrodite’s birth place, Kakopetria and other places in between and we were captivated by the calm, quiet, leisure-like mood of the island.

An important part of exploring a new place is, of course, tasting its food, and some of the foods we tasted were the ones that are the object of this post. Now, I had tasted souvlaki before, of course. We call them brochettes in Argentina, using the french word, and I had also had them as kebabs in Ivory Coast (called after their arabic denomination, which means “roast meat”) but the difference lied in the sauces used for marinating them. Until then, I was used to simply brushing meat and vegetables in olive oil and adding rosemary or thyme, or just lemon, and here were marinades that involved wine, cinnamon, yogurt, and french fries served with oregano. I was fascinated and remember scribbling the ingredients mentioned in the menu in paper napkins to try to emulate the recipes at home.
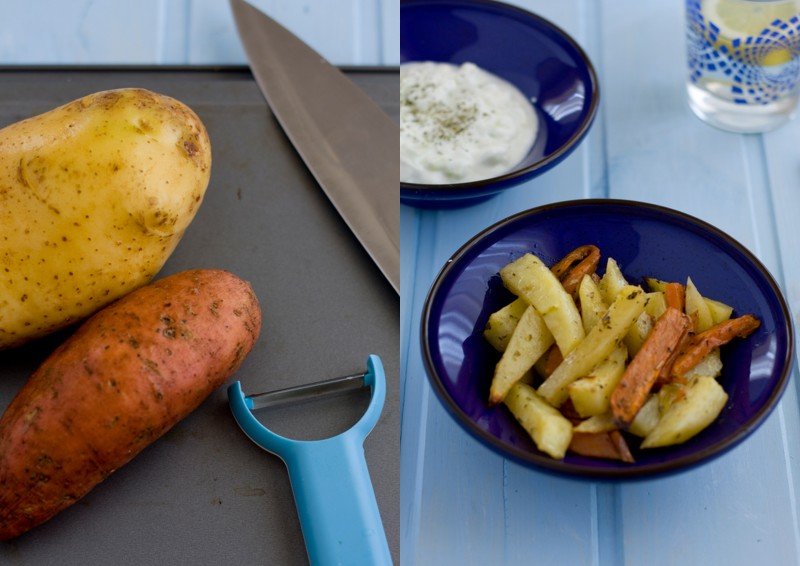
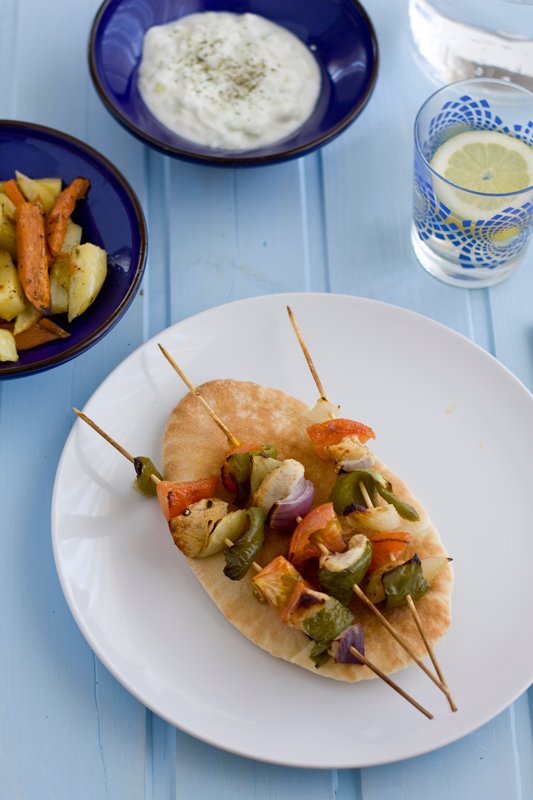
It is through experimenting with the recipes and comments generously provided to me by the people that came into my life since I arrived to Cyprus that I ended up with the chicken marinade for this souvlaki. I accompanied them with traditional tzatziki (using the recipe that my sister in law shared with me many years ago), and with oven- roast mixed potatoes, brushed in olive oil and sprinkled with oregano. For the pitta bread, I used the recipe provided by Circulo Whole Kitchen.
Here are the recipes:
Souvlaki:
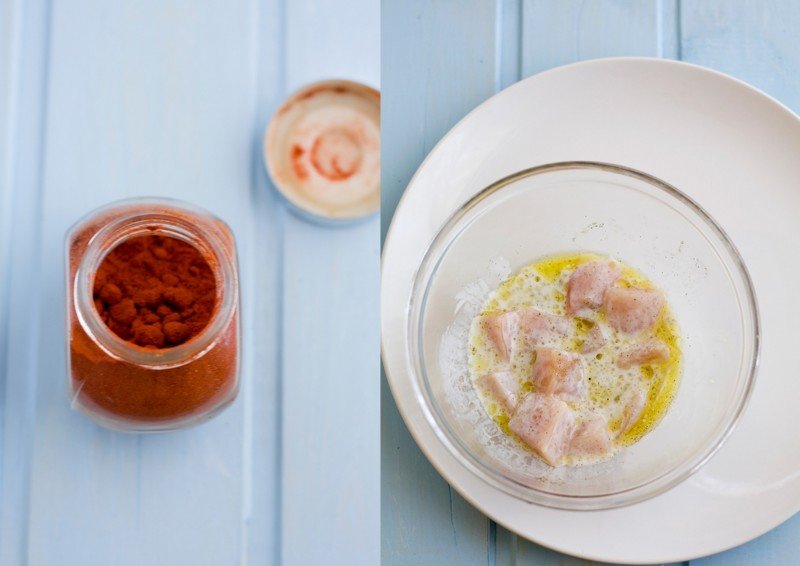
Ingredients (for 8 sticks): 3 tablespoons greek yogurt, 3 tablespoons olive oil, 1 clove of garlic, crushed, 2 teaspoons paprika, salt and pepper to taste, 1 big chicken breast, 1/2 green pepper, 1 tomato, 1/2 red onion, 1/2 white onion, .
Preparation:
1) Mix yogurt, olive oil, garlic, paprika, salt and pepper in a bowl. Dice the chicken breast and add the pieces to the yogurt marinade. Cover with cling film and leave in the refrigerator a minimum of 5 hours (preferably overnight).
2) Dice the vegetables and set aside. Remove the marinating chicken from the refrigerator and start assembling the souvlaki, mixing meat and vegetables. Place them side by side on a baking dish brushed with olive oil and pour any remaining marinade over them.
3) Grill or cook in the oven until ready.
Pitta bread:
Ingredients: 500 grs all purpose flour, 2 teaspoons salt, 2 tablespoons olive oil, 240 ml warm milk, 240 ml warm water, 25 grs fresh yeast.
Preparation:
1) Mix flour and salt. Set aside.
2) Mix milk and water and pour over the yeast, mixing until dissolved
3) Add the the liquid mix to the flour and incorporate. Work the dough thoroughly, until really smooth and soft (this is important! do not skip this step!)
4) Form a ball of dough, place in bowl, cover with cling film and let it rest until it doubles its volume.
5) Flour the counter, put the dough on it, and pat it against the counter a couple of times, in order to remove air.
6) Cut the dough in small portions, cover with a kitchen towel and let them rest for about 15 minutes, in a warm place.
7) Once the small portions of dough have risen, roll them to give them a circular shape, until they are 1/2 cm thick. Place them in baking sheets, cover them and let them rise again.
8) Once risen, cook in a hot oven (220C) for about 6-10 minutes. They should not brown, only be crispy on the outside. Store them one on top of the other, covered with a kitchen towel for maximum freshness.
Oven-roast mixed potatoes:
Ingredients: 1 big potato and 1 big sweet potato, olive oil, oregano
Preparation:
1) Peel and cut the potatoes alongside (as if you were making French fries)
2) Place them on a roasting pan, and brush them with olive oil.
3) Mix salt with one tablespoon of oregano and sprinkle over the potatoes. Cook in the oven until just tender.
Tzaziki (originally published in this post)
Ingredients: 1 cucumber, 1 clove of garlic, greek yogurt and a little bit of parsley for garnishing.
Preparation:
1)Cut the cucumber into thin slices, and then chop them finely. Place them in a bowl.
2)Chop a clove of garlic (or half, if you are not a very garlicky person) and add it to the cucumber.
3) Add greek yogurt (500 ml) and mix well.
4) Chop a few parsley leaves to garnish.
Con sabor latino...
Buenas tardes queridos amigos!
Espero que esten pasando una hermosa semana! No había planeado tomarme vacaciones del blog y tardar tanto en publicar pero la vida se interpuso en mis planes y tuve que ocuparme de asuntos más urgentes, motivo por el cual estas recetas se publican recien hoy. Mi idea original era publicar este post el 18 de junio (ups!), que era el día oficial de publicación de las recetas del Circulo Whole Kitchen, pero, como mencioné anteriormente, lamentablemente ésto no fue posible. Elijo publicarlas, sin embargo, aún cuando haya pasado tanto tiempo, porque la propuesta del Circulo Whole Kitchen para el mes de junio tiene una importancia especial para mí, y porque todos los sabores incluidos son muy veraniegos, ideales para asados y reuniones al aire libre.
En el mes de junio,el Circulo Whole Kitchen nos invitó a preparar tres recetas tradicionales griegas…y como yo vivo en la parte griega de Chipre, estas recetas forman parte de mi vida diaria, y estos sabores forman parte de los recuerdos de esta tierra adoptiva que llevaré conmigo a donde vaya. Una de estas recetas (la de tzaziki), ya la compartí con ustedes en ESTE POST, pero la repito aquí para que no tengan que andar buscando en los archivos (aunque buscar en fácil ahora, no? 😉 Para el resto del menú, utilicé combinaciones de sabores y marinadas que aprendí aquí. Esta es mi forma de acercarles una partecita de mi cultura de adopción- y la primera de mis hijos.
La primera vez que vine a Chipre fue en agosto de 2007, para visitar a mi marido. En ese tiempo yo aún estaba trabajando en Costa de Marfil (donde nos habíamos conocido) y él había llegado a Nicosia un mes antes. Ya habíamos decidido que yo me le uniría aquí definitivamente a fines de ese año, pero 6 meses nos parecía demasiado tiempo para estar separados, así que yo vine a visitarlo durante 10 días en el verano para acortar el tiempo a la distancia. En esas vacaciones comenzamos a conocer la isla. Los días de semana, mientras él trabajaba, yo paseaba por las calles desoladas de Nicosia (que es una ciudad fantasma en agosto!) y, los fines de semana, explorábamos el que sería nuestro nuevo hogar. Así visitamos Pafos, Larnaca, Limassol, la roca donde nació Afrodita, Kakopetria y otros lugarcitos, y quedamos cautivados por el animo veraniego, calmado, tranquilo de la isla.
Una parte importante de explorar un lugar desconocido es, claro está, probar sabores nuevos, y algunos de esos sabores nuevos para mí son los que incluyo en este post. No, no es que haya probado souvlakis por primera vez en este viaje, de hecho en Argentina los llamamos brochettes (usando la palabra francesa) y tambien los había comido en Costa de Marfil (donde los llaman kebabs, usando la palabra árabe, que significa “carne asada”), pero la diferencia estaba en los condimentos utilizados y en la forma de emplearlos. Antes de venir a Chipre, cuando yo hacía brochettes no marinaba la carne, sólo la pincelaba en aceite de oliva y espolvoreaba romero o tomillo o, simplemente, limón…y de pronto aquí me encontraba con marinadas que utilizaban vino, canela, yogurt, paprika y las papas fritas se servian espolvoradas con oregano. Estaba fascinada con los nuevos descubrimientos culinarios, y anotaba los ingredientes que leía en los menus en servilletas de papel para hacer pruebas en casa, e intentar emular las recetas.
La marinada que usé en estos souvlaki de pollo fue producto, justamente, de esos experimentos nacidos de los comentarios generosos y de las recetas que me brindaron personas que aquí conocí. Los serví sobre pan de pitta casero y los acompañé con la tradicional tzaziki (hecha con la receta de mi cuñada) y con papas y batatas rostizadas al horno, pinceladas en aceite de oliva y espolvoreadas con sal oreganada. Espero que les gusten!
Aqui estan las recetas:
Souvlaki:
Ingredientes (para 8 palitos) : 3 cucharadas de yogurt griego, 3 cucharadas de aceite de oliva, 2 diente de ajo machucado, 2 cucharadas de te de paprika, sal y pimienta a gusto, 1 pechuga de pollo grande, 1/2 pimiento morrón verde, 1 tomate, 1/2 cebolla colorada, 1/2 cebolla blanca
Preparacion:
1) Mezclar en un bowl yogurt, aceite, ajo y paprika. Cortar el pollo en cubos y agregar a la marinada de yogurt. Cubrir con papel film y dejar reposar en la heladera un mínimo de 5 horas (preferentemente toda la noche)
2) Una vez transcurrido el tiempo indicado, cortar los vegetales en cubos y retirar el pollo de la heladera. Armar los souvlaki cuidando de intercalar distintas verduras con la carne. Una vez armados, colocarlos en una placa para horno pincelada con aceite de oliva y verter encima todo restante de marinada.Llevar a horno mpderado a fuerte hasta que estén cocidos.
Pan de pitta (receta de Circulo Whole Kitchen)
Ingredientes: 500 gr de harina, 2 cucharaditas de sal, 2 cucharadas de aceite de oliva, 240 ml. de leche tibia, 240 ml. taza de agua tibia, 25 gramos de levadura fresca
Preparación:
1) Poner en un bol la harina junto con la sal.
2) Mezclar la leche con el agua e incorporarla a la levadura mezclando hasta disolverla. Agregar esta mezcla a la harina, poco a poco, junto con el aceite de oliva e ir mezclando hasta que esté todo el líquido incorporado.
3) Formar una masa y comenzar a trabajarla en forma continua hasta que esté bien lisa y suave. Es importante que la masa esté bien amasada.
4) Colocarla en un recipiente y cubrirla con un plástico y dejarla levar hasta que doble su volumen.Una vez levada la masa se vuelca sobre una mesa enharinada.
5) Desgasificar la masa y cortar en porciones que se dejan descansar sobre una superficie enharinada y cubiertos con un paño. Preferentemente en un lugar cálido. Esto hará que nuestro pan leve en aproximadamente 10 a 15 minutos.
6) Se toma cada porción y se estira de medio centímetro de espesor en forma circular o alargada. Se van depositando en placas limpias, se cubren con un paño y se dejan levar nuevamente.
7) El secreto de estos panes es cocinarlos en un horno a una temperatura alta , unos 220º, para que se inflen y formen corteza pero sin color, deben quedar blancos. Los dejamos hornear durante unos 6 a 10 minutos.
8) Para conservarlos blandos se apilan unos sobre otros en caliente y se cubren con un paño, o plástico.
Mix de papas y batatas oreganadas al horno:
Ingredientes: 1 papa grande común, 1 batata, aceite de oliva para pincelar, oregano para espolvorear
Preparacion:
1) Cortar las papas en bastones, como si fueran papas fritas.
2) Colocar las papas en una fuente de horno y pincelar con aceite de oliva.
3) Mezclar la sal con una cucharada de oregano y espolvorear sobre las papas. Cocinar en horno moderado hasta que esten tiernas.
Tzaziki:
Ingredientes: 1 pepino, 1 diente de ajo (o medio, si no quieren espantar vampiros ;), yogurt griego (o yogurt natural, si no encuentran), perejil para espolvorear arriba antes de servir
Preparación:
1) Cortar en pepino en rodaja bien finitas, y luego picarlo hasta que quede chiquito.
2) Picar el diente de ajo muy finito.
3) Agregar el yogurt y mezclar bien.
4) Antes de servir, picar unas cuantas hojas de perejil y espolvorearlas encima.
I hope you like these recipes!
What is the dish that spells summer to you?
PS: Happy 4th of July to all my American followers! May you be enjoying a wonderful day with family and friends!
by Marcela M. | May 18, 2012 | Blog, Main courses, Recipe Box, Recipes, Savories, Uncategorized
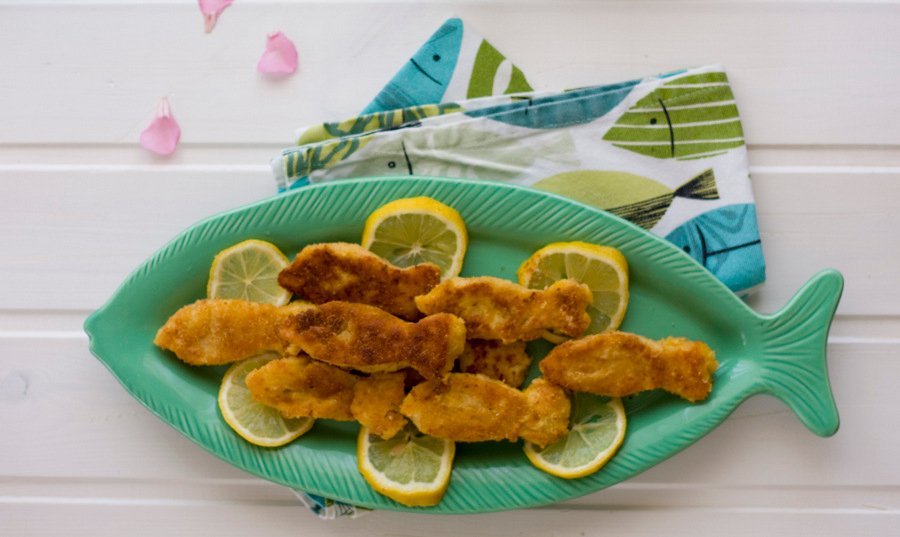
Good morning dear friends! Are you ready for the weekend?
Today I bring you a post with a delicious recipe that I discovered through Whole Kitchen cooking club, El Circulo Whole Kitchen.Whole Kitchen Magazine provides two recipes to its members every month ( one sweet and one savory), and the savory proposal for May 2012 was fish cakes.
I immediately liked the idea because, even though we live on an island, I have found it hard to incorporate fish into our diet, particularly that of our children. When I read the recipe for these fish cakes, I loved how versatile it was: I could shape them in different ways to make them more attractive for Luka and Zoe, and I could sneak in vegetables (Yes, I do that, I have picky eating toddlers!). The recipe also suits very well Cyprus lovely Spring weather, and it was perfect for a quick-lunch at the balcony, after the children came back from nursery school.
Whole Kitchen provided us with two different recipes: one from Jamie Oliver, which called for salmon and potatoes, and the other one from Trotamundos, which called for white fish, beans and potatoes. I decided to make my variation and used white fish fillets, potatoes, and butternut squash for a sweeter taste.
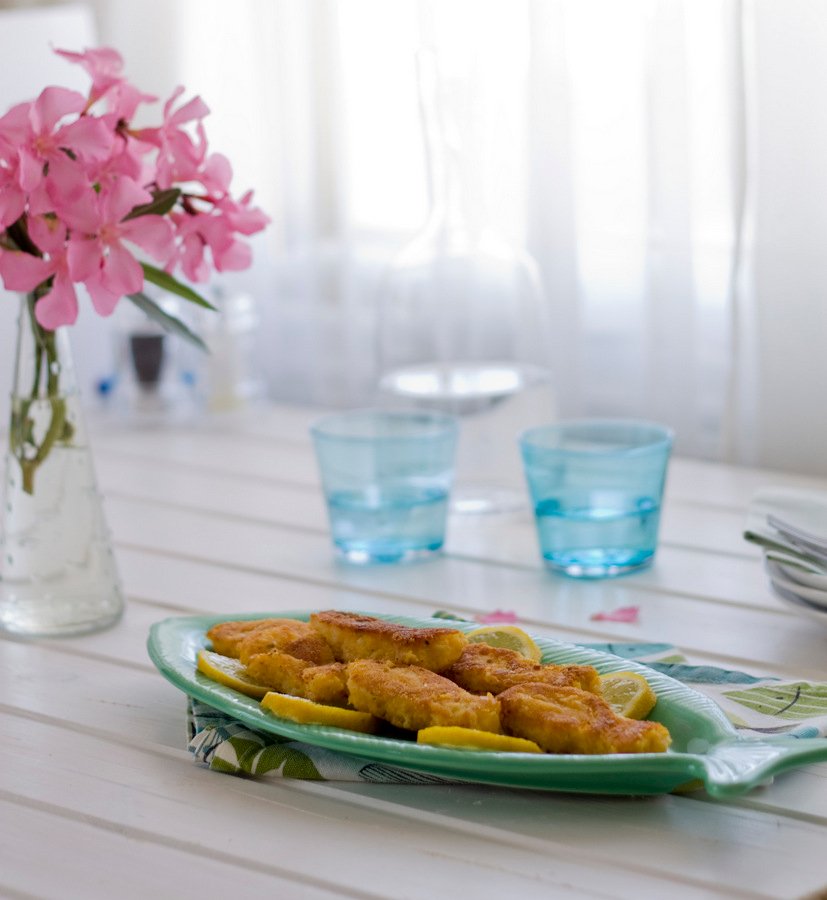
These fish cakes are really, really simple to make and they require very few ingredients: all you need is fish, potatoes and squash, plus one egg and a bit of flour and bread crumbs for assembling them, that’s all. The procedure couldn’t be easier but it may take a bit of time if you decide to give them a specific shape, as I did. First, you need to boil or steam the vegetables until very tender. In the meantime, cook the fish in the oven for about 10 minutes, drizzled with olive oil and covered in aluminum foil. Once everything is cooked, you simply have to mash the vegetables, add the fish and a bit of parsley (or other spice of your own preference) shape the cakes, flour them and fry them in just a bit of oil.
As I mentioned, I did not make these cakes round, as it is traditional. Instead, since I was going to be serving them to my children, I decided to use a fish-shaped cookie cutter to make them more enticing.
In order to give them this shape, I covered a cookie sheet with foil, extended the preparation on top, covered it with more foil and put the sheet in the fridge for half an hour, for it to get some consistency. After this time, I took it out and started cutting little fish with my cutter and placing them on a plate. Once I was done, I put the fish cakes back in the fridge for another half an hour. This is necessary for them not to lose their shape when you flour them.
After half an hour, I took the fish cakes out of the fridge, floured them (passing by flour, egg and bread crumbs) and fried them in just a tiny bit of oil, until golden. The next time I make them I will try to bake them in the oven, but since this was the first time, I decided to stick to the traditional cooking methods. Frying them makes them crispy on the outside while remaining soft on the inside – and they are just delicious!
I also decided to keep the flavours simple, so that the sweetness of the squash would be palpable, and therefore used as condiment only a bit of parsley, salt and pepper. You could be more adventurous, and try to add other spices either in the main mixture or by flavouring the bread crumbs with lemon zest or a Provençal mix (garlic and parsley), for example.
Fish cakes are traditionally accompanied by French fries, but I decided to go for a healthier option and opted for a quick, simple salad of cucumbers and cherry tomatoes instead. While I like to eat fried food on occasions, I don’t have a big resistance to it, and I find that I can tolerate them better if I eat them with fresh vegetables. I am a big fan of salads all year-long, but I must confess that I could pretty much live on them during the warmer months!
Here’s the recipe:
Ingredients:
– 3 fish fillets
– 2 medium-sized potatoes
– 5 slices of butternut squash
– Parsley, salt and pepper to taste
– Flour
– breadcrumbs
-Oil for frying
Preparation:
– Dice potatoes and squash and put in a saucepan, cover with water and bring to the boil until tender.
– Put the fish fillets in an oven tray, add salt and pepper and drizzle with olive oil. Cover with aluminum foil and cook for about 10 minutes.
– Mash the potatoes and squash. Crumble the fish fillets and add them to the vegetable purée. Add salt and pepper to taste and parsley, if desired.
– Shape small cakes with the help of your hands, place them on a tray, and put them in the fridge for half an hour. If you want to give the cakes a cookie cutter shape, extend the mixture on an oven tray covered in foil, put it in the fridge for half an hour, and only after this use the cookie cutter.
– Slightly beat one egg. Remove the cakes from the fish, flour them, dip them in egg, and pass them by bread crumbs so that these stick to them.
– Put a bit of oil in a frying pan and, once heated, add the fish cakes, until golden on both sides. Serve.
I hope you’ll like them!
Have a great weekend!
by Marcela M. | Sep 8, 2011 | Blog, Main courses, Recipe Box, Recipes, Savories, Uncategorized
Hello dear friends! I hope you are having a lovely week
Today I have a BIG surprise, one that I have been dying to tell you about: Two of my recipes, with their pictures, are featured in the September issue of Whole Kitchen Magazine!!!
Last July, I was contacted by Silvia (who writes the beautiful blog Food and Cook, for Elle Magazine). Silvia is also one of the editors of Whole Kitchen and, to my surprise and utter delight, she asked me to collaborate with their September issue. I immediately said YES, of course! Whole Kitchen is a beautiful magazine, full of delicious recipes and gorgeous photography, edited by bloggers I have been following for a long time, and with amazing contributors, so it is a real honour to be able to be a part of it.
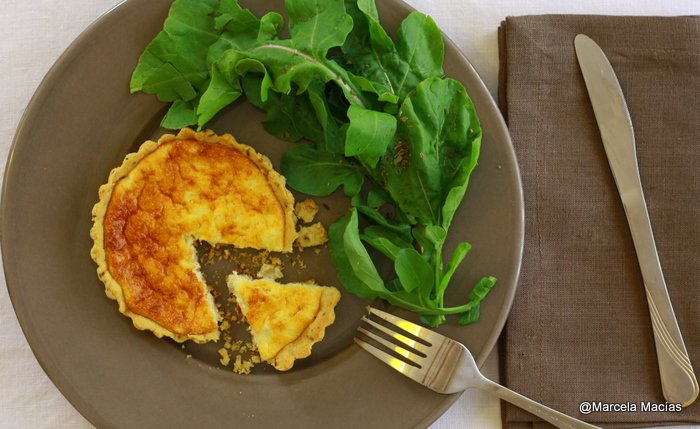
In this issue you will find one savory recipe from me: cheese and echalottes tartelettes, with a hint of cumin (pages 58-61)…
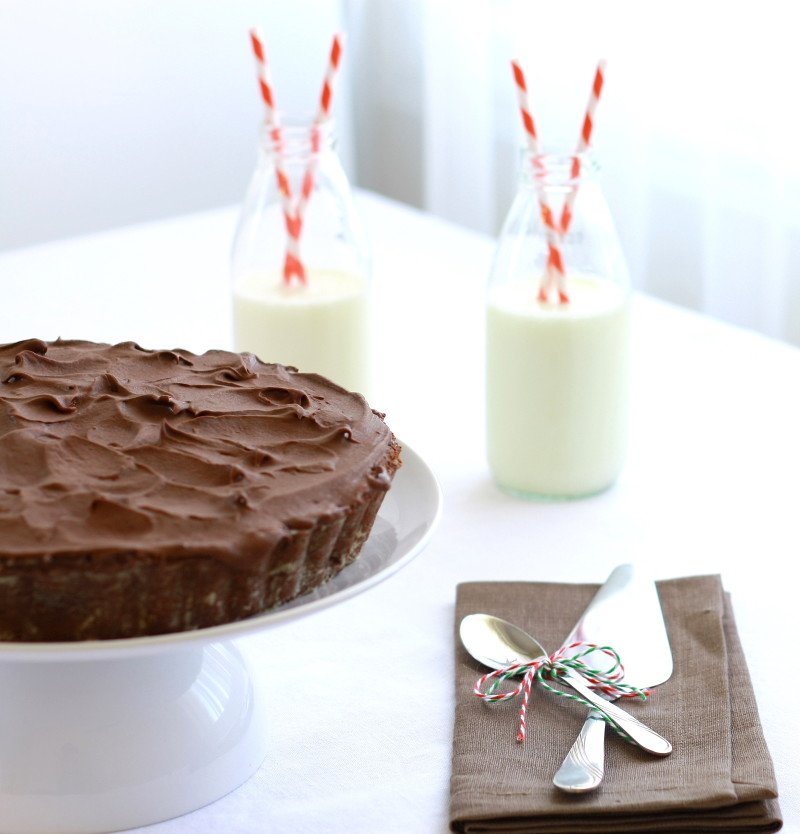
…And one dessert: Chocolate and pear mousse pie (pages 98-101)
This issue also includes great lunch-box ideas, as well as cookies, muffins and pies which could be prepared with children.It has also added a new section called ” Living”, with articles on fashion, beauty and wellness.
Silvia and Beatriz: thank you so much for letting me be a part of your beautiful magazine!
May you all have a wonderful weekend!
NOTE: For the recipe of Chocolate and Pear Mousse pie in English, click here.


