by Marcela M. | Jul 11, 2013 | Blog, Cooking basics and tutorials, Gluten Free, Recipe Box, Recipes, Uncategorized, Vegan & Raw
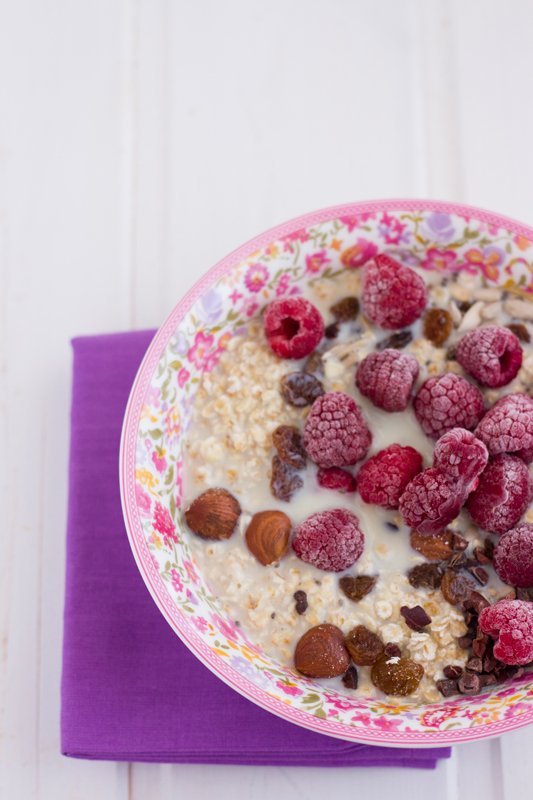
Last Monday, after I finished writing the last post and started taking notes on the one I had planned for today, I realized that it had been over a month since the last time I had posted a recipe! A month?! How could this be?!
It’s true that the ebook of vegetarian, detox friendly, gluten free, sugar free, dairy free and egg free summer recipes had been released in the meantime, but still…unacceptable! 😉
So I decided to remedy this and, for this reason, I am bringing you today my favorite homemade muesli recipe, and adding possible variations to suit you in case you have any food allergies or intolerances- on in case you just don’t like some of the ingredients.
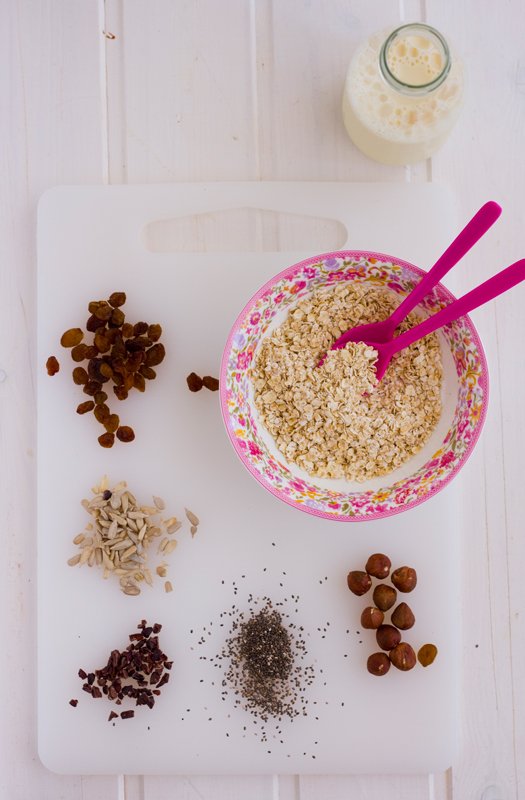
This muesli, together with granola, is one of my favorite breakfast options. It is, not only lush, but also really healthy and it gives me long lasting energy. During school times, when I know I will be in a rush, I make big batches of it and store them in glass jars, so that i just need to put a few spoons in a bowl, pour some vegetable milk over it, let it sit for a few minutes while I prepare my children’s breakfast or boil the water for chamomille tea, and it’s ready!
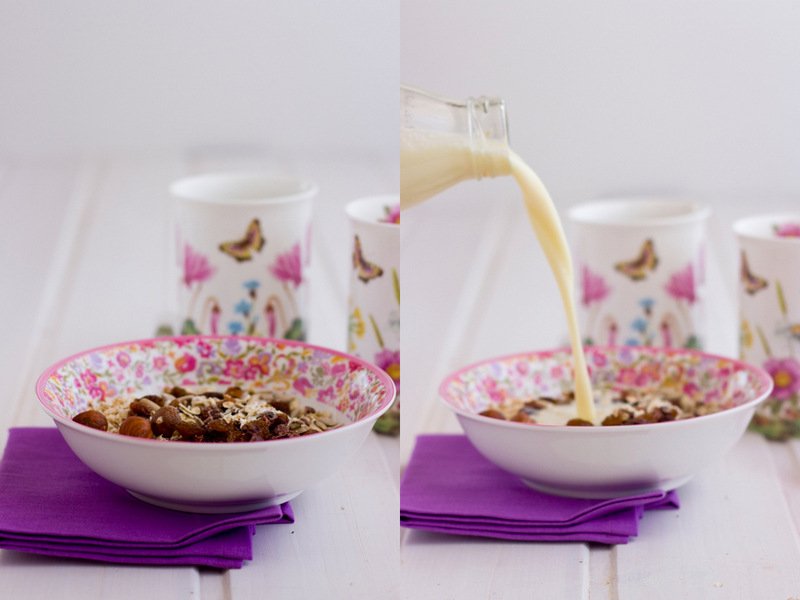
Ready to try it? Here it goes
HOMEMADE MUESLI RECIPE
Ingredients: 3 tablespoons oats, 1 teaspoon chia seeds, 1 teaspoon raw cocoa nibs, 1 tablespoon hazelnuts, 1 teaspoon sunflower seeds, 1 cup vegetable milk, 1 tablespoon raisins, 1/2 cup fresh fruits to top it all.
Preparation: Put the oats in a bowl, add the seeds and nuts and pour the milk over them. Let it sit for a few minutes (or overnight, covered, in the refrigerator if you like the oats to be really soft), add the raisins and fresh fruits and enjoy!
Variations:
1) You may replace hazelnuts for any other nut (almonds, walnuts, pecans, brazil, whichever you prefer)
2) If you can’t eat nuts, add another seed (such as pumpkin seeds, for example)
3) If you can’t eat oats, you may replace them by millet, rice or quinoa flakes.
4) If you have a gluten allergy or intolerance, use gluten free oats or make the replacements above
5) You can replace raisins by any dried fruits, such as dried cranberries, goji berries, or dried apricots, for example.
6) You may omit the raw cocoa nibs- I love their crunchy bitterness but this is a matter of taste, of course.
7) In Summer I like to use frozen fruits to top the muesli, because it adds freshness to it-hence the frost present in the picture’s raspberries. This is a matter of choice. Chose whatever you prefer, or have on hand!
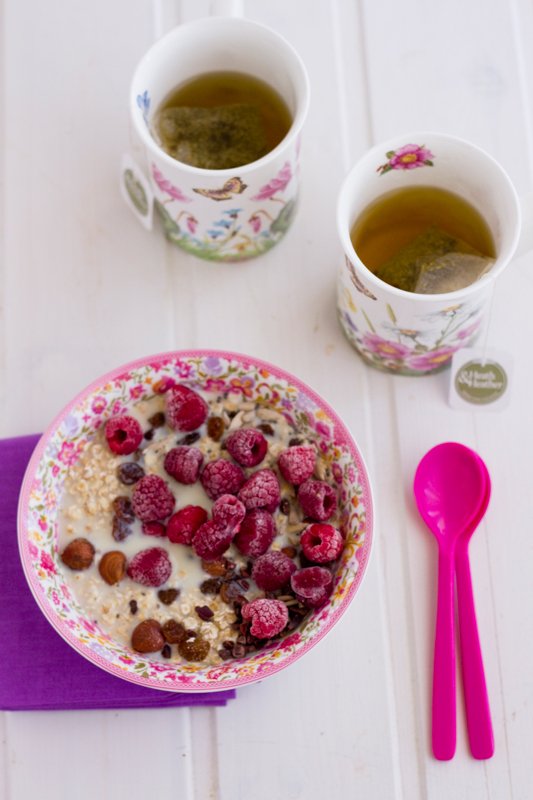
Now it’s your turn: what do you generally have for breakfast? have you ever made muesli before? Please share in the comments below!
by Marcela M. | Nov 22, 2012 | Blog, Breads, Recipe Box, Recipes, Uncategorized

Good morning friends! I am running behind in posting this week and I apologize! With autumn comes cold weather and with it come colds and runny noses, and sometimes fever! Nonetheless, I am getting back on track and I’ll post again later today, as was originally planned.
Now let’s move on to today’s post, shall we? Those who follow me on Facebook and twitter already know this, but for those of you who don’t, here’s the big news I announced on Monday: I am going to be collaborating, on a permanent basis, with a lovely project, a website called Petit-On, created by the adorable Raquel Bermejo (who some of you may already know from the blog Peque a la moda).

Every month, I will contribute a child friendly recipe for the “Cooking” section of the blog, and by child friendly I mean, not only recipes that children may like, but also recipes that can be done with them, with the aim of encouraging children to cook. Each recipe will share a common ingredient will all other recipes published that month by the other contributors, who are bloggers I read, follow and love, such as Elena, from Delicious Stories, Lili, from La cocina de color lila , Laura from Coure coulants and Cristina from La mujer del fotógrafo es química. And, since Petit-On is published in Spanish, I will share them in English here as well, so that you can also make them.

The common ingredient for November was chestnuts, and I contributed these easy and delicious spiced apple, maple and chestnuts muffins. They are very simple and can even be made the night before, so they are ideal for those lazy Sunday morning when we crave something sweet. Just leave them in the fridge in an airtight container, and add the apple, chopped chestnuts and syrup right before baking!
Here’s the recipe
Spiced Apple, maple and chestnut muffins (serves 12. Inspired by the Better Homes and Gardens Cookbook’s Apple Muffins)
Ingredients: 2 cups bread flour, 4 teaspoons baking powder, 1/2 teaspoon cinnamon, 1/4 teaspoon cardamom, 1/4 teaspoon salt, 1/4 cup sugar,1 XL egg, 1/3 cup oil or 60 grs melted butter or margarine (whichever you prefer), 1 cup milk (it may be soy almond, rice or oats milk), 1 granny smith apple, diced, 1/3 cup chopped chestnuts (you may roast them first to release their wonderful aroma), maple syrup (optional)
Preparation: 1)Pre-heat the oven at 200C 2) Sift flour, cinnamon, cardamom, sugar and salt and place them in a big bowl 3) Beat the egg. Add milk and oil and mix well. If you use melted butter/margarine instead of oil, remember that it should not be hot when adding it to the egg or it will cook it! 4) Make a hole in the middle of the dry ingredients and pour the wet ingredients in it. Mix only until combined (do not beat!) 5)Add apple and chestnuts and mix until just combined 5) Pour the batter in the muffins cases, filling them 2/3 only. 6) Pour 1 teaspoon maple syrup in each muffin case and mix it with the rest of the batter with a toothpick or chopstick, making eights. 7) Bake for 10-15 minutes, or until a toothpick comes out clean.

Amigos hispanoparlantes: Este post contiene la traducción de la receta que presenté en Petit-On. Para leerla en español, vayan al posr original, AQUI. Nos vemos más tarde con otra receta simple y riquísima!

See you later today with another easy, yummy recipe!
by Marcela M. | Nov 13, 2012 | Blog, Mousses and ice cream, Recipe Box, Recipes, Sweets, Uncategorized
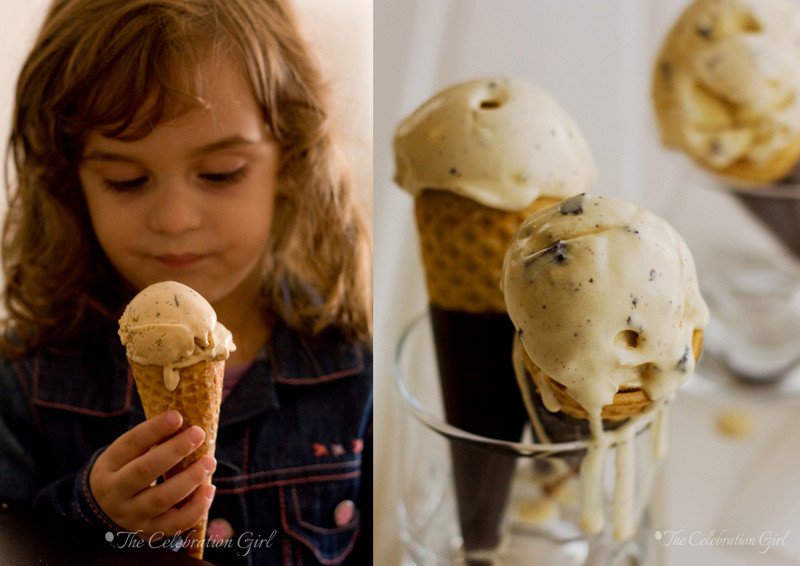
Ice cream has always been my favorite treat, regardless of the season. I have always craved it all year long, and Argentina’s abundance of truly great quality ice cream allowed me to indulge in it even in the middle of winter. When I was a little girl, an ice cream shop opened, for a couple of years, just around the corner from our home, and I remember going to it even in cold weather with my family, all of us covered in coats and scarves but still willing to enjoy a delicious scoop.
As I grew older, the all year craving didn’t stop but, for some strange reason I started associating ice cream with summer only. The end of summer was the end of ice cream for me and, as soon as the weather started to get cold, I switched to pies and cakes.
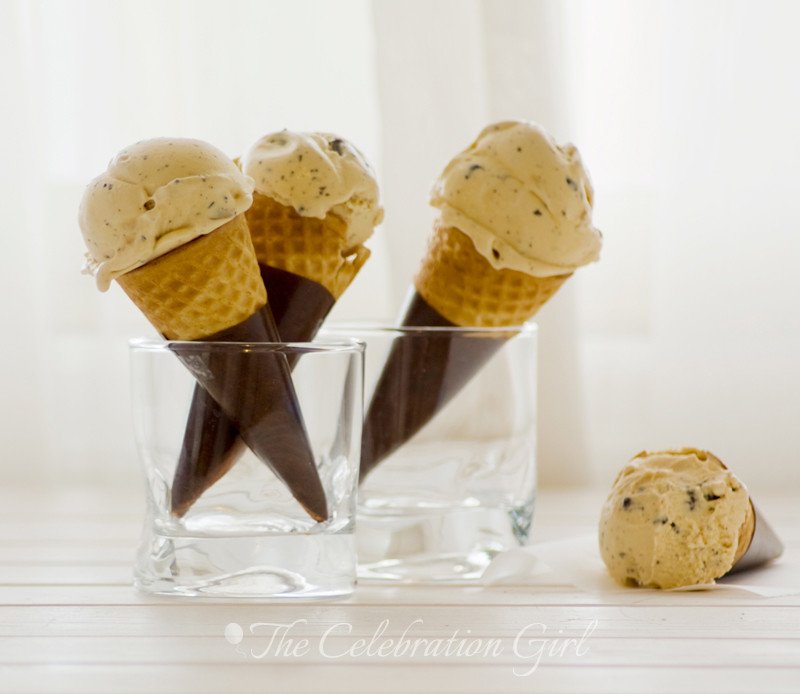
When we came to live in Cyprus, I learnt that summer did not end until October and that real autumn didn’t start until November, so I allowed myself a few more weeks of ice cream indulgence.Ice cream was the one thing I always loved about summer, even when, for most of my life, I was not really fond of summer itself. And even tough this year I embraced summer and enjoyed it to the core, I was so ready, so eager for Autumn to start that I stopped eating ice cream when the last bits disappeared from our freezer in late September.
But Autumn didn’t come in October. The month came and went and the weather was still in the thirty degrees Celsius range, we were still wearing short sleeved t-shirts and flip-flops at home and our sweaters remained stored in boxes in the upper part of our closets. I cursed global warming while longing for the chilly breeze that normally announces the start of the new season and then, when November arrived, I decided that I’d better accept and embrace the extended summer as well and I made ice cream again.
And, of course, the following day, Autumn arrived and I had this ice cream happily tucked in a blanket, watching the rain fall outside my window. Sometimes all it takes for things to change is to accept what we have and to let go of our resistance, don’t you think?
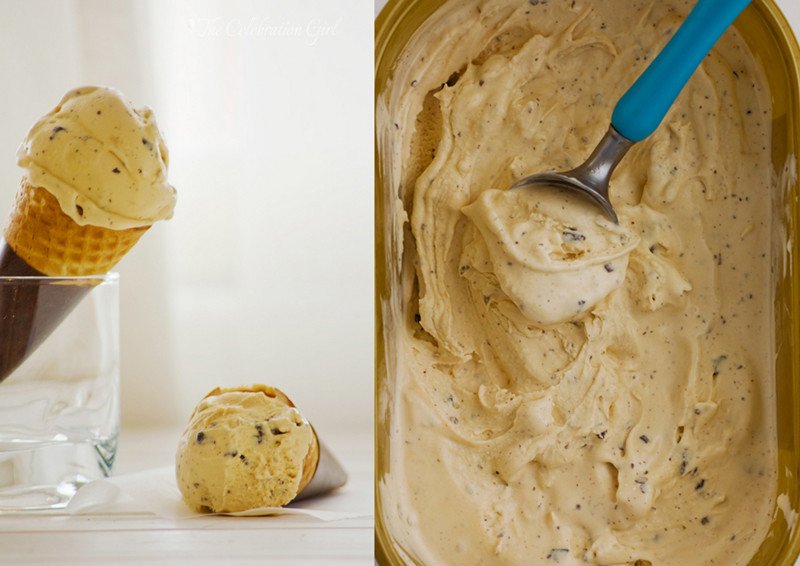
This recipe is a combination of two of my favourite ice creams: dulce de leche granizado and salted caramel. In fact, it looks like dulce de leche granizado (chocolate chunks dulce de leche ice cream) but it isn’t because it is not made with dulce de leche, but with salted caramel sauce instead.The result is less sweet, much quicker (if you,like me, cannot buy dulce de leche in the supermarket) and just as delicious.
Here’s the recipe
Salted caramel and chocolate chip ice cream
Ingredients:
For the salted caramel sauce: 200 grs white sugar, 90 grs unsalted butter, 120 ml heavy cream, 1 teaspoon fleur de sel (flower salt)
For the custard: 500 ml milk, 150 grs sugar, 6 egg yolks, 1 tablespoon vanilla essence, 300 ml cream,salted caramel, 100 grs dark chocolate
Preparation: 1)Make the caramel sauce: Put sugar in a sauce pan over the heat and let it burn until it liquifies and reaches amber color. Stir it from time to time with a heat proof spatula, from sides to center to make sure that it doesn’t burn , but don’t touch it too much or it may crumble. I highly recommend reading David Lebovitz’ tips on how to make caramel, which you can do HERE. Once it is liquid and dark brown, take the pan off the heat and add the butter, stirring with the spatula all the time. It will bubble and grow, so be careful! Once all butter has melted, add the cream and whisk until smooth. Add the salt and continue whisking. Let it rest and cool down at room temperature and make the custard.
2) Make the custard: 1) Put all the milk and 75 grs of sugar in a sauce pan and bring to the heat until you start seeing bubbles forming at the sides (do not let it boil) 2) Beat the egg yolks and the remaining 75 grs of sugar until foamy and, once this is done, pour the warm milk in slowly, whisking constantly. This will allow the eggs to temper, so that they don’t cook when we bring them back to the heat. 3) Pour the egg, sugar and milk mixture back in the saucepan, and bring it back to heat stirring with a wooden spoon as if you were drawing 8 in the pan until it the mixture thickens (it has to coat the spoon). 4) Once the custard thickens, prepare an inverted bath. Put ice and water in a big bowl and place a smaller bowl on top. Put a sifter/strainer over the smaller bowl and pour the custard over it. Passing the custard through the strainer will guarantee that the mixture we end up is smooth as we need it to be before churning the ice cream. 5) Add vanilla and the warm caramel and mix in thoroughly. Finally, add the cold cream, mix well, cover with foil wrap and put in the refrigerator for at least 8 hours to cool down completely.
3) Churn the ice cream in your ice cream machine according to the manufacturer’s instructions. Chop the dark chocolate with a knife and add it to the ice cream 5 minutes before the end of the churning process.
4) Pour the ice cream in an appropriate container and freeze it for at least 4 hours for it to reach scoop consistency.
If you don’t have an ice cream maker put the custard in the freezer as soon as it is ready instead of in the fridge. Remove it after 30 minutes and beat it vigorously with a whisk (if you have a hand held mixer, so much the better), to break the little pieces of ice that may have formed. Bring it back to the freezer and repeat this process 3/4 more times, every 30 minutes.
Con sabor latino…
El helado siempre fue mi “gustito” preferido, independientemente de la estación del año en que me encontrara. Siempre me encantó, siempre tengo ganas de comer helado, y la abundancia de helados riquísimos que hay en Argentina hacía que pudiera darme mi gusto preferido en cualquier época, incluso en medio del invierno. Recuerdo que, cuando era chiquita, una pequeña heladería abrió un local a la vuelta de nuestra casa, por un par de años, y recuerdo cuán maravilloso era ir allí en medio del frío helado del invierno, toda la familia cubierta con tapados y bufandas pero, aún así, deseosos todos de disfrutar una bocha de nuestro sabor favorito.
A medida que fui creciendo, sin embargo y por alguna extraña razón, comencé a asociar helado exclusivamente con verano. El fin del verano comenzó a ser tambien el fin de los helados y, tan pronto como el clima se tornaba fresco, yo re orientaba mis deseos golosos a pies y tortas.
Cuando vinimos a vivir a Chipre, aprendí que aquí el verano no se va hasta entrado octubre y que el verdadero otoño no llega hasta noviembre asi que comencé a permitirma unas semanas extra de indulgencia heladil. El helado era una de esas pocas cosas que me gustaban del verano, aunque el verano en sí no me gustara demasiado. Y a pesar que este año disfruté del verano como nunca antes, estaba tan lista para el otoño y tan deseosa de que éste llegara que dejé de comer helado cuando los ultimos restos de aquellos que habíamos preparado en agosto desaparecieron del freezer hacia fines de septiembre.
Pero el verano no se fue en octubre y el otoño no llegó cuando solía hacerlo. El mes llegó y pasó y el clima seguía rondando los 30 grados centígrados, aún usabamos remeras de mangas cortas y ojotas de entre casa, y nuestros sweaters permanecían guardados en cajas en la parte más alta de nuestros placards. Maldije el calentamiento global una y mil veces, buscando señales de brisa fresca en el aire de la tarde y luego, cuando llegó noviembre sin señales del otoño, me resigné , decidí aprovechar el veranito extendido, e hice helado nuevamente.
Y, como suele ocurrir, en otoño llegó al día siguiente. Y comí este helado sentada en el sillón, envuelta en una manta, viendo la lluvia caer tras la ventana. A veces todo lo que hace falta para que las cosas cambien es aceptar las cosas como son y dejarnos llevar, no?
Esta receta es una combinación de dos de mis sabores de helados preferidos: dulce de leche granizado y salsa de caramelo salada. Parece dulce de leche granizado pero no lo es porque no está hecho con dulce de leche, sino con salsa de caramelo. El resultado es menos empalagoso, mucho más rapido de hacer si, como yo, no pueden comprar dulce de leche en el supermercado, e igualmente exquisito. Espero que les guste!
Aquí está la receta:
Helado granizado de salsa de caramelo salada
Ingredientes:
Para la salsa de caramelo: 200 grs de azucar, 90 grs de manteca, 120 ml de crema de leche, 1 cucharadita de flor de sal
Para el helado: 500 ml de leche, 150 grs de azucar, 6 yemas, 300 ml de crema de leche, 1 cucharadita de esencia de vainilla, salsa de caramelo, 100 grs de chocolate amargo
Preparación: 1)Haga la salsa de caramelo: Coloque el azucar en un cazo/olla y llevelo a fuego hasta que se liquidifique y tome color ambar/marron oscuro. Remueva cada tanto con una espatula o cuchara de madera, desde afuera hacia el centro, pero no demasiado o el caramelo se volverá grumoso y no liquidificará. Les recomiendo que vean los tips de David Levobitz acerca de cómo hacer caramelo, que están llenos de fotos y consejos, AQUI. Una vez que la mezcla esté liquida y marrón oscura, retire la olla del fuego , agregue la manteca y revuelva fuertemente. Tengan cuidado, porque burbujeará y crecerá! Una vez que la manteca esté derretida, vierta la crema de leche, revolviendo con batidor de alambre para que quede lisa y uniforme, agregue la sal, y deje reposar y enfriarse a temperatura ambiente.
2) Prepare la crema inglesa: 1) Ponga en una olla la leche y 75 grs de azucar y lleve a fuego hasta que rompa el hervor. 2) Bata fuertemente las yemas con el resto del azucar hasta que estén espumosas. 3) Vierta la leche caliente sobre las yemas, batiendo constantemente. Esto ayudará a que las yemas tomen calor de a poco, y no se cocinen al llevarlas al fuego. 4) Vierta la preparación de yemas, azucar y leche en una olla y lleve a fuego nuevamente revolviendo con cuchara de madera en forma de ochos, hasta que la preparación espese y nape la cuchara. 5) Prepare un baño maría invertido. Coloque hielo y agua fria en un bowl grande, encima del cual deberá colocar otro bowl más pequeño. Coloque un colador/tamiz sobre el bowl mas pequeño y vierta la crema inglesa sobre el mismo. Esto ayudará a que si algun pedacito de huevo que se ha cocinado, éste no llegue a la crema del helado, y hará que nuestra crema sea bien lisita. 4) Agregue la vainilla y la salsa de caramelo tibia e incorpore. 5) Agregue la crema de leche fría e incorpore bien. Cubra con papel film y lleve a la heladera por 8 horas para enfriarla bien
3) Una vez que la crema esté bien fría, coloque en la máquina heladora siguiendo las instrucciones del fabricante. Yo uso el accesorio de la KitchenAid, con el cual lleva 20 minutos que la preparación esté lista. 5 minutos antes de terminar el proceso, corte a cuchillo el chocolate y agreguelo.
4) Coloque la preparación en un recipiente adecuado y lleve al freezer durante al menos 4 horas para que adquiera la consistencia adecuada.
Si no tiene máquina de hacer helados, coloque la crema en el freezer directamente. Retirela transcurridos 3o minutos y bata vigorosamente para quebrar los cristales de hielo (si tiene batidor de mano, mejor). Vuelva a colocarla en el freezer y repita este procedimiento 3 o 4 veces más, cada 30 minutos, hasta que el helado haya adquirido la consistencia deseada y se haya congelado.
What is your favorite ice cream flavor? Do you have ice cream all year long or only in Summer?
Cual es su sabor de helado favorito? Comen helado todo el año o sólo en verano?
by Marcela M. | Nov 1, 2012 | Blog, Parties, Uncategorized
Fall takes its time before arriving to Nicosia and, when it does, the ways in which it manifests are almost imperceptible to those who haven’t been here for a while. The trees remain unaware of the change of seasons, their leaves refusing to turn yellow, or even brown, until mid-October and the weather is still hot way past the end of Summer. Sweaters don’t take their place in our closets until November, and blankets, duvets, rugs and jackets remain stored until it’s time to assemble the Christmas tree.
Loving fall as much as I do, this has always been hard for me. As soon as September begins, I start scouting the streets in search for a yellow tree, or even a branch, for some fallen leaves. In my daily morning walks, I look for pine cones in the parks near my house and, in the evenings, I go to the balcony to see whether the air has started to cool down, even if only slightly so. Every year, I persist in my hope that fall will arrive sooner, even though I know that we will only need long sleeve t-shirts in November, and that the time for sweaters and duvets will come right before Christmas.
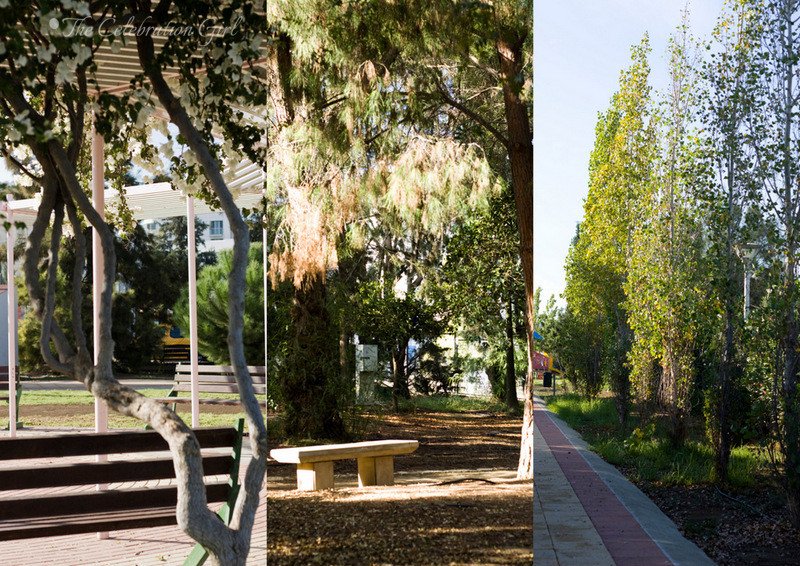
This year, I decided to celebrate fall even more, to cook with seasonal ingredients, and to incorporate nature into the house decoration. We have been looking for ways to mark the change of seasons with Luka and Zoe, and have undertaken nature exploration walks to hunt for weather clues, as way to increase their awareness of their surroundings, their understanding of nature and, hopefully, their environmental consciousness.
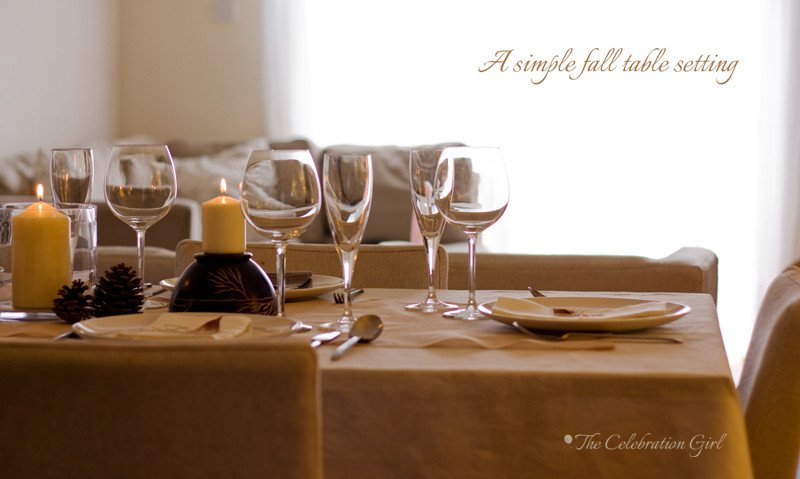
In this spirit, I came up with this very simple table setting for a casual dinner party. As I have said before, I believe in stress free entertainment and that, if we strive for magazine-style, photo shoot perfect parties we run the risk of never receiving friends at home, of not relaxing often enough, of not enjoying important connections with those we love and who love us. When I entertain, I have what I define as “a Taoist approach”: I strive to achieve a happy middle way between throwing a few pizzas on the table and a full blown 5 course dinner with silverware and my grandmother’s china (neither of which I own, by the way).
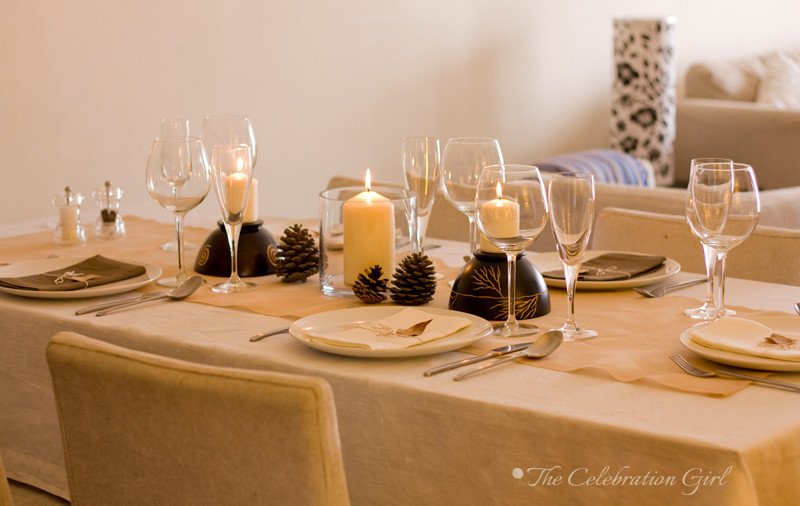
In this occasion, I used our white linen tablecloth, and I made a table runner using leftover fabric from another project.If you don’t have the time to sew a table runner, you can simply fold it and press it well. It will stay in place and you can finish it later. The plates and cutlery are the ones we use on daily basis, and the wine and champagne glasses are from Ikea.
I also prepared a simple centerpiece using candles and a few recycled pieces: a vase from an orchid that my husband gave me as an anniversary present the year we arrived to Nicosia, pine cones I had collected in my morning walks and two wooden bowls from my husband’s days in Rwanda, which I inverted to use as candle holders
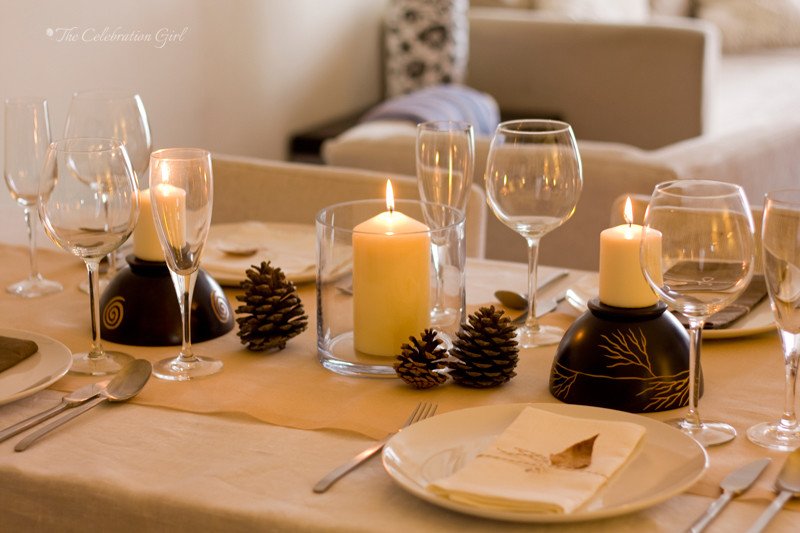
I used napkins in white and brown, to add a little more color to the table (I like to mismatch things), but you could use white only, or even make ones from the same fabric as the table runner.I wrapped the napkins in beige and white baker’s twine and attached a fallen leaf to them, for a little extra embellishment. I was not planning to assign seats, but if you are, you could simply write the name of your guests in the leaves using a black , copper, or brown marker.
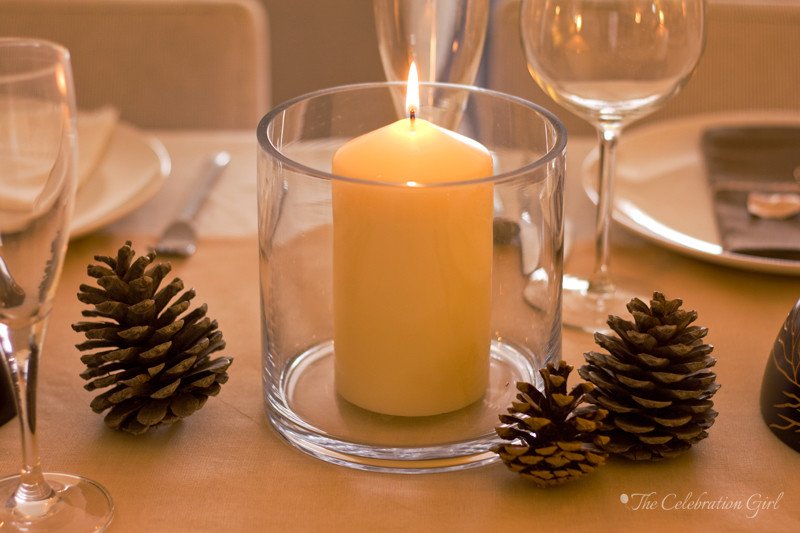
I love the warmth that candles bring to a very simple tablescape such as this one, how welcoming they make it feel, don’t you agree? Now all the table needs is good food and friends with whom to enjoy hours of great conversation- the main ingredients for a wonderful evening.
Do you like to entertain? What do you like to do when you receive friends at home?
Con sabor latino...
El otoño siempre se toma su tiempo antes de llegar a Nicosia y, cuando por fin llega, se manifiesta en formas prácticamente imperceptibles para aquellos que no son de aquí. Los árboles permanecen ajenos al cambio de estación, con sus hojas que se niegan a tornarse amarillas, o siquiera marrones, hasta bien entrado el mes de octubre, y el clima permanece cálido hasta bien pasado el fin del verano. Los sweaters no ocupan el lugar que les corresponde en los armarios hasta llegado noviembre, y las frazadas, duvets, alfombras y camperas, continuan guardados hasta casi el momento de armar el arbol de navidad.
Para alguien que ama el otoño como yo lo amo, ésto ha sido siempre dificil. Tan pronto como llega septiembre comienzo a buscar con ahínco algún indicio de la llegada del otoño en las calles de la ciudad: un árbol amarillo, una ramita siquiera, hojitas caidas, aunque sean pocas. Busco piñas en mis caminatas matutinas por los parques cercanos a mi casa y, por las noches, me asomo al balcón a ver si el aire comienza a refrescar, a ver si el otoño se asoma en la brisa. Cada año persisto en mi esperanza de que el otoño llegue más temprano, aún cuando sé que el tiempo de las mangas largas no llegará antes de noviembre, y que usaremos sweaters y duvets sólo cerca de la navidad.
Este año decidí que, despues de tanto esperarlo, el otoño debía ser celebrado tan pronto como llegara, quise y quiero disfrutar al máximo todo lo que dure, cocinar con productos de estación e incorporar elementos naturales a la decoración de la casa. Tambien hemos estado buscando elementos que nos ayuden a mostrarles a Luka y Zoe el cambio de estaciones, y hemos organizado caminatas de exploración de la naturaleza para buscar pistas acerca del cambio de tiempo, y que así ellos puedan tener un mayor contacto con la naturaleza, comprenderla, tomar conciencia de las modificaciones en el medio ambiente.
Con este espíritu, decidí organizar una cena tranquila, casual, sencilla, y poner la mesa con estas premisas. Como he comentado ya otras veces, creo que lo mejor son las celebraciones desestresadas, porque si aspiramos a organizar eventos dignos de tapa de revista corremos el riesgo de no recibir nunca a nadie en casa, o de no relajarnos cuando lo hacemos, y así nos perdemos de conectar con personas importantes, que nos quieren y a quienes queremos más allá de cómo luzca nuestra mesa. Cuando recibo amigos en casa, mi filosofía es “taoista”: busco el camino medio entre tirar un par de pizzas compradas en la mesa, y poner una mesa con cubiertos de plata y la vajilla de porcelana de la abuela (que no tengo, de todas maneras),
En esta ocasión usé como base nuestro mantel de lino blanco, sobre el que coloqué un camino de mesa en beige que hice yo misma con un retazo de tela que había quedado de otro proyecto. Si quieren hacer un camino de mesa, pero no tienen tiempo de coserlo, o no tienen máquina, no se hagan problema: doblenlo bien, corten, y planchen con cuidado. El camino quedará perfecto y no se moverá por lo que dure la celebración y, una vez que ésta termine, pueden terminarlo tranquilos. Los platos y los cubiertos son los que usamos a diario, y las copas de vino y de champagne son baratísimas y las compramos en Ikea.
El centro de mesa que ven lo preparaé usando velas, elementos naturales y objetos reciclados: piñas que había recolectado en mis caminatas matutinas, un macetero de vidrio en el que vino la primer orquídea que mi marido me regaló en nuestro aniversario, cuando acabábamos de llegar a Nicosia, y dos bowls de madera de la época en que mi marido vivía en Rwanda, los que invertí para hacer las veces de candelabros.
Utilicé servilletas blancas y color chocolate, para darle más color a la mesa, y porque me gusta mezclar cosas, pero pueden usarlas todas de un mismo color, ya sea blanco o bien pueden hacer unas iguales al camino de mesa. Luego agregué un pequeño detalle, para dar más interés al conjunto: envolví las servilletas en hilo beige y blanco, al cual adherí una hoja muerta. En esta ocasión no planifiqué sentar a la gente en un lugar determinado, pero si ustedes prefieren hacerlo, pueden simplemente escribir el nombre de la persona en la hojita misma, con un marcador marrón, cobre o negro.
Finalmente, encendí las velas, porque me encanta la calidez que brindan al ambiente, cómo invitan a sentarse y charlar tranquilos ¿no les parece? Una mesa sencilla, un par de elementos naturales, un par de velas, y todo lo que hace falta es buena comida y amigos queridos con quienes disfrutar horas de conversación agradable: no hace falta más nada para garantizar una noche hermosa.
Y a ustedes ¿les gusta recibir amigos en casa? ¿cómo preparan su hogar para hacerlo?
Have a wonderful weekend!
Que pasen un fin de semana maravilloso!
by Marcela M. | Oct 30, 2012 | Blog, cupcakes, Parties, Sweets, Uncategorized
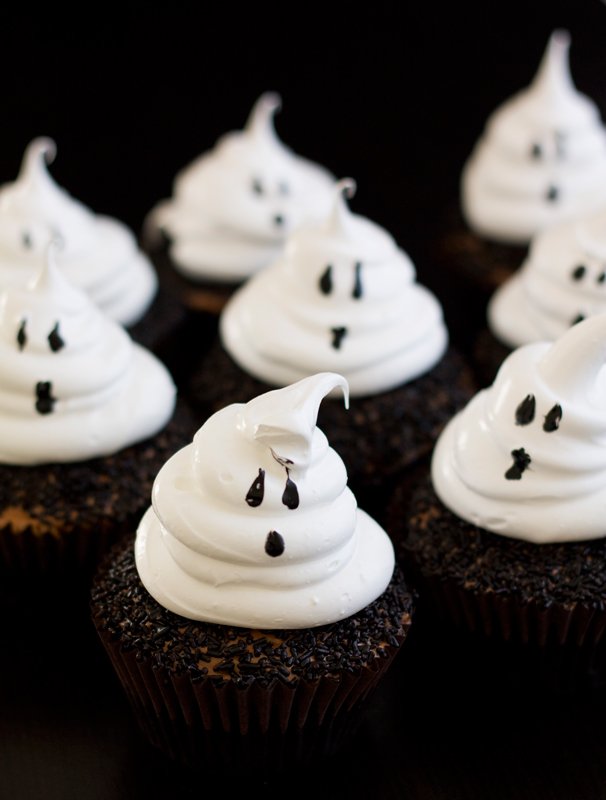
Halloween is almost here!
Today was a day full of holiday expectation: Luka and Zoe were playing with their costumes all afternoon (Zoe will be a witch – we almost named her Hermione, so what else could she be?, and Luka will be a vampire) and relinquished them reluctantly at bedtime, which made me very happy. They also brought back from school jack-o-lantern masks and bats they had made by stamping their hands on paper, and adding googly eyes, and wanted to read Room on the Broom by Julia Donaldson over and over again. This morning I had made the cupcakes above for them to bring to school tomorrow (inspired by these ones by Jenny Steffens) and, as you can imagine, it was a little difficult to keep them away from the refrigerator and to convince them to wait until tomorrow to have one at school! But that is what holidays are all about, don’t you think? Special days, with special traditions that we share with family and friends, and to which we look forward to year after year.
Last year, right before leaving for our family trip to Argentina, I wrote a post with a list of links to parties, food, ideas and free printables from around the web and, this October, that post was one of the ones that got more views. So I thought to do the same this year, in case you need some quick last minute inspiration. Here it goes (click to be redirected!) :
– I love these free printable Halloween candle wrappers and these printables lanterns too
– This post by none other than Amy Atlas has great dessert table ideas and free printables as well
– This witch crash cake has to be my all time favourite (and it looks super easy as well!)
– These Halloween ideas from The TomKat Studio for the DIY network are also great and easy to do
– An easy ghostly treat: mini marshmallows, clear bags, marker and black ribbon!
– No time for baking? Store bought cupcakes, cupcake liners and just a few extra supplies is all you need to make these witch hat cupcakes
–These extra cute owl mini cupcakes have been all around the web and only require oreos and m&ms to decorate them
This is a great video by Wilton on how to decorate easy halloween cupcakes
If you need more inspiration, don’t forget to check the rest of my Halloween pinterest board, and my post from last year!
Enjoy the holiday and, if you are in the USA NE region, stay safe!
* For the cupcakes above I used my favourite chocolate cupcake recipe, from Vegan cupcakes take over the world. I then frosted the cupcakes with milk chocolate swiss meringue buttercream (using a spatula, nothing fancy), covered them in chocolate vermicellis (store-bought), and finally piped a swiss meringue ghost. To make swiss meringue for 15 cupcakes I used 110 grs of egg whites and 220 grs of sugar (let me know if you need instructions on how to make it!). I drew the eyes and mouth with a toothpick dipped in black food coloring.
Con sabor latino…
Halloween ya casi está aquí!
Hoy fue un día lleno de esa hermosa anticipación que se siente con las fiestas: Luka y Zoe jugaron con sus disfraces toda la tarde (Zoe será una bruja (como que casi casi la llamamos Hermione!) y Luka un vampiro) y me los entregaron a regañadientes a la hora de ir a dormir, lo que me hizo muy feliz. Hoy tambien trajeron de la escuela manualidades alusivas: un antifaz de calabaza tallada, y un murcielago hecho con la impresion en papel de sus manitos y ojitos saltarines (de esos de plástico, que se mueven para todos lados), y quisieron leer una y otra vez el cuento Room on the Broom (lugar en la escoba) de Julia Donaldson. Esta mañana, mientras ellos estaban en la escuela, yo les había hecho las cupcakes fantasmagoricas que ilustran este post, para que las lleven mañana a la escuela (y que están inspiradas en estas de Jenny Steffens) y, como podrán imaginarse, con tanta expectativa, a duras penas pude mantenerlos alejados de las mismas, y convencerlos que esperaran a mañana para comerlas! Aunque de eso se trata, no? Las fiestas son justamente esa expectativa, esas tradiciones, ese momento especial compartido con seres queridos, que hacen que las esperemos año a año y que la sola idea de su llegada nos llene el corazón de recuerdos alegres y esperanzas.
El año pasado, como estábamos de viaje para esta época, publiqué un post con links a las mejores ideas halloweenescas que había encontrado en la web y, este año, desde octubre, ese post ha sido uno de los más buscados y leidos. Por eso este año, se me ocurrió hacer lo mismo, pero actualizado. Internet está llena de ideas fantásticas, asi que, si necesitan inspiración de último minuto, chequeen los links que dejé más arriba (en la versión en inglés). No se van a arrepentir!
Y si necesitan aún más ideas, pueden ver el resto de mi pinterest board de halloween, y el post del año pasado, del que les hablaba!
Espero que disfruten muchísimo de este Halloween y que el paso de Sandy los encuentre sanos y salvos!
* Para hacer las cupcakes de las fotos usé mi recete de cupcakes de chocolate favorita (de Vegan cupcakes take over the world) . Las cubrí con swiss meringue buttercream de chocolate y luego les espolvorée granas de chocolate arriba. Para terminar, usando la manga sin boquilla, puse un copón de merengue suizo (hecho con 110 grs de claras y 220 grs de azucar para 15 cupcakes), a los que les dibujé ojos y boca con un palillo escarbadiente mojado en colorante alimentario negro.
by Marcela M. | Oct 22, 2012 | Blog, cookies, Holidays, Recipe Box, Recipes, Sweets, Uncategorized
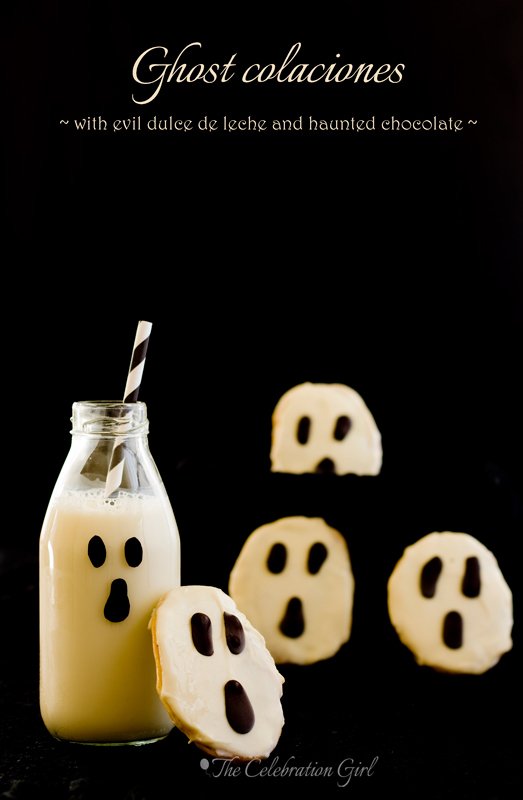
Good evening friends! Can you believe that it’s only 9 days until Halloween? I know I can’t, but I’m excited about it! This is going to be our children’s first full costume and trick or treat celebration, and I’m eager to see how they respond to all the activities at school.The holiday, I should note, is not celebrated in Cyprus (no trick or treating from door to door), but they will have a special party at their nursery and it promises to be fun. I bought their outfits earlier today…and I hope they will agree to wear them! 🙂
Halloween was not celebrated massively in Argentina either, when I was growing up, but my mother did organize a party every year at the institute for learning English as a second language, which she owned. So, every October 31st, her students and us (her children) dressed up in spooky costumes and celebrated it. It was all very funny because October is Springtime in Argentina and, of course, there were no pumpkins to carve at this time of the year, nor did any shops have any decorations that we could use, so we had to do as we could with a few sheets of black and orange cardboard paper. I still smile when I remember how crazy people thought we all we were, walking dressed as ghosts, witches, pirates and skeletons, on our way to the house where the party was held.
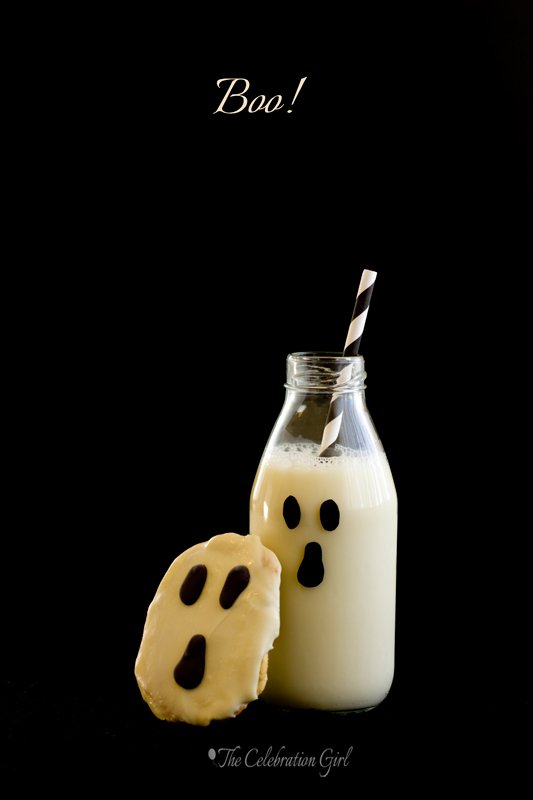
Things have changed in the last 20 years (20 YEARS!!), and Halloween parties are more popular, but, in the spirit of those first celebrations I attended, I thought it would be fun to use this opportunity to share with you the recipe for a delicious, classic cookie from Cordoba, Colaciones, and to “halloweenize” it ( I just invented that word :))
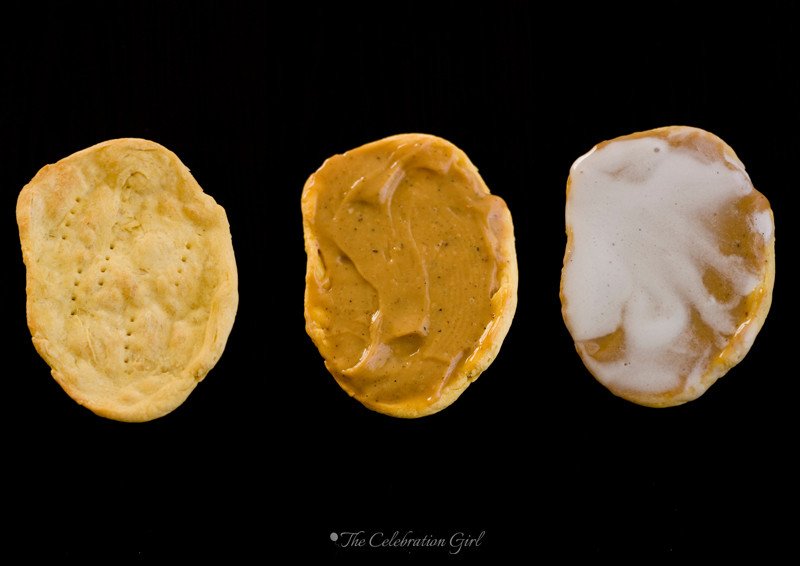
This recipe has been adapted from the one of a famous Argentinian pastry chef called Maru Botana (you can find the original one here), and it is the best one I ever tried. Colaciones’ dough is very peculiar: it doesn’t take any oil or butter, nor does it take any sugar or salt It is just a combination of eggs, egg yolks, flour and a white alcoholic beverage of your choice (the original recipe calls for cherry brandy, but you can also use another type of brandy or gin or vodka). Eggs are beaten, flour and brandy is added and then the dough is kneaded and shaped in the traditional way. One word of caution: do not put the dough in the freezer! I did it because I didn’t have time to finish making them in the same day, and when I thawed it, I had to start all over, because it had become too hard. If you need to make the colaciones in advance, it is better to prepare the dough and bake the cookies in one take. You can store the already baked shells in an airtight container (such as freezer bags), and then fill them with dulce de leche (as is traditional in Córdoba) or quince jam (as they do in some Northern cities of Argentina) and glaze them a few hours before it’s time to serve them.
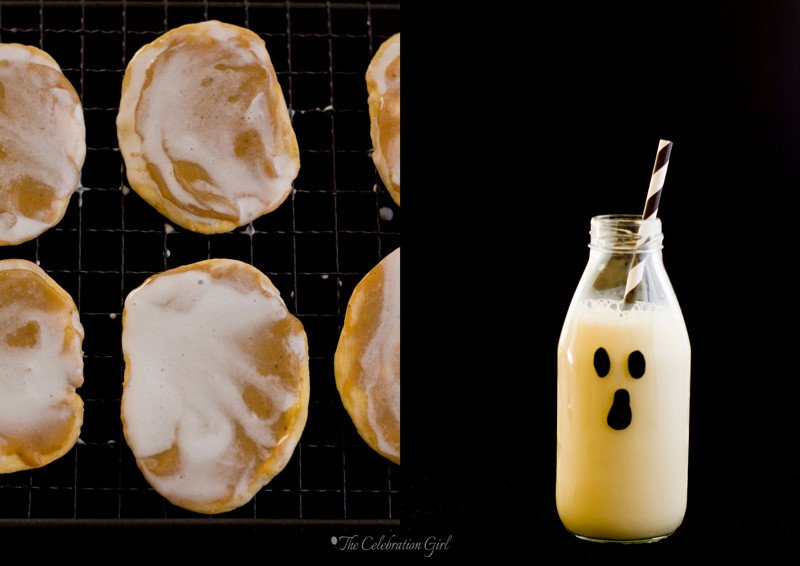
Colaciones’ traditional glaze is a simple combination of a beaten egg white, icing sugar and boiling water. In this occasion, however, I chose to cover them in white chocolate for a smoother, more even finish, because I didn’t want the dulce de leche to be visible. Then, I drew a ghostly face with dark chocolate, using just a regular teaspoon (no fancy decorating items required!). So, if you are looking for an easy, delicious, untraditional sweet for your Halloween celebrations, give colaciones a try! You will love them!
Here’s the recipe:
Colaciones cordobesas (makes 64 cookies of approximately 5 cms) Recipe adapted and translated from Maru Botana’s
Ingredients: 2 eggs, 4 egg yolks, 1 tablespoon of brandy/gin/vodka, 300 grs all purpose flour, 500 grs dulce de leche (if you can find dulce de leche repostero/baker’s dulce de leche, it is better, but any other will work as well), 1 beaten egg white, 2 cups of icing sugar, 2 tablespoons of boiling water (alternatively, if you want to glaze them with white chocolate, you will need approximately 600 grs and 200 grs dark chocolate to draw the spooky face in all 64 cookies).
Preparation: Beat eggs and egg yolks to the ribbon (it takes about 10 minutes). Add flour and brandy, mixing well, until you get a workable ball of dough. Knead the dough and extend it with a rolling pin. Cut the cookies using a round cookie cutter and then work each with your hands, to extend them and make them thinner (as thin as possible, or they will be too hard once baked). The dough is hard to work with, shaping the cookies takes some effort!. Once they are thin, place them on a baking tray covered with baking paper, and pinch them with a fork. Bake them at 175C for about 10 minutes. They will dry and curve in the oven and, once they do this, they are ready. Remove from the oven, let them cool well and fill with a teaspoon of dulce de leche. Next, prepare the glaze of your choice. For the traditional glaze, beat an egg white until firm, add two cups of sugar to “dry”the egg white and then, slowly, add the boiling water. I needed two tablespoons, but you may need more or less, so do it slowly. If you notice that the glaze is too thin and won’t cover the cookies properly, you may add more icing sugar. Note, however, the traditional glaze does not provide an all white, perfect coverage so, if that’s what you are aiming for, I suggest covering the cookies in white chocolate instead. Whichever glaze you chose, let it harden before drawing the spooky face on it.
Decoration: Melt dark chocolate and and let it cool down. Once it’s cool, draw a ghostly face on the cookies, by adding little bits of chocolate with a teaspoon.
Con sabor latino…
Buenas noches amigos! ¿Pueden creer que faltan apenas 9 días para Halloween? A mí me resulta increible, pero en casa estamos super excitados al respecto porque esta va a ser la primera vez que Luka y Zoe van a festejarlo con disfraces y golosinas, y tenemos muchas ganas de ver cómo reaccionan ante todo el despliegue de actividades que están organizando en su escuela. En Chipre no se festeja Halloween masivamente, como en otros países, así que no hay pedidos de golosinas a los vecinos ni nada de eso, pero sí van a tener su primera fiesta en la escuela, y promete estar divertida. Esta mañana, sin ir más lejos, les compré sus primeros disfraces- ahora sólo queda esperar que ;es gusten y se los pongan!
Halloween tampoco se celebraba mucho en Argentina, cuando yo era adolescente, pero mi mamá sí organizaba una fiesta todos los años, en su instituto de inglés. Así que, cada 31 de octubre , sus alumnos y nosotros (sus hijos), nos disfrazábamos y lo celebrábamos. Era todo muy gracioso porque, como octubre es primavera en Argentina, no había zapallos que decorar, y al no ser una fiesta tradicional nuestra, tampoco había en los negocios golosinas especiales, ni decoraciones alegóricas, así que nos arreglábamos simplemente con algunas cartulinas negras y naranjas, y el talento de mi madre para transformar el salón en dos segundos, con lápices y tijeras. Escribo estos recuerdos y sonrío pensando en cómo la gente nos miraba como si estuvieramos locos, al vernos caminar hacia el instituto de inglés vestidos como brujas, fantasmas, y esqueletos.
Todo esto ha cambiado en los últimos 20 años (20 AÑOS!) y ahora Halloween es mucho más común pero, en honor a esos primeros festejos de mi vida, se me ocurrió aprovechar esta ocasión para traerles una receta tradicional Argentina (Cordobesa!) y “halloweenizarla” (sí, inventé esa palabra :))
La receta de hoy ha sido adaptada de la de Maru Botana, una famosa chef pastelera Argentina, y es sin dudas la mejor que he probado. La masa de las colaciones es muy peculiar: no lleva aceite, ni manteca, ni azucar, ni sal. Es sólo un conjunto de huevos, yemas, harina y algún licor blanco de su elección. La receta original de Maru lleva aguardiente de cerezas, pero yo la he hecho también con brandy, gin o vodka. El procedimiento consiste en batir mucho huevos y yemas (aproximadamente 10 minutos con batidora), hasta lograr el punto “letra”, que es cuando al levantar el batidor se forma una cinta de liquido que no se corta, y con la cual puede dibujarse sobre el resto de la preparación (=formar letras). Luego, se agregan harina y aguardiente y se forma n bollo de masa, que se estira, se corta y se da forma con las manos antes de llevar al horno. Aprovecho para hacerles una advertencia: no coloquen la masa en el freezer. Si no tienen tiempo de hacer todas las colaciones en un mismo día, es preferible que hagan la masa, y cocinen las galletitas en el momento, y luego las guarden en el freezer, ya cocidas, en un recipiente hermético o en bolsas especiales. Luego, pueden descongelarlas dentro del recipiente, y retirarlas unas horas antes de servir, para rellenarlas con dulce de leche (como en Cordoba) o con dulce de membrillo (como en algunas provincias del norte de Argentina) y cubrirlas con glaseado.
El glaseado tradicional de las colaciones es uno muy simple a base de clara batida a punto nieve, azucar impalpable y agua hirviendo. En esta ocasión, sin embargo, yo elegí cubrirlas con chocolate blanco para darles un finalizado más parejo y uniforme, ya que no quería que se transparentara el dulce de leche del relleno. Luego, derretí chocolate negro y dibujé la carita del fantasma con el mismo, usando una cuchara de café (no hace falta manga ni nada especial!). Si estan buscando una receta diferente para sus celebraciones, prueben estas colaciones que seguro les encantan!
Para ver la receta original, hagan click en ESTE LINK. Normalmente no suelo publicar recetas de otros autores y el unico motivo por el que lo hago en esta ocasión es porque he agregado notas a la forma de preparala y precisado cantidades de glaseado, que quiero compartir con ustedes, y creo que sería muy confuso tener que ver dos páginas al mismo tiempo para entender una receta. Sin embargo, no dejen de ver la pagina de Maru, porque tiene unas recetas fantasticas y precisas, que vale la pena intentar!
Colaciones cordobesas (para 64 galletitas, aproximadamente), adaptada de una receta original de Maru Botana
Ingredientes: 2 huevos, 4 yemas, 1 cucharada sopera de brandy/aguardiente/gin/vodka, 300 grs de harina común (todo uso), 500 grs de dulce de leche (si consiguen dulce de leche repostero, mejor, pero si no el otro sirve igual), 1 clara batida a nieve, 2 tazas de azucar impalpable, 2 cucharadas soperas de agua hirviendo. Si quieren cubrirlas con chocolate blanco, como hice yo, necesitaran 600 grs del mismo para todas las galletitas, y 200 grs de chocolate negro para dibujar la carita fantasmagórica.
Preparación: Batan los huevos y las yemas a punto letra, aproximadamente 10 minutos con batidora. Agregue el brandy y el harina, de a poco, integrando bien, hasta que pueda formar un bollo de masa con las manos. Estiren con palote de amasar y corten circulos con un cortante redondo (yo use uno de 4 cms). Luego, trabajen la masa con los dedos (vean la foto de más arriba), estirandola para que quede bien finita. Cuiden que la masa quede bien fina, porque si está demasiado gruesa, las colaciones quedarán duras unas vez cocidas. Les advierto que la masa es dura y darles forma requiere esfuerzo! Una vez que esten bien finitas, coloquenlas en una placa para horno cubierta con papel de hornear, y pinchenlas con el tenedor. Cocinenlas a 175C durante aproximadamente 10 minutos. En el horno las galletitas van a secarse y arquearse y, una vez que lo hagan, estarán listas. Retirenlas, dejenlas enfriar, y luego rellenenlas con una cucharada de dulce de leche cada una. Preparen el glaseado batiendo una clara a punto nieve. Agreguen 2 tazas de azucar impalpable, para “secar” la clara, y luego, muy poquito a poco, agreguen el agua hirviendo. Tengan cuidado aquí de que el glaseado no les quede muy “chirle” o “fino”, porque se ser asi no cubrirá bien las colaciones. Si se pasan con el agua, no se hagan problemas, agreguen un poco mas de azucar. Tengan en cuenta que el glaseado tradicional no provee una cobertura perfecta, el dulce de leche suele transparentarse un poco. Si las quieren bien blancas, opten mejor por bañarlas en chocolate blanco, como hice yo.Sea cual sea el glaseado que elijan, recuerden dejarlo secar bien, para que endurezca, antes de decorar con la carita de chocolate.
Decoración: Derritan el chocolate amargo/ semi amargo a baño maría, y dejenlo enfriar. Una vez frío, coloquen un poco de chocolate en una cuchara de té y dibujen, despacito, una carita fantasma sobre las colaciones (es muy facil, es solo cuestion de hechar pequeñas cantidades de chocolate muy de a poco, moviendo la cuchara a lo largo, para “estirar” ojitos y boca)
Do you celebrate Halloween? What do you normally bake for the occasion?
Celebran Halloween? Qué dulces suelen preparar para esta ocasión?


