by Marcela M. | Jul 11, 2013 | Blog, Cooking basics and tutorials, Gluten Free, Recipe Box, Recipes, Uncategorized, Vegan & Raw
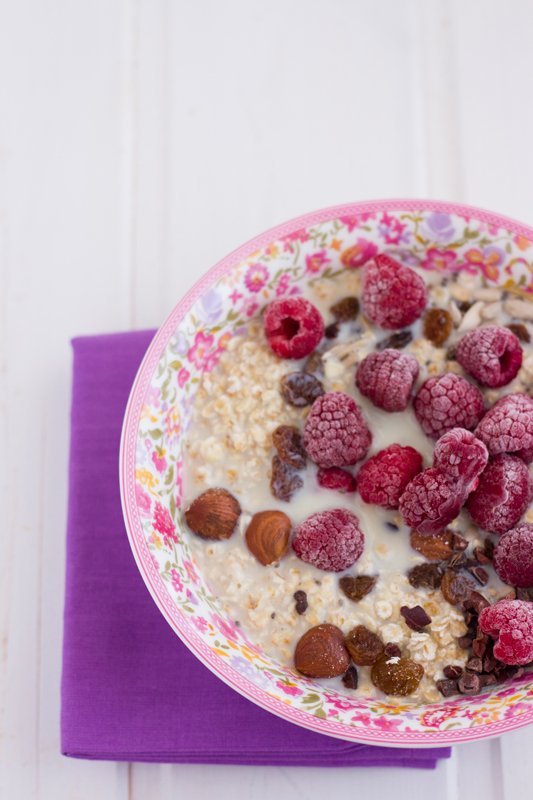
Last Monday, after I finished writing the last post and started taking notes on the one I had planned for today, I realized that it had been over a month since the last time I had posted a recipe! A month?! How could this be?!
It’s true that the ebook of vegetarian, detox friendly, gluten free, sugar free, dairy free and egg free summer recipes had been released in the meantime, but still…unacceptable! 😉
So I decided to remedy this and, for this reason, I am bringing you today my favorite homemade muesli recipe, and adding possible variations to suit you in case you have any food allergies or intolerances- on in case you just don’t like some of the ingredients.
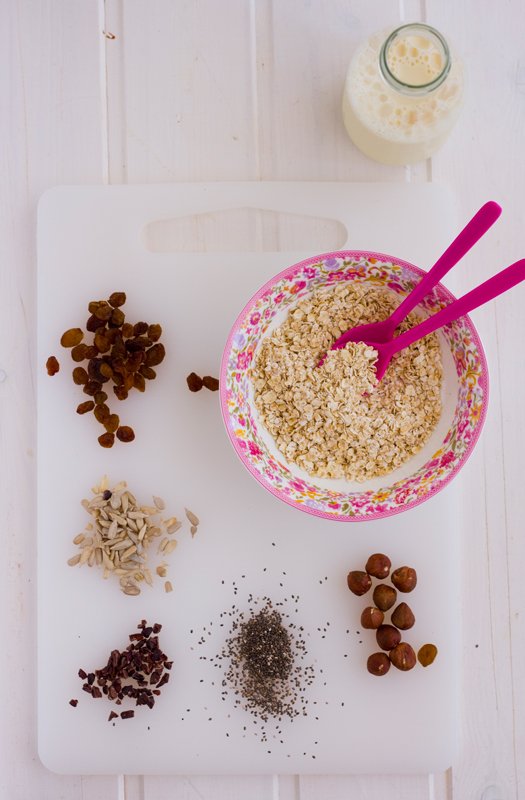
This muesli, together with granola, is one of my favorite breakfast options. It is, not only lush, but also really healthy and it gives me long lasting energy. During school times, when I know I will be in a rush, I make big batches of it and store them in glass jars, so that i just need to put a few spoons in a bowl, pour some vegetable milk over it, let it sit for a few minutes while I prepare my children’s breakfast or boil the water for chamomille tea, and it’s ready!
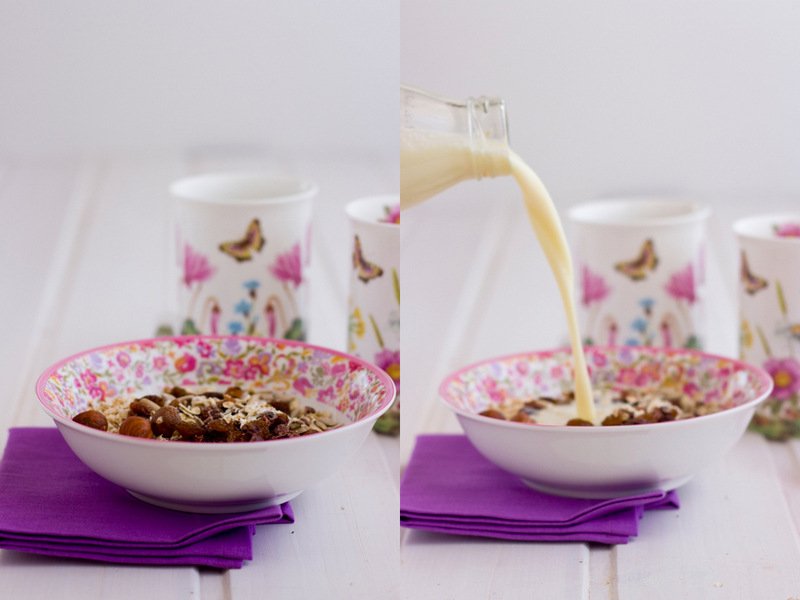
Ready to try it? Here it goes
HOMEMADE MUESLI RECIPE
Ingredients: 3 tablespoons oats, 1 teaspoon chia seeds, 1 teaspoon raw cocoa nibs, 1 tablespoon hazelnuts, 1 teaspoon sunflower seeds, 1 cup vegetable milk, 1 tablespoon raisins, 1/2 cup fresh fruits to top it all.
Preparation: Put the oats in a bowl, add the seeds and nuts and pour the milk over them. Let it sit for a few minutes (or overnight, covered, in the refrigerator if you like the oats to be really soft), add the raisins and fresh fruits and enjoy!
Variations:
1) You may replace hazelnuts for any other nut (almonds, walnuts, pecans, brazil, whichever you prefer)
2) If you can’t eat nuts, add another seed (such as pumpkin seeds, for example)
3) If you can’t eat oats, you may replace them by millet, rice or quinoa flakes.
4) If you have a gluten allergy or intolerance, use gluten free oats or make the replacements above
5) You can replace raisins by any dried fruits, such as dried cranberries, goji berries, or dried apricots, for example.
6) You may omit the raw cocoa nibs- I love their crunchy bitterness but this is a matter of taste, of course.
7) In Summer I like to use frozen fruits to top the muesli, because it adds freshness to it-hence the frost present in the picture’s raspberries. This is a matter of choice. Chose whatever you prefer, or have on hand!
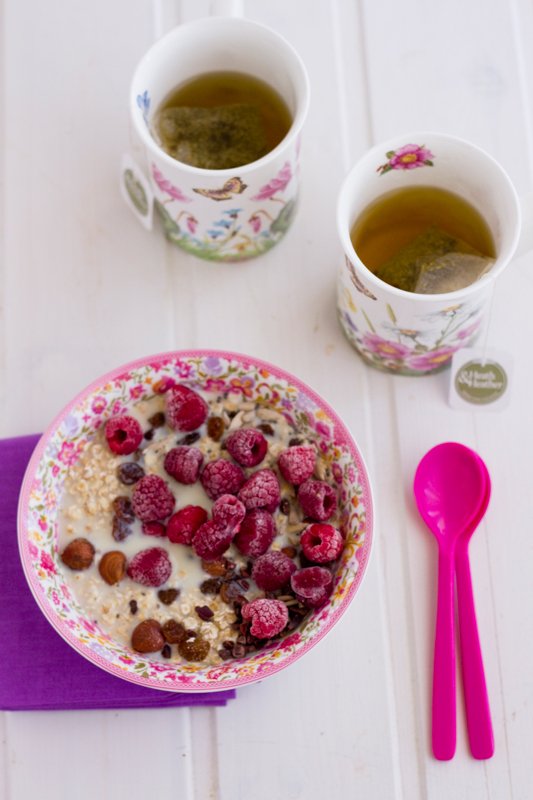
Now it’s your turn: what do you generally have for breakfast? have you ever made muesli before? Please share in the comments below!
by Marcela M. | Apr 11, 2013 | Blog, Cooking basics and tutorials, Drinks, Gluten Free, Recipe Box, Recipes, Vegan & Raw
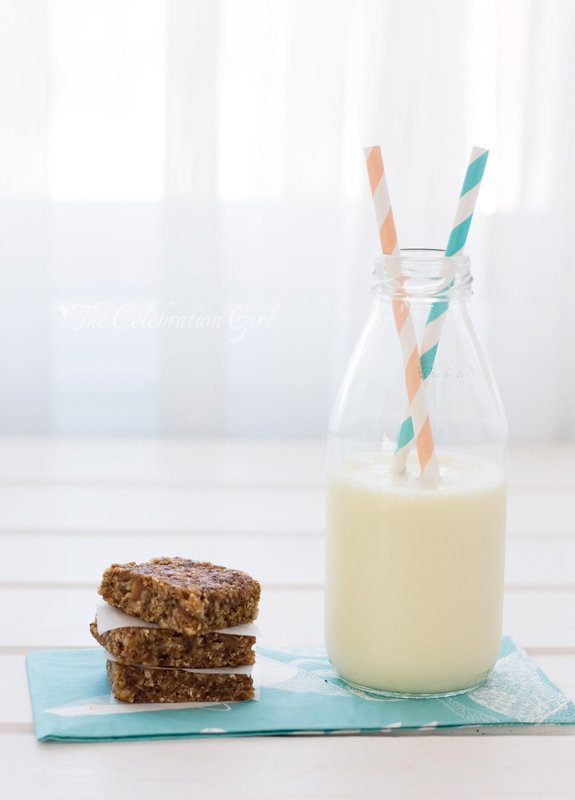
One of the questions that I get asked the most whenever someone finds out that I don’t eat dairy is: “what do you drink with your coffee?”. When I reply saying that I can chose between soy, nut, oats or even date milk, people normally mention how expensive these are.
And it is true, store-bought vegetable milks are expensive. But the good news is that they are also very easy to make at home!
I made this batch of almond milk a week ago, when I was preparing for my detox and it took me no longer than 15 minutes. When I was making it, I thought that some of you may like to learn how I do it, so I decided to write this DIY. In this occasion I made 100% almond milk, but you can replace almonds with hazelnuts, cashews, pistachios, walnuts…any nut! And the beauty of it is that the proportions remain the same. You can even mix different nuts (almond and hazelnut milk is delicious) to experiment and add variety. Oh! And there’s an added bonus: nut flour! The traces of nut that remain after straining the milk can be dried in the oven and used as nut flour in baking! Isn’t that great?
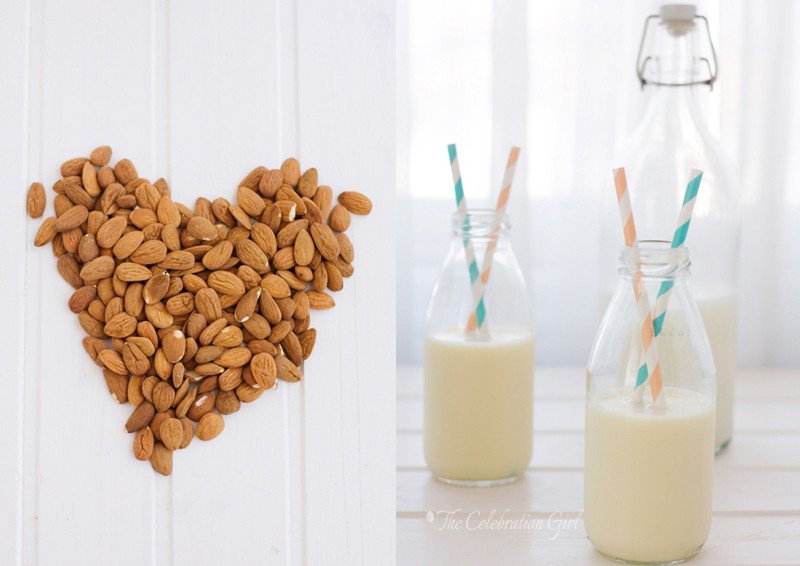
So, what do you need to make nut milk? well, nuts of course, water, a blender and a cheesecloth. If you have a mesh strainer, so much the better but if you don’t, that’s ok too.
Ready to get started? Here’s the recipe:
Almond Milk (makes 1 litre)
Ingredients: 1 cup almonds, 4 cups water.Optional: 1 tablespoon of honey/agave or other sweetener.
Preparation:
1) Soak the almonds in water for at least 4 hours (I leave them overnight)
2) Drain the almonds and put them in a small bowl. Pour boiling water over them and let them rest for 5 minutes. This will allow the peel to come off easily, just by rubbing it off the almonds.
3) Put the blanched almonds in a blender and add 4 cups of water. Blend until the almonds are not visible anymore.
4) Put a cheesecloth over a bowl and pour the milk on it. The cheesecloth will capture the pieces of nut that are too big.
5) Pour the milk in a bottle and store in the refrigerator for up to a week.
6) Put the nut pieces on a baking tray and place it in the oven at 115C until they are dry (it can take a while, just be careful not to let them brown). Store in an airtight container and use in baking!
Did you like this recipe? Had you even make nut milk at home before? Please, share in the comments below!
Con sabor latino…
Una de las preguntas que más recibo, cada vez que menciono que no consumo lacteos, es “¿con qué tomas el café?”. Y cuando respondo que hay muchas leches vegetales diferentes, como la de soja, avena, nueces y hasta dátiles, la gente suele comentar cuan caras son las mismas.
Y es cierto, las leches vegetables que venden en el supermercado son caras. Pero la buena noticia es que también son facilísimas de hacer en casa! Esta tanda de leche de almendras, por ejemplo, la hice cuando estaba preparandome para el detox de comienzos de mes y me llevó no más de 15 minutos. Mientras la hacía, se me ocurrió que a algunos de ustedes podría resultarle util esta receta, y por eso decidí escribir este post.
En esta ocasión, hice leche 100% de almendras, pero con la misma receta pueden hacer leche de avellanas, de pistachios, de nueces pacanas, de nueces comunes (walnuts), de castañas de cajú (anacardos)…cualquier nuez, la que tengan en casa y les resulte más barata! Tambien pueden incluso mezclarlas (la leche de almendras y avellanas es deliciosa) para experimentar y agregar variedad. Y ¿saben qué es lo mejor? Cuando terminen, tambien habrán hecho harina de nuez, porque los restos que quedan en en liencillo pueden secarse en el horno a temperatura baja y utilizarse luego como harina, al hornear. ¿ No es maravilloso?
Qué necesitamos para hacer leche de nuez? Nueces, claro, agua, una licuadora, un bowl y liencillo (la tela finita que se usa para hacer queso). Si tienen un colador grande, de esos que se usan para cernir, suele venir bien para sostener el lienzo, pero si no tienen no se hagan problemas!
Listos para comenzar? Aquí está la receta
Leche de almendras (rinde 1 litro)
Ingredientes: 1 taza de leche de almendras, 4 tazas de agua. Opcional: 1 cucharada de miel/agave u otro endulzante.
Preparación:
1) Coloque las almendras en un bowl, cubra con agua y deje reposar por al menos 4 horas (yo las dejo toda la noche, pero es más por costumbre que otra cosa)
2) Seque las almendras, coloquelas en un bowl seco y vierta encima de las mismas agua caliente (hirviendo). Deje reposar 5 minutos. Esto hará que sea facil pelar las almendras, verán como la piel sale entera con solo frotarlas con las manos.
3) Coloque las almendras peladas en la licuadora. Agregue 4 tazas de agua y licue todo hasta que las almendras se pulvericen.
4) Coloque liencillo sobre un bowl, dejando que sobre a los costados. Vierta la leche de almendras sobre el mismo. El liencillo atrapará los pedacitos de almendra que sean demasiado grandes.
5) Retire el liencillo y vierta la leche de almendras en una botella (yo prefiero de vidrio). Guarde en la heladera (refrigerador) hasta una semana.
6) Coloque los restos de almendras en una placa para horno(los que quedaron atrapados en el liencillo), y lleve a horno suave (115C) hasta que se sequen, teniendo cuidado que no se tornen marrones. Una vez seca la harina de almendras, guardela en un recipiente hermético y utilicela al hornear!
Les gustó esta receta? Alguna vez hicieron leche de nuez? Cuentenme en los comentarios!
by Marcela M. | Jan 31, 2013 | Blog, Cooking basics and tutorials, Recipe Box, Recipes

Good morning dear friends! How are you? Can you believe that the first month of the year is already gone? Am I the only one that feels that Christmas was, like, yesterday?
This past week I was hit by a cold, again. It seems that every virus that is going around finds a place in my throat because I have been coughing and coughing and coughing for a week now. It is getting better, fortunately, but a little bit of it still remains, which is why I haven’t posted here as planned- I was barely cooking. I have a pile of recipes I want to tweak and photograph for you, and I am hoping to be able to do it in the upcoming weeks.
The recipe I am bringing you today is the one I contributed to Petit-On in January. The monthly challenge involved recipes containing oats, an ingredient I love. In fact, my most iconic desert, nugatón , has oats as its main ingredient and I considered sharing that recipe instead for quite a while. I finally decided against it because it also takes great quantities of chocolate and butter and most of us are still detoxing from the holidays, am I right?
I started making my own granola and muesli 5 years ago, when I was living in Ivory Coast. They are both so easy to make, and making them at home allows me to become creative and vary nuts, seeds and spices to suit the season (and my own cravings!). This combination that I bring you today is ideal for winter, because it uses honey, ginger, cinnamon and cardamom, spices that pair very well with seasonal fruits like apples and pears. If you live in the Southern hemisphere, I recommend eating it with apricots or peaches, which also pair well with this spice blend.
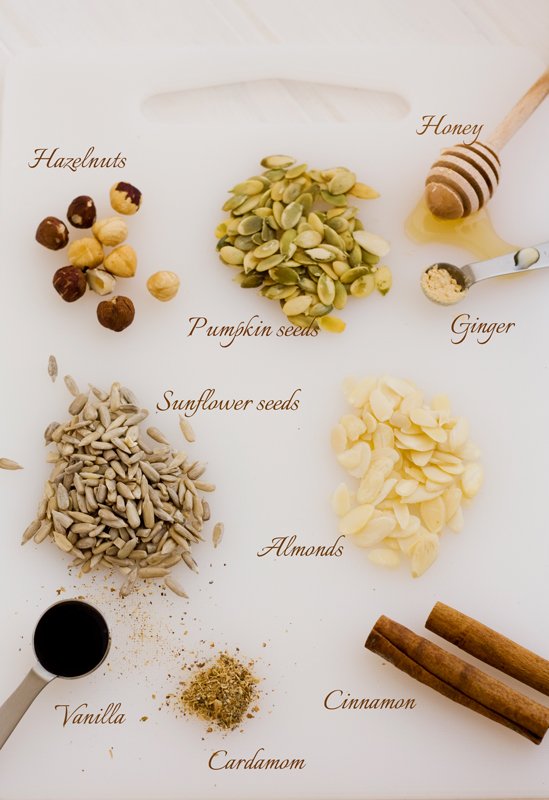
As you will see from the instructions, this recipe is very easy to make and all you need are a couple of bowls and an oven tray in order to do so. All you need to do is mix the dry and wet ingredients separately, then mix them and pour them in a lined (or non-stick) oven tray, then place it in the oven for about half an hour, turning the granola from time to time to make sure it browns evenly, without burning.
The recipe uses very little honey as a sweetener, so as to let the spices shines. I find that, when food is too sweet, the general sweetness tends to overpower the other flavors, so I like to opt for a milder sweet taste. Furthermore, there is also the sweetness of the dates and raisins so, fear not, it is delicious. If you like extra sweet food, you may add a few more spoons of honey, but I encourage you to try it this way first- you may be hooked! Also, if you are vegan, feel free to replace the honey by agave nectar, it works fine as well.
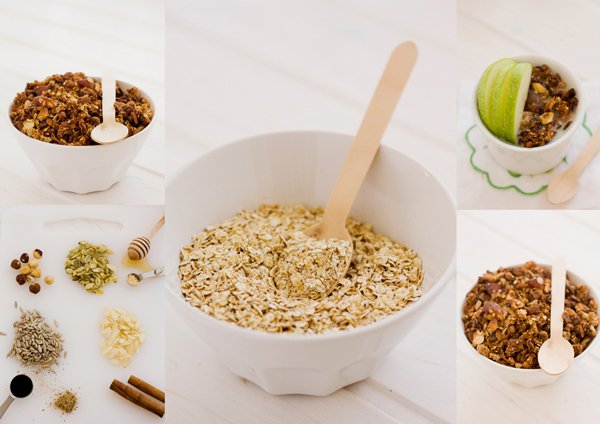
Here’s the recipe:
Spiced Granola
Ingredients: 2 cups rolled oats, 1/2 cup sliced almonds, 1/2 cup crushed hazelnuts, 1/4 cup pumpkin seeds, 1/4 cup sunflower seeds, 2 tablespoons oil, 2 tablespoons honey, 6 tablespoons water, 1 tablespoon vanilla extract, 1 teaspoon cinnamon, 1/2 teaspoon ground ginger, 1/4 teaspoon cardamom, 1/3 cup raisins, 1/3 cup medjool dates.
Preparation:
1- Pre-heat the oven to 200C. Line a baking tray with baking paper and set aside.
2- Put oats, almonds, hazelnuts, pumpkin and sunflower seeds in a bowl and mix.
3- In another bowl, place oil, honey, water, vanilla and spices. Mix well.
4- Add the wet ingredients to the dry ingredients and mix very well, until they are evenly soaked.
5- Pour the mixture on the lined oven tray and extend it evenly. Place the tray in the oven and bake for 20/30 minutes, or until evenly browned. It is very important to remove the tray after the first 10 minutes, and every 5 minutes after that, in order to turn the granola so that it browns evenly. If you just let it sit in the oven for the whole duration, the upper parts will burn! Hazelnuts are particularly sensitive to heat, so keep a close eye on them.
6- Once all granola is golden brown (but not burnt!), remove it from the oven and let it cool down on the counter.
7- Remove the date pits and cut the dates in fours.
8- Add raisins and dates to the granola and store in an airtight container.
9- Serve with milk or yogurt (I like almond milk) and fruit, if so desired.
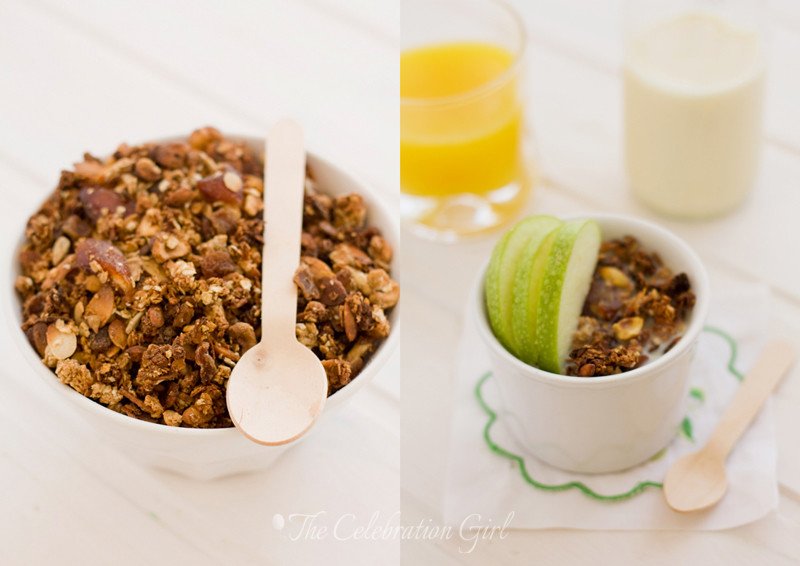
I hope you like this recipe. Have a wonderful weekend!
Amigos hispanoparlantes: Esta receta es la traducción de la que publiqué, en español, para Petit-On, y que pueden ver haciendo click AQUI.
by Marcela M. | Dec 13, 2012 | Blog, Christmas and NYE, cookies, Cooking basics and tutorials, Holidays, Recipe Box, Recipes, Sweets
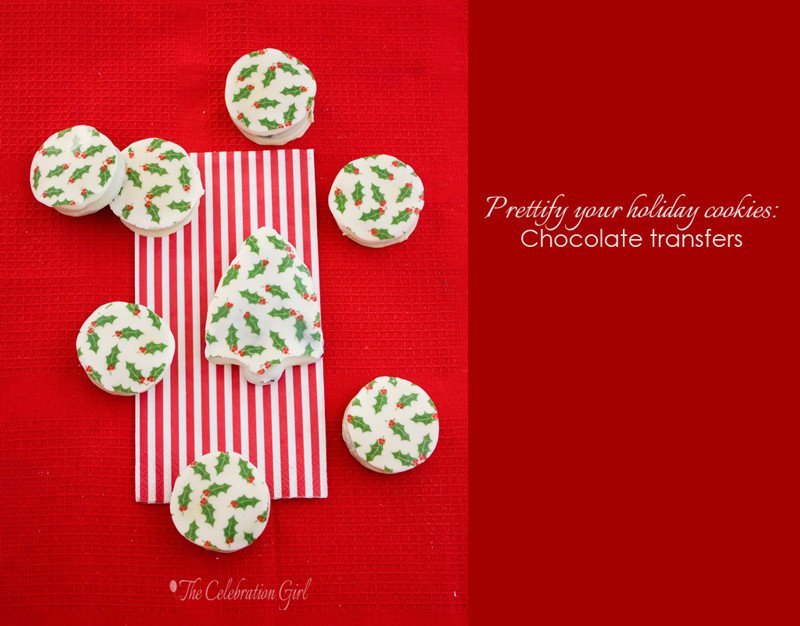
Good morning friends! Day 13 of the advent and the last of this year’s post about cookie decorating! I know some of you were expecting tutorials on royal icing, but I decided to leave those for next year, when we can dedicate several posts to different techniques. For those of you who would like to decorate cookies with royal icing and would like to know where to start, you may check THIS and THIS post, where I list links and resources as well.
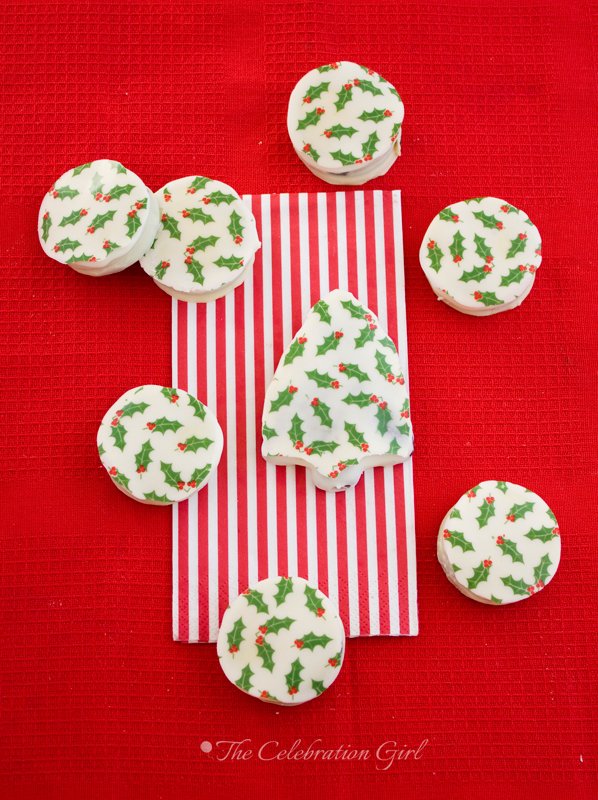
Today’s technique is one that I had been curious about for quite a while, but had never tried before. When browsing party websites, I used to see those beautiful designer oreo cookies, and wondered how they made them, until I discovered that chocolate transfer sheets existed, and that I could buy them in Cyprus (tip for Cyprus residents: I got these at Sprinkles and Sparkles*). This is the first time I used one, so there’s definitely a lot of room for improvement, but they are really easy to use! I love how fast it is to decorate cookies with them, how pretty they look once finished, and also the fact that they represent and alternative to royal icing (which not everyone likes).
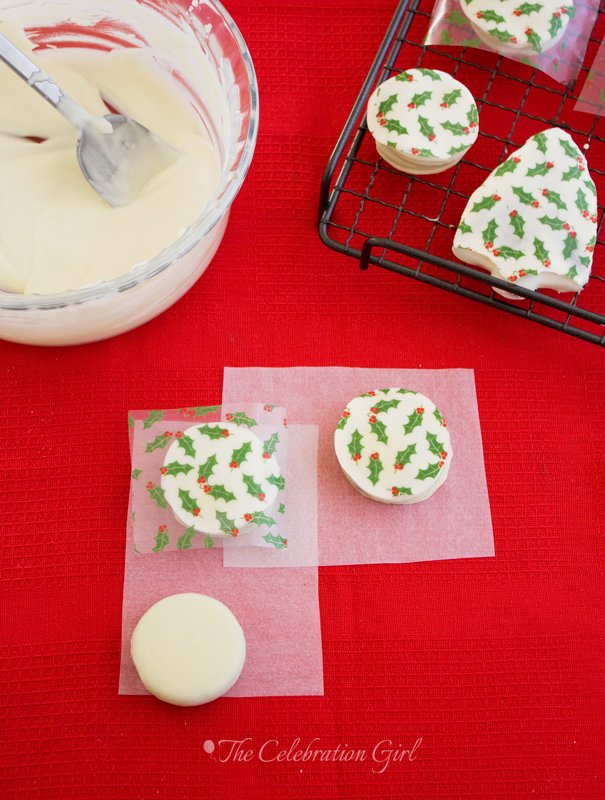
I dipped two types of cookies, for experimentation purposes: chocolate covered oreos and a pine tree chocolate cookie. Bird, from Bird’s party, made a tutorial showing how to create a really perfect finish for oreos that are not already covered in chocolate and which you can check HERE. The method I use is more appropriate for cookies that have a shape other than circular.
Here it is:
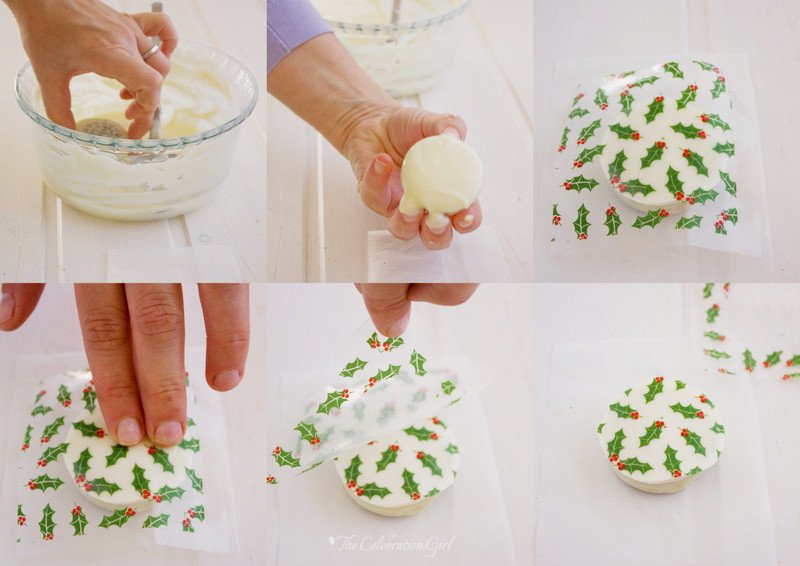
1) Melt the chocolate and cut the transfer sheet (which comes in A4 size) to match the size of the cookies. I cut stripes and the cut those stripes into small squares.
2) Holding the cookie in your hand, invert it and dip it in the chocolate, front-side down. Dip it well.
3) Lift the cookie, invert it so that the excess chocolate drips, and tap your hand against the counter a couple of times, so that the surface becomes smooth and even.
4) Put the cookie on a wire rack or parchment paper and place the transfer sheet on top of it.
5) Using your fingers, smooth the sheet, especially the sides, so as to make sure that it adheres properly to the chocolate, and to get rid of any air bubbles.Let the chocolate set and harden (about an hour. You can also accelerate the process by putting then in the refrigerator)
6) Carefully, lift the transfer sheet to reveal the design. Smooth the sides, if necessary.
That is all it takes! Isn’t it wonderful? Beautifully decorated cookies in virtually no time!
Have you used this method before? Would you like to try it?
Con sabor latino…
Buenos días queridos amigos! Día 13 del adviento, y hoy nos toca el último tutorial sobre cómo decorar galletitas para las fiestas. Sé que varios de ustedes estaban esperando tutoriales acerca de cómo decorar galletitas con glacé real, pero decidí dejar los mismos para el año que viene, cuando pueda dedicar varios posts a mostrarles diferentes técnicas. Para aquellos que quieran decorar galletitas de esa forma en estos días, pueden ver ESTE y ESTE post, donde además de enseñar técnicas básicas, adjunto links y recursos que pueden encontrar online.
La tecnica de hoy es una que tenía ganas de probar desde hacía tiempo. Cuando miraba páginas dedicadas a fiestas siempre veía esas oreos preciosas, con diseños complicados y me preguntaba cómo los lograban. Luego, un día, aprendí que existían las llamadas láminas de transferencia de chocolate y que hasta podía conseguirlas en Chipre! Esta es la primera vez que uso una, así que se imaginarán que hay mucho que mejorar, pero me han resultado super faciles y me encanta el resultado tan bonito y tan rápido que dan, así como que sean una alternativa al glacé que, convengamos, no le gusta a todo el mundo.
Yo hice la impresión en dos tipos de galletitas; oreos ya bañadas en chocolate blanco (compradas), y unas cookies de chocolate con forma de pino de navidad. Bird, de Bird’s party, hizo un tutorial muy bueno hace unos días acerca de cómo bañar oreos comunes y hacer la impresión al mismo tiempo, para que queden perfectas. Pueden ver ese tutorial AQUI. La tecnica que yo usé es más apropiada cuando queremos hacer la transferencia en una galletita de forma diferente o tamaño más grande.
Para hacerlas, sigan estos pasos:
1) Derritan el chocolate. Corten la hoja de transferencia (que viene en tamaño A4) del tamaño de las galletitas. Yo la corté en tiras horizontales, que luego dividí en pequeños cuadrados.
2) Tomen la galletita con la mano, inviertanla y sumerjanla cara abajo en el chocolate. Asegurense que quede bien impregnada.
3) Con la galletita aun en su mano, inviertanla para que el exceso de chocolate comience a deslizarse por el borde y golpeteen el canto de la mano contra la mesa, para que se empareje y alise.
4) Coloquen la galletita sobre una rejilla o papel manteca y pongan la hoja de transferencia sobre la misma.
5) Usando la yema de los dedos, alisen la hoja de transferencia, especialmente en los bordes, para asegurarse que ésta se adhiera correctamente al chocolate, y que no queden burbujas de aire. Dejen que el chocolate se enfríe y endurezca (aproximadamente una hora, o pueden acelerar el proceso colocando las galletitas en la heladera)
6) Una vez que el chocolate haya endurecido y con mucho cuidado, despeguen la hoja de transferencia, levantandola por un costado. Emparejen los costados, de ser necesario.
Y listo, nada más, eso es todo lo que lleva hacerlas! No es maravilloso? Galletitas decoradas de manera bonita y en nada de tiempo!
Han usado este método antes? Les gustaría probarlo?
*I have no affiliation whatsoever to Sprinkles and Sparkles. The reason I mentioned where I got the transfer sheets is as a service to my readers, and only because people have asked me before where to buy them. You may also get them online from HERE
by Marcela M. | Dec 11, 2012 | Blog, Christmas and NYE, cookies, Cooking basics and tutorials, Holidays, Recipe Box, Recipes, Sweets

Good evening dear friends! Today, on day 11 of the advent, we continue decorating cookies, this time with a star ingredient: chocolate!
I love, love, loooove chocolate and I almost everyone I know also does, so I thought that it would be a good idea to include a mini section on super easy chocolate decorations. These are all very simple ways to spice up your cookies, that do not require anything more than a heat proof bowl for melting the chocolate, and a spoon. If you have a cooling rack to let the chocolate drip, so much the better, but if you don’t, you will still be able to make these cookies.
Working with chocolate can be tricky and the key is to melt it properly so as to achieve the right texture, and so as to make it last. It is important not to overheat it, or you will end up with something more similar to cookie dough than fluid, beautiful chocolate, and you should be particularly careful about this when working with white chocolate which, in my experience, can be quite moody.
Start by chopping the chocolate into small chunks and putting them in a heat proof bowl. Place the bowl over a saucepan containing a small amount of water, and bring it to low heat. The bowl should not touch the water, we just want the steam to melt the chocolate. Let the first pieces start to melt, shake the bowl a little bit and, when about 50% of it has melted, remove the bowl from the heat and mix with a wooden spoon. The remaining chocolate will melt when mixing. The reason I don’t let all chocolate melt over the heat is that it runs the risk of overheating (it has happened to me before). Once all chocolate is melted, continue mixing vigorously until it’s fluid and easy to work with.
Now that your chocolate is melted, let’s begin playing with those cookies!
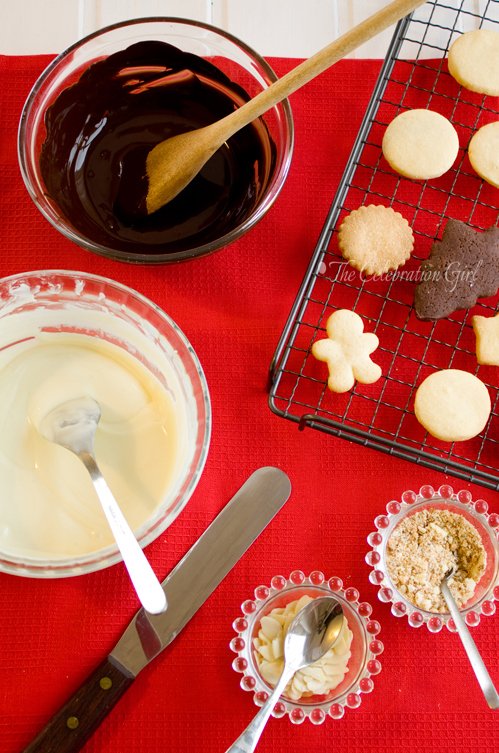
You will need: dark chocolate, white chocolate and for some variations, ground nuts (I used almonds). You could also use chocolate/candy food coloring in case you want to add some more variety to the mix. Note that candy/chocolate coloring is different from general gel food coloring:it contains even less water, so as not to spoil the chocolate’s texture.Make sure that you are using the right kind!
Here are the versions I did:
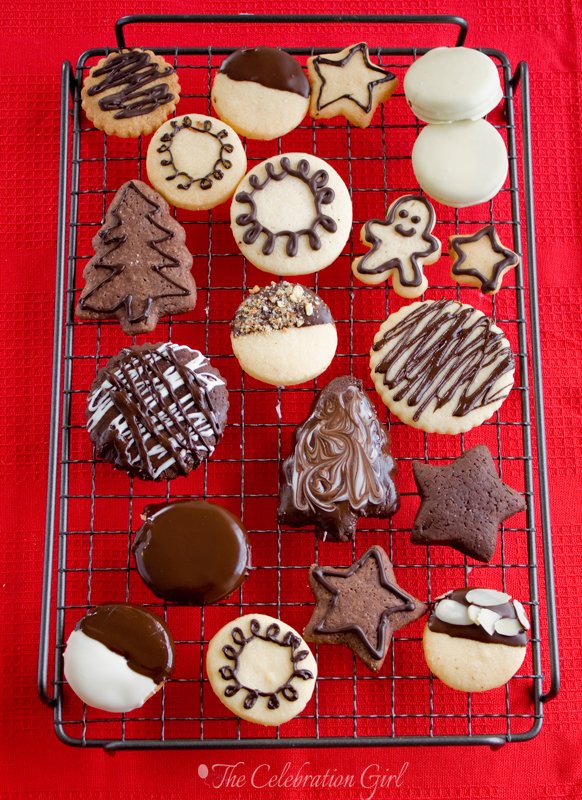
1) Full coverage: The first, most obvious option, is to fully cover the cookies in chocolate, either black or white. You can cover single or sandwich cookies, they both taste delicious. When you are covering your cookies fully, it is better to use a wire rack, because it allows the excess chocolate to drip, without creating a mess at the bottom. Simply pour a spoon or two of chocolate over the cookie, tap the rack against the counter a couple of times (so that the chocolate distributes evenly and there are no air bubbles) and let it drip and dry.

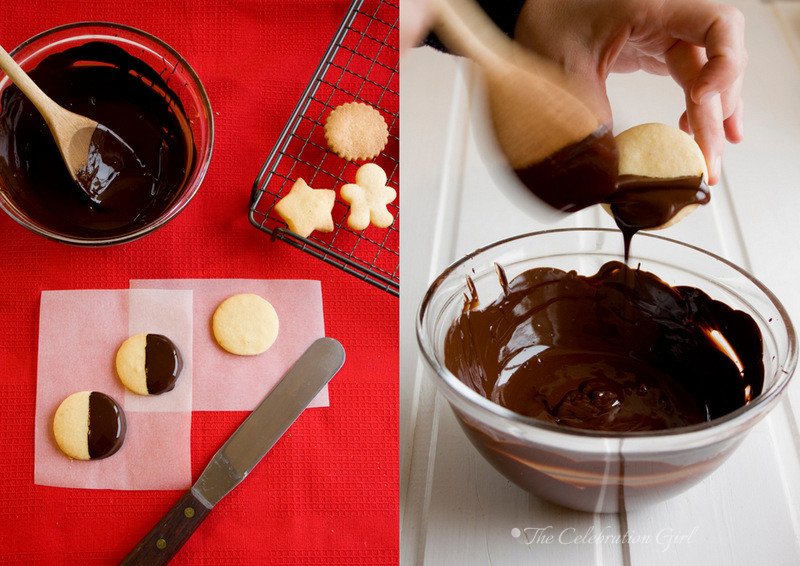
2) Half covered: This is an option that I like, not only because of how it looks, but also because the chocolate does not hide the cookie’s other flavors. It is very easy to do, as you can see from the pictures above: hold the cookie vertically, above the bowl of melted chocolate and, with a spoon or spatula, drop chocolate over the lower part of the cookie. Shake it slightly, so that the excess chocolate drips and then place it on a wire rack to finish drying.
3) Half covered, with nuts: Pour crushed nuts of your choice, or slivered almonds over the chocolate, right after placing the cookies on the wire rack. Let it dry. This is a delicious option for shortbread cookies!
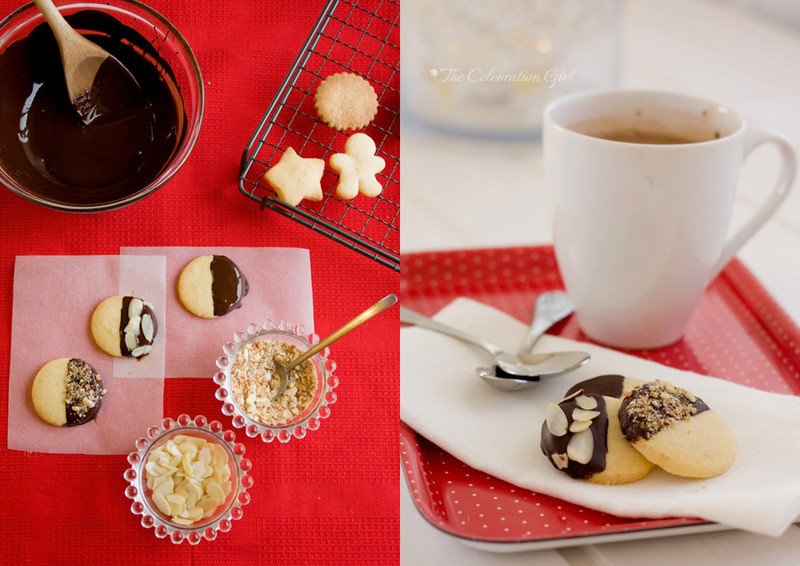
4) White and dark chocolate covered cookies: Another easy variation of the above, this time using both types of chocolate. Proceed to cover one side of the cookie, as shown in point 2 above, and let it dry. Once dry, cover the other half with the other chocolate. Let dry.
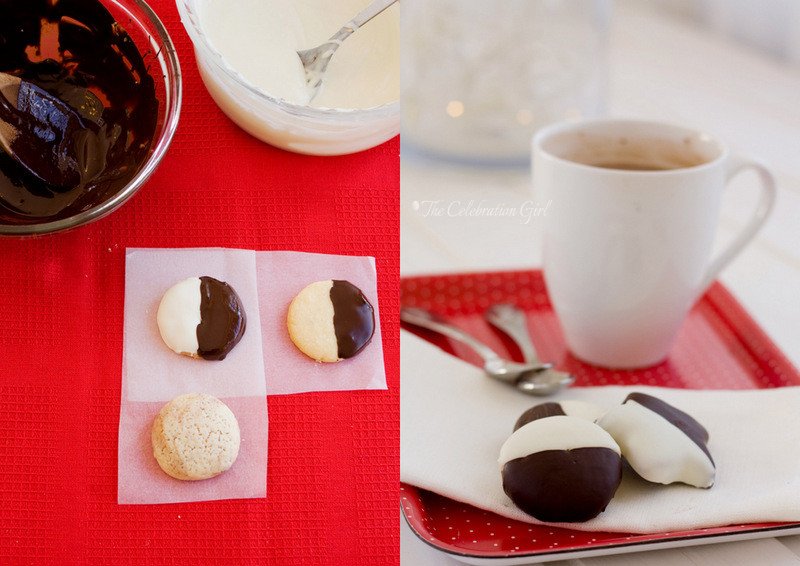
5) Marbled chocolate cookies: Cover the cookie completely with one color of chocolate and then, before it sets, add drops of the other chocolate here and there and immediately draw over them with a toothpick, moving your hand back and forth between the two chocolates.
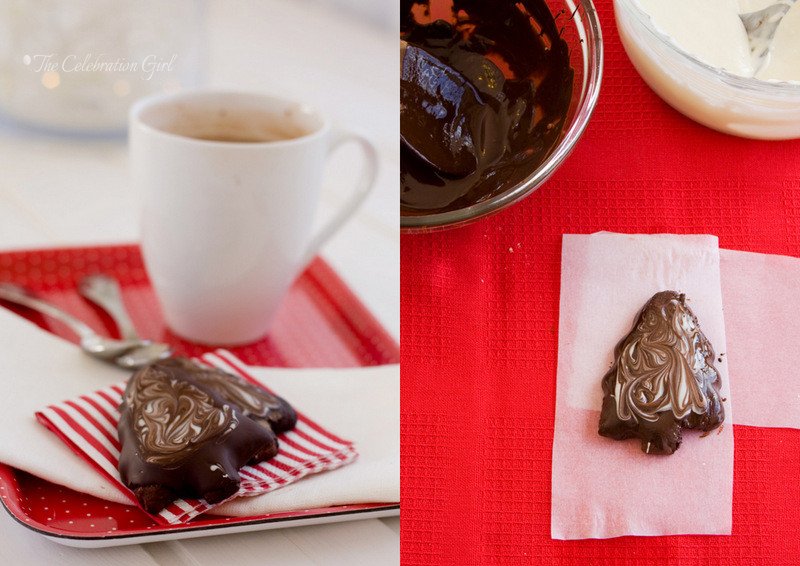
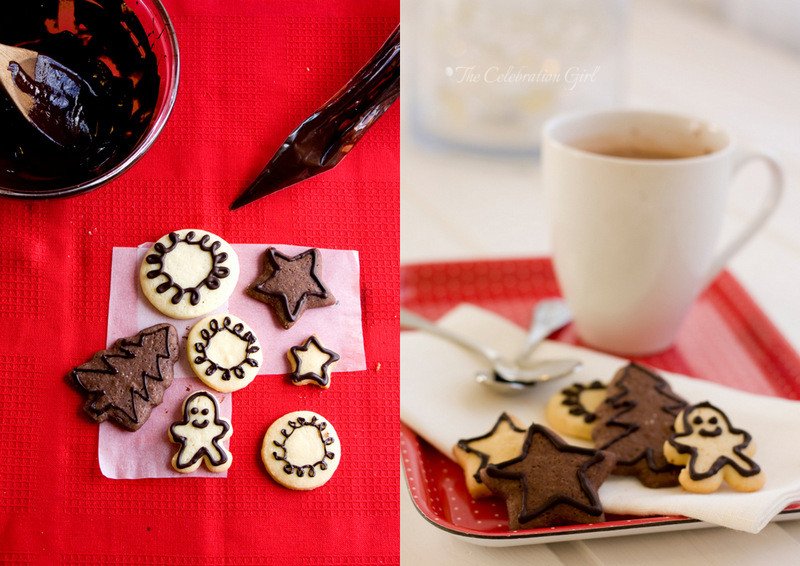
6) Piped chocolate cookies: In order to make this design, you will need a disposable piping bag or a paper cornet. If you want to know how to make a paper cornet to pipe chocolate, you can check THIS video from Dyane Bakes, which is great.
Melt the chocolate and, once it reaches the appropriate texture, introduce a few spoons inside a cornet or piping bag. Cut a small aperture at the bottom of it and draw as with a pencil brush. You will need to work fast because the chocolate may harden inside the piping bag quite fast. If this happens, put the piping bag under running warm water until it melts again.
7) Chocolate stripes: Easy breezy. Hold the cookie over the bowl of melted chocolate, dip a spoon in it, let it drip until the stream of chocolate becomes thin and drizzle the cookie, moving your hand fast back and forth. Repeat with another color if you so desire.
Do you like these ideas? Which type of chocolate is your favorite?

Con sabor latino…
Buenas noches queridos amigos! Hoy, en el 11avo día del adviento vamos a seguir decorando galletitas, esta vez con un ingrediente estrella: el chocolate!
Amo, amo aaaaaaaaamo el chocolate, especialmente el bien amargo, y la mayoría de la gente que conozco tambien es fanática del mismo, así que pensé que podría ser una buena idea incluir una mini sección con decoraciones chocolatosas. Todas estas son formas muy sencillas de cambiar un poco sus galletitas, que requieren como todo instrumental un bowl resistente al calor para derretir el chocolate, y una cuchara. Si tienen una rejilla sobre la cual bañar las galletitas, es mejor porque ésta permita que el chocolate corra sin apelotonarse debajo, pero si no tienen una, tranquilos que tambien puede hacerse sólo quedará un poco menos prolijo).
Trabajar con chocolate tiene sus bemoles, pero la clave está en derretirlo correctamente y asegurarnos de templarlo bien antes de comenzar, para que tenga la textura adecuada y para que se deslice correctamente. Es muy importante no sobrecalentarlo, porque de hacerlo así terminaremos con un masacote más parecido a masa de galletas que a chocolate derretido! Tengan cuidado especialmente al trabajar con chocolate blanco, ya que en mi experiencia, es bastante temperamental.
Comiencen por cortar en trozos pequeños el chocolate y coloquenlos en un bowl resistente al calor. Luego, coloquen agua en una olla pequeña, y luego pongan el bowl sobre la misma, asegurándose que éste no toque el agua (sólo queremos que el vapor derrita el chocolate). Lleven la olla a fuego mínimo y,cuando el chocolate comience a derretirse,agitenla un poco para que el calor se distribuya. Cuando se haya derretido un 50% aproximadamente, retiren la olla del fuego y comiencen a mezclar vigorosamente. El chocolate restante se derretirá al entrar en contacto con el que ya está derretido, a medida que mezclamos. La razon por la que yo no dejo que todo el chocolate se derrita con la olla al fuego es que así se corre el riesgo de sobrecalentarlo, y arruinarlo (me ha pasado!). Una vez que todo el chocolate se ha derretido, continuen mezclando hasta que adquiera una textura fluida, con la cual sea facil trabajar.
Ahora que ya tienen listo su chocolate, empecemos a jugar con las galletitas!
Para hacer las galletitas que les mostraré a continuación necesitarán chocolate amargo o semi amargo y chocolate blanco y, para algunas, tambien nueces picadas a elección (yo usé almendras). Tambien pueden teñir el chocolate blanco con colorante, para añadir variedad, pero tengan en cuenta que los colorantes de chocolate no son los mismos que los de otras preparaciones, porque tienen que tener menor contenido de agua para no estropearlo. Asegurense de usar el colorante correcto si quieren teñir su chocolate!
He aquí las galletitas que hice en esta ocasión:
1) Galletitas totalmente bañadas en chocolate: Esta es la opción más obvia y sencilla.Pueden bañarse así galletas individuales o alfajorcitos, con cualquier chocolate. Ambas opciones son deliciosas. Cuando cubran sus galletitas completamente,tengan en cuenta que es mejor usar una rejilla para que el chocolate extra pueda gotear sin crear un pegotero en la base de la galletita. Para hacerlas, coloquen las galletitas sobre una rejilla, viertan una cucharada o dos de chocolate, golpeteen un par de veces la rejilla contra la mesada para que el chocolate se distribuya bien y no haya burbujas de aire, y dejen secar un par de horas.
2) Galletitas bañadas por la mitad: Esta opcion me encanta, no sólo por cómo luce sino tambien porque evitamos que el chocolate tape los aromas de las galletitas (sobre todo el negro, que puede ser invasivo). Hacerlas es muy sencillo: tomen la galletita y coloquenla de manera vertical sobre el bowl de chocolate. Con una cuchara o espatula, viertan chocolate sobre la mitad de la galletita, sacudanla un poco para que caiga el exceso y coloquenla sobre una rejilla para dejarla secar.
3) Galletitas bañadas por la mitad, con nueces: Espolvoreen nueces molidas a elección sobre la mitad cubierta de chocolate antes que se seque.Tambien pueden usar almendras fileteadas. Esta opcion es deliciosa con las galletitas de manteca.
4) Galletitas bicolor: Otra variante sencilla de la número 2. La clave está en hacer un lado primero, dejar que se seque, y luego bañar la otra mitad con el otro color.
5) Galletitas marmoladas: Bañen completamente la galletita con un chocolate y, una vez totalmente cubierta, agreguen gotas del otro chocolate en diversos lugares. Finalmente, dibujen diseños con un palillo escarbadiente, mezclando los chocolates, moviendo la mano en forma de 8.
6) Galletitas con contorno de chocolate: Para hacer este diseño necesitarán una manga descartable o hacer un cono de papel como el que indican en este video. Derritan el chocolate y, una vez que haya alcanzado el temple, coloquen un par de cucharadas dentro del cono o manga y dibujen como lo harian con un pincel. Tengan en cuenta que deberán trabajar rápidamente porque de lo contrario el chocolate se endurecerá dentro de la manga. Si les ocurre esto último, coloquen la manga bajo un chorro de agua caliente. Si usan un cono de papel deberan sacar los restos de chocolate seco del mismo y derretirlo nuevamente.
7) Galletitas con rayas de chocolate: Facilísimas. Tomen la galletita y sostenganla con una mano sobre el bowl con chocolate. Sumerjan una cuchara en el mismo, elevenla, dejando que el chocolate corra hasta que el hilo sea fino y una vez que así sea, dibujen rayas de chocolate, moviendo la mano de izquierda a derecha rápidamente. Repitan con el otro chocolate si asi lo desean.
¿Les gustan estas ideas? ¿Cuál es su sabor de chocolate preferido?
by Marcela M. | Dec 6, 2012 | Blog, Christmas and NYE, cookies, Cooking basics and tutorials, Holidays, Recipe Box, Recipes, Sweets
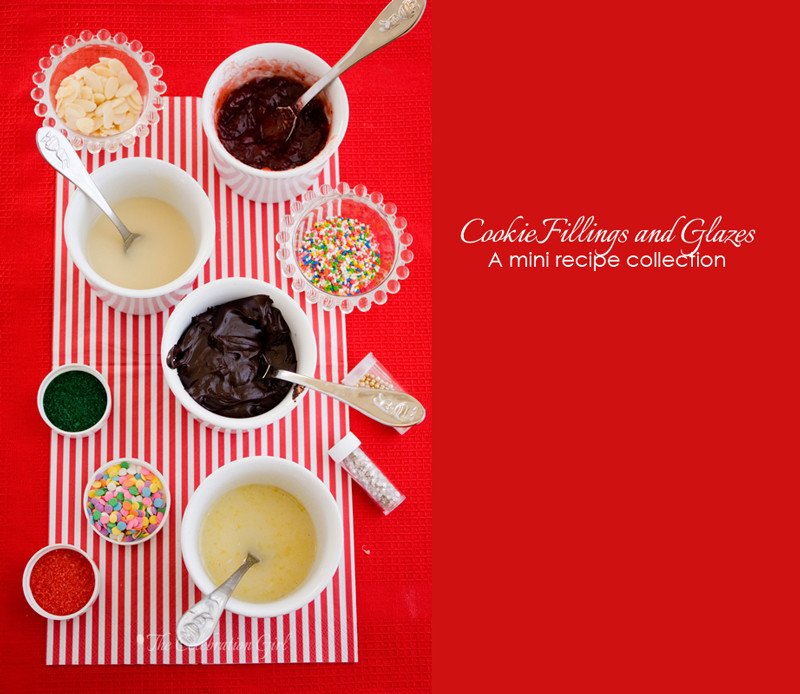
Good morning dear friends! Day 6 of the advent, almost 1 week into the season already and the weekend is almost here!
Today’s post is, in fact, the first part of a longer post that will be completed tomorrow, when we continue playing with the cookies we made before . These are some of the recipes I will be using and, for brevity sake and not to make one post super long, I thought it better to divide it in two. So, here are some of my favorite glazes and fillings to go with the cookie doughs I shared with you on Day 3.
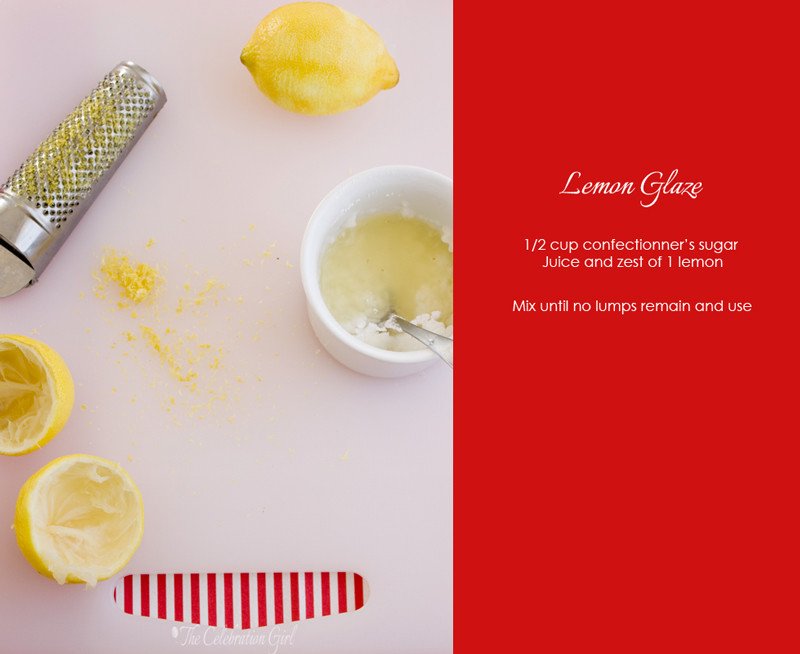
I also like to glaze my cookies with an orange glaze. In order to make it, use juice and zest of an orange instead of that of a lemon, in the same quantities and in the recipe above.
When I want to make a more traditional unflavored sugar Sugar glaze, I mix 1/2 cup confectioner’s sugar, 1 tablespoon warm water, 1 teaspoon of golden syrup and 1 teaspoon vegetable oil until no lumps remain. Traditionally this glaze uses melted butter but, as I have mentioned before, I prefer to skip using dairy as much as possible due to my son’s mild intolerance.
This a great filling, especially for almond or hazelnut shortbread cookies. There is something about pairing nuts and chocolate that is just heavenly perfect. I use coconut cream when I want to make a dairy free version, keeping the quantities stable.
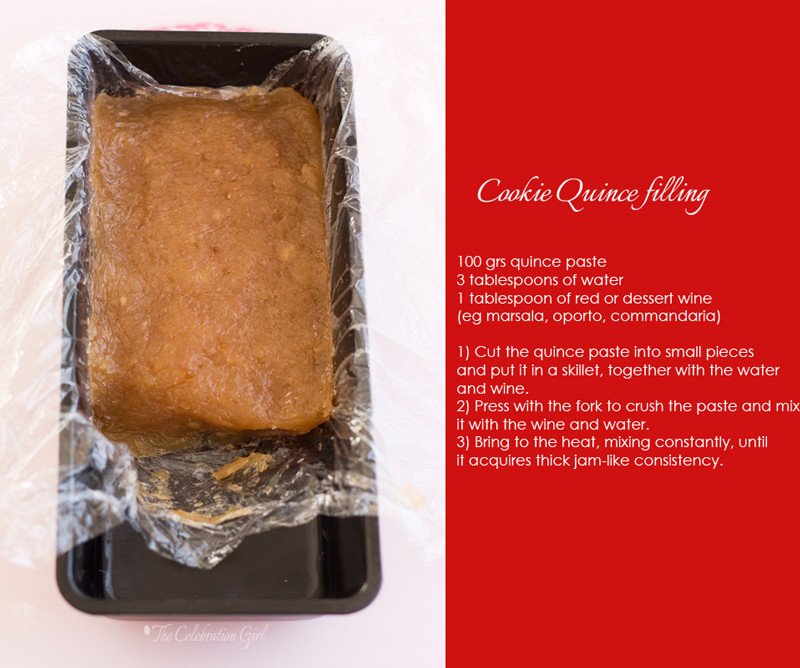
Quince paste or “Dulce de Membrillo”, as we call it back home, is a staple food in most Argentinian homes (or at least it was in mine when I was growing up), but outside of Argentina it isn’t that easy to find. A friend of my mother’s recently shared with me this wonderful recipe and I put it in use, taking advantage of quince season, with the idea of making the famous pastafrola. However, when I thought about fillings for the advent’s cookies, I realized that quince paste would make a wonderful one. I gave it the necessary jam-like consistency using the same method I use for making pastafrola’s filling (quantities vary, though). Here you have it:

So, get those fillings and glazes ready, because we will be using them tomorrow!
What are your favourite sugar cookie fillings and glazes?
Con sabor latino…
Buenos días queridos amigos! Es el 6to día del adviento, ya ha transcurrido casi una semana de la temporada festiva y el fin de semana nos pisa los talones.
El post de hoy es, en realidad, la primera parte de un post más largo que completaré mañana, cuando continuaremos jugando con las galletitas que horneamos anteriormente. Estas recetas son algunas de las que usaré mañana, así que para no hacer un solo post larguísimo, decidí dividirlo en dos. Aquí tienen, entonces, algunos de mis rellenos y baños favoritos para las galletas que compartí con ustedes el 3er día del adviento:
1) Glaseado de limón: Mezclar 1/2 taza de azucar impalpable con el jugo y la ralladura de 1 limón, revolviendo bien hasta que no queden grumos.
2) Glaseado de naranja: Mezclar 1/2 taza de azucar impalplable con el jugo y la ralladura de una naranja. Revolver bien hasta que no queden grumos.
3) Glaseado de azucar: Mezclar 1/2 taza de azucar impalplable con 1 cucharada de agua caliente, 1 cucharadita de golden syrup (azucar invertido) o syrup de maiz y una cucharadita de aceite vegetal, revolviendo hasta que no quede ningun grumo. Tradicionalmente, esta receta lleva manteca pero yo uso aceite a causa de la leve intolerancia a los lacteos de mi hijo.
4) Relleno de crema de chocolate: Colocar 60 grs de chocolate amargo en un bowl. Llevar 1/3 de taza de crema de leche al fuego, retirar cuando rompa el hervor y verter sobre el chocolate, dejando que éste se disuelva. Una vez casi completamente disuelto, batir vigorosamente hasta obtener una crema. Agregar 2/3 tazas de azucar impalpable y mezclar bien, hasta que no queden grumos. Si quieren hacerla sin lacteos, reemplacen la crema de leche por crema de coco.
5) Dulce de membrillo casero: Lavar y cepillar 2 membrillos y colocarlos en una olla con agua hirviendo durante 10 minutos. Retirar, dejar enfriar, pelar y procesar. Pesar la pasta resultante, que tiene que dar aproximadamente 500 grs. Agregar 400 gramos de azucar granulada comun (si es menos o mas, ajustar la cantidad proporcionalmente), cubrir con papel film y dejar reposar toda la noche. Al día siguiente, colocar en una olla de hierro, tipo Le creuset o essen, y llevar a fuego revolviendo constantemente con cuchara de madera hasta que la pasta se desprenda del fondo y de los bordes. Cubrir un molde de budin con papel film, verter dentro la pasta de membrillo, apretando con una cuchara para que quede compacta. Cubrir la pasta con papel film, bien al ras y asegurandose que no queden burbujas de aire. Dejar reposar en la heladera.
6) Pasta jalea de membrillo (para rellenar galletitas): Cortar 100 grs de membrillo en trozos y colocar en una sarten, junto con 3 cucharadas de agua y 1 cucharada de vino tinto o de postre. Pisar con tenedor para ablandar la pasta e integrarla con los líquidos. LLevar a fuego, pisando y revolviendo constantemente, hasta que adopte una consistencia de mermelada bien espesa.
Ya lo saben: vayan preparando estos rellenos y glaseados, que mañana comenzaremos a usarlos!
Y de paso, cuentenme, cuales son sus preferidos?


