Good evening dear friends! Today, on day 11 of the advent, we continue decorating cookies, this time with a star ingredient: chocolate!
I love, love, loooove chocolate and I almost everyone I know also does, so I thought that it would be a good idea to include a mini section on super easy chocolate decorations. These are all very simple ways to spice up your cookies, that do not require anything more than a heat proof bowl for melting the chocolate, and a spoon. If you have a cooling rack to let the chocolate drip, so much the better, but if you don’t, you will still be able to make these cookies.
Working with chocolate can be tricky and the key is to melt it properly so as to achieve the right texture, and so as to make it last. It is important not to overheat it, or you will end up with something more similar to cookie dough than fluid, beautiful chocolate, and you should be particularly careful about this when working with white chocolate which, in my experience, can be quite moody.
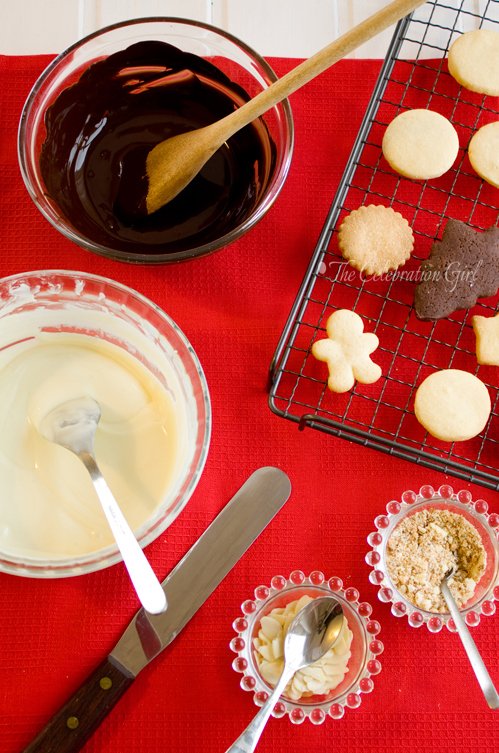
Start by chopping the chocolate into small chunks and putting them in a heat proof bowl. Place the bowl over a saucepan containing a small amount of water, and bring it to low heat. The bowl should not touch the water, we just want the steam to melt the chocolate. Let the first pieces start to melt, shake the bowl a little bit and, when about 50% of it has melted, remove the bowl from the heat and mix with a wooden spoon. The remaining chocolate will melt when mixing. The reason I don’t let all chocolate melt over the heat is that it runs the risk of overheating (it has happened to me before). Once all chocolate is melted, continue mixing vigorously until it’s fluid and easy to work with.
Now that your chocolate is melted, let’s begin playing with those cookies!
You will need: dark chocolate, white chocolate and for some variations, ground nuts (I used almonds). You could also use chocolate/candy food coloring in case you want to add some more variety to the mix. Note that candy/chocolate coloring is different from general gel food coloring:it contains even less water, so as not to spoil the chocolate’s texture.Make sure that you are using the right kind!
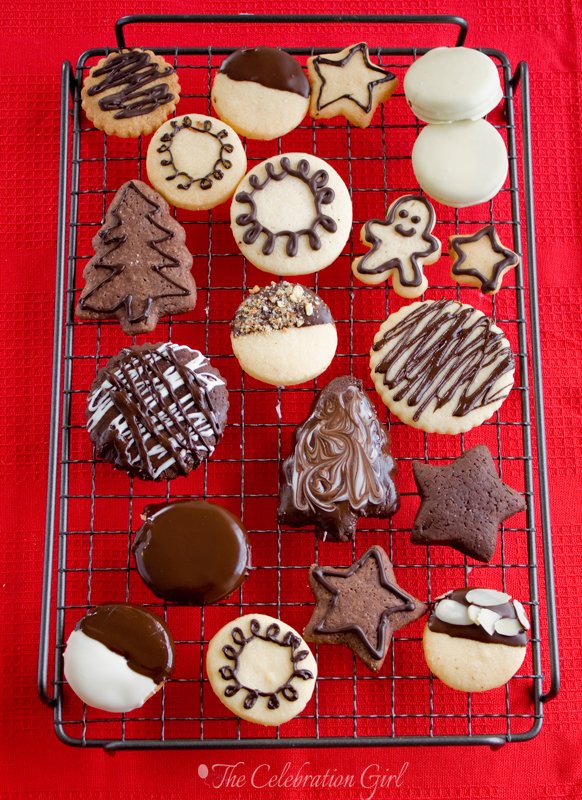
Here are the versions I did:
1) Full coverage: The first, most obvious option, is to fully cover the cookies in chocolate, either black or white. You can cover single or sandwich cookies, they both taste delicious. When you are covering your cookies fully, it is better to use a wire rack, because it allows the excess chocolate to drip, without creating a mess at the bottom. Simply pour a spoon or two of chocolate over the cookie, tap the rack against the counter a couple of times (so that the chocolate distributes evenly and there are no air bubbles) and let it drip and dry.
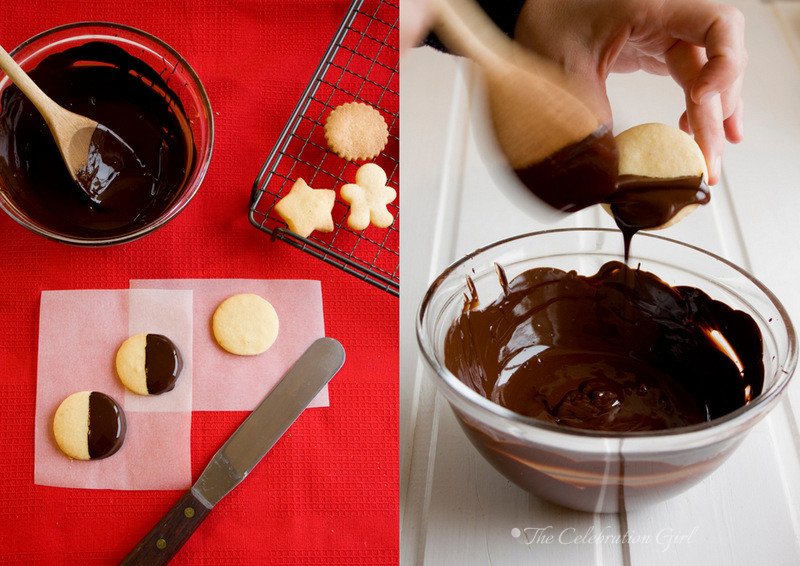
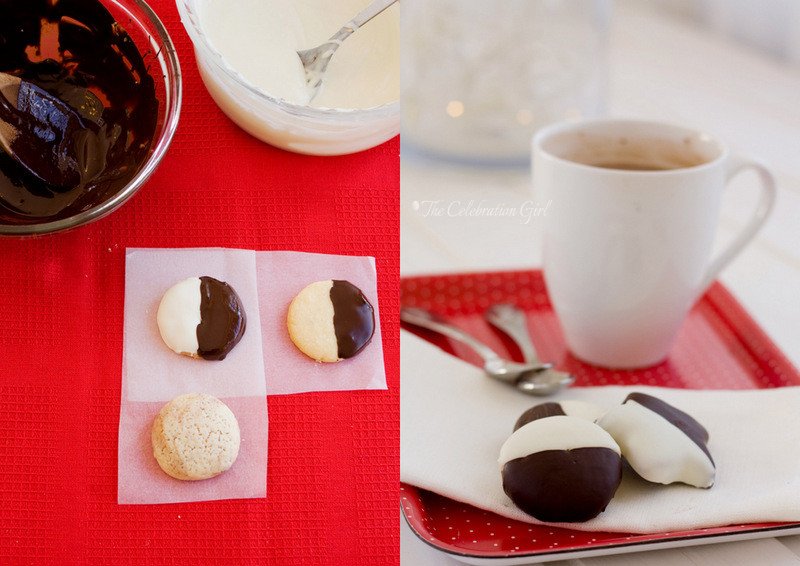
2) Half covered: This is an option that I like, not only because of how it looks, but also because the chocolate does not hide the cookie’s other flavors. It is very easy to do, as you can see from the pictures above: hold the cookie vertically, above the bowl of melted chocolate and, with a spoon or spatula, drop chocolate over the lower part of the cookie. Shake it slightly, so that the excess chocolate drips and then place it on a wire rack to finish drying.
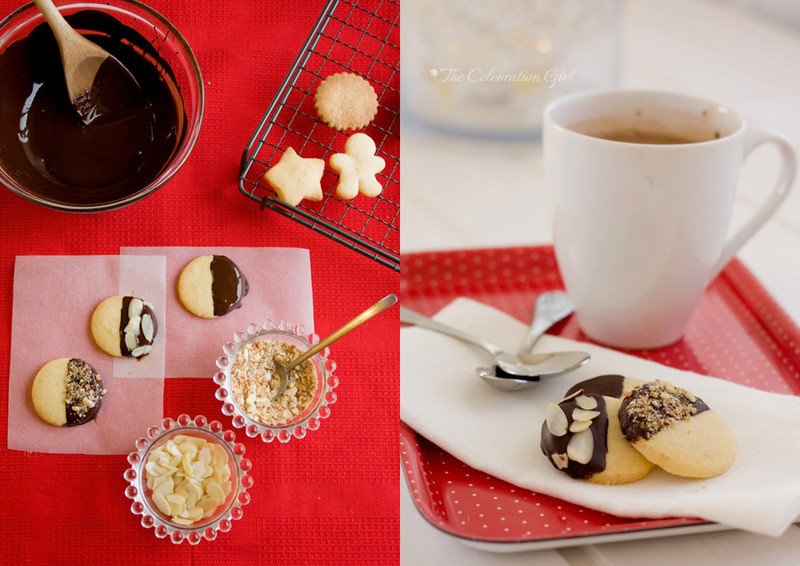
3) Half covered, with nuts: Pour crushed nuts of your choice, or slivered almonds over the chocolate, right after placing the cookies on the wire rack. Let it dry. This is a delicious option for shortbread cookies!
4) White and dark chocolate covered cookies: Another easy variation of the above, this time using both types of chocolate. Proceed to cover one side of the cookie, as shown in point 2 above, and let it dry. Once dry, cover the other half with the other chocolate. Let dry.
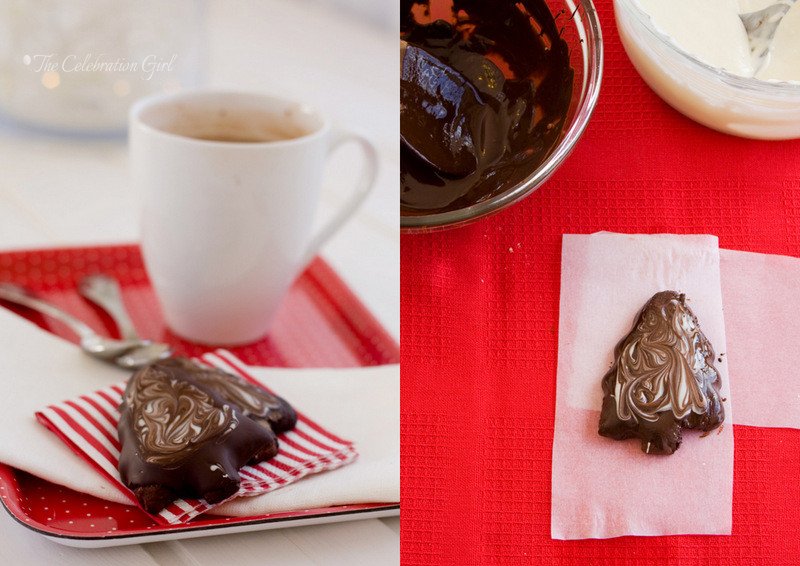
5) Marbled chocolate cookies: Cover the cookie completely with one color of chocolate and then, before it sets, add drops of the other chocolate here and there and immediately draw over them with a toothpick, moving your hand back and forth between the two chocolates.
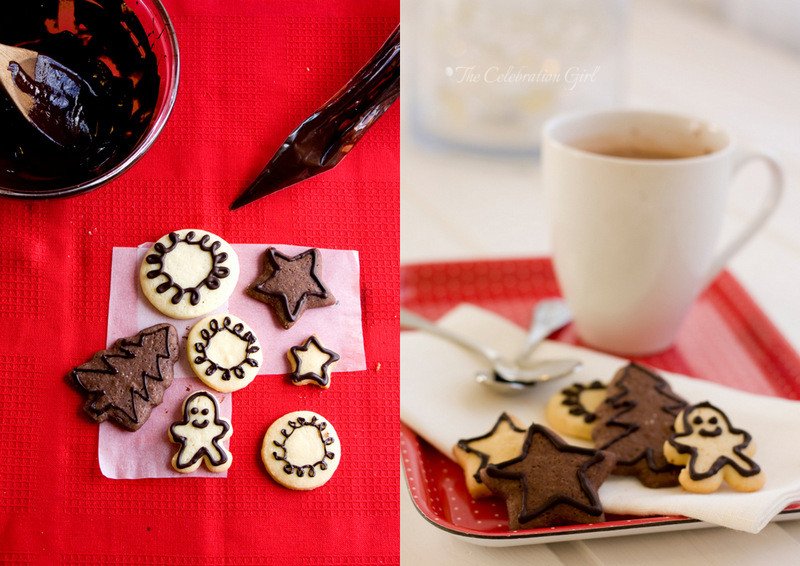
6) Piped chocolate cookies: In order to make this design, you will need a disposable piping bag or a paper cornet. If you want to know how to make a paper cornet to pipe chocolate, you can check THIS video from Dyane Bakes, which is great.
Melt the chocolate and, once it reaches the appropriate texture, introduce a few spoons inside a cornet or piping bag. Cut a small aperture at the bottom of it and draw as with a pencil brush. You will need to work fast because the chocolate may harden inside the piping bag quite fast. If this happens, put the piping bag under running warm water until it melts again.
7) Chocolate stripes: Easy breezy. Hold the cookie over the bowl of melted chocolate, dip a spoon in it, let it drip until the stream of chocolate becomes thin and drizzle the cookie, moving your hand fast back and forth. Repeat with another color if you so desire.
Do you like these ideas? Which type of chocolate is your favorite?
Con sabor latino…
Buenas noches queridos amigos! Hoy, en el 11avo día del adviento vamos a seguir decorando galletitas, esta vez con un ingrediente estrella: el chocolate!
Amo, amo aaaaaaaaamo el chocolate, especialmente el bien amargo, y la mayoría de la gente que conozco tambien es fanática del mismo, así que pensé que podría ser una buena idea incluir una mini sección con decoraciones chocolatosas. Todas estas son formas muy sencillas de cambiar un poco sus galletitas, que requieren como todo instrumental un bowl resistente al calor para derretir el chocolate, y una cuchara. Si tienen una rejilla sobre la cual bañar las galletitas, es mejor porque ésta permita que el chocolate corra sin apelotonarse debajo, pero si no tienen una, tranquilos que tambien puede hacerse sólo quedará un poco menos prolijo).
Trabajar con chocolate tiene sus bemoles, pero la clave está en derretirlo correctamente y asegurarnos de templarlo bien antes de comenzar, para que tenga la textura adecuada y para que se deslice correctamente. Es muy importante no sobrecalentarlo, porque de hacerlo así terminaremos con un masacote más parecido a masa de galletas que a chocolate derretido! Tengan cuidado especialmente al trabajar con chocolate blanco, ya que en mi experiencia, es bastante temperamental.
Comiencen por cortar en trozos pequeños el chocolate y coloquenlos en un bowl resistente al calor. Luego, coloquen agua en una olla pequeña, y luego pongan el bowl sobre la misma, asegurándose que éste no toque el agua (sólo queremos que el vapor derrita el chocolate). Lleven la olla a fuego mínimo y,cuando el chocolate comience a derretirse,agitenla un poco para que el calor se distribuya. Cuando se haya derretido un 50% aproximadamente, retiren la olla del fuego y comiencen a mezclar vigorosamente. El chocolate restante se derretirá al entrar en contacto con el que ya está derretido, a medida que mezclamos. La razon por la que yo no dejo que todo el chocolate se derrita con la olla al fuego es que así se corre el riesgo de sobrecalentarlo, y arruinarlo (me ha pasado!). Una vez que todo el chocolate se ha derretido, continuen mezclando hasta que adquiera una textura fluida, con la cual sea facil trabajar.
Ahora que ya tienen listo su chocolate, empecemos a jugar con las galletitas!
Para hacer las galletitas que les mostraré a continuación necesitarán chocolate amargo o semi amargo y chocolate blanco y, para algunas, tambien nueces picadas a elección (yo usé almendras). Tambien pueden teñir el chocolate blanco con colorante, para añadir variedad, pero tengan en cuenta que los colorantes de chocolate no son los mismos que los de otras preparaciones, porque tienen que tener menor contenido de agua para no estropearlo. Asegurense de usar el colorante correcto si quieren teñir su chocolate!
He aquí las galletitas que hice en esta ocasión:
1) Galletitas totalmente bañadas en chocolate: Esta es la opción más obvia y sencilla.Pueden bañarse así galletas individuales o alfajorcitos, con cualquier chocolate. Ambas opciones son deliciosas. Cuando cubran sus galletitas completamente,tengan en cuenta que es mejor usar una rejilla para que el chocolate extra pueda gotear sin crear un pegotero en la base de la galletita. Para hacerlas, coloquen las galletitas sobre una rejilla, viertan una cucharada o dos de chocolate, golpeteen un par de veces la rejilla contra la mesada para que el chocolate se distribuya bien y no haya burbujas de aire, y dejen secar un par de horas.
2) Galletitas bañadas por la mitad: Esta opcion me encanta, no sólo por cómo luce sino tambien porque evitamos que el chocolate tape los aromas de las galletitas (sobre todo el negro, que puede ser invasivo). Hacerlas es muy sencillo: tomen la galletita y coloquenla de manera vertical sobre el bowl de chocolate. Con una cuchara o espatula, viertan chocolate sobre la mitad de la galletita, sacudanla un poco para que caiga el exceso y coloquenla sobre una rejilla para dejarla secar.
3) Galletitas bañadas por la mitad, con nueces: Espolvoreen nueces molidas a elección sobre la mitad cubierta de chocolate antes que se seque.Tambien pueden usar almendras fileteadas. Esta opcion es deliciosa con las galletitas de manteca.
4) Galletitas bicolor: Otra variante sencilla de la número 2. La clave está en hacer un lado primero, dejar que se seque, y luego bañar la otra mitad con el otro color.
5) Galletitas marmoladas: Bañen completamente la galletita con un chocolate y, una vez totalmente cubierta, agreguen gotas del otro chocolate en diversos lugares. Finalmente, dibujen diseños con un palillo escarbadiente, mezclando los chocolates, moviendo la mano en forma de 8.
6) Galletitas con contorno de chocolate: Para hacer este diseño necesitarán una manga descartable o hacer un cono de papel como el que indican en este video. Derritan el chocolate y, una vez que haya alcanzado el temple, coloquen un par de cucharadas dentro del cono o manga y dibujen como lo harian con un pincel. Tengan en cuenta que deberán trabajar rápidamente porque de lo contrario el chocolate se endurecerá dentro de la manga. Si les ocurre esto último, coloquen la manga bajo un chorro de agua caliente. Si usan un cono de papel deberan sacar los restos de chocolate seco del mismo y derretirlo nuevamente.
7) Galletitas con rayas de chocolate: Facilísimas. Tomen la galletita y sostenganla con una mano sobre el bowl con chocolate. Sumerjan una cuchara en el mismo, elevenla, dejando que el chocolate corra hasta que el hilo sea fino y una vez que así sea, dibujen rayas de chocolate, moviendo la mano de izquierda a derecha rápidamente. Repitan con el otro chocolate si asi lo desean.
¿Les gustan estas ideas? ¿Cuál es su sabor de chocolate preferido?




Yo tambien amo el chocolate! – Mi hermana ama las masas, asi q le prometi recibirla con una buena cantidad de galles de este tipo! Lo q si… a la heladera, aca el calor esta agobiante…
Besos Marce! Espero el post de mañana.