by Marcela M. | Apr 16, 2014 | Blog, Gluten free and Vegan, Mousses and ice cream, Recipe Box, Recipes, Sweets, Vegan & Raw
My husband and I joke that we are pretty much like the couple in Tina Fey’s movie, Date Night.If you have seen the movie (which is hilarious and I totally recommend), you know that Claire and her husband Phil like routine and go every week to the same local restaurant for a date. Then, one day, they decide to spice it up and go to a posh Manhattan restaurant (without reservation), take someone else’s table and then the movie turns into a funny thriller.In our case, the action part came a few years ago, when we both worked in peacekeeping, and now we have more or less settled into a routine that we love.
Where we are 100% like the Fosters is in our restaurant routine: once we find one that we love, we rarely change, we become regulars and end up knowing the waiter’s names. Every city we go to, we fall in love with a couple of places and become loyal customers. Back in Abidjan, our hearts belonged to Nuit de Saigon (Vietnamese cuisine), Maroush (Lebanese cuisine), and Restaurant de la Paix (also Lebanese cuisine), in Belgrade we chose Kosava and Tribecca, in Florence, Ristorante Pinolo and Open View (overlooking the Arno) in Barcelona, Ugarit (Sirian cuisine), and here in Cyprus, we love Karvounomageiremata, Sitio and the Syrian-Arab Friendship club. I’m sure there are plenty of other great places, but these are the ones we adore.
Did you notice a trend in the list above?
Yes, we love Middle Eastern cuisine and we always find a middle eastern restaurant wherever we go. Hoummous, tabbouleh, fatayer, fattoush, falafel…you name it, we have probably tried and most certainly loved it. But for some reason, before coming to live in Nicosia I had never tried Middle Eastern desserts (except Baklava, of course). Then one night, we were given a complimentary Machalebi with our mint tea and I was smitten. The texture was so soft it almost melted in my mouth, and its sweet, rose flavour was utterly delicious.
The problem was that it was made with milk and cream- and as you know, I don’t eat dairy. So I came up with my own version.
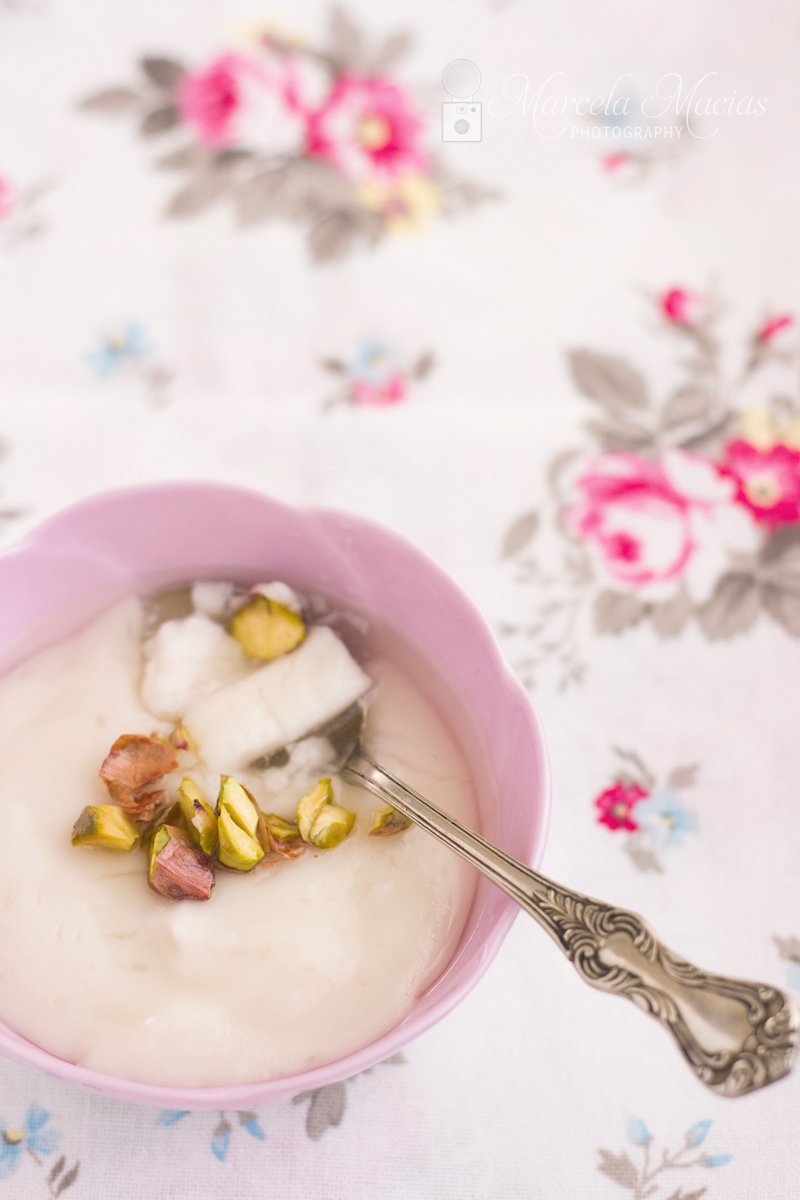
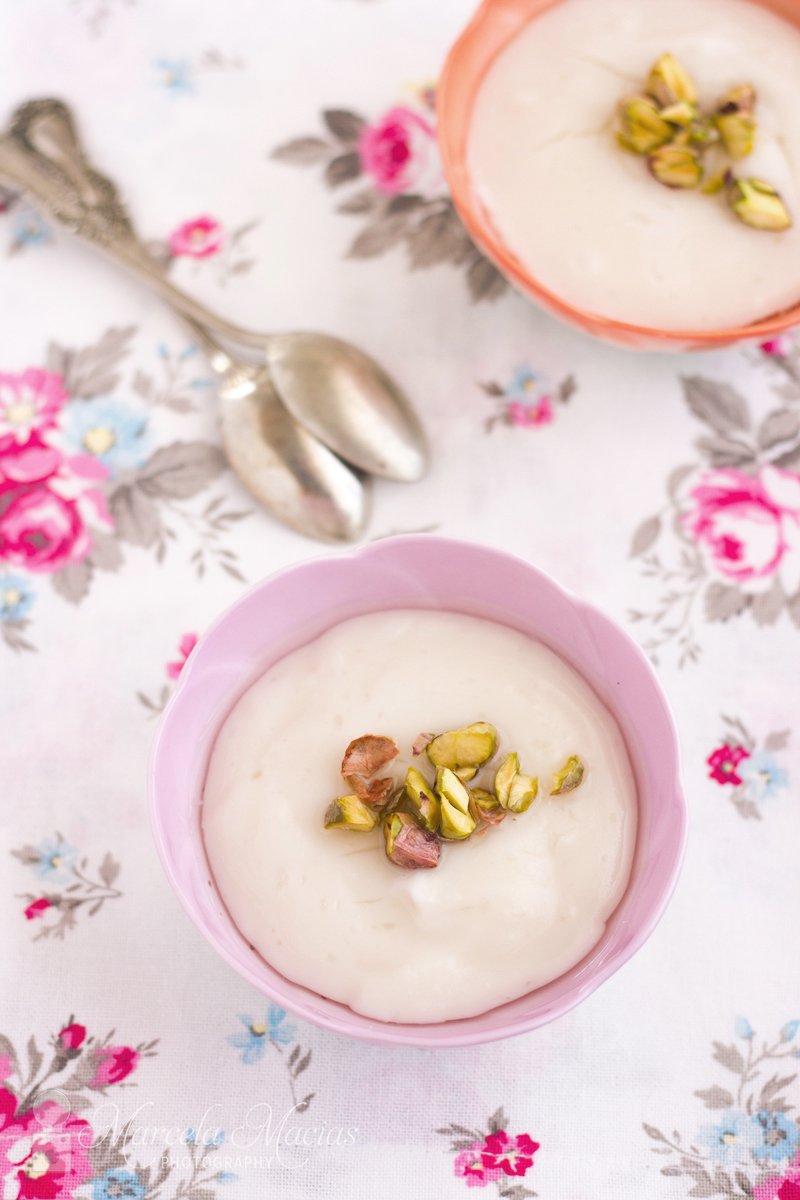
I checked a couple of recipes, changed this, removed that, and ended up with this recipe: My coconut machalebi, made with equal parts coconut milk and coconut cream, lots of rose water and a little bit of sugar.
And the best part? It takes about 15 minutes to make so it’s ideal for those times when we don’t have loads of time, yet want to impress our guests with an unusual, exquisite dessert. It is also pretty allergy friendly because it doesn’t have dairy, eggs or wheat.
I chose coconut milk and cream because of their luscious texture, but if they are hard to find where you leave, just replace them by other non-dairy versions. In this occasion I used caster sugar so as not to affect the pearly white texture of the dessert, but if you prefer not to use refined sugar, you can use coconut sugar for a change. It will then be brownish in color, but still yummy.
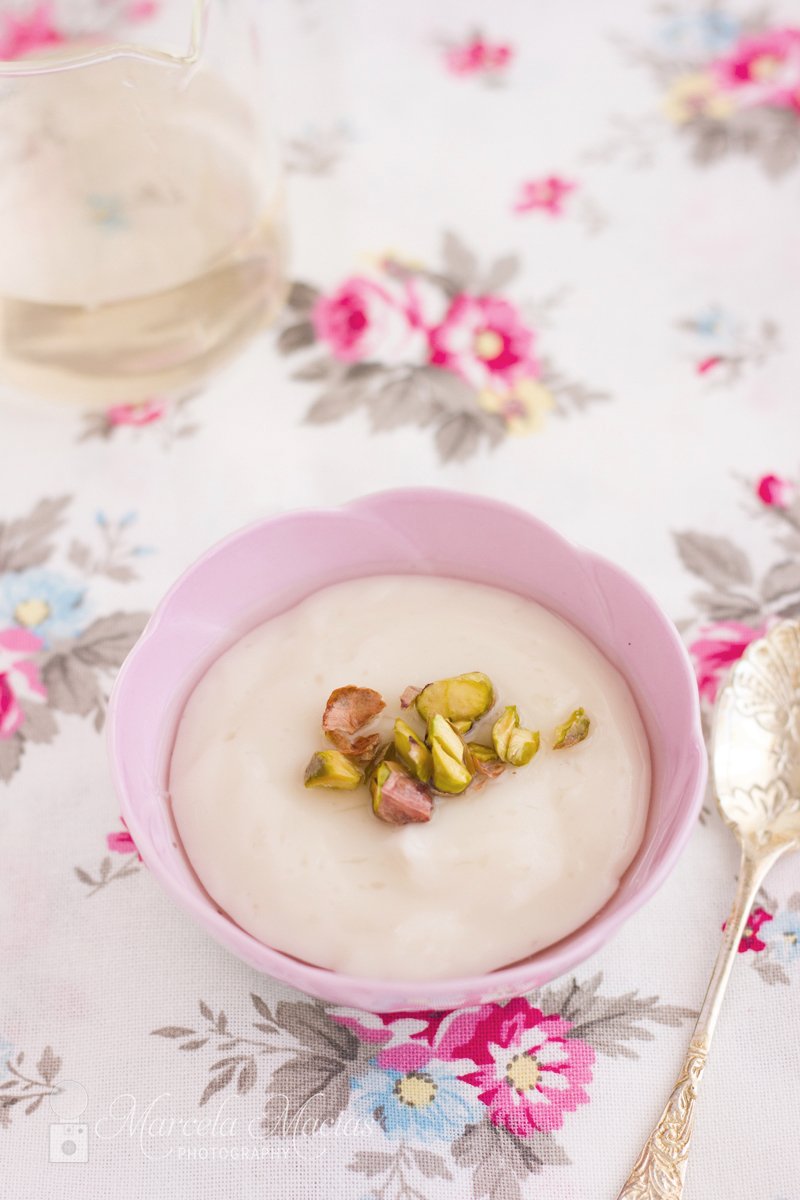
Here’s the recipe:
Coconut Machalebi (serves 6)
Ingredients: 1 can (400 ml) coconut milk, 1 can (400 ml) coconut cream, 3/4 cup cornstarch, 1/3 cup caster sugar, 2 tablespoons rose water 4 tablespoons of pistachios, roughly chopped. For the rose syrup: 1/2 cup water, 1/2 cup caster sugar, 2 tablespoons of rose water.
Preparation:
1) In a bowl, mix coconut milk and cornstarch until the latter dissolves. Set apart.
2) Put the coconut cream and sugar in a saucepan and bring it to the boil, then reduce heat to minimum and let it simmer until the sugar is completely dissolved, stirring constantly to prevent the sugar from caramelizing at the bottom.
3) Once the sugar has dissolved, add the coconut milk and cornstarch, and the rose water and let the preparation simmer until it starts to thicken, stirring with a whisk.
4) Once the preparation starts to thicken, remove from the heat and whisk vigorously to ensure a smooth, silky texture.This will also allow the preparation to cool down a little bit.
5) Pour the preparation into ramequins or small bowls, add a teaspoon of chopped pistachios, cover with foil and let chill in the refrigerator while you prepare the rose syrup.
6) Prepare the syrup: Put water and sugar in a saucepan and bring it to the boil, then reduce the heat and let it simmer for 5 minutes. Remove from heat, add the rose water and let the syrup cool.
7) Remove the machalebi from the refrigerator, add 2 or 3 tablespoons of rose syrup to each ramequin and serve.

Do you have a favorite cuisine? Let me know in the comments below!
by Marcela M. | May 30, 2013 | Gluten Free, Mousses and ice cream, Recipe Box, Recipes, Sweets, Vegan & Raw
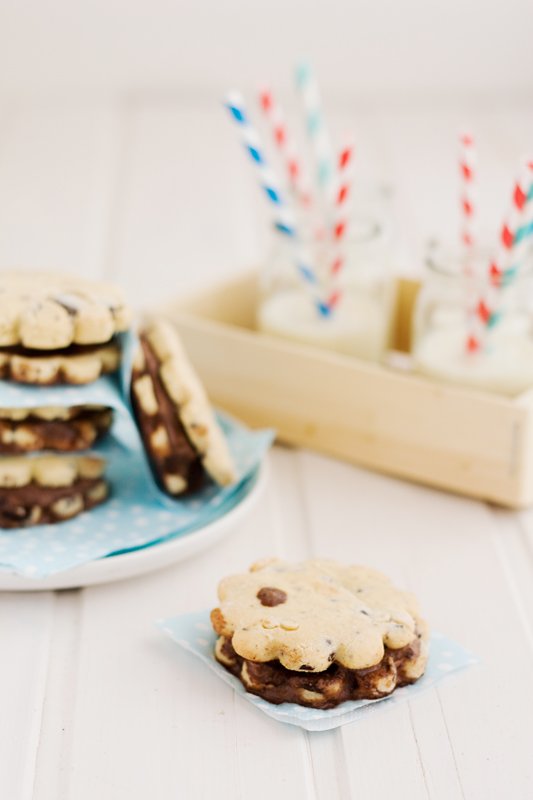
Summer is for ice cream, don’t you think? And how about ice cream sandwiches, aren’t they yumminess to the chore? Don’t they bring memories of childhood, leisurely days , friends and bikes, and ice creams trucks in the park? I thought so too, and this is why I decided to bring you a delicious ice cream sandwich recipe, that is also gluten free and dairy free, for you to enjoy like you used to when you were a child.
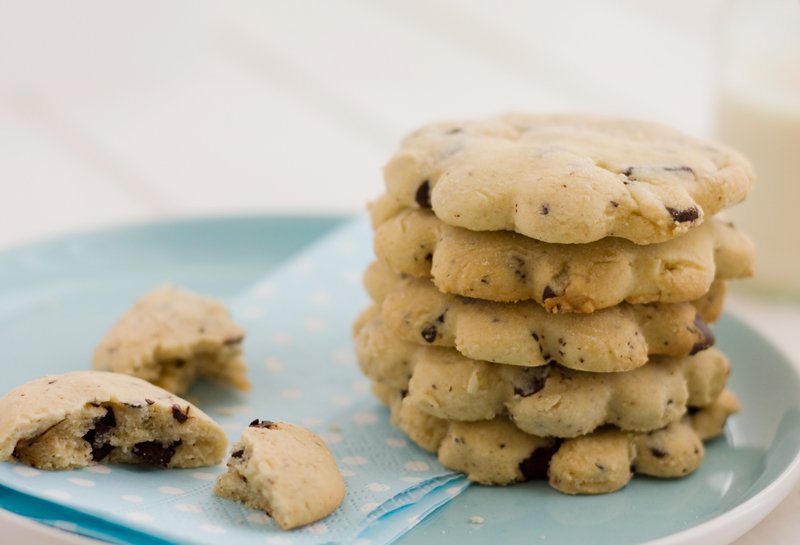
These ice cream sandwiches are made of delicious gluten free and dairy free chocolate chip cookiesand vegan chocolate ice cream (dairy free and egg free) because I believe that food allergies shouldn’t stop us from eating tasty treats.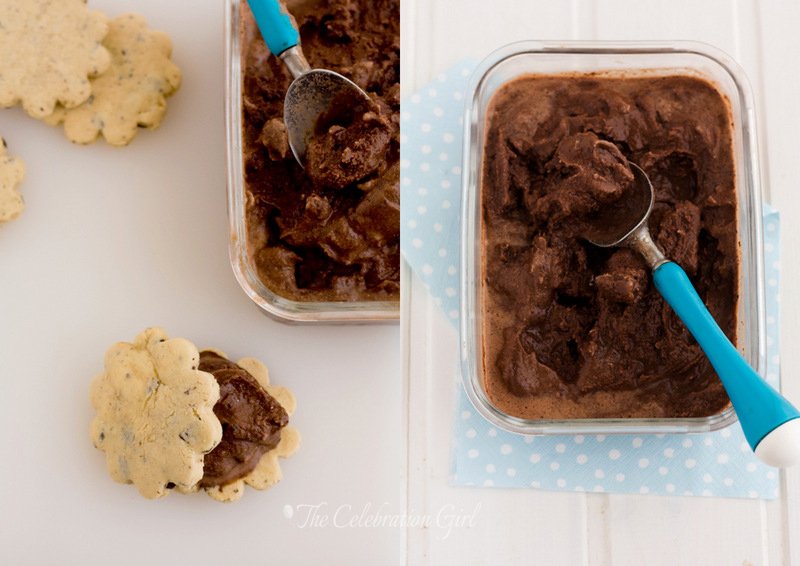
The cookies were adapted from a shortbread cookie recipe by Aran Goyoaga that appears in her book Small Plates and Sweet Treats. I modified the flour combination that she uses because I didn’t have the same ones, and I added big chunks of chocolate that add a little crunchiness to the sandwiches.

Do you want the recipe? Here it is:
Gluten free and dairy free ice cream sandwich recipe
1) Make the Gluten free & Dairy Free chocolate chunks cookies
Ingredients: 110 grs of vegan margarine, 1 cup/200 grs caster sugar, 2 teaspoons vanilla extract, 1 medium size egg, 1/2 cup cornstarch, 1 cup/115 grs almond flour (I used processed almonds), 1 1/4 cup/ 175 grs rice flour (plus a little bit more to dust the counter), 1/2 teaspoon salt, 100 grs chocolate (70%), cut in chunks, or chocolate chip cookies.
Preparation:
1) Beat margarine and sugar for 2 minutes. It is very important not to overbeat margarine or the cookies will turn out oily, so just incorporate both ingredients well and make sure the resulting cream has some fluffiness but don’t continue further than that.
2) Scrape the sides of the bowl, add vanilla and eggs and beat well, until fully incorporated.
3) In a different bowl, mix the dry ingredients and add them to the margarine cream in three times, mixing well and scraping the sides of the bowl after every addition. Again, don’t over mix or the dough will be too soft. Add the chocolate chunks or chips and incorporate them into the dough.
4) Wrap the foil in plastic and put it in the refrigerator for one hour. These cookies freeze very well, so if you can make the dough ahead of time, freeze it and bake the cookies at a later date.
5) Dust the counter with rice flour, remove the dough from the refrigerator, extend it with a rolling pin and cut the cookies with the desired shape. I made medium size flowers, but you could also try with a simple circle or square cookie cutter.
6) Place the cookies on a baking tray lined with baking paper and bake for 10-15 minutes, until barely golden on top. Remove from the oven and let them cool down.

2) Make the Chocolate coconut ice cream
Ingredients: 2 cans of 400 ml of coconut milk, 1 cup sugar, 1/2 cup cocoa
Preparation:
1) Put all the ingredients in a saucepan, and bring to the heat, stirring all the time with a wooden spoon until it slightly thickens (very slightly). This will help dissolve well all pieces of coconut and cocoa and ensure that the ice cream turns out smooth.
2) Place the chocolate coconut milk in a container with a lid and put it in the refrigerator for at least 8 hours
3) Remove the milk from the refrigerator, and churn it in your ice cream maker according to the manufacturer’s instructions. I use the KitchenAid ice cream attachment, with which it takes 15/20 minutes for the ice cream to be ready.
4) Once the ice cream is ready, place it in the freezer for 2 hours for it to reach scoop consistency.
3) Assemble the ice cream sandwiches
1) Put a scoop of ice cream between two cookies, and place the sandwiches on a tray
2) Place the tray in the freezer until the ice cream hardens (or it will melt too soon!).
3) Serve, or store in the freezer in an airtight container.
Did you like this recipe?
If you did, share it with your friends using the social media buttons below and subscribe to my newsletter for more yumminess delivered right into your inbox!
by Marcela M. | Apr 18, 2013 | Gluten Free, Mousses and ice cream, Recipe Box, Recipes, Sweets, Vegan & Raw
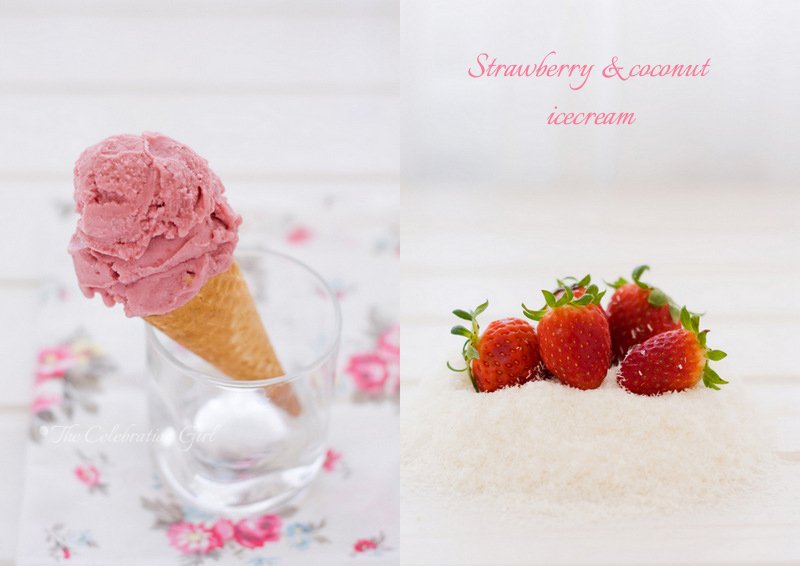
Good morning dear friends!
Today’s recipe was my monthly contribution to the Spanish website Petit-On. As I have mentioned before, each month I contribute a recipe based on an ingredient chosen by one of the blog’s contributors. To my utter delight, the ingredient for April was strawberries!
I love strawberries and, each year, I wait anxiously for April to arrive because I know that it’s strawberry season. I love their fragrant smell, their sweetness that goes so well with slightly tangy flavors, and the deep red of their skins. They are delicious and beautiful, a real feast for all senses. The funny thing is that I hated them when I was a child…but fortunately I have come to my senses since then!
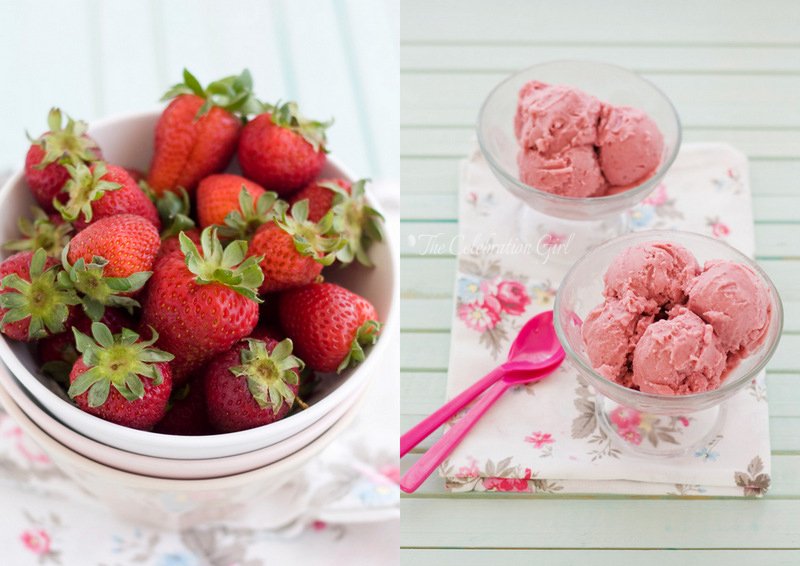
Loving strawberries as I do, it took me a while to chose a recipe, but I finally decided to make this one, because what better way to greet the warmer weather and celebrate Spring than with a delicious ice cream?
As you will soon see, an added beauty of this recipe is that it takes very few ingredients: coconut milk, fresh strawberries, sugar and a splash of good vanilla, to enhance the strawberries natural flavor (I use vanilla bean paste but you may use vanilla extract if you want, or a vanilla pod). Yes, no milk, no cream and no eggs, which also means no need to make a custard, beat ingredients or anything like that. I warm up the milk with the sugar for a little while, so that the sugar cristals dissolve but you can also make it raw and just out all ingredients in a blender or food processor at the same time, process and refrigerate for a couple of hours before churning in an ice cream maker.
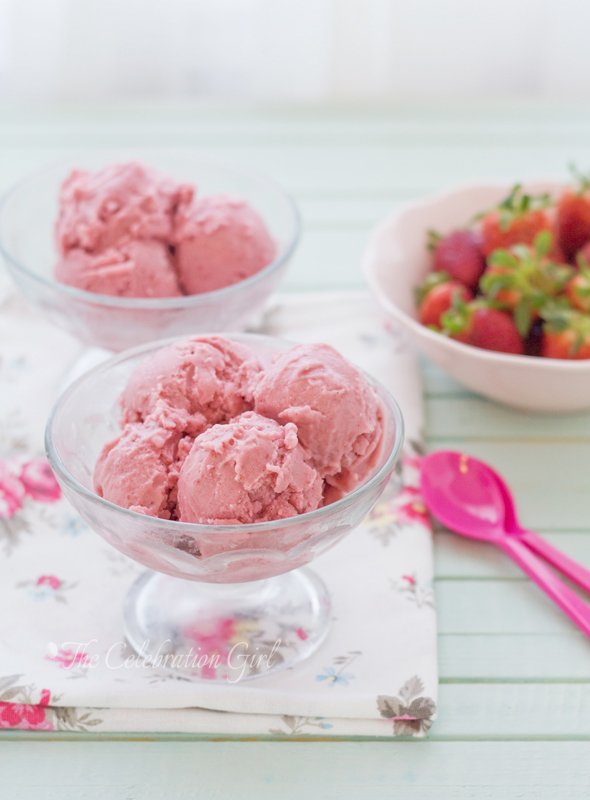
Here is the recipe:
Strawberry and coconut ice cream
Ingredients: 2 1/2 cup of strawberries , 1 can of coconut milk, 1/2 cup of sugar, 1 teaspoon of vanilla bean paste/the seeds of 1 vanilla pod or 2 teaspoons of vanilla extract.
Preparation:
1) Wash the strawberries, remove the leaves, cut them in half and put them in the bowl of a food processor or blender. Process and blend until they transform into a purée. Reserve.
2) Put coconut milk and sugar in a saucepan and bring to moderate heat for about 5 minutes, so that the sugar crystals dissolve. Remove from the heat, let cool down for a while and add vanilla.
3) Pour the sugared milk in the food processor/blender, together with the strawberry purée and pulse a few times to to integrate well.
4) Pour the preparation in a tall glass/bowl, cover with foil and refrigerate for at least 4 hours before churning.
5) Remove the preparation from the refrigerator and churn in your ice cream maker according to the manufacturer’s instructions. I use the KitchenAid ice cream attachment, with which it takes 15-20 minutes for the ice cream to reach soft consistency.
6) Remove the ice cream from the machine, put it in an airtight container and place it in the freezer for a couple of hours so that it reaches scoop consistency.
If you don’t have an ice cream machine, you can still make this recipe. In that case, instead of refrigerating the preparation as is required before churning, put it directly in the freezer, and remove it every 30 minutes during 2 hours, beating it vigorously every time, so as to break the ice crystals. You may also use it to make ice lollies, if you have the molds. They will be delicious either way!
Do you like to make ice cream at home? Do you have any food allergies that prevent you from eating ice cream at a shop? Let me know in the comments below and I promise I’ll do my best to come up with a recipe you can eat!
by Marcela M. | Nov 13, 2012 | Blog, Mousses and ice cream, Recipe Box, Recipes, Sweets, Uncategorized
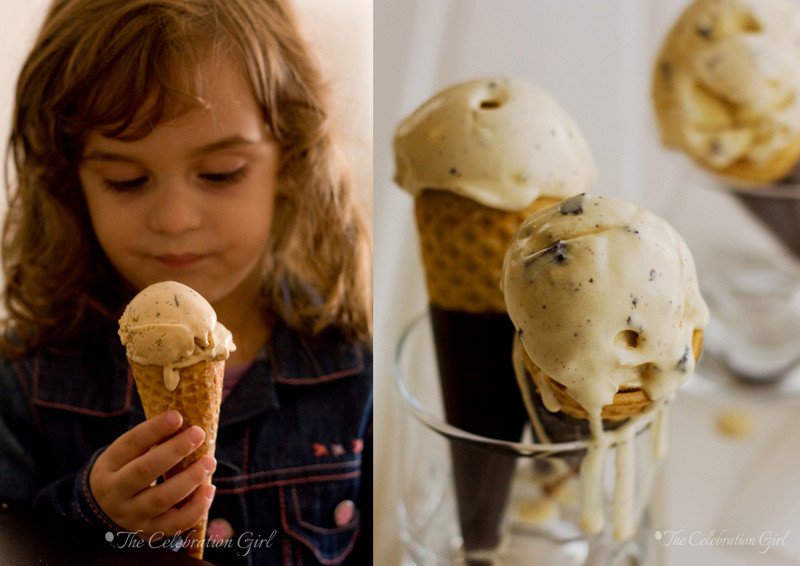
Ice cream has always been my favorite treat, regardless of the season. I have always craved it all year long, and Argentina’s abundance of truly great quality ice cream allowed me to indulge in it even in the middle of winter. When I was a little girl, an ice cream shop opened, for a couple of years, just around the corner from our home, and I remember going to it even in cold weather with my family, all of us covered in coats and scarves but still willing to enjoy a delicious scoop.
As I grew older, the all year craving didn’t stop but, for some strange reason I started associating ice cream with summer only. The end of summer was the end of ice cream for me and, as soon as the weather started to get cold, I switched to pies and cakes.
When we came to live in Cyprus, I learnt that summer did not end until October and that real autumn didn’t start until November, so I allowed myself a few more weeks of ice cream indulgence.Ice cream was the one thing I always loved about summer, even when, for most of my life, I was not really fond of summer itself. And even tough this year I embraced summer and enjoyed it to the core, I was so ready, so eager for Autumn to start that I stopped eating ice cream when the last bits disappeared from our freezer in late September.
But Autumn didn’t come in October. The month came and went and the weather was still in the thirty degrees Celsius range, we were still wearing short sleeved t-shirts and flip-flops at home and our sweaters remained stored in boxes in the upper part of our closets. I cursed global warming while longing for the chilly breeze that normally announces the start of the new season and then, when November arrived, I decided that I’d better accept and embrace the extended summer as well and I made ice cream again.
And, of course, the following day, Autumn arrived and I had this ice cream happily tucked in a blanket, watching the rain fall outside my window. Sometimes all it takes for things to change is to accept what we have and to let go of our resistance, don’t you think?
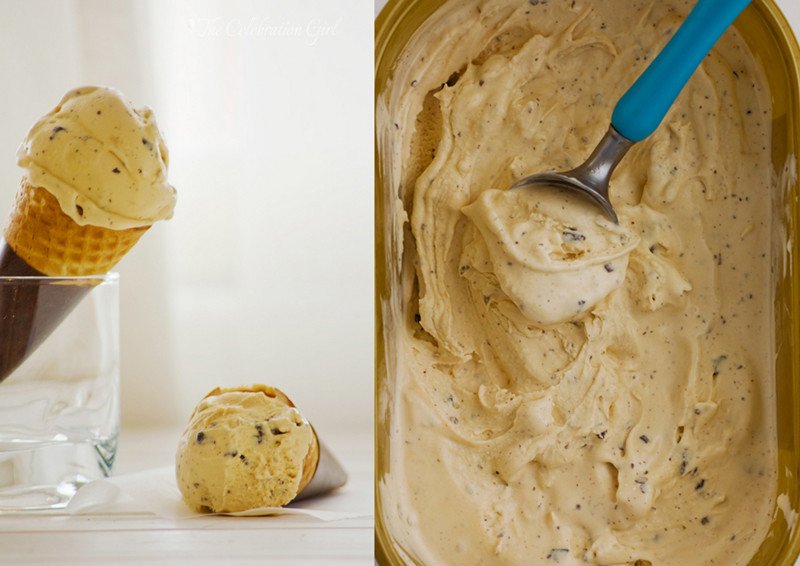
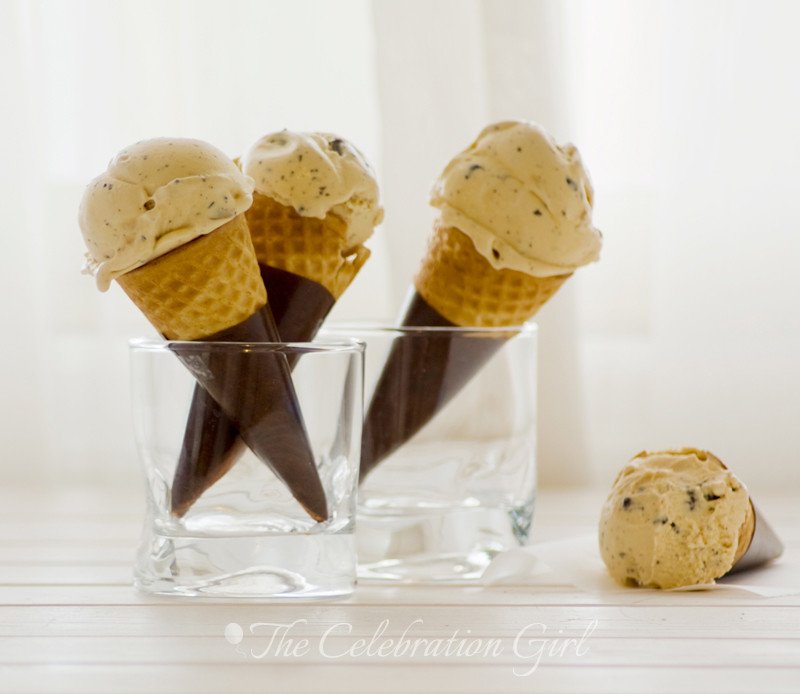
This recipe is a combination of two of my favourite ice creams: dulce de leche granizado and salted caramel. In fact, it looks like dulce de leche granizado (chocolate chunks dulce de leche ice cream) but it isn’t because it is not made with dulce de leche, but with salted caramel sauce instead.The result is less sweet, much quicker (if you,like me, cannot buy dulce de leche in the supermarket) and just as delicious.
Here’s the recipe
Salted caramel and chocolate chip ice cream
Ingredients:
For the salted caramel sauce: 200 grs white sugar, 90 grs unsalted butter, 120 ml heavy cream, 1 teaspoon fleur de sel (flower salt)
For the custard: 500 ml milk, 150 grs sugar, 6 egg yolks, 1 tablespoon vanilla essence, 300 ml cream,salted caramel, 100 grs dark chocolate
Preparation: 1)Make the caramel sauce: Put sugar in a sauce pan over the heat and let it burn until it liquifies and reaches amber color. Stir it from time to time with a heat proof spatula, from sides to center to make sure that it doesn’t burn , but don’t touch it too much or it may crumble. I highly recommend reading David Lebovitz’ tips on how to make caramel, which you can do HERE. Once it is liquid and dark brown, take the pan off the heat and add the butter, stirring with the spatula all the time. It will bubble and grow, so be careful! Once all butter has melted, add the cream and whisk until smooth. Add the salt and continue whisking. Let it rest and cool down at room temperature and make the custard.
2) Make the custard: 1) Put all the milk and 75 grs of sugar in a sauce pan and bring to the heat until you start seeing bubbles forming at the sides (do not let it boil) 2) Beat the egg yolks and the remaining 75 grs of sugar until foamy and, once this is done, pour the warm milk in slowly, whisking constantly. This will allow the eggs to temper, so that they don’t cook when we bring them back to the heat. 3) Pour the egg, sugar and milk mixture back in the saucepan, and bring it back to heat stirring with a wooden spoon as if you were drawing 8 in the pan until it the mixture thickens (it has to coat the spoon). 4) Once the custard thickens, prepare an inverted bath. Put ice and water in a big bowl and place a smaller bowl on top. Put a sifter/strainer over the smaller bowl and pour the custard over it. Passing the custard through the strainer will guarantee that the mixture we end up is smooth as we need it to be before churning the ice cream. 5) Add vanilla and the warm caramel and mix in thoroughly. Finally, add the cold cream, mix well, cover with foil wrap and put in the refrigerator for at least 8 hours to cool down completely.
3) Churn the ice cream in your ice cream machine according to the manufacturer’s instructions. Chop the dark chocolate with a knife and add it to the ice cream 5 minutes before the end of the churning process.
4) Pour the ice cream in an appropriate container and freeze it for at least 4 hours for it to reach scoop consistency.
If you don’t have an ice cream maker put the custard in the freezer as soon as it is ready instead of in the fridge. Remove it after 30 minutes and beat it vigorously with a whisk (if you have a hand held mixer, so much the better), to break the little pieces of ice that may have formed. Bring it back to the freezer and repeat this process 3/4 more times, every 30 minutes.
Con sabor latino…
El helado siempre fue mi “gustito” preferido, independientemente de la estación del año en que me encontrara. Siempre me encantó, siempre tengo ganas de comer helado, y la abundancia de helados riquísimos que hay en Argentina hacía que pudiera darme mi gusto preferido en cualquier época, incluso en medio del invierno. Recuerdo que, cuando era chiquita, una pequeña heladería abrió un local a la vuelta de nuestra casa, por un par de años, y recuerdo cuán maravilloso era ir allí en medio del frío helado del invierno, toda la familia cubierta con tapados y bufandas pero, aún así, deseosos todos de disfrutar una bocha de nuestro sabor favorito.
A medida que fui creciendo, sin embargo y por alguna extraña razón, comencé a asociar helado exclusivamente con verano. El fin del verano comenzó a ser tambien el fin de los helados y, tan pronto como el clima se tornaba fresco, yo re orientaba mis deseos golosos a pies y tortas.
Cuando vinimos a vivir a Chipre, aprendí que aquí el verano no se va hasta entrado octubre y que el verdadero otoño no llega hasta noviembre asi que comencé a permitirma unas semanas extra de indulgencia heladil. El helado era una de esas pocas cosas que me gustaban del verano, aunque el verano en sí no me gustara demasiado. Y a pesar que este año disfruté del verano como nunca antes, estaba tan lista para el otoño y tan deseosa de que éste llegara que dejé de comer helado cuando los ultimos restos de aquellos que habíamos preparado en agosto desaparecieron del freezer hacia fines de septiembre.
Pero el verano no se fue en octubre y el otoño no llegó cuando solía hacerlo. El mes llegó y pasó y el clima seguía rondando los 30 grados centígrados, aún usabamos remeras de mangas cortas y ojotas de entre casa, y nuestros sweaters permanecían guardados en cajas en la parte más alta de nuestros placards. Maldije el calentamiento global una y mil veces, buscando señales de brisa fresca en el aire de la tarde y luego, cuando llegó noviembre sin señales del otoño, me resigné , decidí aprovechar el veranito extendido, e hice helado nuevamente.
Y, como suele ocurrir, en otoño llegó al día siguiente. Y comí este helado sentada en el sillón, envuelta en una manta, viendo la lluvia caer tras la ventana. A veces todo lo que hace falta para que las cosas cambien es aceptar las cosas como son y dejarnos llevar, no?
Esta receta es una combinación de dos de mis sabores de helados preferidos: dulce de leche granizado y salsa de caramelo salada. Parece dulce de leche granizado pero no lo es porque no está hecho con dulce de leche, sino con salsa de caramelo. El resultado es menos empalagoso, mucho más rapido de hacer si, como yo, no pueden comprar dulce de leche en el supermercado, e igualmente exquisito. Espero que les guste!
Aquí está la receta:
Helado granizado de salsa de caramelo salada
Ingredientes:
Para la salsa de caramelo: 200 grs de azucar, 90 grs de manteca, 120 ml de crema de leche, 1 cucharadita de flor de sal
Para el helado: 500 ml de leche, 150 grs de azucar, 6 yemas, 300 ml de crema de leche, 1 cucharadita de esencia de vainilla, salsa de caramelo, 100 grs de chocolate amargo
Preparación: 1)Haga la salsa de caramelo: Coloque el azucar en un cazo/olla y llevelo a fuego hasta que se liquidifique y tome color ambar/marron oscuro. Remueva cada tanto con una espatula o cuchara de madera, desde afuera hacia el centro, pero no demasiado o el caramelo se volverá grumoso y no liquidificará. Les recomiendo que vean los tips de David Levobitz acerca de cómo hacer caramelo, que están llenos de fotos y consejos, AQUI. Una vez que la mezcla esté liquida y marrón oscura, retire la olla del fuego , agregue la manteca y revuelva fuertemente. Tengan cuidado, porque burbujeará y crecerá! Una vez que la manteca esté derretida, vierta la crema de leche, revolviendo con batidor de alambre para que quede lisa y uniforme, agregue la sal, y deje reposar y enfriarse a temperatura ambiente.
2) Prepare la crema inglesa: 1) Ponga en una olla la leche y 75 grs de azucar y lleve a fuego hasta que rompa el hervor. 2) Bata fuertemente las yemas con el resto del azucar hasta que estén espumosas. 3) Vierta la leche caliente sobre las yemas, batiendo constantemente. Esto ayudará a que las yemas tomen calor de a poco, y no se cocinen al llevarlas al fuego. 4) Vierta la preparación de yemas, azucar y leche en una olla y lleve a fuego nuevamente revolviendo con cuchara de madera en forma de ochos, hasta que la preparación espese y nape la cuchara. 5) Prepare un baño maría invertido. Coloque hielo y agua fria en un bowl grande, encima del cual deberá colocar otro bowl más pequeño. Coloque un colador/tamiz sobre el bowl mas pequeño y vierta la crema inglesa sobre el mismo. Esto ayudará a que si algun pedacito de huevo que se ha cocinado, éste no llegue a la crema del helado, y hará que nuestra crema sea bien lisita. 4) Agregue la vainilla y la salsa de caramelo tibia e incorpore. 5) Agregue la crema de leche fría e incorpore bien. Cubra con papel film y lleve a la heladera por 8 horas para enfriarla bien
3) Una vez que la crema esté bien fría, coloque en la máquina heladora siguiendo las instrucciones del fabricante. Yo uso el accesorio de la KitchenAid, con el cual lleva 20 minutos que la preparación esté lista. 5 minutos antes de terminar el proceso, corte a cuchillo el chocolate y agreguelo.
4) Coloque la preparación en un recipiente adecuado y lleve al freezer durante al menos 4 horas para que adquiera la consistencia adecuada.
Si no tiene máquina de hacer helados, coloque la crema en el freezer directamente. Retirela transcurridos 3o minutos y bata vigorosamente para quebrar los cristales de hielo (si tiene batidor de mano, mejor). Vuelva a colocarla en el freezer y repita este procedimiento 3 o 4 veces más, cada 30 minutos, hasta que el helado haya adquirido la consistencia deseada y se haya congelado.
What is your favorite ice cream flavor? Do you have ice cream all year long or only in Summer?
Cual es su sabor de helado favorito? Comen helado todo el año o sólo en verano?
by Marcela M. | Jun 25, 2012 | Blog, Cakes, Mousses and ice cream, Recipe Box, Recipes, Sweets, Uncategorized
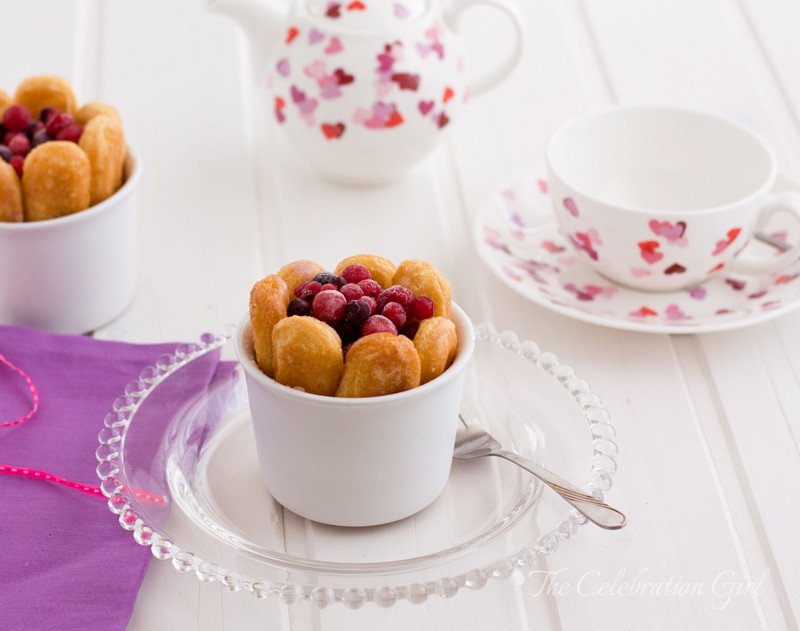
Good morning dear friends! I hope you had a lovely weekend.
Summer arrived in Nicosia all of a sudden and, in a way took me by surprise. We had had a relatively mild Spring until a couple of weeks ago and, as the end of June started to approach, temperatures began to rise and rise and we are now averaging 35 C every day, with peaks of 41C. These are the usual Summer temperatures around here, so we have developed a few strategies for coping with the heat. These involve light clothing, frequent showers, lots of lemonade and -you guessed it- avoiding to turn the oven on as much as possible.
This is why, when Circulo Whole Kitchen proposed to its members to prepare a charlotte for the June challenge, I was thrilled: here was a dessert I had never attempted to make, relatively easy, and that required no baking! Perfect!
Charlotte is a very simple dessert, which knows different variations: the cake mold lining can be made with ladyfingers, swiss roll or sponge cake, and the fillings may include fruit purée, mousses or custard. The recipe I chose to prepare in this occasion (inspired by this one) uses ladyfingers, and is filled with a combination of red fruits mousse ( made with fruit purée, whipped cream and gelatin) and white chocolate mousse (made with melted white chocolate, whipped cream and gelatin). Its preparation takes approximately 15 minutes and needs to be chilled for about 5 hours before serving.
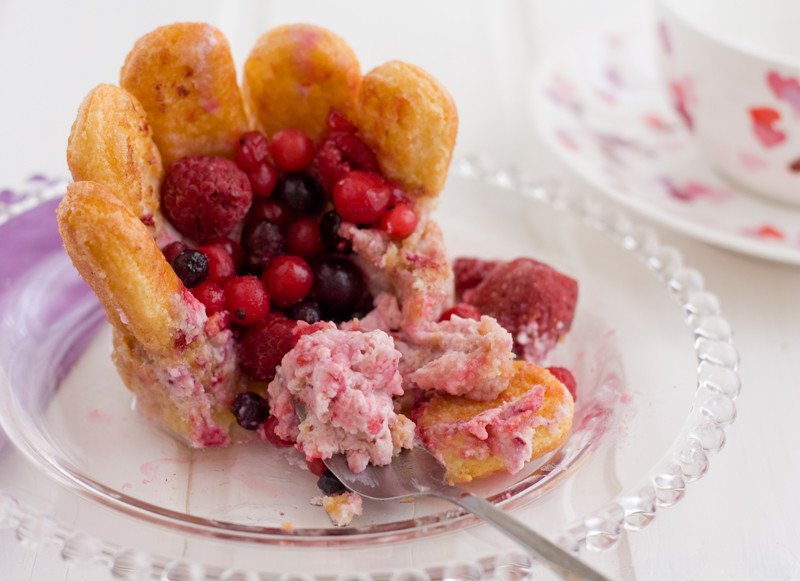
Since this was my first time making it, my charlotte doesn’t look as perfect as I would have liked it to. This is because of two reasons: 1)I over-dipped the cookies in syrup, which made them too soft, and it was therefore difficult for them to keep their shape. 2) I lined the bottom before the sides, so the bottom of the side cookies was too wet and the cookies tended to open when removed from the mold. So now I know better! The next time I will barely dip the cookies and I will make sure that the sides are line first. I hope that with these tips your own charlottes will come out perfect!
Despite these setbacks, I am quite happy with these charlottes because they passed the taste test (which, I believe, is the most important one when it comes to food!). They are a simple, delicious dessert, that looks pretty and is ideal for summer entertaining.
Here is the recipe;
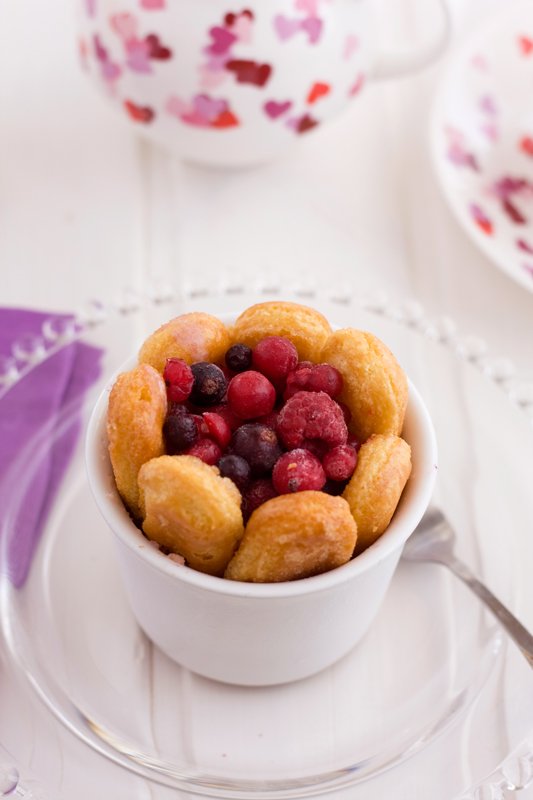
Red fruits and white chocolate charlotte
Ingredients:
– 1 pack of ladyfingers (or enough to completely cover sides and bottom of a 6 inch cake pan or 6 ramequins)
– sugar syrup, made with 100 grs of sugar, covered with water and put to boil for a few minutes. You may flavour the syrup with dessert wine, like oporto or marsala, or even with coffee or orange juice and zest (depending of the flavour of the charlotte itself).
– 150 grs white chocolate, melted and cooled to room temperature
-150 grs red fruits (I used a frozen berry mix, that I defrosted in the refrigerator)
– 1 envelope of unflavoured gelatin
– 100 ml of heavy cream
– 4 tablespoons of icing sugar
Preparation:
1) Prepare the sugar syrup. Slightly dip enough ladyfingers and line a mold of the desired size with them.
2) Dissolve the gelatin in half a cup of warm water. Add 1/4 cup of cold water to cool it down. Divide in half. Set aside.
3) Melt the white chocolate and let it cool.
4) Wash the red fruits (I used a mixture of cranberries, blueberries, raspberries and strawberries) and process them (you may use a blender for this purpose). Pass the resulting purée through a sieve and set aside the pieces that were too big.
5) Whip the heavy cream together with the icing sugar, until firm (“en chantilly”). Divide in two and set aside.
6) Mix the red fruits pulp with half the whipped cream, with circular movements. Add half the gelatin and mix it in, slowly. Set aside.
7) Mix the melted and cooled white chocolate with the remaining half whippedcream. Add the gelatin and mix it in, slowly. Set aside
8) At this point you will have two mousses, and you can do two things: 1) Fill the lined pan with the red fruits mousse, let it cool for a few minutes in the refrigerator, add a layer of ladyfingers and then add the white chocolate mousse, or 2) Fill the lined pan with the red fruits mousse and, then, add the white chocolate mousse in the middle and draw designs with a skewer to marble it.
9) Leave in the refrigerator for 4 to 5 hours, unmold and serve with red fruits on top ( don’t worry, it comes out of the pan easily!)
Con sabor latino
Buenos días queridos amigos! Espero que hayan pasado un hermoso fin de semana!
El verano llegó a Nicosia de repente y me tomó por sorpresa. Hasta ahora veníamos teniendo una primavera con temperaturas moderadas pero,a medida que junio comenzó a llegar a su fin, éstas comenzaron a ir en aumento y ahora estamos con un promedio de 35C diarios, con picos de 41C. Estas son temperaturas comunes durante el verano chipriota, asi que a estas alturas ya hemos desarrollado algunas estrategias para hacer frente a tremendo calor, que incluyen ropa liviana, ducharnos varias veces por día y-como se imaginarán- evitar a toda costa encender el horno.
Por este motivo, me alegré cuando ví que Circulo Whole Kitchen proponía como receta dulce para el mes de junio una charlotte, postre que nunca había preparado antes, relativamente sencillo y que no requería cocción! Perfecto!
La Charlotte es un postre sencillo, del cual existen muchas variantes, que van desde el tipo de galletas con el que se cubre el molde en el que se lo realiza (vainillas, pionono, o torta esponjosa), hasta el relleno (que puede consistir en puré de frutas, mousses diversas o crema. La receta que yo elegí en esta ocasión (inspirada en esta) utiliza vainillas y un relleno compuesto de dos mousses: una de frutos rojos (yo utilicé arandanos, frambuesas, grosellas y frutillas, procesados, y mezclados con crema chantilly y gelatina sin sabor) y otra de chocolate blanco (hecha a base de chocolate derretido, crema chantilly y gelatina sin sabor, para darle consistencia). La preparación lleva tan sólo 15 minutos, pero requiere reposo en la heladera/refrigerador por aproximadamente 5 horas.
Como ésta era mi primera vez haciendo este postre, mis charlottes no lucen todo lo perfectas que me hubiera gustado. Esto se debe a dos motivos: 1) Exageré al remojar las vainillas en almibar y quedaron demasiado blandas, lo que complicó que mantuvieran la forma y 2) Recubrí con vainillas el fondo del molde, antes que los lados, entonces las vainillas que se encontraban a los lados se humedecieron demasiado con las mousses en la parte de abajo y tendieron a abrirse al desmoldarlas. Lo bueno es que ya aprendí que para la próxima tengo que mojar apenas las galletas y poner primero las galletitas de los costados. Espero que estos datos les sirvan a ustedes para poder alcanzar la perfección de entrada!
Igualmente, a pesar de estos errores, estoy muy conforme con el resultado de este postre porque de gusto estaban riquísimas (y, en definitiva, eso es lo que importa cuando se trata de comida, verdad?) Ademas son sencillas, deliciosas y lucen bonitas y son ideales para eventos de verano.
Así que sin más, esta es la receta. Espero que les guste!10
Charlotte de chocolate blanco y frutos rojos
Ingredientes:
-1 paquete de vainillas (o las que sean suficientes para recubrir el o los moldes que vayan a usar. El relleno es suficiente para un molde de 15. 4 cms, o 6 ramequins)
– almibar, hecho con 100 grs de azucar, recubierta con agua y llevada a fuego por unos minutos (que no se pase, que no quieres hacer caramelo!)
– 150 grs de chocolate blanco derretido y enfriado (tiene que estar a temperatura ambiente)
– 150 grs de frutos rojos
– 1 sobre de gelatina sin sabor
– 100 cm3 de crema de leche
– 4 cucharadas de azucar impalpable
Preparación:
1) Prepare el almibar. Coloque el azucar en un jarro, recubra con agua y lleve a fuego por unos minutos, hasta que la mezcla espese ligeramente. Remoje las vainillas en el almibar y recubra con las mismas el molde a utilizar.
2) Derrita el chocolate a baño maría (o en el microondas, si tiene uno). Deje enfriar hasta que quede a temperatura ambiente.
3) Procese los frutos rojos en la procesadora o licuadora. Pase el puré por un tamiz hasta obtener la pulpa.
4) Bata la crema de leche a punto chantilly con el azucar impalplable. Divida en dos partes iguales y reserve.
5) Disuelva la gelatina sin sabor en media taza de agua caliente. Agregue 1/4 taza de agua fria para bajar la temperatura. Divida en dos y reserve.
6) Mezcle la pulpa de frutos rojos con la mitad de la crema chantilly y, una vez bien incorporado, agregue la mitad de la gelatina sin sabor. Reserve
7) Mezcle el chocolate blanco con la mitad de chantilly restante, e incorpore luego la gelatina sin sabor que había reservado.
8) Rellene el/los moldes con mousse de frutos rojos. A continuación, tiene dos opciones; 1) Colocar el molde en la heladera unos minutos (hasta que tome un poco de consistencia) y a continuacion, agregar una capa de vainillas y luego la mousse de chocolate blanco o 2) Una vez rellenado el molde con la mousse de frutos rojos, agregar la mousse de chocolate blanco inmediatamente en el centro y luego hacer dibujos con un palito de brochette, para marmolarla.
9) Coloque el/los moldes en la heladera/refrigerador por 4 a 5 horas. Desmolde y sirva con frutos rojos (no se preocupe, se desmolda super facilmente!)
I hope you’ll like it!
See you later this week!
by Marcela M. | Aug 3, 2011 | Blog, Mousses and ice cream, Recipe Box, Recipes, Sweets, Uncategorized
Happy Wednesday everyone! How are you today? How is this week going, so far? I hope you are all enjoying the warmth of Summer or the chilly days of winter, wherever you may be.
I had originally planned to bring you the recipes for the rest of the salads and dips that we had for our simple summer lunch, last week, but I received so many requests for the Lemon Coconut Mousse one that I decided to leave the salads for the next post. I guess my readers have a sweet tooth! 😉
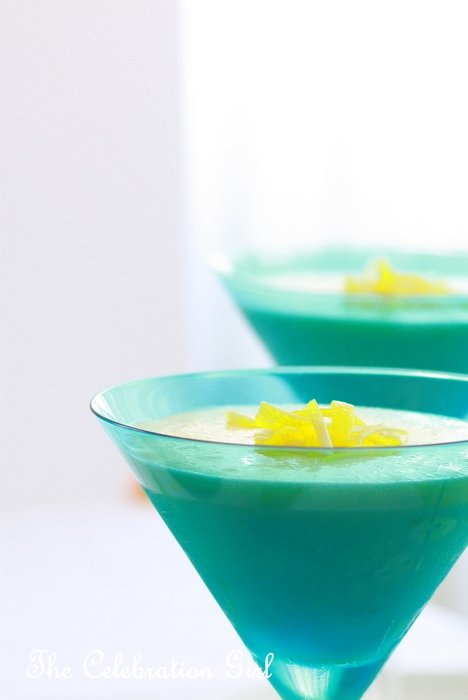
This Lemon Coconut mousse was adapted from a recipe by Ina Garten and it’s easy to do even though it does take some time. Basically, I make my own lemon curd (with a recipe I had completely forgotten I had and I rediscovered when going through an old recipe notebook!) and I replace the sweetened whipped cream of her original recipe, by coconut cream (I find that the mousse is already sweet enough, and I like the addition of the subtle coconut flavor). I also doubled the amount of lemon zest because I like it very lemony.
In order to make this mousse you will need:
Ingredients:
For the Lemon Curd (serves two and half cups):
1 egg
2 egg yolks
zest and juice of 2 lemons
40 grs of butter
150 grs of sugar
2 tablespoons of cornstarch
250 ml of water
For the Lemon Custard:
3 XL whole eggs
3 XL egg yolks
1 cup of sugar
1/2 cup of lemon juice
4 teaspoons of lemon zest
a dash of salt
Additionally, to turn the custard into mousse:
3 egg whites, whipped into a firm meringue together with 2 tablespoons of sugar
1 cup coconut cream.
You can find coconut cream in the Asian food aisle of your supermarket, or you can simply put a can of unopened coconut milk in the fridge overnight. When you open the can, cream will have formed on top. Scoop it and add it to the rest of the preparation, it’s that easy!
1) The first thing to do when making this mousse is to prepare the Lemon Curd. I like to do this the day before, to make my life easier, but you can also do everything on the same day.
In order to make the lemon curd, put all ingredients in a pan and cook until it thickens, stirring constantly so that the cream doesn’t burn/sticks to the bottom of the pan. It will take about 6/7 minutes. Let it cool for about 15 minutes and then let it rest on the fridge.
2) The second step is to make the Lemon Custard. I know the original recipe says that the whole recipe takes a total 15 minutes preparation but, in my experience it takes double as much time just to get the custard ready. But from then on, it’s only a few extra minutes!
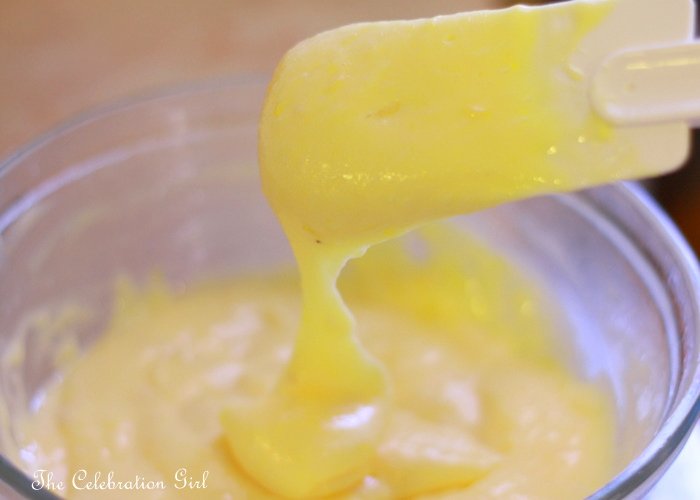
In order to make the custard, put all ingredients in a heat-proof bowl and put this one on top of a pan with simmering water. Let it cook, beating constantly with a whisk. After about 10 minutes it will start to thicken. Continue beating until it reaches pudding consistency (Argentinian friends: tiene que tener la textura de un postrecito). When it does, take the bowl off the heat and let it cool for about 15 minutes. Then, cover with plastic wrap and put in the fridge for 1-2 hours. When I make this mousse for a special occasion, I generally prepare both the Lemon Curd and the Lemon Custard the day before and let them sit in the fridge overnight.
After taking the custard out of the fridge it should look like this:
3) When the custard is ready, whip the egg whites until firm. Add the two tablespoons of sugar, one at a time, and continue beating until the meringue becomes glossy and firm.
4) Fold the egg whites carefully into the lemon custard with a spatula.
5) Add the coconut cream, making sure it incorporates evenly into the preparation.
6) Add 1 cup of Lemon Curd. Incorporate.
7) Put the Lemon Mousse in the fridge and chill for several hours. Serve and enjoy!
If you like lemony desserts, I am sure you will love this mousse: it is sweet and it has a wonderful, luscious texture.
In order to decorate it, I used just a few thin slices of lemon zest.

Would you like to have some?
I wish you a wonderful rest of the week and weekend. See you in a few days with a new post!


