by Marcela M. | Jun 3, 2013 | Cakes, Recipe Box, Recipes, Sweets

Last Wednesday, May 29th, was my 37th birthday and the blog’s second and we celebrated both with nugaton.
Nugaton is, for those who know me from my days in Argentina, my most iconic dessert. This is the one dessert that was never missing in our birthdays and the only cake my brother still wants for his. Nugaton is the dessert I am always asked to prepare when I’m invited to a party back home, and the one that my friends most looked forward to eating whenever I entertained.
It is not, however, a family recipe. Truth be told, the original recipe appeared in a box of Quaker Oats in Argentina, in the ’70s. It quickly popularized because it was ideal for making in a whim, and kids loved it. The original recipe, however, has been modified countless times, as it normally happens in family kitchens, where ingredients and proportions are altered depending on what the person cooking has on hand, or to each family’s taste.
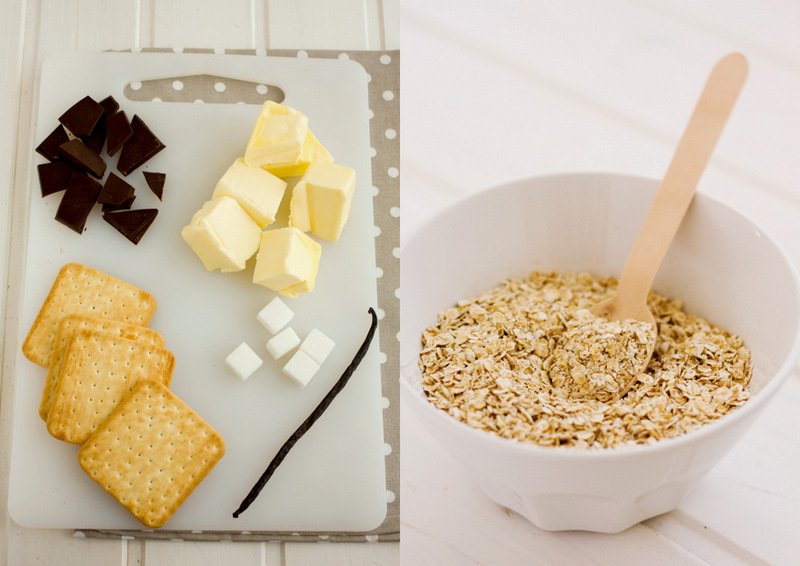
The beauty of Nugaton is not only that it is very simple to make, doesn’t require an oven and can be shaped in any way one wants, but also that the ingredients are few and, generally speaking, easy to find. Because of this, I have been able to make it pretty much everywhere I have lived. Those who know me from Córdoba, New York, Québec, Fuerteventura, Belgrade, Daoukro and Abidjan have all had a taste of this childhood classic and have all loved it.
Now it’s your turn to do it and to let me know how you like it!
The most important part of making nugaton is to get the chocolate oat paste right. For many years, I was unable to get consistent results because, ahem, I had never measured the ingredients (you can see the original page of my recipe notebook HERE and laugh at the lack of precision). I knew how nugaton was supposed to turn out and I just kept adding this and that, and maybe a little more of that other thing until I reached the desired result. This was fine for me, but it made it impossible to share the recipe with anyone else, as you can imagine!
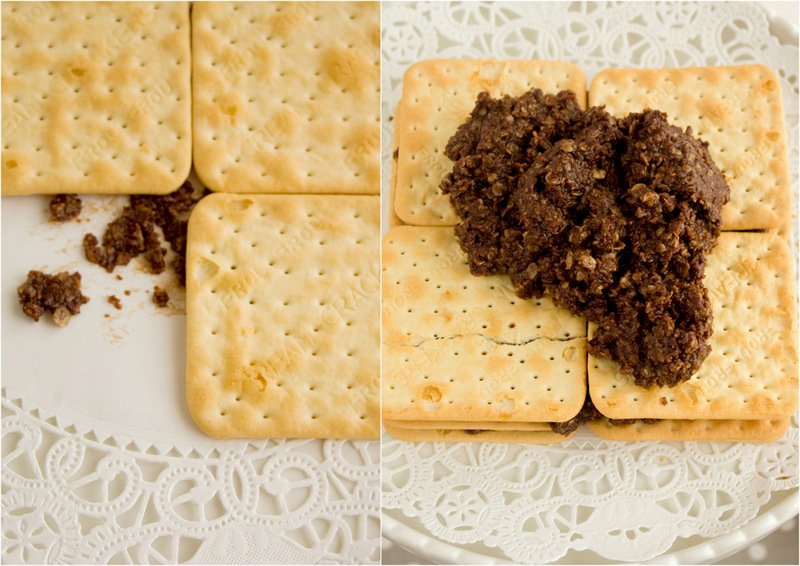
This time, because I was going to share the recipe with you, I wanted it to be precised, so I measured everything and I am confident that you will be able to enjoy a delicious home made nugaton, that will look and taste the same as mine does- or even better!
Now, just one important recommendation before I leave you with the recipe: try to use ingredients that are the best quality possible. When a recipe uses very few ingredients, as in this case, each of them affects the final taste, so the better the quality, the better the results. And even though I don’t normally make specific brand recommendations, in this case I will because, in my experience, it makes a difference. So there it goes: use Quaker oats when making it. Trust me on this one!
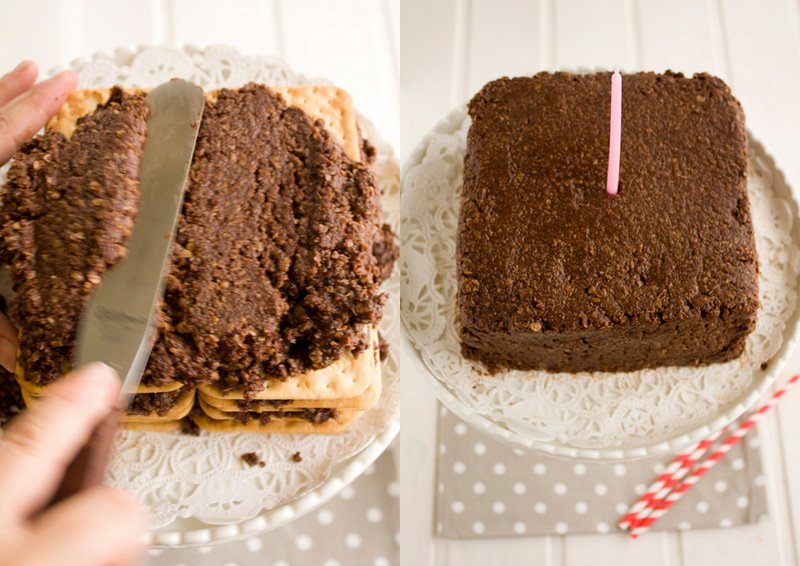
You will notice that, in this recipe, I use 70% chocolate and may wonder if it can be made with cocoa, and the answer is yes, it can. In fact, my mum makes it cocoa most of the time, and I will give you the quantities for it too. You can also use half chocolate and half cocoa. And even though the original recipe uses butter, if you, like me, cannot eat dairy, it can be replaced by dairy-free margarine. The same goes for milk: the original recipe calls for cow’s milk, but I normally replace by oat, almond or hazelnut ones that go really great with this dessert.
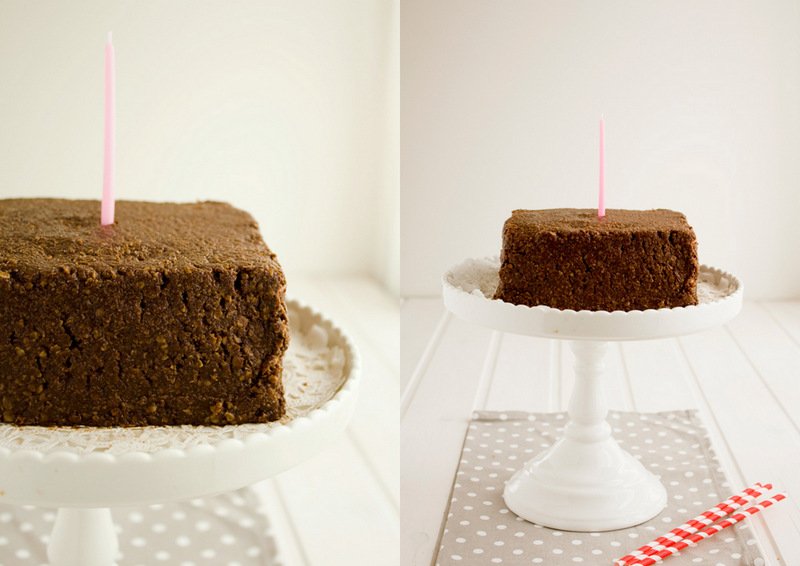
Here is the recipe:
Nugaton
Ingredients: 300 grs butter or dairy-free margarine , 350 grs dark chocolate (70%) or 100 grs dark chocolate + 3/4 cup cocoa, 1 teaspoon vanilla extract, 350 grs sugar, 500 grs oats, 200 ml milk (I use oat, almond or hazelnut milk), two packs of cream crackers.
Preparation:
1) Melt butter/margarine and chocolate together in a saucepan
2) Put the oats and sugar in a big saucepan and mix well.
3) Pour the margarine/chocolate sauce over the oats and mix well. At this time, you will notice that it feels like the sauce is not enough to coat the oats. Don’t worry, keep mixing.
4) Bring the mixture to slow heat and continue stirring all the time. Add milk in small doses, mixing very well after each addition. After a few minutes, you will notice that the oats start to cook,and the paste becomes easier to work with. When this happens, mix one more time, remove from the heat and continue stirring for a couple of minutes.
5) Put a little bit of paste at the base of the plate where you will present your nugaton, so that the crackers stay in place. Add one layer of crackers and then put a couple of tablespoons of nugaton paste on top. Spread the paste well all over the top, using a spatula.
6) Continue layering crackers and paste until you have approximately 6 tablespoons of paste left. When this happens, put the last layer of crackers and then pour all the remaining paste on top. Working with a spatula, spread and smooth the paste all along the top and sides of the cake, as you would with any frosting. Decorate as desired and put it in the refrigerator until one hour before serving.
What is your most iconic dessert, the one that people always ask you to do over and over again?
Please, share with me in the comments below!
by Marcela M. | May 13, 2013 | Cakes, Recipe Box, Recipes, Sweets, Vegan & Raw
Good morning dear friends!
We are still in Belgrade, enjoying the beautiful Spring days with our family and taking daily strolls with Luka and Zoe around the city.
Everything has been very quiet around here these past days because of the extended holiday of Labor Day and the Orthodox Easter, so the city, which is normally booming with energy, has had a lovely calm, leisure-like feeling, pretty much like the one you get on a vacation resort by sea. Really, really nice and relaxing 🙂
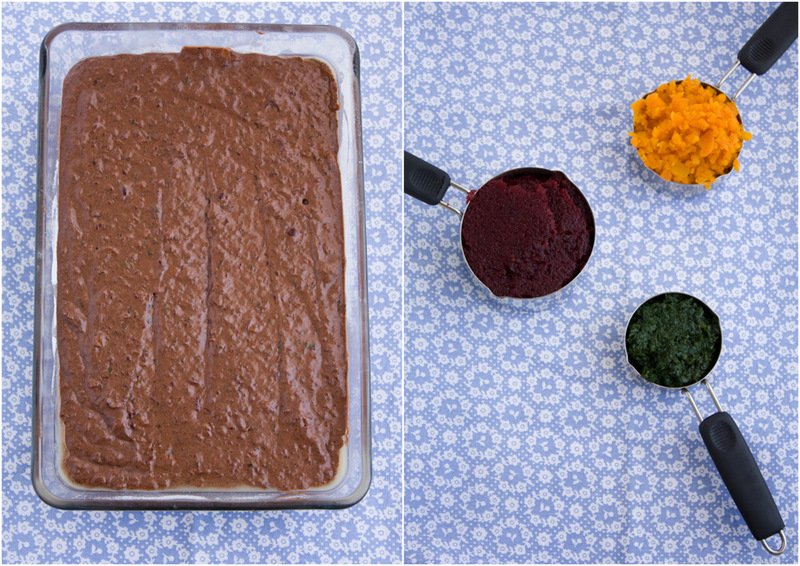
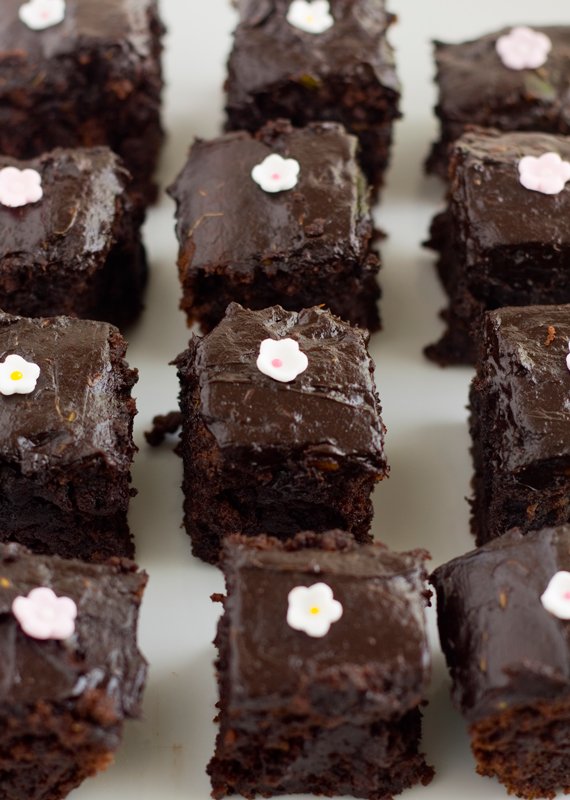
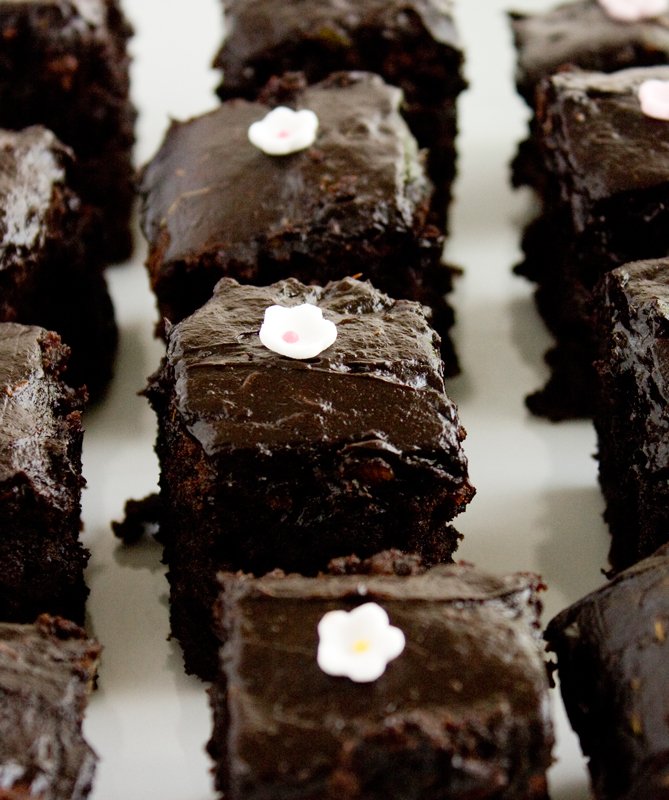
Today’s post, however, is not about Belgrade. It is a recipe I came up with in my quest to get my children to eat vegetables! I had seen online and read about different cakes and brownies made with veggies inside, but all the recipes I could find used dairy which, as you know, is an ingredient that Luka and I shouldn’t eat. So I decided to experiment a bit, and, after a few trials, I came up with this recipe. To make it even yummier, I also made a frosting that, instead of butter and tons of sugar, uses avocado and honey. And the best part? It tastes delicious!
I like to make this cake in a sheet cake or brownie pan because it’s ideal for cutting into small bites. One word of caution, though: The addition of the veggies makes this cake EXTREMELY moist, so make sure that it’s cold when you cut it. It is actually a good idea to put it in the fridge for 20 minutes before doing so, and to use a sharp knife dipped in hot water to do so.
And don’t worry: this cake does not taste like salad! If you let it cool down appropriately, you won’t be able to tell there are veggies inside. I advise you, though, to make it with your children because I think it is a good idea for them to get used to the idea that vegetables can be part of the food they like. The more they get used to you making vegetables a part of their diet, the more normal they will seem to them and, hopefully, they will be willing to try them in other ways as well.
Here is the recipe:
Chocolate sheet cake and frosting, with hidden veggies (dairy free, egg free)
Ingredients: 100 grs dark chocolate (70%), 1 cup vegetable milk, 1 teaspoon apple cider vinegar, 1/3 cup oil, 1 cup sugar, 2 teaspoons vanilla extract, 1 cup beet puree, 1/2 cup carrot puree, 1/4 cup spinach puree, 1 1/2 cups flour, 1/2 cup cocoa, 3/4 teaspoon baking soda, 1/2 teaspoon baking powder, 1/4 teaspoon salt. For the frosting: 1 avocado, 1/2 cup honey (or agave), 2 tablespoons cocoa
Preparation:
1) Put the chocolate in a bowl, then place the bowl over a pot of boiling water and let it melt. Once it has melted, set aside and let it cool.
2) Put the milk in a bowl and add the vinegar. Wait a few minutes, until it curdles.
3) Add oil, sugar and vanilla and beat until incorporated.
4) Sift flour, cocoa, salt, baking powder and baking soda.
5) Add 1/2 the flour mixture to the liquid ingredients and mix well.
6) Add the vegetables to the batter. Mix well.
7) Add the rest of the flour. Mix well to incorporate fully.
8) Add the melted chocolate and mix very well for a few minutes.
9) Grease a pan and dust it with cocoa. Pour the batter in it, tap it against the counter to divide it evenly and remove any air bubbles, and place it in the oven, pre heat at 175 degrees celsius, for about 1 hour, or until a knife stuck in the middle comes out clean.
10)Once fully cooked, remove the cake from the oven and let it cool.
11) Make the frosting: Peel the avocado, remove the flesh and mash it with a fork. Add honey and cocoa and beat until light and fluffy. You may use an electric mixer if you have one.
12) Once the cake has cooled down, add the frosting on top. Place it in the refrigerator for 20 minutes, cut into small square bites and enjoy!
Do you hide vegetables in desserts? Which is your favorite recipe? Please share in the comments!
by Marcela M. | Feb 14, 2013 | Blog, Cakes, Gluten Free, Holidays, Recipe Box, Recipes, Sweets, Valentine's day, Vegan & Raw
Good morning dear friends! Happy Valentine’s day!
Do you celebrate this holiday or it is not a tradition where you live? As an Argentinian, I didn’t grow up with Valentine’s day and learn’t about it from movies and American TV shows. It was only in the late ’90s that it became more common to celebrate it, but that was only for those who had someone to celebrate it with and, until I met my husband, many years after that and in a different country, I didn’t. Most years, I would get together with my best friend (also single at the time) , cook together and watch movies that had nothing to do with romance, like the Lord of the Rings trilogy-extended edition. It was awesome. Rom-Coms could be watched any other day. We were not against the holiday, we were not a Valentine’s Grinch, we just felt that it was not for us. Like “
The day of the secretary” is not for you unless you are a secretary and you don’t expect your life to be different just because someone else is celebrating, I didn’t expect anything from Valentine’s day. But since everything seemed to be taken over by teddy bears and pink hearts, we made it ours by creating our own traditions.
The first Valentine’s day after I met my husband, which happened 3 weeks after we got married, we spent it apart. We were living in Ivory Coast at the moment, and had left to get married in Italy during our vacation time. But the day after we left there were riots that led to the evacuation of all non-essential staff of the organization where we worked and we got married on the day when our colleagues were being transported to Gambia. Then the call came: My husband had to go back, he was essential staff. I was not, so I had to stay behind. Argentina was too far away so, a mere two weeks after the wedding, we traveled to Belgrade (where my husband’s family lives) and I stayed with them for 3 weeks. My husband’s ethnic group has a tradition (no longer being followed anymore, from what I’m told) of bringing the bride back to her family a few weeks after the wedding, to give her the opportunity to change her mind, so we used to joke that he didn’t want to risk it, so he was leaving me with his family instead 😉
So Valentine’s day went by, uncelebrated, and maybe because of that, we never made a big deal about it. But we always have some treat, even if it’s just a block of dark chocolate, to mark the day, just because we take every opportunity to celebrate all that is good in our life.
Today’s recipe is the one I prepared for my monthly contribution to Petit-On. The ingredient selected for February was cheese, which presented a problem for me, so I checked with Raquel to see if I could use substitutions, and she encouraged me to write this recipe.
If you are reading these words and have been reading this blog for a while, you are probably wondering why is cheese a problem for me. I have, after all, a recipe for the best cheesecake ever, which is also one of the most visited blog posts. The reason is that I can’t eat dairy without feeling pain in my breasts due to a condition called cystic fibrosis. We discovered it two years ago when I ran in panic to the doctor after finding a lump the size of a marble in my right breast. The doctor ordered a breast ultrasound and we found out that I have cysts in my breasts, which are not dangerous but fill with liquid during ovulation, which causes pain. Milk makes the pain bad, but cheese, cream and yogurt make it unbearable and, when I do eat them, I know it’s at my own risk and regret it later. Since then 95% of my diet is vegan (I didn’t eat meat or eggs from before discovering this condition) and I have been working on finding substitutions for my favorite treats (You may have noticed that I normally list ” butter or margarine”in the ingredients, and that is because I used to make it with butter but now use vegan margarine and know it can be done). Now let’s be honest: vegan cheese is not brie or camembert, but when the choice is feeling enormous pain and freaking out when doing my breast exam, vegan cheese does the trick.

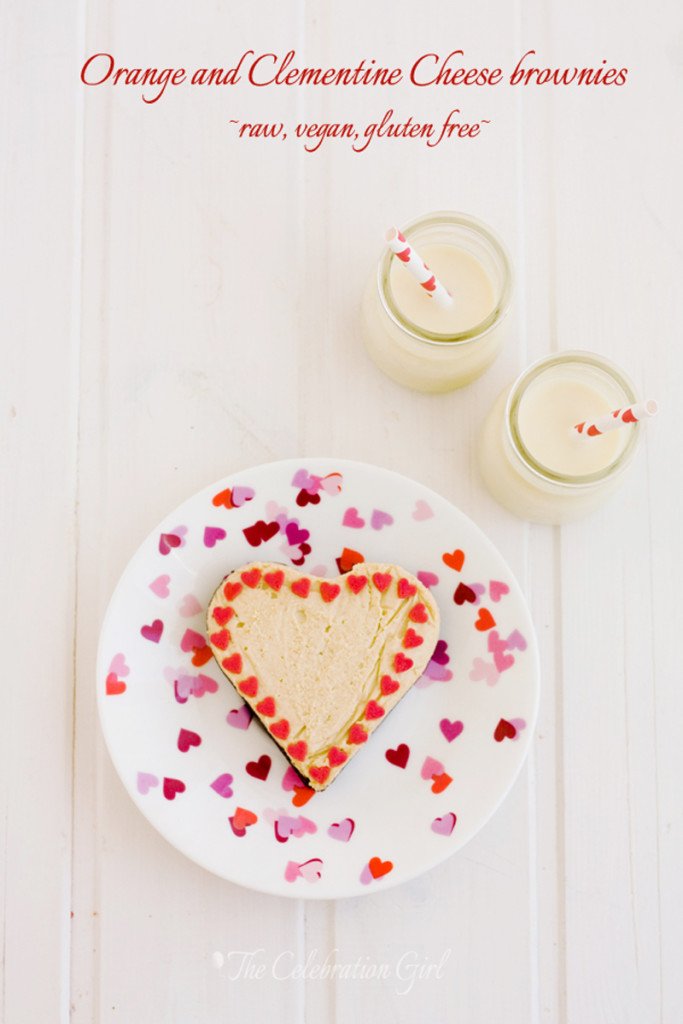
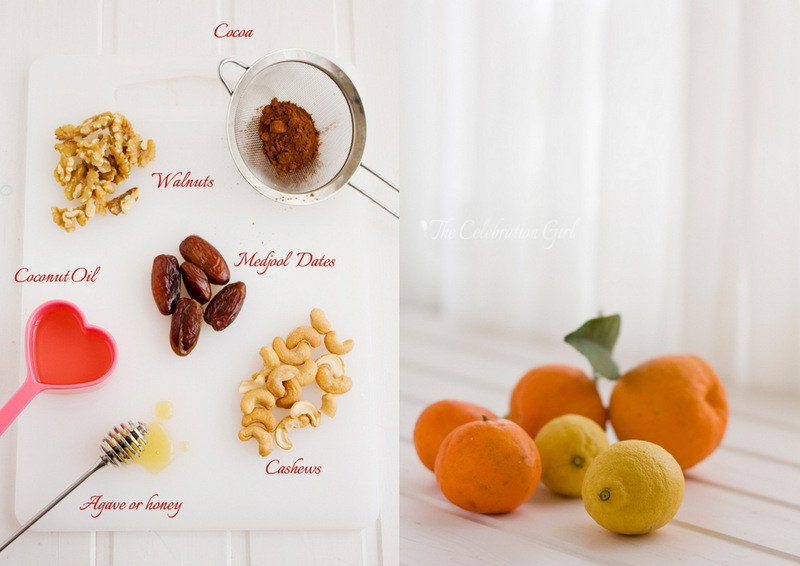
This recipe was created by adapting and modifying two recipes from Sara Britton, of the blog My New Roots. I had been wanting to try them for a while and found this to be the perfect opportunity to do so. And I love the result! It is called cheese brownie, because it has a raw brownie base,made only with walnuts, cocoa, dates and cocoa nibs for added crispiness. As Sara advises, Medjool dates are better because they are sweeter, but if you cannot find them or they are too expensive, simply add more quantity. Also, if you can, use good quality cocoa because it does make a difference.
The cream cheese filling is made with cashews, that were soaked overnight, agave nectar (or honey, if you are not vegan), coconut oil (which hardens at room temperature, so you will need to submerge the closed bottle in warm water for 10 minutes before using it), lemon juice (to give it the slightly bitter, characteristic “cheese”flavor) and orange and clementine juice and zest. I chose these flavors instead of the more traditional vanilla/fruits of the forest because citrus are in season and the trees that line my street are ripe with fruits. They also combine beautifully with the depth of dark chocolate.
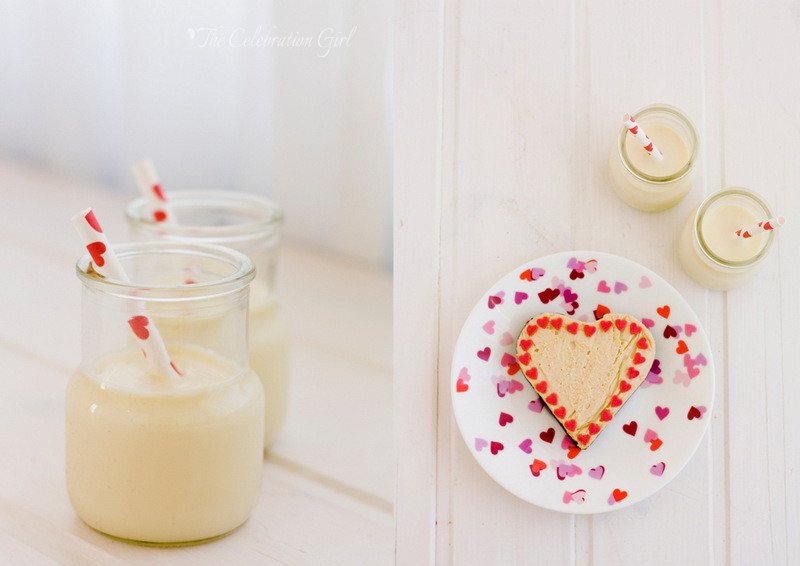
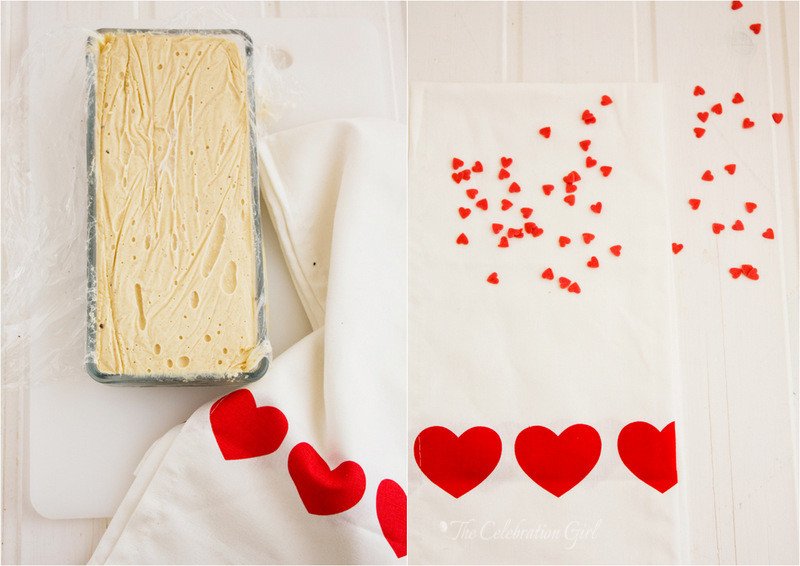
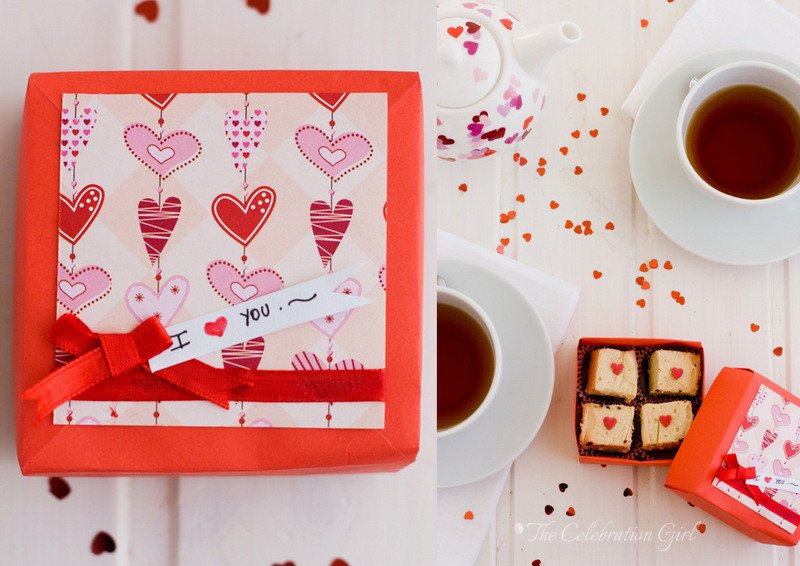
As you will see, the recipe is very, very easy and it only requires a food processor or blender to do all the work. Furthermore, because of its characteristics, it is very versatile, and can be shaped in any form you like and even cut using a cookie cutter. I made little hearts using small heart shaped pans for my children, and a bigger, rectangular one, which I then cut in small squares to eat as “cheese brownie bites”. Since today is Valentine’s day, I placed a few bites in a home made origami box lined with mini cupcake cases, to give as a small present. Do you like them?
Here is the recipe:
Orange and Clementine Cheese brownies (adapted and modified from My New Roots)
Ingredients:
For the crust: 1 cup walnuts, 1 1/2 cup dates (Medjool are best), unpitted and soaked in warm water for 10 minutes, 1/2 cup cocoa powder, 2 teaspoons cocoa nibs
For the filling: 2 1/2 cups raw cashews, soaked overnight, 2/3 cup coconut oil, 2/3 cup agave or honey, 1/2 cup lemon juice, 1/2 cup orange juice, juice of 1 clementine, zest of 1 orange and 1 clementine. NOTE: If you like sweeter desserts, reduce lemon juice to 1/3 cup and replace by orange juice.
Preparation:
1. Cover the pan you will use with foil, making sure to leave plenty at the sides. This will help you unmold the cake without needing to invert it (just pull the excess foil and lift, carefully, and it will come up.
2. Place walnuts in the bowl of the food processor and process until they turn into powder. Add cocoa and process 30 seconds to integrate (or pulse). Turn the processor on and start adding the dates, one at a time, until getting a sand-like dough that compacts when pressed between your fingers.
3. Pour the dough in the pan, extend it evenly and press with your fingers to shape it. Set aside.
4. Wash and dry the Food processor’s bowl and fill it with all the ingredients necessary for the filling. Just dump them all at once. Turn the food processor on, and let it work until the ingredients morph into a smooth cream. How smooth the filling will be depends greatly on how powerful is your food processor, so I joke that if it becomes very smooth, I made a vegan philly cheesecake and, if it’s a bit crumbly, I made a ricotta cake instead 😉
5. Pour the filling over the crust and smooth using a spatula.
6. Wrap the cake in the excess foil and place it in the fridge for at least 6 hours.
7. Take out of the freezer 30 minutes before serving. Cut with a warm sharp knife while still cold.
Amigos hispanoparlantes: La receta en castellano está en Petit-On! Pueden verla haciendo click AQUI.
by Marcela M. | Dec 24, 2012 | Blog, Cakes, Christmas and NYE, Holidays, Recipe Box, Sweets
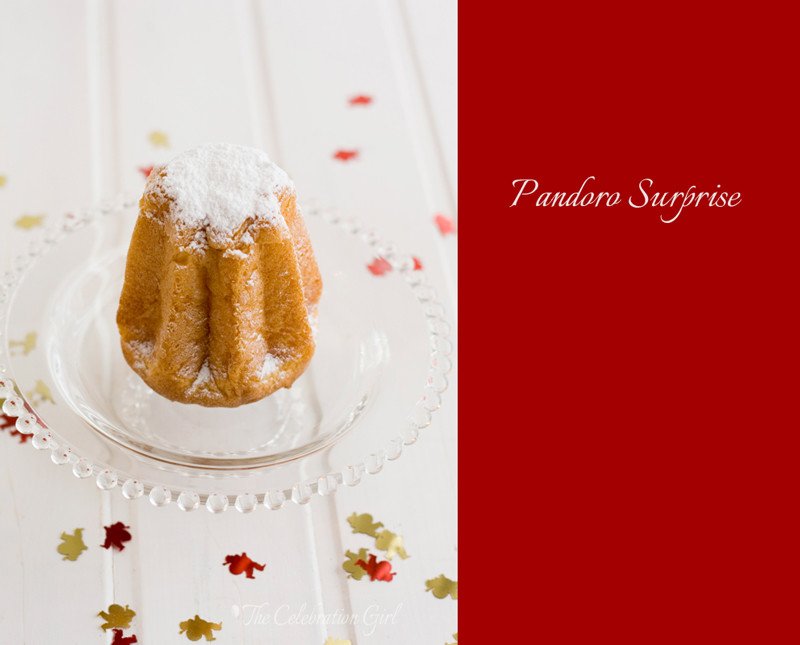
Good morning dear friends! Today is Christmas’ eve and this is the last post of the 2012 advent calendar! I can imagine that, by now, all presents are wrapped, all menus are more or less figured out, and you must already have an idea of how you want to set up your Christmas table, am I right? Or maybe not?
In case you need a last minute idea, here is one of my favorites, a twist on the traditional Pandoro/Panettone/Pan dulce, that we normally eat after the toast, back home in Argentina. And because it is a last minute idea, it requires no baking, no effort at all, and it requires only two store-bought items: pandoro/panettone/pan dulce and ice cream.
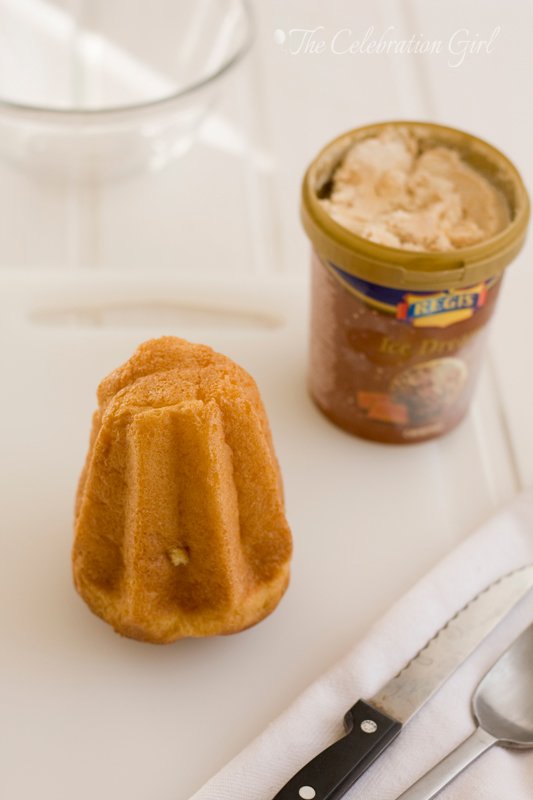
1) Begin by cutting the top of the Pandoro, and carving a hole with a serrated knife, as in the picture below.
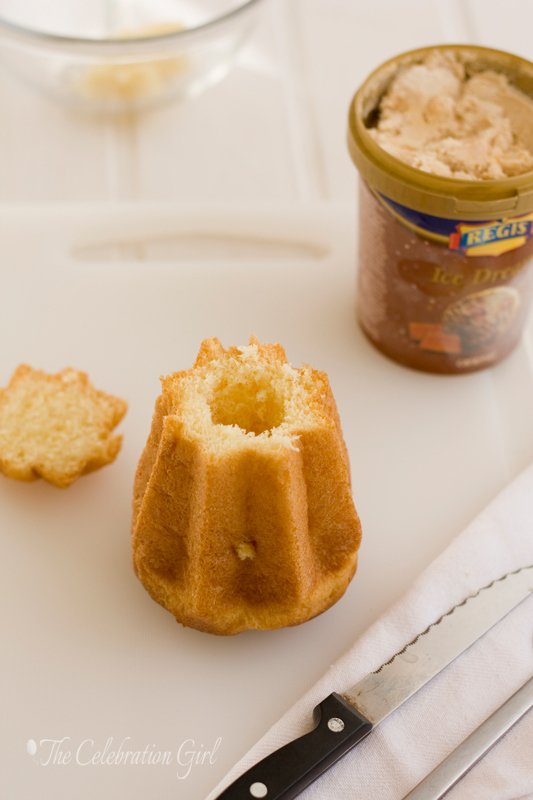
2) Using a spoon, fill the hole with the ice cream of your choice. In this occasion, I used caramel but my favorite is actually stracciatella, or plain vanilla if you are using pan dulce instead of pandoro. It is better to let the ice cream sit at room temperature for 15 minutes before using it, so that it’s softer and easier to work with. But if you are in a rush, simply mix it with a spoon until it reaches the right consistency.

3) Place the” cap” of the pandoro back on top, wrap in foil and put the pandoro in the freezer for 2 to 3 hours.
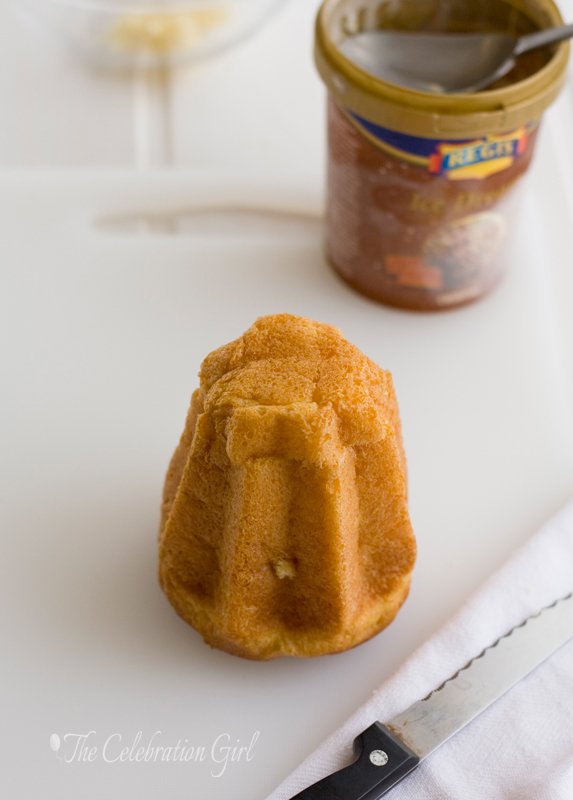
4) For serving, you have two options: serve it as you would serve an ice cream cake, straight out of the freezer, dusting it with icing sugar or pouring chocolate sauce on top, or as a chaud-froid, by placing the pandoro a few seconds in the microwave to heat the exterior without melting the interior, then adding hot chocolate sauce on top. If you don’t have a microwave, you can heat the oven, turn it off and place the pandoro inside for 5 minutes maximum. This will make the exterior slightly warm, without completely melting the ice cream inside.
May your celebrations be merry and bright, and may your heart be full of love, today and always!
Have a lovely Christmas, dear friends!

Con sabor latino…
Buenos días queridos amigos! Hoy es nochebuena, y este es el último post de este calendario de adviento virtual 2012. Imagino que, para este momento, todos los regalos estaran ya envueltos, el menú delineado, y ya tendrán una idea de cómo quieren poner la mesa para la cena de navidad…o quizas no?
Por si acaso lo necesitan, aquí les dejo una idea de último minuto que me encanta, una vuelta de tuerca al tradicional Pandoro/Pan dulce/ Panettone con el que solemos brindar, en Argentina, cuando suenan las 12 campanadas anunciando que ya es Navidad. Como es una idea de último minuto, no requiere horneado, ni decoración, ni esfuerzo, sólo dos ingredientes comprados: el panettone/pandoro/pan dulce y helado.
1) Comiencen por cortar la tapa del pandoro y ahuequenlo con un cuchillo serrucho.
2) Con una cuchara, coloquen helado en el hueco. Yo usé helado de caramelo en esta ocasión, pero mi preferido es el de crema granizada para el pandoro, y uno de buena vainilla para el pan dulce. Tengan en cuenta que es mejor que el helado no esté demasiado duro, asi que saquenlo de la heladera 15 minutos antes de usar, o bien revuelvanlo unos minutos con una cuchara hasta que se ablande.
3) Coloquen la tapa nuevamente en su lugar, cubran en papel film y lleven al freezer por al menos dos a tres horas
4) Para servir, hay dos opciones igualmente ricas: presentarlo como una torta helada, o sea ni bien sacado del freezer, espolvoreado con azucar impalplable o acompañado de salsa de chocolate ; o bien como un chaud froid, colocandolo un par de segundos en el microondas para que el exterior se caliente apenas, sin derretir el helado, y acompañarlo de salsa de chocolate caliente. Si no tienen microondas (como yo), calienten el horno y, cuando tenga temperatura, apaguenlo y coloquen el pandoro dentro por un máximo de 5 minutos. Recuerden que no queremos que el helado se derrita, sólo calentar apenas el exterior, para generar una textura y sensación diferentes al probarlo.
Espero que sus celebración sean maravillosas y muy felices, y que sus corazones estén llenos de amor, hoy y siempre!
Que tengan una muy feliz navidad, queridos amigos!
by Marcela M. | Dec 18, 2012 | Blog, Cakes, Christmas and NYE, Holidays, Recipe Box, Recipes, Sweets

Good morning dear friends! It’s day 18 of the advent and here I bring you another edible gift idea: a cake mix for a delicious mocha chocolate chip cake – with recipe included, of course.
This recipe is not my own. It appeared on Hallmark magazine in January 2008, a beautiful publication that, unfortunately, doesn’t exist anymore. I was living in Ivory Coast at the time, working in peacekeeping and was subscribed to the magazine, that I received by post on a bi-monthly basis and this was the last number I received before moving to Cyprus. It was like a breath of fresh air, full of lovely ideas, crafts and delicious recipes.
It was in its pages that I saw this cake for the first time, as well as the way to layer it for a present, which I have adapted below. The article included other recipes as well, but I haven’t tried them yet. I promise to share them with you as soon as I do!
The great thing about this gift is that it takes out all stress from making a cake from scratch. People who hate baking generally hate the precision it requires, the measuring, sifting, scooping…by doing all that work for them, we take away all difficulty. The person who receives this mix only has to add a few ingredients and follow a few simple steps (the same that are required when making a box cake) and in a less than an hour they will have a delicious, preservatives-free cake with fresh ingredients ready to be eaten.
You could also prepare this cake mix for yourself, without the fancy label and packaging, and keep it ready for those times when you want a home baked cake but you don’t feel like going through all the trouble. It is also a great option when travelling for a short time, to the mountains or to the beach, when we don’t feel like bringing all our baking equipment with us. We can just pre-measure all dry ingredients at home, toss them in a Ziploc bag or any other container, and finish baking at our destination. Another advantage? The mix lasts for 6 months!

Here is the recipe and the instructions for layering it as in the pictures
Mocha chip cake (adapted from Hallmark Magazine of January 2008)
Ingredients: (for making the cake at home): 2 cups sifted cake flour, 1 tablespoon espresso, 2 teaspoons baking powder, 1 teaspoon baking soda, 1/2 teaspoon salt, 1/2 cup unsweetened cocoa, 2/3 cup brown sugar, 2/3 cup granulated sugar, 1/4 cup powdered milk , 1/2 cup mini chocolate chips, 170 grs or 3/4 cup butter or margarine, 3/4 cup water, 3 eggs, 2 tablespoons vanilla extract (the last four are the ingredients to be added by the recipient of the cake mix jar)
Note: If you don’t have cake flour, you can make it at home. For each of all purpose flour, remove 2 tablespoons from it and add 2 tablespoons cornstarch. Sift together several times, to integrate.
Preparation of the cake mix: I am detailing below how to layer the mix, as described by Hallmark magazine. You can also put each ingredient as an individual layer, it doesn’t affect the final outcome, but make sure to sift together flour,baking powder and baking soda before adding them for better results.
Layer 1: 3/4 cup cake flour, espresso, baking powder and baking soda
Layer 2: 1 cup cake flour and cocoa
Layer 3: 1/4 cup cake flour and brown sugar
Layer 4: granulated sugar and powdered milk
Layer 5: chocolate chips
Instructions (to be included with the cake mix):
1) Pour all contents of the jar in a bowl and mix briefly
2) Add 170 grs of soft butter and ½ cup of water and beat on medium speed for 3 minutes
3) In another bowl, beat 3 eggs with ¼ cup of water and 2 teaspoons vanilla extract
4) Add egg mixture to cake batter in 3 times, mixing well after each addition.
5) Divide the batter in two and pour it in two 9 inch/20 cms round cake pans, previously greased and dusted with cocoa or flour (cocoa doesn’t leave a white trace and adds to the chocolatey flavor)
6) Bake at 175C or 350 F for 20 to 30 minutes, or until a stick inserted in the middle comes out clean
7) Let cool and frost with vanilla, mocha or chocolate frosting, if desired.
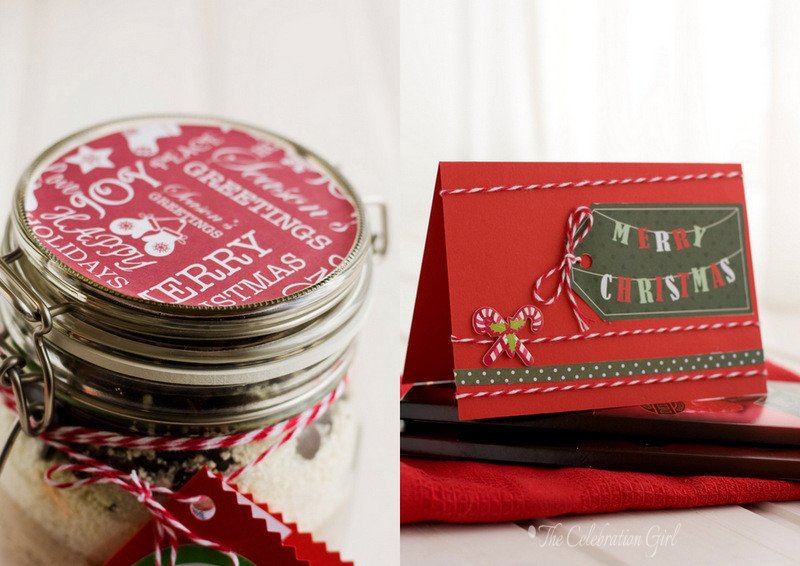
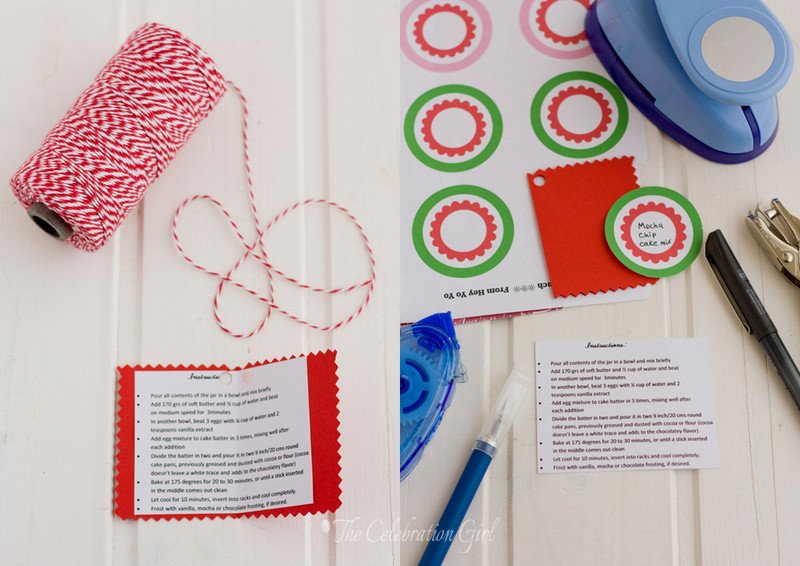
Once I had measured, mixed and layered all ingredients, it was time to beautify the present. I cut a circle of Christmas paper (which came with a crafts magazine) and glued it to the top of the jar. I prepared a small card, containing the instructions, with a small piece of red cardboard paper, zig zag scissors, a hole punch and party circles that I downloaded for free from catch my party (I will show you other uses of those free printables in posts to come). I also copied the instructions in a word document (using calibri font, size 8), printed it, cut it and glued it to the inside of the card. Then, I punched a hole and attached it to the jar with red and white baker’s twine.
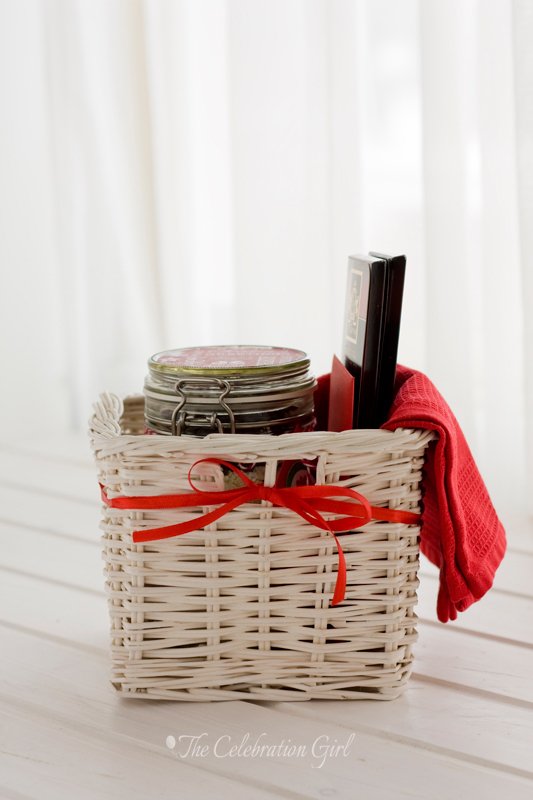
The whole present also included a red kitchen towel, a home made greeting card, two bars of good quality chocolate and recipes for my favorite vanilla, mocha and chocolate frostings, as well as recipes for making hot chocolate. Everything was placed in a white straw container, and tied with red ribbon. I truly hope the persons I am giving it to will like it!
Do you like it?
Con sabor latino…
Buenos días queridos amigos! Hoy es el día 18 del adviento y aquí les traigo otra idea de regalo comestible: una mezcla casera para una torta moca de chocolate (o sea, con café), con receta incluida, por supuesto.
Esta receta no es de mi autoría, la ví en el número de enero de 2008 de una revista que lamentablemente ya no existe, Hallmark Magazine. Este número en particular lo recibí por medio de una suscripción, justo antes de venir a vivir a Chipre. Era una revista preciosa, llena de manualidades, recetas deliciosas e ideas creativas. En sus páginas encontré esta receta que hoy comparto con ustedes, y la idea de regalar mezclas pre hechas. El artículo incluía otras receta que no incluyo porque aún no las he probado, pero tengan seguro que, en cuanto lo haga, las compartiré aquí con ustedes!
Este es un regalo que me encanta hacer porque quita todo el stress que mucha gente siente al preparar una torta casera. La mayor parte de la gente que conozco a la que no le gusta la repostería, suele tenerle miedo y hasta odiarla por la precisión que ésta requiere, por cómo hay que medir, cernir y pesar los ingredientes. Con este regalo, nosotros hacemos todos esos pasos por ellos, y quien lo recibe sólo tiene que actuar como con una torta de caja: agregar ingredientes húmedos y mezclar. Unos pocos pasos despues y en menos de una hora tendrán una torta casera, sin conservantes y con ingredientes frescos, lista para ser disfrutada.
Tambien pueden usar esta idea para preparar mezclas para ustedes mismos, y dejarlas listas para esos días cuando tenemos ganas de comer algo caserito pero no tenemos ganas de tomarnos todo el trabajo que ello implica. Tambien es una buena idea para cuando salimos de vacaciones por un dias, al campo o a la playa, y no queremos trasladar todo nuestro equipo de reposteria (cucharas medidoras, balanzas y demases). Sólo tendremos que medir y pesar todo en casa, ponerlo en una bolsa Ziploc o en otro recipiente y terminar la preparación donde sea que vayamos. Otra ventaja más? La mezcla dura 6 meses!
Aqui les dejo la receta y las instrucciones para que las capas queden como en la foto:
—————————-
Torta moca de chocolate (adaptada de la edicion de enero 2008 de Hallmark Magazine)
Ingredientes (para hacer la torta en casa): 2 tazas de harina de reposteria, 1 cucharada de espresso en polvo, 2 cucharaditas de polvo de hornear, 1 cucharadita de bicarbonato sodico, 1/2 cucharadita de sal, 1/2 taza de cacao amargo, 2/3 taza de azucar moreno, 2/3 taza de azucar comun, 1/4 taza de leche en polvo, 1/2 taza de chispas de chocolate, 170 grs de manteca o margarina, 3 huevos, 3/4 taza de agua, 2 cucharadas de extracto de vanilla (estos últimos cuatro ingredientes deberán ser agregados por la persona que recibe el regalo, si es para regalar).
Nota: si no tienen harina de reposteria, pueden hacerla casera de la siguiente manera: Por cada taza de harina común, retiren 2 cucharadas soperas y reemplacenlas por maizena (fécula de maiz). Tamicen varias todo para que se integre bien, y listo!
Preparación de la mezcla pre hecha: La forma de presentación que les detallo a continuación es la sugerida por Hallmark magazine. Tambien pueden colocar los ingredientes uno a uno, de manera individual, pero asegurense de tamizar harina, polvo de hornear y bicarbonato antes de hacerlo, para que la torta quede perfecta.
1er capa: 3/4 taza de harina, espresso, polvo de hornear y bicabonato sódico
2da capa: 1 taza de harina y cacao amargo
3er capa: 1/4 taza de harina y azucar moreno
4ta capa: azucar comun y leche en polvo
5ta capa: chispas de chocolate
Instrucciones (deben acompañar el frasco con la mezcla):
1) Coloque el contenido del frasco en un bowl amplio y mezcle brevemente
2) Agregue 170 grs de manteca y 1/2 taza de agua y bata con batidor electrico a velocidad media por 3 minutos
3) En otro bowl, bata los huevos con 1/4 taza de agua y 2 cucharadas de vainilla
4) Agregue la mezcla de huevos al resto de la masa en tres tiempos y bata bien luego de cada adición.
5) Divida la mezcla en dos y coloque en dos moldes de torta de 20 cms, enmantecados y espolvoreados con cacao o harina (yo prefiero cacao para tortas de chocolate porque no deja pelicula blanca y hace que el sabor sea aun mas chocolatoso)
6) Cocine en horno a 175 grados por 20 a 30 minutos
7) Retire, deje enfriar, rellene con crema de vainilla, moca o de chocolate (si asi lo desea) y espolvoree con azucar impalpable.
———
Una vez que mezclé los ingredientes y los coloqué en el frasco, llegó la hora de arreglarlo para que quedara bonito para regalo. Corté un círculo de papel navideño (que había venido de regalo con una revista de manualidades) y lo adherí a la tapa del frasco. Preparé una tarjetita con cartulina roja, tijera de puntas, un troquel individual y unos printables gratis que encontré en catch my party. Copié las instrucciones en word (con letra calibri, tamaño 8), las imprimí, recorté y pegué a la tarjeta. Luego usé el troquel para hacer un agujero y adjunté la tarjeta al frasco con hilo rojo y blanco.
El regalo tambien incluía un repasador rojo, dos tabletas de chocolate de buena calidad, una tarjeta hecha a mano, recetas para mis cremas de vainilla, moca y chocolate preferidas, y recetas para preparar chocolate caliente. Coloqué todo en una cajita de paja de color blanco y finalicé la presentación con un moño rojo.
Espero que este regalo le guste a quienes pienso entregarselo! Y a ustedes ¿les gusta?
by Marcela M. | Oct 18, 2012 | Blog, Cakes, Recipe Box, Recipes, Sweets, Uncategorized

Have you ever had a cake once and then dreamed about it for a long, long time, wishing you had the recipe? This is what happened to me with this cake.
The first time I had it, I must have been around 6 years old. We had gone to the house of one of my mother’s friends, Cecilia, and she served us this cake. I remember falling in love with its flavor immediately and I never forgot about it. Years later, Cecilia came home and baked it with us, but we were so into the conversation that we didn’t write the recipe down. “It’s easy! we will remember!”we thought but, of course, we didn’t. As time went by, we started doubting our own memories ( “How much honey did it take? One cup? No, it was two..or maybe one… I can’t say for sure” “What was it that Ceci had added to the honey that made it bubble?” ), until after a couple of failed attempts we recognized we didn’t remember how the cake was made at all. My mother and Cecilia lost contact for a while and I lost hope of getting this recipe.
Then, one day, just a few years ago, my mom surprised me sending me this recipe by email! She had met Cecilia, asked her for it and wrote it down for me! I baked it the following day and it was as good as I remembered.
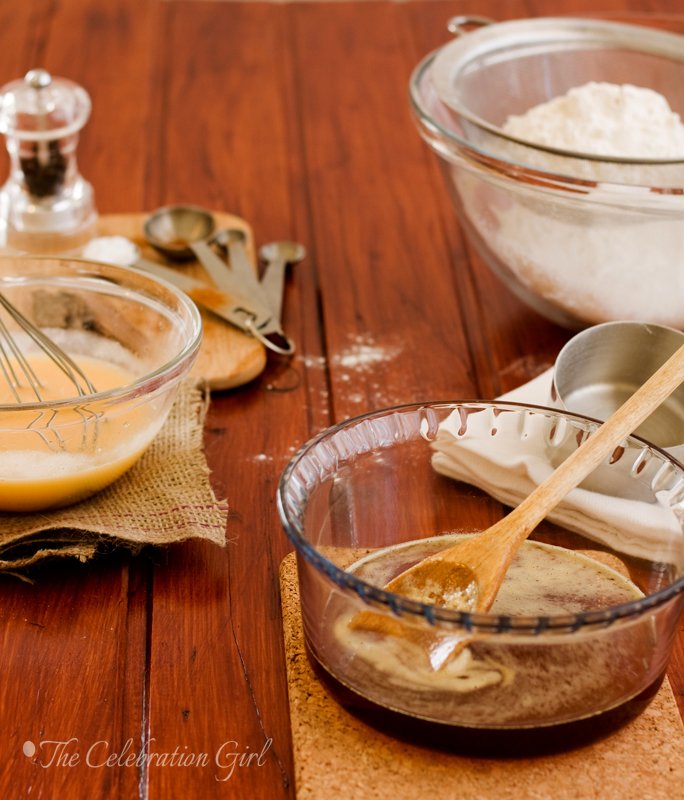
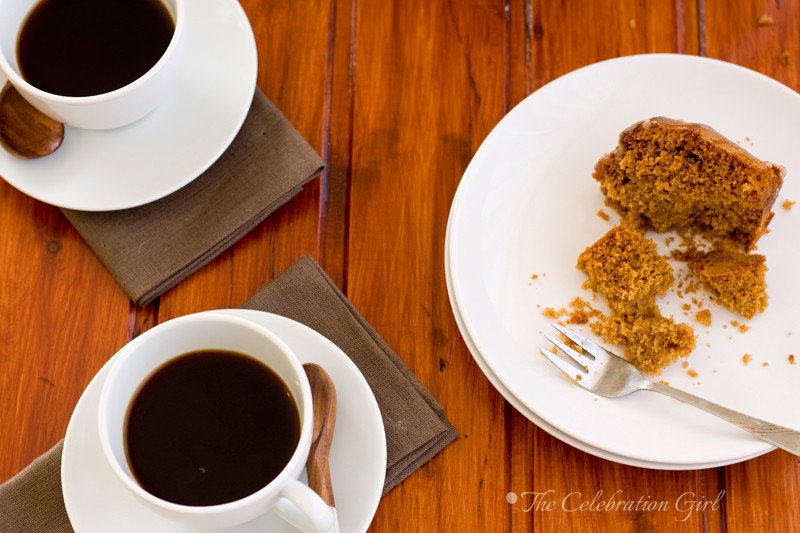
This is a really, really easy cake and it is ideal for eating when the weather starts to cool down, wrapped in a blanket, reading a good book by the window, or to share with friends while having coffee. I like it so much because of its ingredients: honey, cinnamon and pepper so, if you like Christmas cookies, you will most probably like this cake too. But there’s more: This cake is sweet, but not too sweet and spicy but not too spicy . It’s just perfect!
In this occasion I covered it with a cinnamon glaze, but this is completely optional: the cake doesn’t need it and it is just as delicious without it.

Now, without further ado, here’s the recipe:
Cecilia’s honey cake (serves 12)
Ingredients: 125 ml of honey ( 1 small glass), 1 teaspoon of baking soda, 125 ml oil (canola/ sunflower), 2 eggs, 2 teaspoons of sugar, 2 cups of self-raising flour, 1 teaspoon baking powder (see note), 1 teaspoon of ground cinnamon, 1/4 teaspoon of ground black pepper.
Preparation: Put the honey in a small saucepan, add enough water to barely cover the honey and bring to the boil. When it starts boiling (when the first bubbles appear at the sides of the pan), remove from the heat and add the baking soda. It will grow and bubble a lot, so keep mixing with a wooden spoon until it stops. Let it cool down, until warm but not hot. In the meantime, beat eggs, sugar and oil in a separate bowl and add to the honey once this is warm. Sift flour, cinnamon, pepper and baking powder and add to the liquid ingredients, little by little, mixing until no lumps remain. Pre-heat the oven at 175 C. Grease and flour a 6 inch pan, pour the preparation in it and bake for about 40 minutes, or until a toothpick inserted in the middle comes out clean.
Note: If you are making this recipe in Argentina, you do not need to add baking powder to the self-raising flour. I used Blancaflor without needing it!
For the cinnamon glaze: Mix 1 cup of icing sugar and 1 tablespoon of cinnamon and add boiling water until reaching a spreadable consistency (I needed 3 tablespoons, but it may vary. Pour over the cake, let it cool down and slightly harden and enjoy!
I hope you like this recipe as much as I do and let me know if you make it (you can add pictures to the facebook page!).Have a great weekend!
Con sabor latino...
¿Alguna vez les pasó eso de comer una torta deliciosa y soñar con ella por mucho tiempo, deseando tener la receta para poder hacerla una y otra vez? Eso es precisamente lo que me ocurrió a mí con esta torta de miel.
La primera vez que la probé debo haber tenido unos 6 años. Habíamos ido de visita a la casa de una amiga de mi mamá, llamada Cecilia, y ella nos ofreció esta torta que había preparado. Qué delicia! Quedé inmediatamente enamorada de su sabor y nunca lo olvidé. Cada vez que mi mamá se encontraba con su amiga, yo recordaba esta torta deliciosa y le pedía la receta, pero siempre lo olvidaba. Un día Ceci hasta vino incluso a hacerla a casa pero, inmersas en la conversación, olvidamos anotar la receta. “Es facil, nos vamos a acordar’pensamos pero, por supuesto, no lo hicimos. Con el tiempo, nuestros recuerdos comenzaron a tornarse borrosos y fuimos olvidando detalles importantes. “¿ Llevaba una o dos tazas de miel? ¿qué era eso que Cecilia agregaba a la miel que la hacía borbotear?” empezamos a preguntarnos, hasta que un día, luego de varios intentos fallidos, tuvimos que reconocer que no teníamos idea de cómo se hacía. Cecilia y mi mamá perdieron contacto por un tiempo,y yo perdí la esperanza de volver a probar la adoraba torta de miel.
Luego, un día, hace unos años, mamá me sorprendió enviandome esta receta por email. Se había re encontrado con Cecilia, le había preguntado la receta y, esta vez sí, la había anotado para mí. La hice al día siguiente de recibirla, y sabía tan rica como la recordaba!
Esta es una de esas tortas fáciles, fáciles, fáciles, y es ideal para comer cuando el clima comienza a tornarse más fresco, envuelto en una manta, leyendo un libro al lado de la ventana, o compartiendo con amigos alrededor de tazas de café caliente. Me encanta por sus sabores: miel, canela,pimienta, y si a ustedes les gustan las típicas galletitas navideñas, seguramente también la amarán. Pero ese no es el único motivo: Esta es una torta dulce, pero no demasiado dulce, y especiada, pero no demasiado especiada. Es perfecta!
En esta ocasión la cubrí con un glaseado de canela, pero si quieren consumir menos azucar pueden obviarlo tranquilamente: la torta no lo necesita y es igualmente maravillosa sin él.
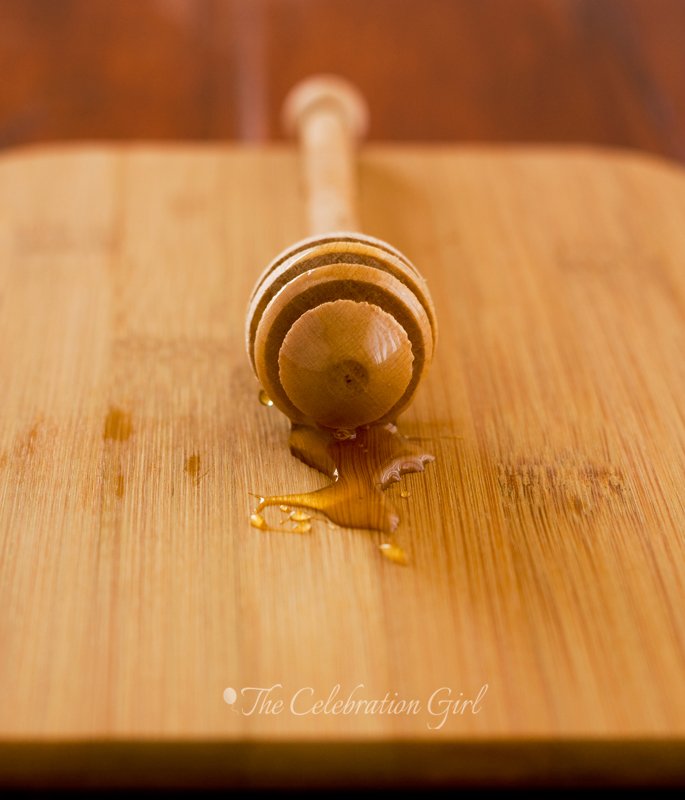
Ahora sí, sin más prolegómanos, aquí está la receta:
Torta de miel (para 12 personas)
Ingredientes: 125 ml de miel, 1 cucharadita de bicarbonato sódico, 125 ml de aceite, 2 huevos, 2 cucharaditas de azucar, 2 tazas de harina leudante, 1 cucharadita de polvo de hornear (ver nota), 1 cucharadita de canela molida, 1/4 de cucharadita de pimienta molida.
Preparación: Colocar la miel en una cacerola pequeña, cubrirla apenas con agua, y llevarla a fuego moderado. Cuando rompa el hervor, retirar del fuego y agregar el bicarbonato, revolviendo siempre para que no rebalse (el bicarbonato hará que la miel crezca y burbujee alocadamente). Dejar reposar hasta que esté tibia. Mientras tanto, batir en un bowl los huevos, el aceite y el azucar. Agregar a la miel cuando ésta esté tibia. Cernir harina, polvo de hornear, canela y pimienta y agregar a los ingredientes líquidos poco a poco, incoporando bien hasta que no queden grumos. Precalentar el horno a 175C. Engrasar y enharinar un molde de unos 12/15 cms de diametro y verter la mezcla en el mismo. Llevar a horno moderado por aproximadamente 40 minutos o hasta que, al insertar un cuchillo en el medio, éste salga limpio.
Nota: Si hacen esta receta en Argentina, no hace falta que agreguen polvo de hornear a la harina leudante, yo he usado harina Blancaflor sin necesidad de hacerlo.
Glaseado de canela: Mezclar una taza de azucar impalpable con 1 cucharada sopera de canela. Agregar agua hirviendo de a poco, hasta que adquiera consistencia de glaseado. Verter sobre la torta, dejar que enfríe y servir!
Espero que les guste esta receta tanto como a mí y cuentenme si la hacen! Pueden subir fotos a la página de facebook, me encantaría ver sus re-creaciones de esta torta (y de todas mis otras recetas!).
Que tengan un hermoso fin de semana!


