by Marcela M. | Oct 18, 2012 | Blog, Cakes, Recipe Box, Recipes, Sweets, Uncategorized

Have you ever had a cake once and then dreamed about it for a long, long time, wishing you had the recipe? This is what happened to me with this cake.
The first time I had it, I must have been around 6 years old. We had gone to the house of one of my mother’s friends, Cecilia, and she served us this cake. I remember falling in love with its flavor immediately and I never forgot about it. Years later, Cecilia came home and baked it with us, but we were so into the conversation that we didn’t write the recipe down. “It’s easy! we will remember!”we thought but, of course, we didn’t. As time went by, we started doubting our own memories ( “How much honey did it take? One cup? No, it was two..or maybe one… I can’t say for sure” “What was it that Ceci had added to the honey that made it bubble?” ), until after a couple of failed attempts we recognized we didn’t remember how the cake was made at all. My mother and Cecilia lost contact for a while and I lost hope of getting this recipe.
Then, one day, just a few years ago, my mom surprised me sending me this recipe by email! She had met Cecilia, asked her for it and wrote it down for me! I baked it the following day and it was as good as I remembered.
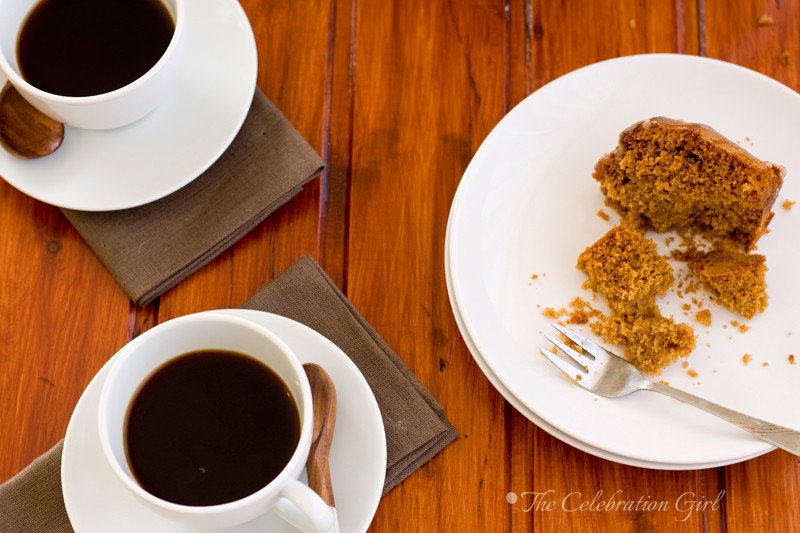
This is a really, really easy cake and it is ideal for eating when the weather starts to cool down, wrapped in a blanket, reading a good book by the window, or to share with friends while having coffee. I like it so much because of its ingredients: honey, cinnamon and pepper so, if you like Christmas cookies, you will most probably like this cake too. But there’s more: This cake is sweet, but not too sweet and spicy but not too spicy . It’s just perfect!
In this occasion I covered it with a cinnamon glaze, but this is completely optional: the cake doesn’t need it and it is just as delicious without it.

Now, without further ado, here’s the recipe:
Cecilia’s honey cake (serves 12)
Ingredients: 125 ml of honey ( 1 small glass), 1 teaspoon of baking soda, 125 ml oil (canola/ sunflower), 2 eggs, 2 teaspoons of sugar, 2 cups of self-raising flour, 1 teaspoon baking powder (see note), 1 teaspoon of ground cinnamon, 1/4 teaspoon of ground black pepper.
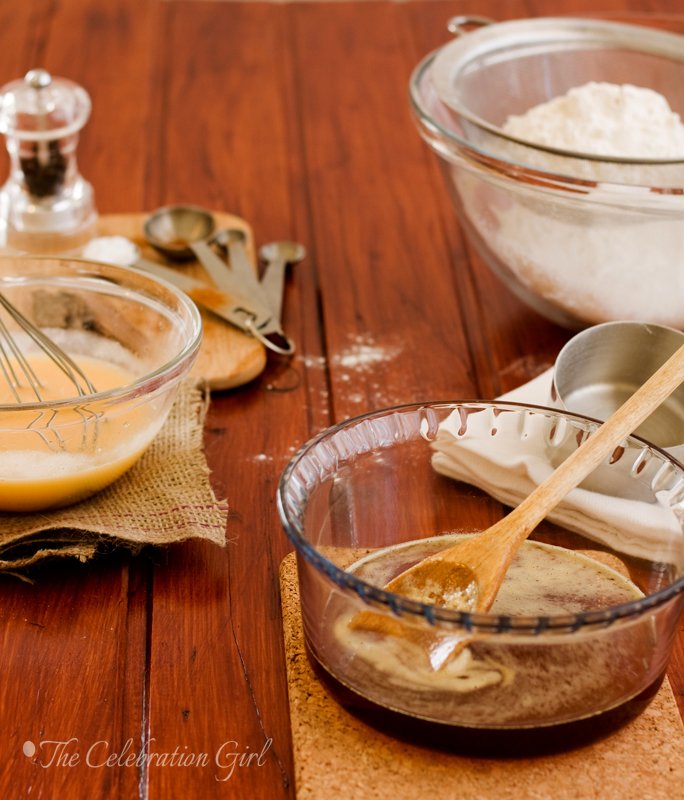
Preparation: Put the honey in a small saucepan, add enough water to barely cover the honey and bring to the boil. When it starts boiling (when the first bubbles appear at the sides of the pan), remove from the heat and add the baking soda. It will grow and bubble a lot, so keep mixing with a wooden spoon until it stops. Let it cool down, until warm but not hot. In the meantime, beat eggs, sugar and oil in a separate bowl and add to the honey once this is warm. Sift flour, cinnamon, pepper and baking powder and add to the liquid ingredients, little by little, mixing until no lumps remain. Pre-heat the oven at 175 C. Grease and flour a 6 inch pan, pour the preparation in it and bake for about 40 minutes, or until a toothpick inserted in the middle comes out clean.
Note: If you are making this recipe in Argentina, you do not need to add baking powder to the self-raising flour. I used Blancaflor without needing it!
For the cinnamon glaze: Mix 1 cup of icing sugar and 1 tablespoon of cinnamon and add boiling water until reaching a spreadable consistency (I needed 3 tablespoons, but it may vary. Pour over the cake, let it cool down and slightly harden and enjoy!
I hope you like this recipe as much as I do and let me know if you make it (you can add pictures to the facebook page!).Have a great weekend!
Con sabor latino...
¿Alguna vez les pasó eso de comer una torta deliciosa y soñar con ella por mucho tiempo, deseando tener la receta para poder hacerla una y otra vez? Eso es precisamente lo que me ocurrió a mí con esta torta de miel.
La primera vez que la probé debo haber tenido unos 6 años. Habíamos ido de visita a la casa de una amiga de mi mamá, llamada Cecilia, y ella nos ofreció esta torta que había preparado. Qué delicia! Quedé inmediatamente enamorada de su sabor y nunca lo olvidé. Cada vez que mi mamá se encontraba con su amiga, yo recordaba esta torta deliciosa y le pedía la receta, pero siempre lo olvidaba. Un día Ceci hasta vino incluso a hacerla a casa pero, inmersas en la conversación, olvidamos anotar la receta. “Es facil, nos vamos a acordar’pensamos pero, por supuesto, no lo hicimos. Con el tiempo, nuestros recuerdos comenzaron a tornarse borrosos y fuimos olvidando detalles importantes. “¿ Llevaba una o dos tazas de miel? ¿qué era eso que Cecilia agregaba a la miel que la hacía borbotear?” empezamos a preguntarnos, hasta que un día, luego de varios intentos fallidos, tuvimos que reconocer que no teníamos idea de cómo se hacía. Cecilia y mi mamá perdieron contacto por un tiempo,y yo perdí la esperanza de volver a probar la adoraba torta de miel.
Luego, un día, hace unos años, mamá me sorprendió enviandome esta receta por email. Se había re encontrado con Cecilia, le había preguntado la receta y, esta vez sí, la había anotado para mí. La hice al día siguiente de recibirla, y sabía tan rica como la recordaba!
Esta es una de esas tortas fáciles, fáciles, fáciles, y es ideal para comer cuando el clima comienza a tornarse más fresco, envuelto en una manta, leyendo un libro al lado de la ventana, o compartiendo con amigos alrededor de tazas de café caliente. Me encanta por sus sabores: miel, canela,pimienta, y si a ustedes les gustan las típicas galletitas navideñas, seguramente también la amarán. Pero ese no es el único motivo: Esta es una torta dulce, pero no demasiado dulce, y especiada, pero no demasiado especiada. Es perfecta!
En esta ocasión la cubrí con un glaseado de canela, pero si quieren consumir menos azucar pueden obviarlo tranquilamente: la torta no lo necesita y es igualmente maravillosa sin él.
Ahora sí, sin más prolegómanos, aquí está la receta:
Torta de miel (para 12 personas)
Ingredientes: 125 ml de miel, 1 cucharadita de bicarbonato sódico, 125 ml de aceite, 2 huevos, 2 cucharaditas de azucar, 2 tazas de harina leudante, 1 cucharadita de polvo de hornear (ver nota), 1 cucharadita de canela molida, 1/4 de cucharadita de pimienta molida.
Preparación: Colocar la miel en una cacerola pequeña, cubrirla apenas con agua, y llevarla a fuego moderado. Cuando rompa el hervor, retirar del fuego y agregar el bicarbonato, revolviendo siempre para que no rebalse (el bicarbonato hará que la miel crezca y burbujee alocadamente). Dejar reposar hasta que esté tibia. Mientras tanto, batir en un bowl los huevos, el aceite y el azucar. Agregar a la miel cuando ésta esté tibia. Cernir harina, polvo de hornear, canela y pimienta y agregar a los ingredientes líquidos poco a poco, incoporando bien hasta que no queden grumos. Precalentar el horno a 175C. Engrasar y enharinar un molde de unos 12/15 cms de diametro y verter la mezcla en el mismo. Llevar a horno moderado por aproximadamente 40 minutos o hasta que, al insertar un cuchillo en el medio, éste salga limpio.
Nota: Si hacen esta receta en Argentina, no hace falta que agreguen polvo de hornear a la harina leudante, yo he usado harina Blancaflor sin necesidad de hacerlo.
Glaseado de canela: Mezclar una taza de azucar impalpable con 1 cucharada sopera de canela. Agregar agua hirviendo de a poco, hasta que adquiera consistencia de glaseado. Verter sobre la torta, dejar que enfríe y servir!
Espero que les guste esta receta tanto como a mí y cuentenme si la hacen! Pueden subir fotos a la página de facebook, me encantaría ver sus re-creaciones de esta torta (y de todas mis otras recetas!).
Que tengan un hermoso fin de semana!
by Marcela M. | Oct 8, 2012 | Blog, Main courses, Recipe Box, Recipes, Savories, Uncategorized

Most of my childhood memories seem to be highly sensorial and related to nature, and many, many of them are related specifically to food.
When I was growing up, we used to spend our Summers and our weekends (during the rest of the year) in a house located in the hills of Córdoba, my home province. The house, which was big enough to host cousins and other relatives who visited us every vacation, was settled in a small commune where all neighbours knew each other and where all children were friends.The garden that surrounded it had a swimming pool and trees that we would climb in the hot summer afternoons, and even an orchard with red and white plums, peaches, apricots, quinces, apples and walnut trees.
My memories of those times are deeply marked by that house: the cold shock of the first splash in the pool, the sound of shared laughter and of our dog’s noisy bark (he hated it when we jumped into the pool and even fell into the water a couple of times, while chasing us) . I remember the warmth of the towels in which my mom would wrap us after the last swim of the day, the roughness of the branches of the magnolia tree that was our hideout, and the wonderful smell of its flowers, carried inside the house by the early morning breeze.
Foodwise, I was, back then, an extremely picky eater who would only taste two fruits (apples and bananas) so I did not take advantage of our orchard as I should have. But I still remember the exuberant, beautiful look of the baskets full of produce, how their smell filled the kitchen, especially in the mornings, and how the fruits felt in my small hands when peeling them for making huge quantities of jams and marmalades, that would then be gifted to friends and stored for the winter months. I remember how, in January, we used to buy watermelons and cantaloupes by the side of the road, when coming from the city, and how my father’s fingers would get full of pink sticky juice while eating them at the garden table, after siesta, and the delicious taste of the afternoon’s chocolate milk and cookies, which filled my empty stomach after hours of swimming, running and playing.
Autumn memories, in turn, bring back the smell of freshly sharpened pencils, the sound of dead leaves crunching under my shoes, the weird texture of the spider web paper that we used to protect school books, the perceived freezing cold of our bedsheets at night, and the welcomed warmth of blankets and covers.
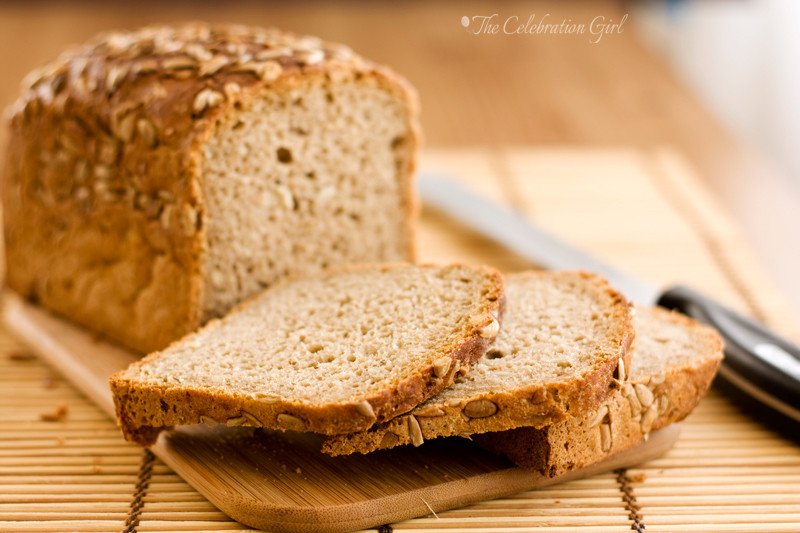
Autum was back to school time, so our time in the country side was limited to weekends, and from those days, I remember the apples fallen all around the orchard trees, the fun of cracking walnut shells, and the trips to the communal fig tree, to collect fruit for conserves (we used to make jars of figs in syrup). I remember the home-made bread that we would buy by the side of the road, in the same small shops where we bought watermelons and cantaloupes in summer time and, most of all, I remember soup.
In those early years of my life, my family had a tradition: every Sunday evening, when we returned from the country side, my father and my mother would make soup while we watched V alien invasion. I remember that soup as the perfect one, because it was full of flavours I loved: leek, onions, butternut squash or pumpkin (depending on what we could get), potatoes, carrots and green beans. I don’t remember whether other vegetables were included because, being the picky eater that I was, I probably left those uneaten if there were, but it doesn’t matter. The vegetables were roughly chopped, and cooked in vegetable stock for what seemed like ages for my hungry young self and, once ready, we would eat it with bread (often, the remains of the home-made bread bought on the road).
These are the flavours present in the soup that I bring you today except, this time, I omitted peas and potatoes and I processed all ingredients, once cooked, for a smoother feel. The result is a hearty soup which, I hope, will bring you warmth in the cold days to come.
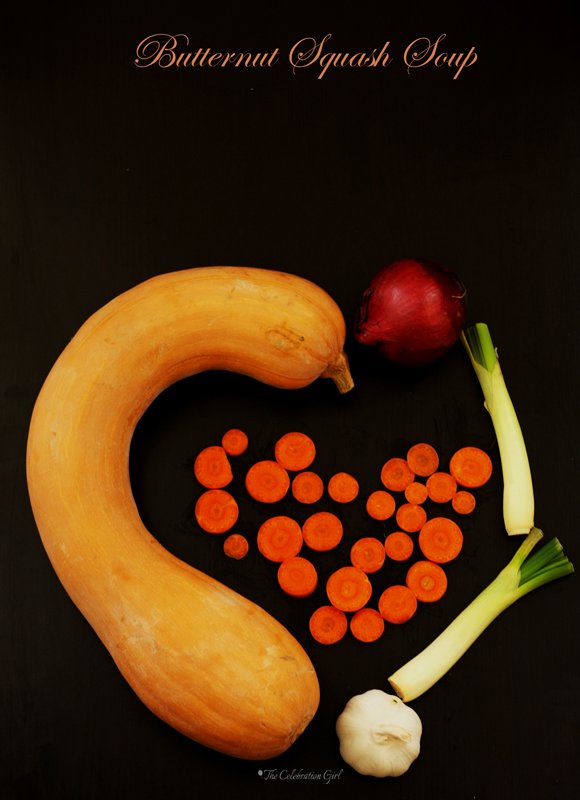
Here is the recipe (for 2 persons):
Ingredients: 4 thick slices of butternut squash, 1/2 red onion. 1 leek, 2 carrots, 1 garlic clove, 1 tablespoon of olive oil, 1 tablespoon of dried vegetable stock.
Preparation: 1) Dice onion, pumpkin slices and leek. Crush the garlic clove and slice the carrots, then cut each slice in fours. 2) Put olive oil in a saucepan and, once it is warm, add onion and garlic and leave until golden (stirring with a wooden spoon so that they don’t burn) 3) Add the rest of the vegetables and cover with water mixed with the vegetable stock. 4) Cover the saucepan, turn the heat to minimum and let it simmer for 30-40 minutes, or until the vegetables are soft. 5) Once the soup is ready, turn off the heat and process with an immersion food processor. If you don’t have an immersion food processor, let the soup cool down, transfer to the bowl of a regular food processor, process, and then re-heat for a few minutes before serving.

Con sabor latino…
Mis recuerdos de la infancia son sumamente sensoriales y relacionados con la naturaleza y, muchos de ellos, están especificamente ligados a la comida.
Cuando yo era niña, solíamos pasar los veranos, y los fines de semana (durante el resto del año), en una casa que se encontraba en las sierras de Córdoba, mi provincia natal. La casa, que era lo suficientemente grande para alojar primos y demás parientes que nos visitaban cada año, estaba ubicada en una pequeña comuna donde todos los vecinos se conocían y todos los niños eramos amigos. El jardín de dicha casa, que era grande, tenía una pileta de natación y arboles a los que trepábamos para guarecernos del calor de las tardes de verano, y hasta una quinta de árboles frutales que incluía ciruelos blancos y rojos, durazneros, quinotos, nogales, membrillos y manzanos.
Mis recuerdos de ese tiempo están muy marcados por esa casa: el shock helado del primer chapuzón en la pileta, el sonido de la risa compartida y del ladrido ruidoso de nuestro perro (que odiaba que nos lanzáramos a la pileta y, por eso, nos perseguía desde el borde- y que hasta se cayó al agua más de una vez). Recuerdo la calidez de las toallas con que mi mamá nos envolvía por la noche, cuando terminábamos de nadar y jugar, la aspereza de las ramas de la magnolia donde solíamos escondernos, y el aroma maravilloso de sus flores (aún mis preferidas), que inundaba la casa, traído por la brisa de la mañana.
En lo que hace a la comida, en ese entonces yo era mañosísima y sólo probaba dos frutas (manzanas y bananas), por lo que no aprovechaba como hubiera debido la abundancia de la quinta. Pero, a pesar de ello, aún recuerdo la exuberancia de los canastos llenos de frutas, cómo sus aromas inundaban la cocina, sobre todo por la mañana, y las texturas diferentes en mis pequeñas manos, al pelar las distintas frutas para hacer toneladas de mermeladas y jaleas que luego regalaríamos a amigos, y guardaríamos en frascos para el invierno. Recuerdo cómo, en enero, solíamos comprar sandías y melones al costado de la ruta, y cómo las manos de mi padre se llenaban de ese jugo pegajoso y rosado , al comerlos después de la siesta; y recuerdo el sabor delicioso de la leche chocolatada y las galletitas de la merienda, que llenaban mi estómago hambriento despues horas de nadar, correr y jugar.
Mis recuerdos del otoño por su parte, tienen el aroma de lápices nuevos, el sonido de las hojas muertas crujiendo bajo mis zapatos, la extraña textura del papel araña con el que forrábamos libros y cuadernos, el frío helado de las sábanas, al entrar a la cama por la noche, y la bienvenida calidez de las colchas y frazadas que nos abrigaban.
El otoño era una epoca escolar, así que nuestro tiempo en el campo se limitaba a los fines de semana y, de esos días, recuerdo las manzanas caidas alrededor de los árboles de la quinta, lo divertido que era romper cascaras de nueces , y los viajes a la higuera comunal para buscar frutas suficientes para preparar tarros de higos en almibar. Recuerdo el pan casero que comprábamos al costado de la ruta (en los mismos puestos que vendían sandías y melones durante el verano) y, por sobre todas las cosas, recuerdo la sopa.
En esa primera infancia, mi familia tenía una tradición: cada domingo por la noche, al regresar del campo, mi mamá y mi papá preparaban una sopa mientras nosotros (mi hermano y yo) veíamos V invasión extraterrestre. Recuerdo esa sopa como la perfección absoluta, porque incluía todos mis sabores preferidos: puerros, cebollas de verdeo, calabaza o zapallo (lo que encontráramos), cebollas, papas, zanahorias y arvejas. A decir verdad, no recuerdo si había algún otro ingrediente porque como era muy mañosa, si lo había, seguramente no lo habré comido! En la sopa de mi infancia, estos ingredientes eran cortados en cubos y se los cocinaba en un caldo de verduras por lo que, en mis recuerdos de niña hambrienta, parecían añares y, una vez lista, solíamos comerla acompañada con pan (generalmente el mismo pan casero que había sobrado del campo).
Estos son los sabores que están presentes en esta sopa que hoy les traigo. Esta vez, sin embargo, omití papas y arvejas y licué los ingredientes, una vez cocidos, para darle una textura cremosa. El resultado es una sopa sustanciosa, que espero les brinde calor en los fríos días por venir.
Aqui está la receta:
Ingredientes: 4 rodajas gruesas de calabaza, 1 puerro, 1/2 cebolla colorada, 2 zanahorias, 1 diente de ajo, 1 cucharada de aceite de oliva, 1 cucharada de caldo de verduras disecado.
Preparación: 1) Corte en cubos la calabaza, el puerro y la cebolla. Machaque el ajo y corte las zanahorias en rodajas, y luego cada rodaja en 4 pedazos 2) Ponga el aceite de oliva en una olla, y agregue la cebolla y el ajo, cocinandolos hasta que estén dorados (revuelva con cuchara de madera para que no se quemen). 3) Agregue el resto de las verduras y cubra con agua, en la que habrá disuelto previamente el caldo. 4) Cubra la olla, ponga el fuego a mínimo y deje cocer por 30 a 40 minutos, o hasta que las verduras estén tiernas. 5) Una vez cocidos los ingredientes, retire la olla del fuego y, usando una procesadora de mano, procese los ingredientes hasta que esten disueltos. Si no tiene procesadora de mano, deje enfriar la sopa, coloquela en el bowl de una procesadora tradicional, procese y luego caliente nuevamente antes de servir.
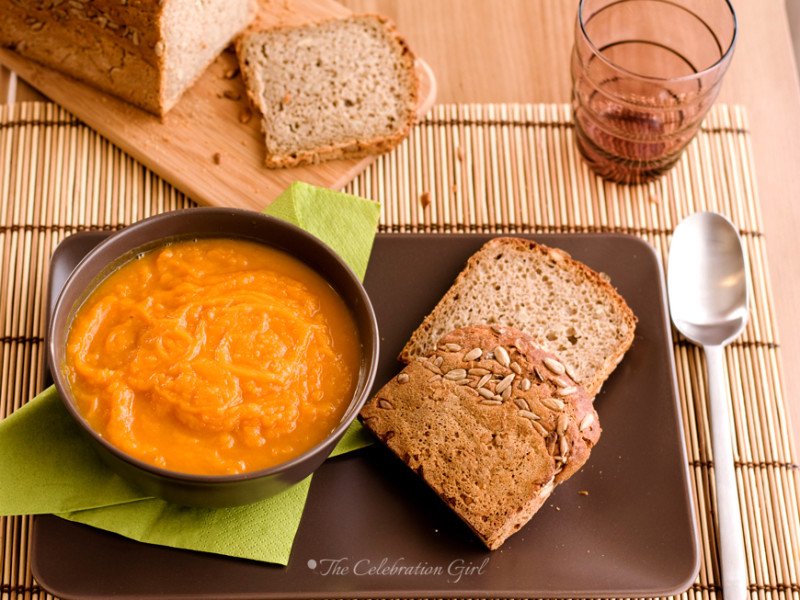
May you have a wonderful week! I’ll come back on Thurday with a surprise I hope you will like!
Que tengan una semana maravillosa! El jueves estaré de vuelta con una sorpresa que espero que les guste!
by Marcela M. | Oct 2, 2012 | Blog, Parties, Uncategorized
Good evening friends! I hope you had a lovely weekend!
I write this post late in the evening because today was a holiday, Cyprus Independence Day, so we took advantage of having Luka and Zoe home for an extra dose of playing, crafting and cooking together. I try to spend as little time as possible in front of the computer when they are home (I don’t always manage, but I try!).
Now on to today’s post: Luka and Zoe’s 4th birthday party!
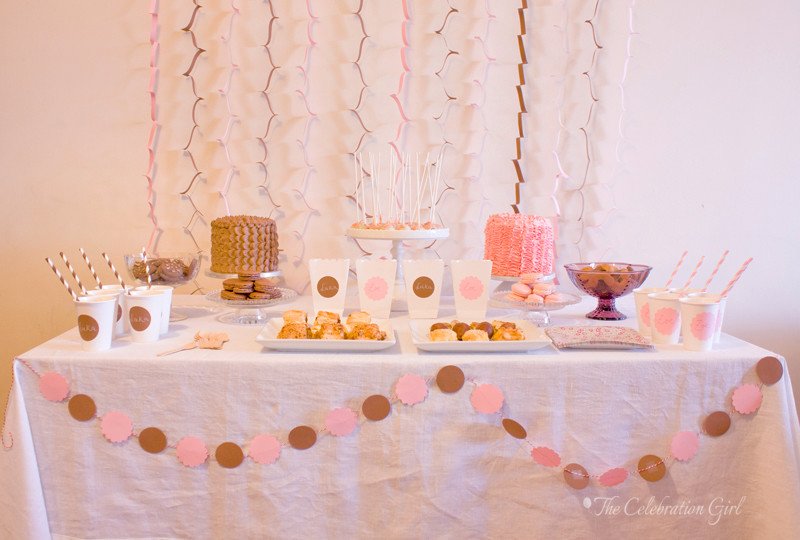
If I had to chose one word to describe the party, it would be relaxed. Unlike other birthdays, for this one we decided to take it easy, not only on the day itself, but also during the preparations. This year there was no rush, no late night crafting, no stressing over little details. We did our best to give our children a pretty little home party that was within our budget; and we made a conscious decision to make our best for Luka and Zoe to enjoy, not only the party itself, but also the weeks before it.
Let me explain this a little better. Earlier this year, I mentioned to my husband a comment a friend had made to me, about how her child was always cranky and hypersensitive the week prior to his birthday, and I noticed that the same had happened with our children the week prior to their last party. “Of course children get cranky and hypersensitive” said my husband, and then explained his thoughts: “The week before these parties mothers go crazy with all the preparations, and children at this age don’t really understand what it all is about, nor do they care, so they get nervous.” This got me thinking a lot about how we celebrate and about how we honour the persons in our life, and I realized how easy it is to slip into the mistake of doing things that, while beautiful, are not really for the ones we intend to honour, but for ourselves. So we made the commitment to follow our children’s lead as to what they want(and then adapt that to be within our means, of course) to have them participate in the preparations as much as possible, and to be mindful about the fact that in every celebration, little or big, it is the memories we built that matter. We decided to make an extra effort to build memories that are happy from beginning to end, memories that are untarnished by unnecessary stress or arguments over minor details.
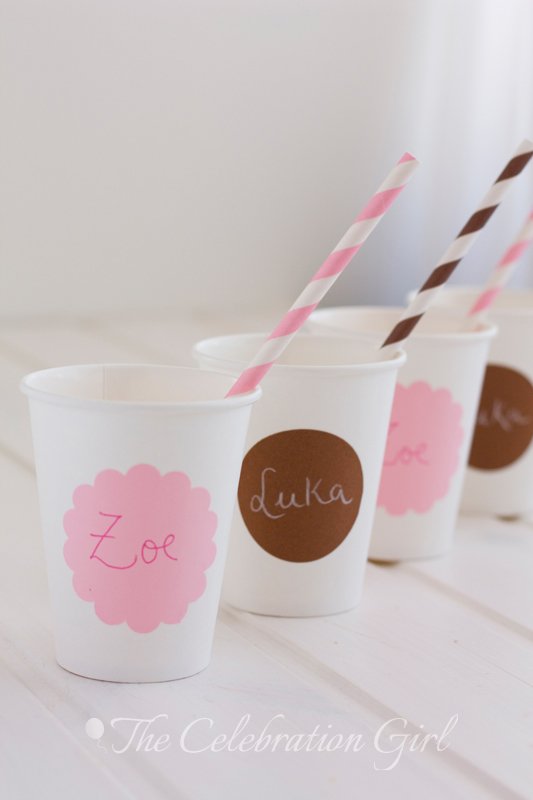
We started by setting up a stress-free birthday preparation plan of action, for which my natural A-type personality behaviour came in handy (wink, wink). Luka and Zoe didn’t really care about anything else than there being a cake with candles they could blow over and over so, without a theme chosen by themselves, I decided to make one based only on flavours they love: vanilla, strawberry, and chocolate, lots of chocolate. This lead to a simple color palette: brown and pink, with a white/creme base. With this in mind, I checked what I already had at home to set the table (I had almost everything. The only thing I had to buy were the popcorn boxes) and prepared a menu based on the number of persons that we knew we would invite, which was very small because Luka and Zoe’s birthday falls the middle of the Summer vacations.
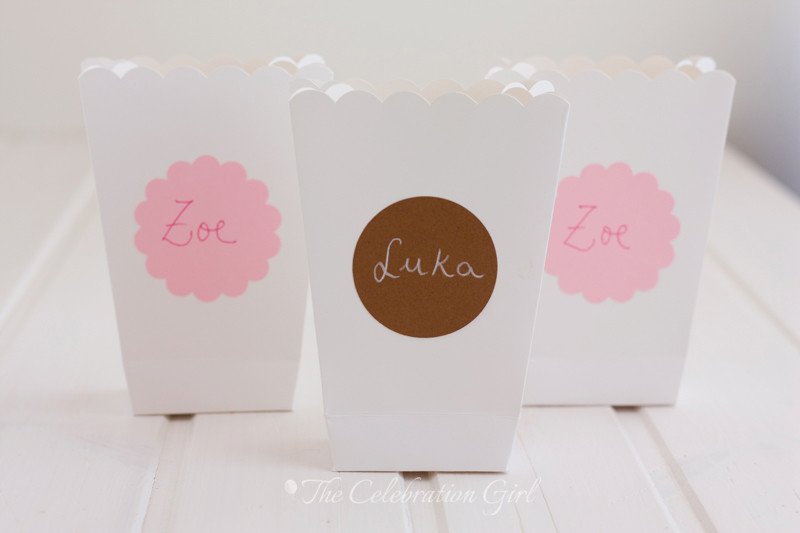
One month before the party, while Luka and Zoe were in Summer school, I baked the macarons, and froze them. Three weeks before the party, I baked the cakes and froze them too, wrapped in two layers of foil. One week before the party, I prepared the cakes’ frostings and froze them as well. Two nights before the party, I prepared the streamers for the backdrop, the garland for the dessert table, and I punched and glued the circles that I used to personalize paper cups and popcorn boxes. The day before the party, I defrosted all food, made the cake-pops, assembled the cakes including crumb coating and, on the night before, I decorated them in no more than one hour.
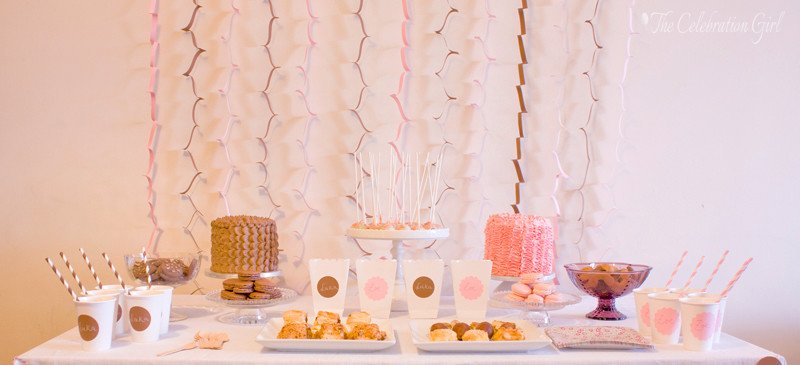
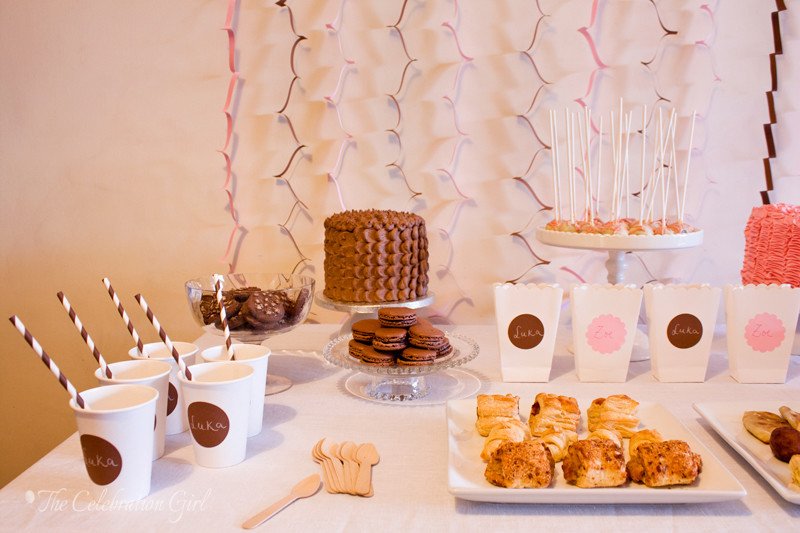
Two hours before the party, we bought a few petits fours at a local bakery. One hour before the party, while Luka and Zoe were playing by my side, I set up the backdrop (using double sided tape) and all dishes. 15 minutes before the beginning of the party, I placed the food and took a few pictures. Here’s a look at how the table looked before and after the food was added:
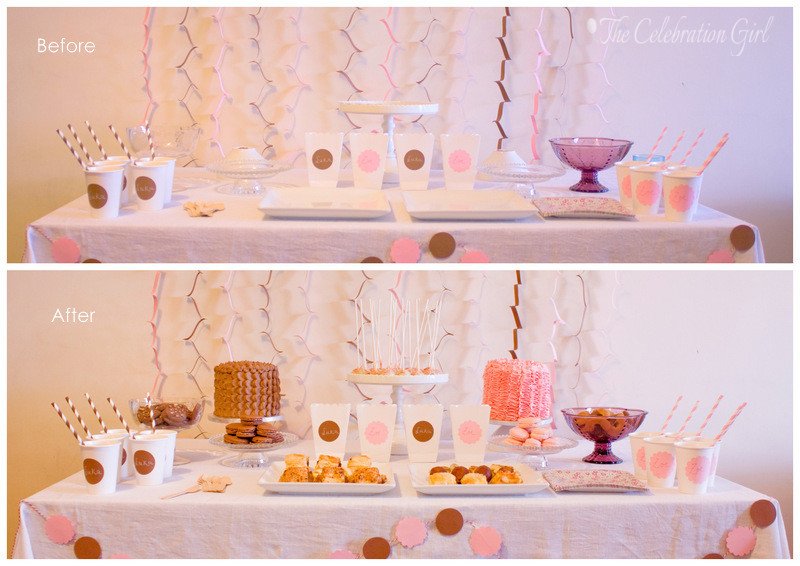
If you look closely, you will see that I used a few “tricks’: The cakes were placed on a cake drum on top of inverted white bowls (I don’t own small cake stands) and the cute glass cake stands where the macarons were placed? They are dessert plates placed on top of matching bowls, glued together with a little piece of play-dough so that they would be safe for little hands!
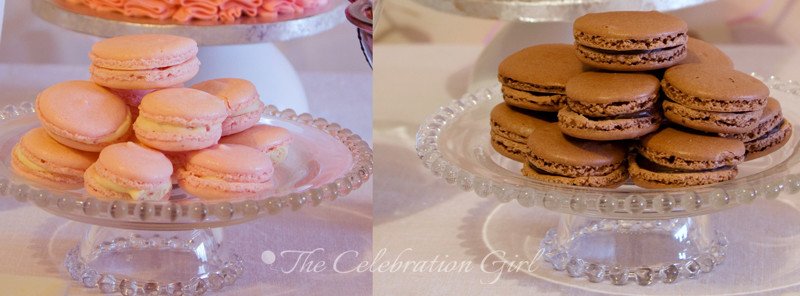
The food consisted of the above said petits-fours (in different flavours), chocolate macarons with dark chocolate ganache, rose macarons with white chocolate and strawberry ganache, chocolate cake pops (covered in white chocolate and drizzled with pink chocolate-Sorry there are no pictures!), Luka and Zoe’s favourite cookies (Pan di Stelle and Abracci), popcorn, and the birthday cakes.
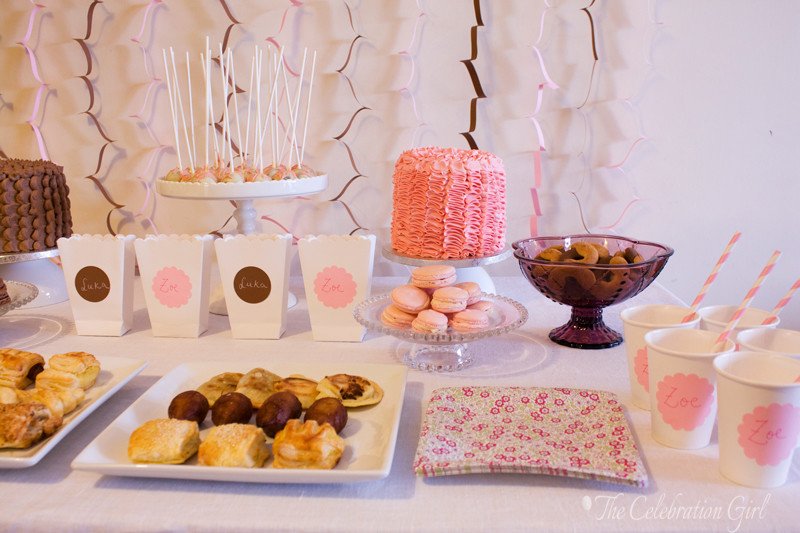
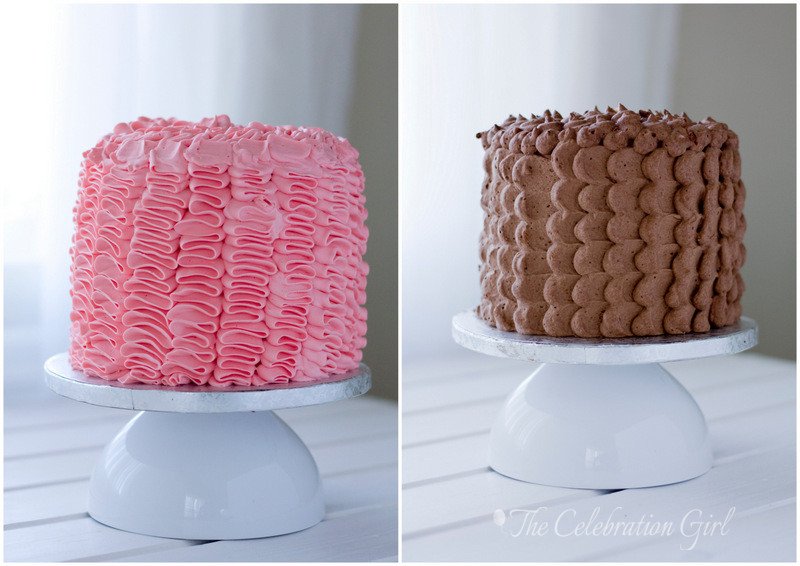
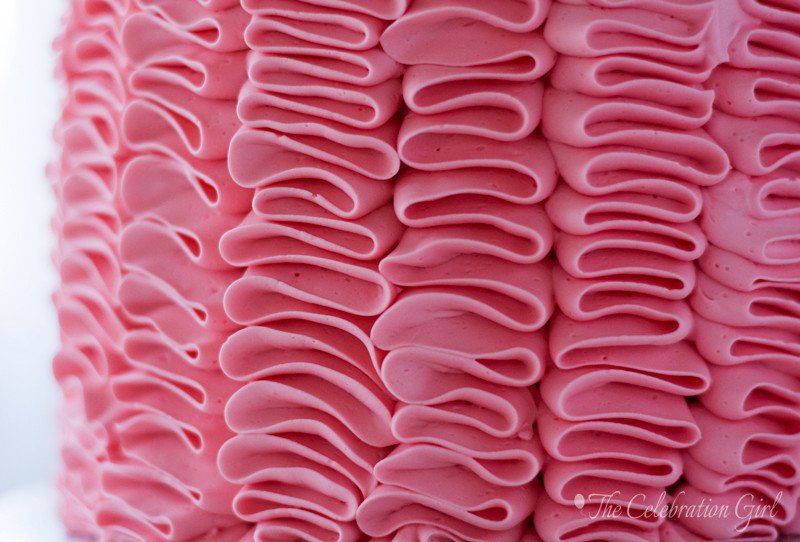
Zoe’s cake was made of layers of vanilla and strawberry cake filled and frosted with tons and tons pink vanilla bean swiss meringue buttercream ruffles. You can see how to make the ruffles watching THIS video by My Sweet and Saucy. It is really, really easy and fast!
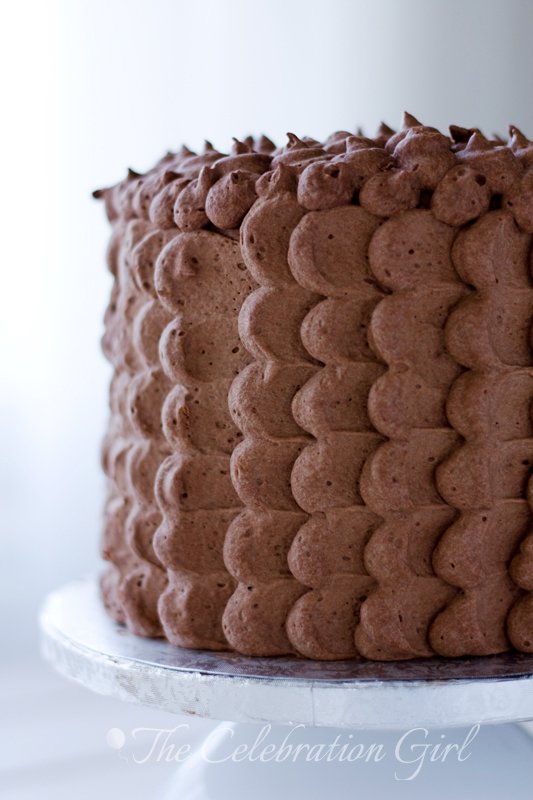
Luka’s cake was made of layers of a very moist chocolate cake, filled and frosted with semi-sweet chocolate swiss meringue buttercream. For the decoration, I used the petal technique, which has been all over the web these past months and that you can learn by reading THIS tutorial by My Cake School. It is a little more time consuming than the ruffles, but just as easy.
You probably noticed that the pictures are…well, not my best. I had decided not to over stress about them before the party (not to stress Luka and Zoe out) and, during the party, in the middle of it all, a few funny things happened. If you follow me on facebook, you already know what that is, but if you don’t, here’s the status message I published at the time: Instructions for candle blowing with 4 year old children: 1) Innocently believe that it will be possible to light 8 candles with two 4 year old kids waiting patiently to blow them, despite this being the first birthday when they actually realize what is going on and are super excited 2) Set up the camera on a tripod in a hurry, while trying to keep said children away from the tripod and, mostly, from the camera. 3) Accidentally set incorrect speed settings, thereby causing all pictures to be blurred.4) Try to light candles in one cake first 5) Watch both children blow vigorously from below, turning off the candles as soon as they are lit 6) Realize that no matter which settings you chose, your children are blowing the candles so quickly that the continued shooting did not have time to even start taking pictures before all candles were blown.7) Quickly, grab a child and put her next to the cake to try to “fake”a picture, while the other child runs around asking “again! again!”. 8) Light the candles of the second cake, grab the children and their friend (who also wants to blow candles!) and make a last attempt 9) Enjoy the happy chaos and everybody’s laughter and forget about whether anyone will be able to distinguish anything from the pictures 😉
Have a wonderful day!
Con sabor latino…
Buenas noches queridos amigos! Espero que hayan tenido un fin de semana hermoso!
Escribo este post tarde por la noche porque hoy fue feriado, el día de la Independencia de Chipre, así que aprovechamos que Luka y Zoe estaban en casa para tener una dosis extra de mimos, juegos, manualidades y cocina juntos. Cuando ellos están en casa intento no acercarme a la computadora…no siempre lo logro, pero lo intento!
Ahora sí, hablemos del post de hoy: el cuarto cumpleaños de Luka y Zoe!
Si tuviera que describir la fiesta con una sola palabra, sería relajada. A diferencia de otros cumpleaños, este decidí tomar todo con calma, no sólo el día de la fiesta, sino tambien durante los preparativos. Este año no hubo corridas, manualidades hasta altas horas de la noche ni stress por pequeños detalles. Hicimos todo lo posible para darle a nuestros hijos una fiesta casera y bonita, dentro de nuestro presupuesto, y tomamos la decisión consciente de esforzarnos por que Luka y Zoe disfrutaran, no sólo de la fiesta en sí, sino tambien de las semanas anteriores a la misma.
Dejenme explicarles un poco mejor a qué me refiero con ésto. A comienzos de este año, le mencioné a mi marido el comentario que una amiga me había hecho, acerca de cómo su hijo siempre se ponía nervioso y estaba hiper sensible durante toda la semana antes de su fiesta, y cómo yo había notado lo mismo en nuestros hijos durante la semana anterior a su última fiestas de cumpleaños, que celebramos en Argentina. “Es lógico que los chicos se pongan nerviosos e hipersensibles “, me dijo mi marido, y explicó: “Justamente es en esa semana antes que las madres estan enloquecidas corriendo detras de los detalles y preparativos de las fiestas, y los chicos, que a esta edad no entienden de qué se trata, ni les importa, se ponen nerviosos”. Esto me dejó pensando mucho acerca de cómo celebramos y cómo honramos las personas importantes en nuestra vida y me dí cuenta de cuan fácil es caer en el error de hacer cosas que, aunque bonitas, no estan dirigidas a quienes queremos celebrar y honrar, sino que son hechas para nosotros mismos, porque nos gustan a nosotros, porque satisfacen un deseo nuestro y no de la otra persona. Por ello, asumimos el compromiso de dejar que nuestros hijos quienes decidan qué quieren y qué no (adaptando ésto a nuestras posibilidades, claro!), de hacerlos participar en los preparativos, y de tener muy presente que en toda celebración, grande o chica, lo que importa con los recuerdos que creamos juntos. Y nos comprometimos, tambien, a hacer un esfuerzo extra por que esos recuerdos que creamos sean recuerdos felices de principio a fin, recuerdos que no estén manchados por stress innecesario o discusiones sin importancia.
Con este objetivo en mente, armamos un “plan de acción para una fiesta de cumpleaños sin stress”, facilitado por mi personalidad tipo A ;)Luka y Zoe no querían nada especial, sólo una torta con velitas que pudieran soplar una y otra vez así que, sin un tema elegido por ellos mismos, decidí concentrarme para armar todo en sus sabores preferidos: vainilla, frutilla y chocolate, mucho chocolate. Esto llevó a una paleta de colores simple y sencilla: rosa y marrón chocolate, con una base en crema/blanco. Con esto en mente, comencé a ver qué tenía disponible en casa para servir la mesa (para mi alegría, descubrí que tenía casi todo-sólo compré las bolsas de popcorn), y planifiqué el menú en base a la cantidad de invitados, que fueron muy poquitos porque mis hijos cumplen años en plenas vacaciones de verano.
Un mes antes de la fiesta, mientras Luka y Zoe estaban en la escuela de verano, preparé los macarons y los congelé en el freezer. 3 semanas antes de la fiesta,prepará las tortas (cada capa por separado) y las congelé tambien, envueltas en doble capa de papel film. Una semana antes de la fiesta, preparé las cremas con las que rellenaría y decoraría las tortas y las congelé. Dos noches antes del día de la fiesta, preparé las guirnaldas que decorarían la pared contra la cual iría la mesa dulce, la guirnalda que iba en la mesa, y personalicé los vasos y las bolsas de popcorn con circulos de cartulina en los que escribí el nombre de mis hijos. El día antes de la fiesta descongelé toda la comida, hice los cake pops con los restos de torta que sobraron al emparejarlas, armé las tortas, incluyendo la primer capa de crema de la decoración y, la noche anterior, las decoré en no más de una hora.
Dos horas antes de la fiesta, mi marido compró unos petits fours en una panadería cercana.Una hora antes de la fiesta, mientras Luka y Zoe corrían y jugaban alrededor mío, puse las guirnaldas en la pared y coloqué la vajilla en la mesa.15 minutos antes que llegaran los invitados, coloqué la comida, y saqué un par de fotos (arriba pueden ver el antes y el despues de la preparación de la mesa dulce)
Si miran las fotos del antes y el despues detalladamente, notaran que usé un par de truquitos: como no tengo cake stands pequeños, coloqué las tortas en su base de carton sobre bowls blancos invertidos, y los macarons sobre pies de torta que en realidad no son sino platos de postre colocados sobre mini bowls haciendo juego, invertidos. Los bowls estan pegados a los platos con plastilina, que es facil de sacar y de lavar, para que no se muevan y sean seguros para pequeñas manitos toca todo.
La comida consistió en los mencionados petits fours, macarons de chocolate rellenos con ganache de chocolate amargo, macarons de rosas rellenos con ganache de chocolate blanco y frutillas, cake pops cubiertos con chocolate blanco y tiras de chocolate blanco teñido de rosa (no hay fotos, perdon!), las galletitas preferidas de Luka y Zoe (Abracci y Pan di Stelle), pochoclo y las tortas, claro.
La torta de Zoe estaba formada por capas de tortas de vainilla y frutilla, rellena y decorada con montones de volados de crema de manteca suiza a la vainilla, teñida de rosa. Para saber cómo hacer los volados pueden ver ESTE VIDEO de My Sweet and Saucy (en Ingles). Es facil y rapidísimo!
La torta de Luka estaba formada por capas de torta húmeda de chocolate, rellena y decorada con crema de manteca suiza de chocolate semi amargo. Para decorarla usé una técnica que se ha visto muchísimo en internet estos últimos meses, llamada “petalo” y que pueden aprender viendo ESTE TUTORIAL de My cake school. Si bien este método lleva un poco más de tiempo que los volados, es igualmente fácil de hacer.
Posiblemente hayan notado que las fotos de este post no son, ejem, de las mejores que he tomado. El día del cumpleaños decidí no estresarme al respecto antes que llegaran los invitados para no poner nerviosos a Luka y Zoe (siguiendo la misma linea de pensamiento que les comentaba antes). A lo largo de la fiesta, en medio de todo el caos que estos eventos son generalmente, ocurrieron un par de cosas graciosas. Si me siguen en facebook, posiblemente hayan leido el status que publiqué en esa ocasión y sepan de qué hablo, pero por si acaso no es así, aquí lo tienen: Instrucciones para soplar velitas con niños de 4 años: 1) Cree, inocentemente, que será posible encender 8 velas con dos niños de 4 años excitadísimos y esperando impacientemente para soplarlas,y justo en el primer año en que se dan cuenta de qué es un cumpleaños 2) Coloque la cámara en un trípode a las corridas, e intentando mantener a dichos niños alejados del trípode y de la cámara 3) Seleccione los parámetros incorrectos accidentalmente, causando que todas las fotos sucesivas aparezcan borrosas 4) Intente encender las velas, una torta por vez 5) Observe cómo los mencionados niños la persiguen soplando vigorosamente, apagando las velas tan pronto como usted logra encenderlas. 6) Dese cuenta que los parametros de la cámara no importan demasiado, porque sus hijos estan soplando las velas tan rapidamente que todas se han apagado antes que el modo continuo de la cámara comience siquiera a tomar fotos. 7) Rápido, tome un niño y coloquelo en posicion de soplado aunque todas las velas ya esten apagadas, para fingir una foto correcta, mientras el otro niño corre alrededor gritando, excitadísimo, “de nuevo! de nuevo!”8) Encienda las velas de la segunda torta, tome ambos niños y a su amiguita que a estas alturas tambien quiere soplar velas, y haga un último intento 9) Disfrute el feliz caos y las risas generalizadas y olvide que nadie será capaz de distinguir nada en las fotos 😉
Que tengan un hermoso día!

by Marcela M. | Sep 27, 2012 | Blog, Europe, Travel, Uncategorized
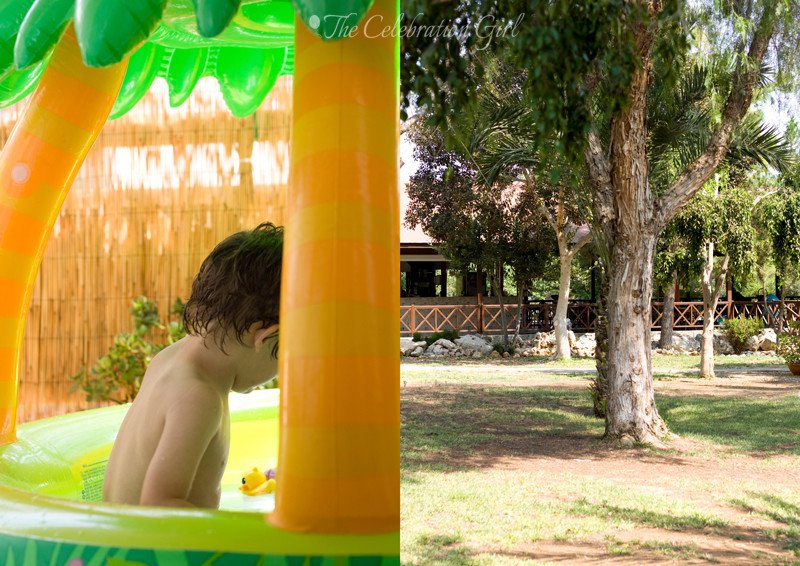
Autumn is here.
September is almost over and, while Summer is still lingering in Nicosia, some trees have started to lose their leaves, and, early in the mornings and when the sun sets at night, the air is fresh and a lovely, cool breeze signals the beginning of the new season.
I am, normally, an autumn-winter person. I thrive in cold weather, I love snow and even rain, and I have a hard time putting up with high temperatures. I have always looked forward to seeing the first yellow leaves appear in the trees, to getting cardigans and sweaters out of storage and to knowing that delicious apples and pears were going to fill the market stalls soon. But this year, something changed and it wasn’t my love for cold weather, which remains intact.
This year, perhaps for the first time, I also embraced Summer.

It may have been the fact that, for the past 7 years, I have been living in countries with warmer weather climates (first in Ivory Coast, and now in Cyprus), or it may have been the fact that this was the first year that Luka and Zoe went to school, so August felt like vacations and not just like “another hot month”. Or maybe it was because we didn’t travel and, as a consequence, we got to explore Nicosia and other parts of the island with fresh eyes, or perhaps because after a hard first half of the year (2012 has been a rough one so far), we now take every single opportunity to connect, cherish our family, and celebrate.
For whatever reason, this past Summer we slowed down, we unplugged from all the media paraphernalia, we looked around us and we made it a point to be present, to be mindful, and to take advantage of what we have, of where we live, of who we are. We wanted to make this a fun-filled summer, so I turned to Pinterest for inspiration. I had been collecting ideas for a while, and in August we put them to good use.
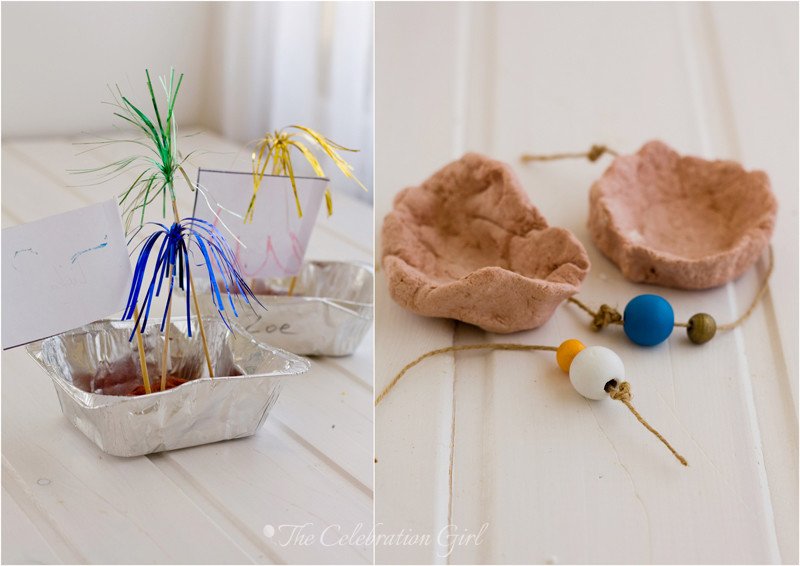
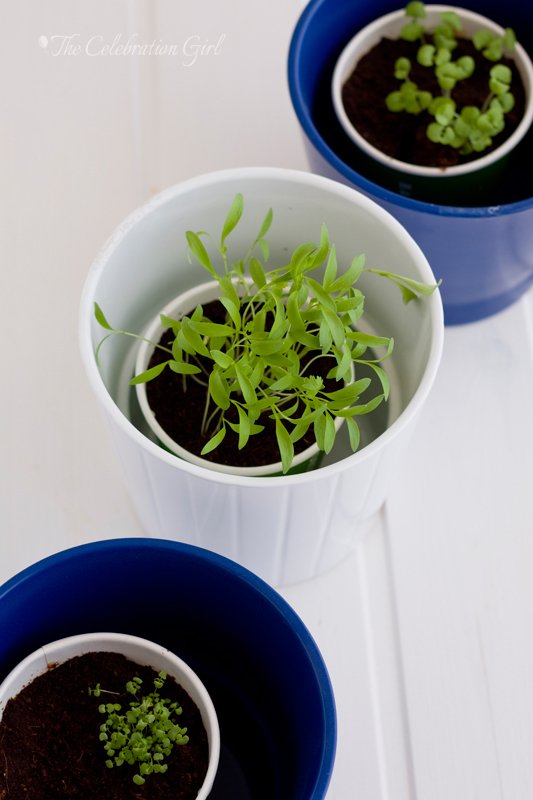
We wanted to have as much contact with nature as possible, so, at home, we planted spices to season our food. We also explored different parks and playgrounds daily, and took nature observation walks in the early hours of the morning, and then came back home to combat the heat in the paddling pool set up in the balcony. When it was too hot to get outside, we stayed indoors and spent our time doing arts and crafts. We played with clay and play-dough. We did collages and paper mobiles and hang them from the windows to twist and turn with the afternoon breeze.
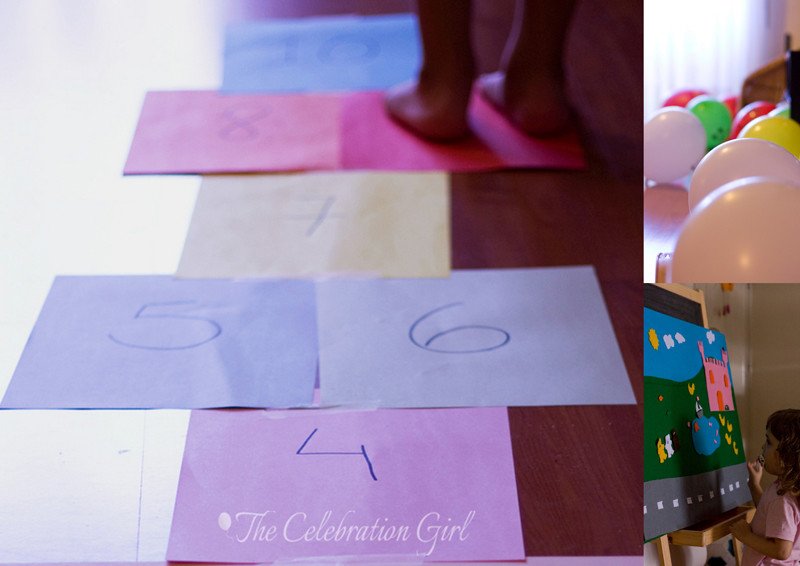
We made Toilet Tube cars, filled the house with balloons for no reason at all, glued a paper hospcotch to the floor and spent days jumping on it. We made a felt board for telling stories and singing rhymes.
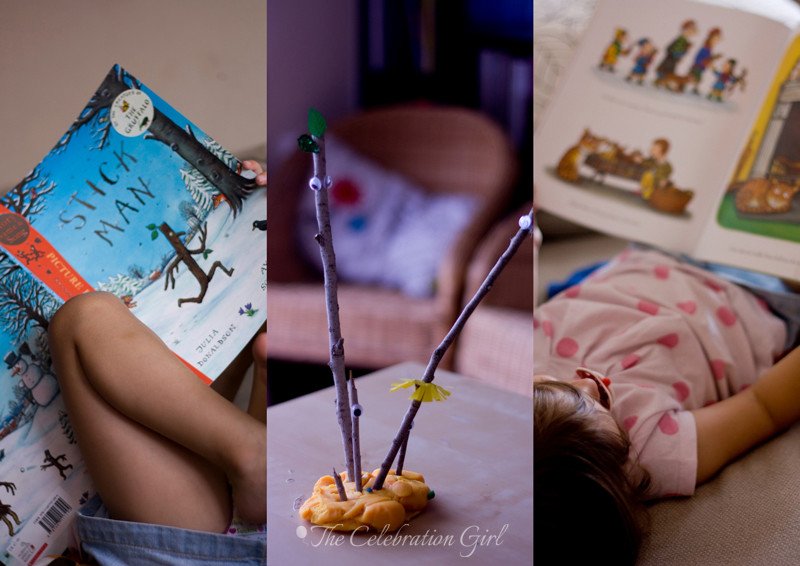
We read a lot, old and newly- discovered books, and we filled the ipod with readalong versions of our favourite stories.

We brought books to life, with a little imagination. We made lots and lots of origami boats and made them race in the paddling pool with the power of our lungs. We made origami airplanes and spent entire afternoons making them fly all around the house.
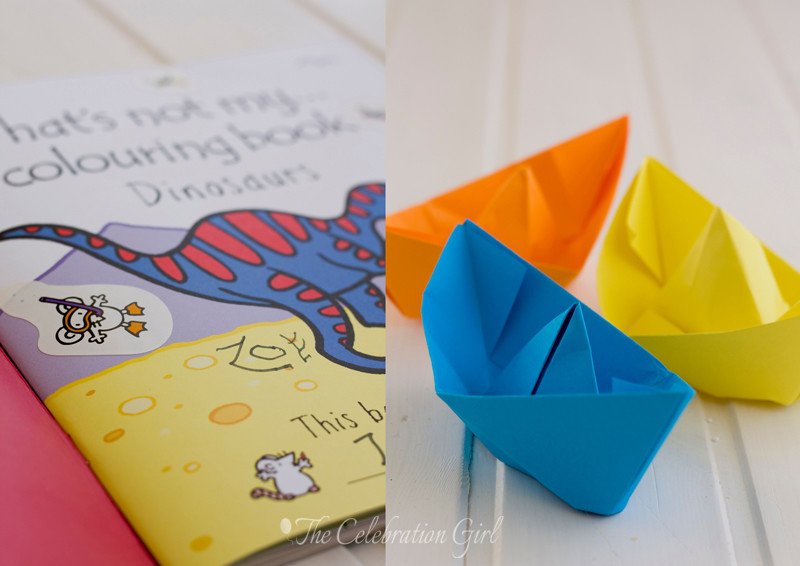
And Zoe wrote her name alone for the very first time!
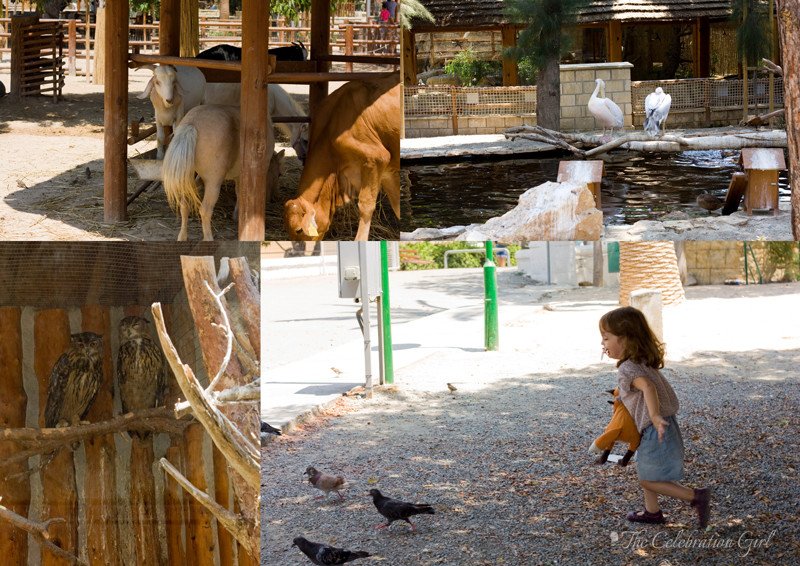
On weekends, we took day trips around the island. We visited the Protaras Aquarium, where we saw octopus, sharks, upside-down fish, penguins, pacus and many other species. We visited the Limassol Zoo, where we saw owls, monkeys, birds and even deers. We visited the Troodos Mountains and had lunch at a lovely, shaded restaurant, next to the calming sound of a stream of water where little geese and ducks were bathing.
We spent a weekend at a hotel, by the beach, and it was wonderful. We bathed and sunbathed, we played and relaxed. We saw beautiful sunsets, and the most amazing dawns from our balcony, and it all felt as carefree, peaceful and joyful as Summer should.

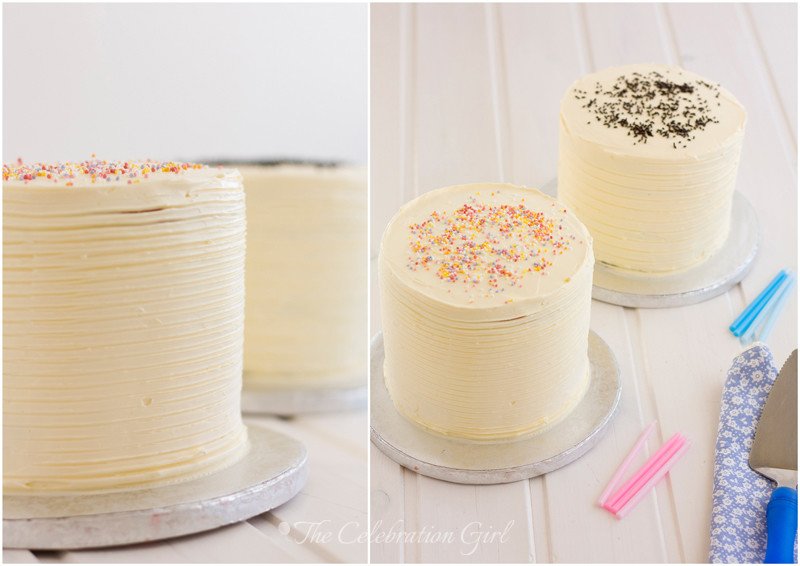
We celebrated Luka and Zoe’s birthday with not one, not two, but three cakes (each!). Yes, that’s right: one mini cake made from stacked cupcakes for the day of their birthday, one cake for each of them for a mini party at home (pictures in the next post!), and one cake for each to bring to school, to celebrate with their friends and classmates (these are cakes pictured below. Plain and simple on the outside, but with a surprise on the inside: They were rainbow cakes!).
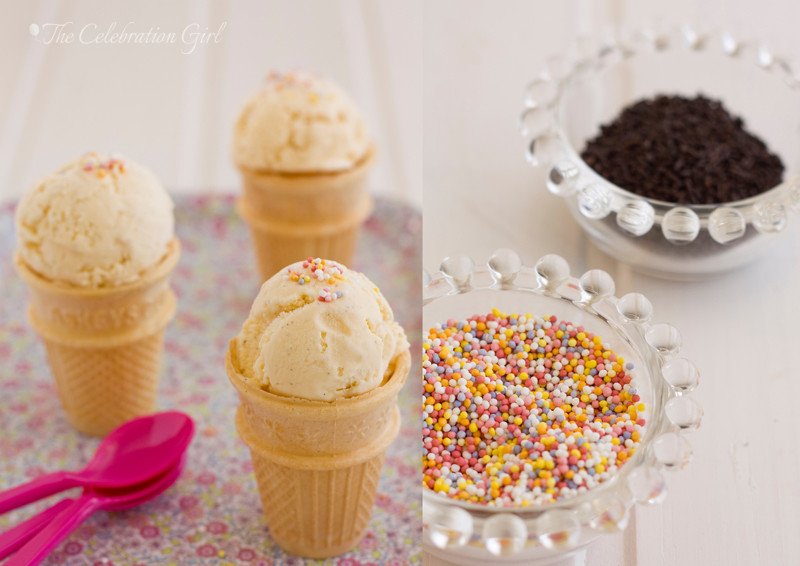
We didn’t bake much, because it was too hot to turn the oven on…but we made ice cream! And plenty of it!

At the beginning of August, we bought the KitchenAid’s ice cream attachment and began experimenting with flavours. I turned to the internet for recipes and I was not disappointed. We made David Lebovitz’ s vanilla bean ice cream (which is AMAZING), and chocolate ice cream, the famous one ingredient banana ice cream from The Kitchn (a wonderful guilt free treat!) , and an absolutely delicious vegan coconut chocolate ice cream. We also made Food and Cook’s chocolate popsicles and her yogurt and raspberries popsicles. My advice: try them all! And if you don’t have an ice cream maker, worry not, the recipes can be adapted (just let me know in the comments if you have any doubts about how to do it).
We enjoyed this Summer as Summers are meant to be enjoyed: fully. And now, as the last bits of ice cream disappear from our freezer, the weather slowly starts to get chillier and we start thinking about adding blankets to our beds, we are ready to fully embrace the colder days of Autumn.
I hope you all had a lovely Summer, or a cozy winter, depending on where you live, and I hope that you are all ready for the next season.
Have a wonderful week!

El otoño está aquí.
Septiembre casi llega a su fin y, aún cuando el verano aún se resiste a irse de Nicosia, algunos árboles ya han comenzado a perder sus hojas y, temprano por la mañana y al ponerse el sol, el aire ya está fresco y una adorable brisa señala el comienzo de la nueva estación.
Yo soy, en geneal, una persona otoñal. Me siento mejor en climas fríos, amo la nieve, y hasta la lluvia, y me cuesta terriblemente tolerar las altas temperaturas. Desde chica esperaba con ansias ver las primeras hojas amarillas aparecer en los árboles, el momento de sacar cardigans y sweaters de los baules y colocarlos en los placares (closets) y, sobre todo, ese saber que las manzanas y peras más deliciosas pronto llenarían los estantes de las fruterías. Pero este ano, algo cambió, y no fue mi amor por el frío, que sigue fuerte e intacto.
Este año,por primera vez, me entregué al verano, y lo aproveché sin desear que terminara.
Quizás haya sido porque hace siete años que vivo en climas cálidos (Costa de Marfil, primero, y ahora Chipre), quizás haya sido porque este fue el primer año que Luka y Zoe fueron a la escuela, entonces Agosto se transformó en sinónimo de vacaciones, y no tan sólo de otro mes caluroso. O quizás haya sido porque, como no salimos de viaje, aprovechamos al máximo la ciudad en que vivimos y exploramos la isla con nuevos ojos. O tal vez haya sido que, luego de una primera mitad del año complicada (2012 viene siendo un año duro), aprovechamos cada pequeña oportunidad para conectar, disfrutar de nuestra familia, y celebrar que estamos juntos.
Por el motivo que fuere, este verano que acaba de pasar decidimos desacelerar, desconectarnos de la parafernalia mediatica, mirar a nuestro alrededor y asegurarnos de estar presentes en nuestro aquí y ahora, de vivir concientemente, y disfrutar de aquello que tenemos, del lugar donde vivimos, y de todo lo que somos. Quisimos que este fuera un verano divertido, alegre, así que aprovechamos para poner en práctica todas las ideas que había estado recolectando en Pinterest desde hacía un tiempo.
Una de las cosas que queríamos era tener tanto contacto con la naturaleza como fuera posible, así que plantamos plantas aromáticas en el balcón y nos aseguramos de explorar distintos parques todos los días, y de hacer caminatas de observación de la naturaleza, todos los días, temprano por la mañana. Cuando el calor comenzaba a arreciar, volviamos a casa, disfrutabamos de la pileta plástica que colocamos en el balcón y, si se tornaba insoportable, entrábamos a casa a hacer arte y manualidades. Así pasamos las siestas jugando con plastilina y masilla, hicimos collages y móviles de papel que colgamos de la ventana para que la brisa de la tarde los hiciera volar y dar volteretas. Construimos autitos con tubos de papel higienico, llenamos la casa de globos por que sí, pegamos rayuelas en el piso y pasamos tardes enteras saltando en ellas. Creamos un cuadro de felpa y contamos historias y canciones con sus personajes.
Leimos mucho, libros viejos y nuevos, y llenamos el ipod de audio libros de nuestras historias favoritas y, con un poco de imaginación, dimos vida a nuestros libros. Hicimos barquitos de papel y los hicimos correr carreras con la fuerza de nuestros pulmones. Hicimos avioncitos de papel y pasamos tardes enteras haciendolos volar por toda la casa.¡ Y Zoe escribió su nombre por primera vez!
Durante los fines de semana, nos dedicamos a explorar la isla en viajecitos de un día. Visitamos el acuario de Protaras, donde vimos pulpos,tiburones, pinguinos, peces invertidos y pacus, entre otras especies. Fuimos al Zoológico de Limasol, donde vimos buhos, monos, pájaros diversos y hasta alces. Subimos a las montañas Troodos y almorzamos en un restaurant precioso, bajo las copas de los arboles, y delimitado por una corriente de agua fresca en la que se bañaban, contentos, patitos y gansos.
Pasamos un fin de semana en un hotel frente al mar, y fue maravilloso. Nos bañamos en la pileta (piscina), tomamos sol, jugamos y nos relajamos. Vimos atardeceres hermosos y amaneceres de ensueño, desde la calma de nuestro balcón y todo hizo que nos sintieramos tan tranquilos, relajados y felices como todos deberian poder sentirse en verano.
Celebramos el cumpleaños de Luka y Zoe con no una, no dos, sino tres tortas ¡cada uno!. Si, como lo leen: una mini torta de cupcakes el día de su cumple, una torta cada uno para la mini fiesta que hicimos en casa (fotos en el proximo post!) y una torta cada uno para llevar a la escuela, y así soplar las velitas con sus amigos y compañeros (estas son las tortas de la foto, que son muy simples y sencillas por fuera, pero con sorpresa adentro: son la famosa torta arco iris!)
No hicimos tortas ni cupcakes ni esas cosas que requieren horno porque hacía demasiado calor…pero hicimos muchos helados!
A comienzos de agosto compramos el accesorio helador de la KitchenAid y, a partir de entonces, comenzamos a experimentar y probar helados de distintos sabores. Busqué las recetas y la inspiración en blogs de confianza, y en internet, y la verdad es que no me decepcionaron. Hicimos dos helados de David Lebovitz, el de vaina de vainilla (INCREIBLE!) y el de chocolate (que tiene una textura de chocolate con leche), el helado de un banana de un solo ingrediente, the The Kitchn, y un helado vegano absolutamente delicioso, de chocolate y coco. Tambien probamos dos recetas de Food and Cook, el de palitos de chocolate y el de palitos de yogur y frambuesas. Mi recomendación: haganlos a todos! Y no se preocupen si no tienen máquina heladora, las recetas pueden adaptarse (si no saben cómo, dejenme un comentario en el post!)
La verdad es que disfrutamos de este verano como los veranos deben ser disfrutados: completamente. Y ahora que los últimos restos de helado comienzan a desaparecer de nuestro freezer, que el clima comienza, lentamente, a tornarse más fresco y que empezamos a pensar en agregar colchas a nuestras camas, ahora sí estamos listos para aprovechar cada minuto de los días fríos, del otoño.
Espero que ustedes hayan tenido también un verano hermoso, o un invierno cálido, dependiendo de dónde vivan, y espero que esten listos para vivir al máximo y disfrutar enormemente la nueva estación que apenas se asoma.
Que tengan una semana maravillosa!
by Marcela M. | Aug 10, 2012 | Blog, Parties, Uncategorized
Good Morning friends!
I hope you are having a lovely week, enjoying the warmth of summer (if you live in the Northern Hemisphere) or the cool days of winter (if you live in the South).
Luka and Zoe are currently on a break from nursery school and, for this reason, I have decided to take a break from blogging during this month, and to dedicate it completely to making this a summer to remember. A few weeks ago, I read THIS post on the blog Modern Parents Messy kids and it got me thinking about how time seems to fly, how childhood seems to go by in the blink of an eye.
I remembered, as I read, a passage from one of my favourite books, Ray Bradbury’s Dandelion Wine, where it says: “You’ll find out it’s little savors and little things that count more than big ones. A walk on a spring morning is better than an eighty-mile ride in a hopped-up car, you know why? Because it’s full of flavors, full of a lot of things growing. You’ve time to seek and find. I know, you’re after the broad effect now, I suppose that’s fit and proper. But you got to look at grapes as well as watermelons. You greatly admire skeletons and I like fingerprints; well, and good. Right now such things are bothersome to you, and I wonder if it isn’t because you never learned to use them. If you had your way you’d pass a law to abolish all the little jobs, the little things. But then you’d leave yourselves nothing to do between the big jobs and you’d have a devil of a time thinking up things? Cutting grass and pulling weeds can be a way of life.” So, I decided to make this a summer of little things: to blow lots of bubbles, to hunt for rocks, to explore new parks, to try new games, to bake more cookies, to laugh a lot, and jump on beds, and give “no”a little break. Without computer(except for talking to grandma (my mother) via skype), without cellphones, just trying our best to be present, to be mindful, to really be here and now.
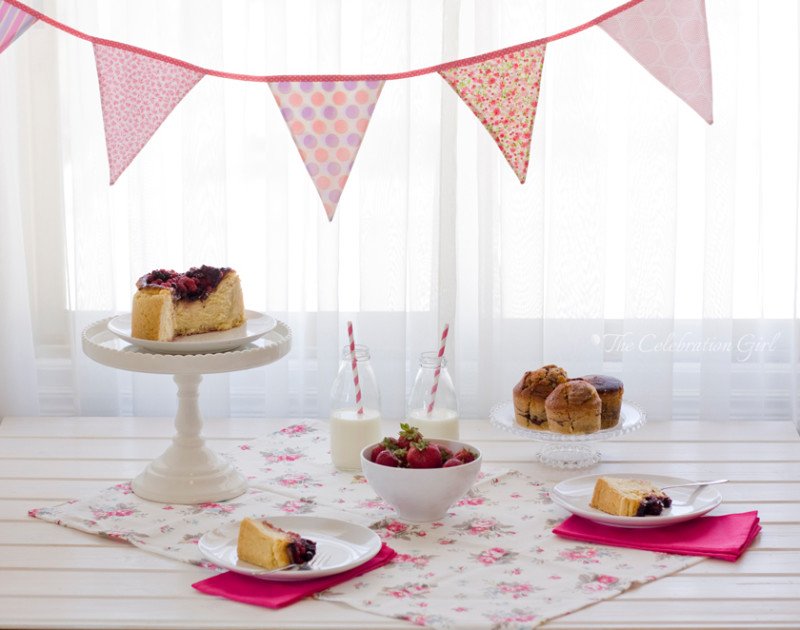
But I didn’t want to leave you just like that, so I put together a teeny tiny tutorial for planning a simple, yet pretty, table setting, which could be useful if you are entertaining but do not have a huge budget. This is how I do it:
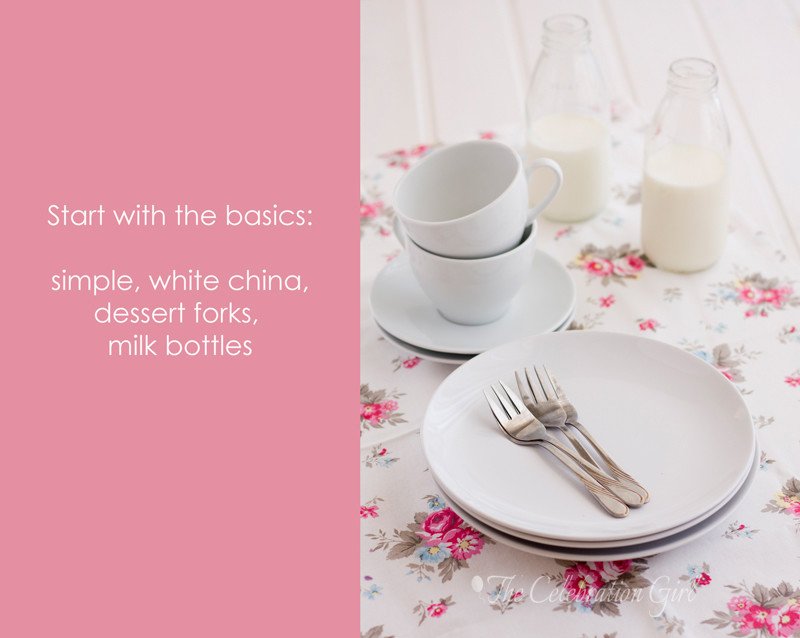
I don’t own expensive china, but I do own a set of very basic and versatile white plates and cups (from Ikea), which I can always pair with anything more colourful that I find around the house. I find that, when one doesn’t have tons of money and plenty of space for different tableware sets (I know I don’t!), white is the best choice. And one little secret: my milk bottles are not, in fact, milk bottles. They are recycled energy drink bottles! I scout supermarkets for cute bottles and sometimes chose products based on other uses I can give to the packaging.
If your china has a pattern or a different colour, don’t panic! Just keep reading!

Next, pick something that you really like from your home. For my birthday I chose the above-pictured kitchen towel (which I don’t use as such because I find it too pretty!) and I used it as a place mat in the middle of the table, to add a pop of colour. But you could use anything: a vase, a wooden toy, a pretty box, anything that you find beautiful and that matches the look that you want for your table.

Colour is the next step…or you could chose to work with whites only, and then add interest by using different textures. But if you do chose colour, remember that you don’t need to stick to a monochromatic palette using only shades of the same colour, or colours that are next to each other on the colour wheel; you also have the option of working with contrasting colours. So, if your china has a blue pattern, you are not restricted to blues and greens, but you could also use oranges, yellows and browns and there are so many shades of each that the possibilities become endless!
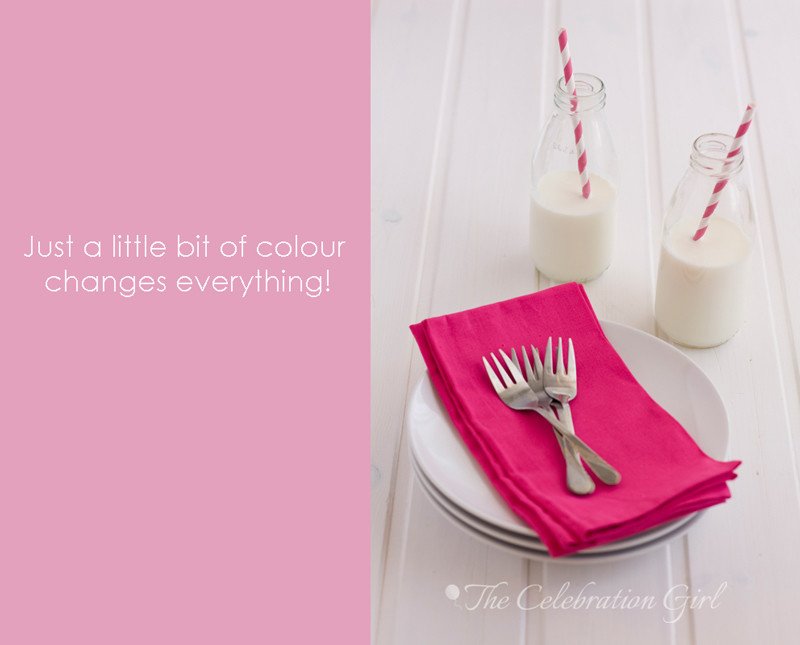
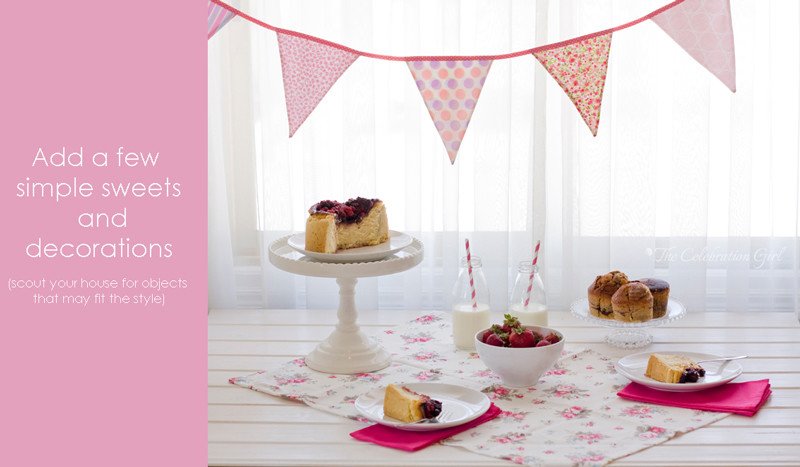
Work with what you already have, and remember that pops of colour don’t need to be expensive items: a few lemons, oranges, or even tomatoes, a couple of colourful straws, a few leaves or flowers from your garden (or the neighbour’s-ask first!), a few candles, a mason jar with some ribbon, anything can work. The banner from the picture above was taken from my daughter’s bedroom, for example, and the pretty glass cake stand? It’s not a cake stand at all, but a plate placed on top of an inverted bowl.
Finally, add food. Whatever food you like, it doesn’t have to be anything fancy. As much as I like beautifying food, I am a big believer that the most important thing is for it to taste delicious.
And most importantly, relax and have fun with those you love. That’s the only thing that matters.
Have a wonderful summer (or winter!)! See you again in September!
(Spanish translation coming soon)
by Marcela M. | Jul 21, 2012 | Blog, cookies, Recipe Box, Recipes, South America, Sweets, Travel, Uncategorized
Good evening dear friends! I hope you are having a lovely weekend.
Days have been incredibly HOT in Nicosia this past week, with temperatures ranging from 40 to 45.5 degrees celsius. Summer is definitely here and this means doing our best to minimize as much as possible the heat that comes into the house. This is why we clean early in the morning, and then try to keep all window shutters down, to turn the stove on as little as possible and, you guessed it, we avoid baking! We tend to opt for meals that require minimal cooking, such as fresh salads, and, for dessert, we eat fruits and simple home-made fruit lollies.
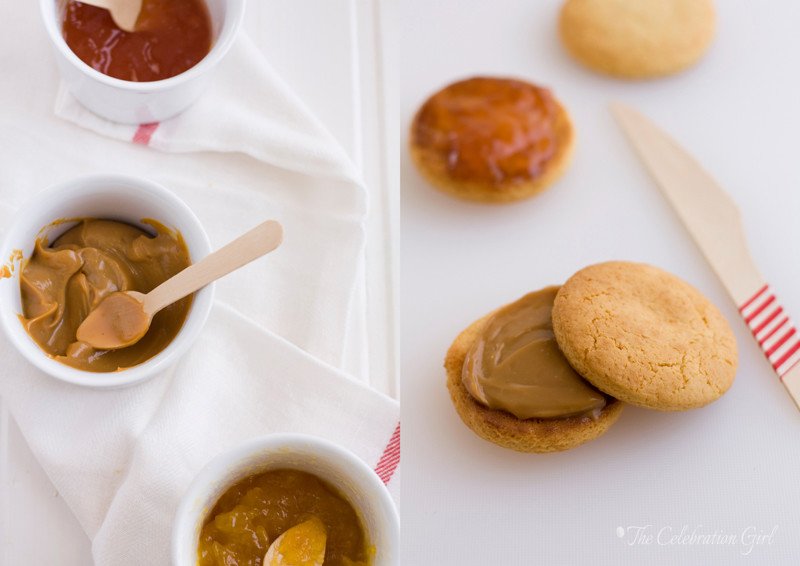
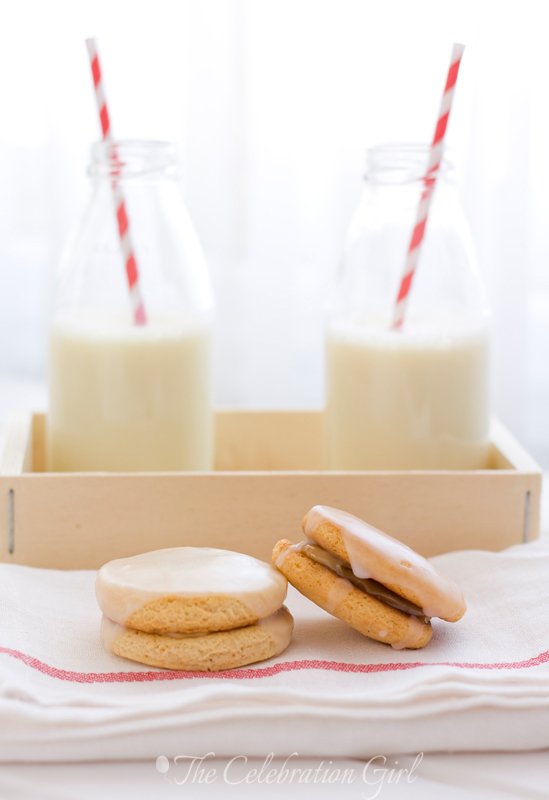
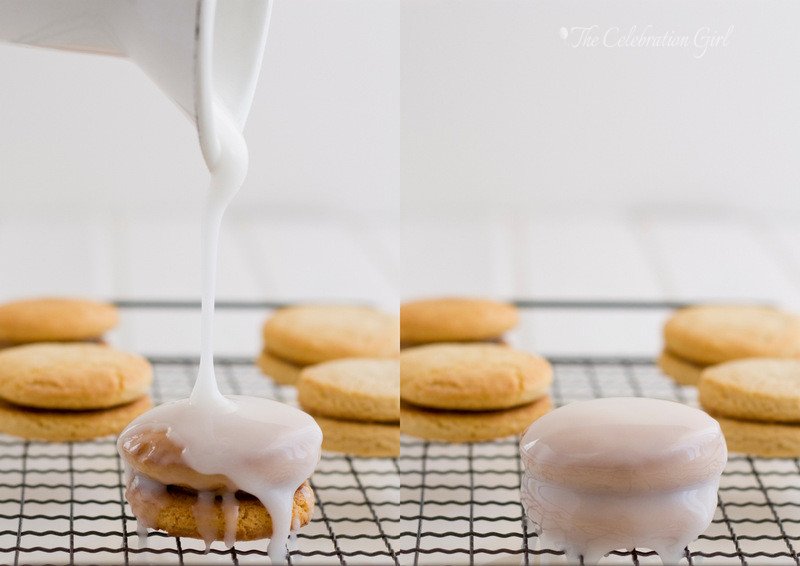
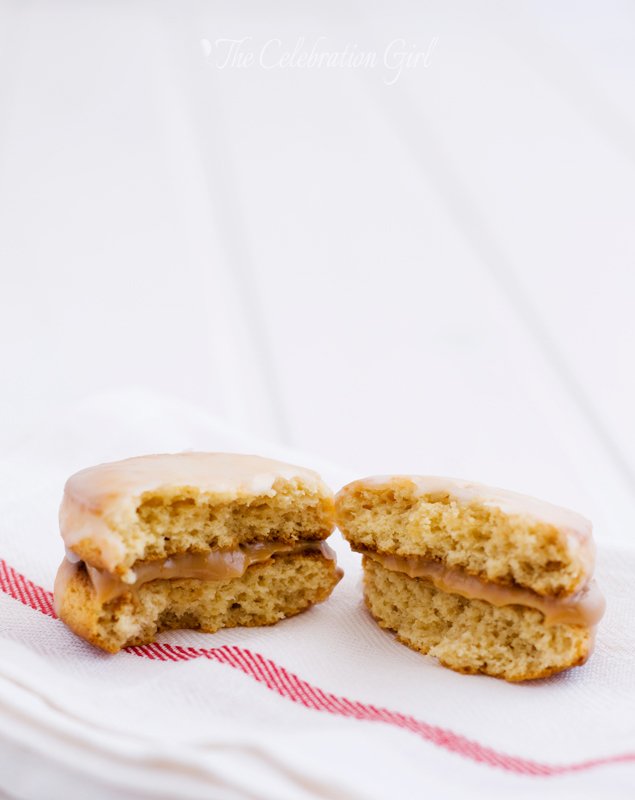
Sometimes, however, we do crave a little baked treat and, for those occasions, these alfajores are perfect: they are incredibly easy and they take only 5 to 7 minutes in the oven to be ready. After they have cooled down, they are sandwiched with fruit jam or dulce de leche and covered in the simplest glaze of all: icing sugar to which we just add a few tablespoons of boiling water and a sprinkle of lemon juice. They couldn’t be easier!
You may have noticed that I called these alfajores “semi cordobeses” , and there is a reason for that. I had been looking for a while for a recipe of the particular type of alfajores from my home city. I never had one because, when I lived there, I always bought them from a nearby store but, now that I live abroad and that I have children whom I would like to introduce to my culinary traditions, I wanted to be able to make them at home.
The search, however, proved to be difficult. It turns out that Argentina’s cocina criolla (créole cuisine) is famous for being “unreliable” or “moody”. Now, I honestly refuse to attribute human characteristics to any recipe and I believe, instead, that what happens is product of the typical way recipes are transmitted back home: as part of family heritage. Recipes are learned, first, by watching our elders prepare them at home and, later, by making them together with them when we are older. At my own home, for example, we rarely measured ingredients and recipes were rarely written down. We just knew how they were supposed to turn out and how to fix common problems, because we had been making them our whole life.
This reminds me of an anecdote from my grandmother. One day, back in 1997, I was about to leave Argentina for a few months when I realized that I had never written down some of her delicious staple recipes and that I would not necessarily remember how they were done because they were not everyday dishes. So I sat down with her, in her kitchen, armed with a notebook and a mate, and she started trying to explain to me how the recipes were done. Our dialogues went more or less like this:
Me: So, let’s see, “rosquitas“. What ingredients do they take?
Grandma Antonia: 6 eggs, 3 tablespoons of alcohol, 1/2 kilo of flour.
Me: And how do I make them?
Grandma Antonia: Just mix everything until you get a smooth dough. But if you feel that it turns out to be too dry, add another egg.
Me: (confused) But how do I know if the dough is too dry and I should add another egg or if I should just keep mixing??
Grandma Antonia: I don’t know! I just know!
Of course, we ended up making rosquitas together and I took many more notes than the ones initially provided by my grandmother. She knew so well how to make the recipe that it was hard for her to put herself in my shoes, or in the shoes of anyone who, well, just didn’t know everything that she did.
Most of the recipes I have from my home are like that. They mention “a drop of milk”, “a bit of flour”, or they get started with 100 grs of chocolate but then add unmeasured extra quantities of it as the preparation progresses, according to how we know the dish is supposed to turn out because we made it countless times before. This is perfectly okay when recipes are transmitted within families but it becomes a problem when one has never seen the dish being prepared before. People tend to transmit the initial ingredients and the basic procedures but, more often than not, they simply forget to pass down vital information that one only acquires when making the food with them. Then, of course, fiascos become very common!
Let me just tell you that I had many of those fiascos before achieving this recipe (which gave me a few headaches too!) and I still haven’t found a good one for our traditional colaciones. What’s more, I don’t think my search for the real alfajor cordobés is over yet. These are delicious cookies, the texture of which does resemble that of our traditional sweets…but the taste is not quite “it”, in my opinion, and that is the reason I called them “semi-cordobeses”. That being said, do try them, because they are really, really tasty!
Here is the recipe:
Ingredients (For 25 alfajores of 4 cms diameter/ 50 single cookies)
– 500 grs all purpose flour (0000)
– 10 grs amonium bicarbonate (or 12 grs sodium bicarbonate, which is less smelly)
-10 grs baking powder
– 120 grs soft butter or margarine
– 2 eggs (I used M)
– 200 grs sugar
– 50 grs honey
– 15 grs malt extract (I used barley malt extract, which I found in the organic food section of my local supermarket)
– Fruit jam of your choice or dulce de leche, for sandwiching the cookies. I used quince jam, apricot jam and dulce de leche, for more variety. Traditional jams are quince, apricot, apple and pear.
– 4 cups of icing sugar
– 1 tablespoon of lemon juice
– 3/4 cup of boiling water (or 12 tablespoons)
Preparation:
1) Mix flour, baking powder and bicabonate.
2) Pour flour mix on the kitchen counter and make a hole in the middle
3) Add butter, eggs, honey, malt extract and sugar in the hole. Start mixing the wet ingredients with your hands, and once this is done, start incorporating the flour, little by little, until you get a uniform dough.
4) Cover the dough in plastic wrap and put in the refrigerator for 20 minutes.
5) In the meantime, prepare your baking sheets by lining them with baking paper.
6) A few minutes before removing the dough from the refrigerator, preheat the oven to 250 degrees C (maximum)
7) Roll the dough 1/2 cm wide and cut circles using a cookie cutter. Place the circles on baking sheets and put them in the freezer for 5 minutes. NOTE: The cookies grow in the oven, so place them apart on the baking sheet or they will join one another. Also, do not skip the freezer part or they will lose their shape!
8) Bake in a hot oven for 5 to 7 minutes, until they barely begin to brown. Be careful, they brown easily!
9) Remove from the oven, transfer to a wire rack and let cool completely
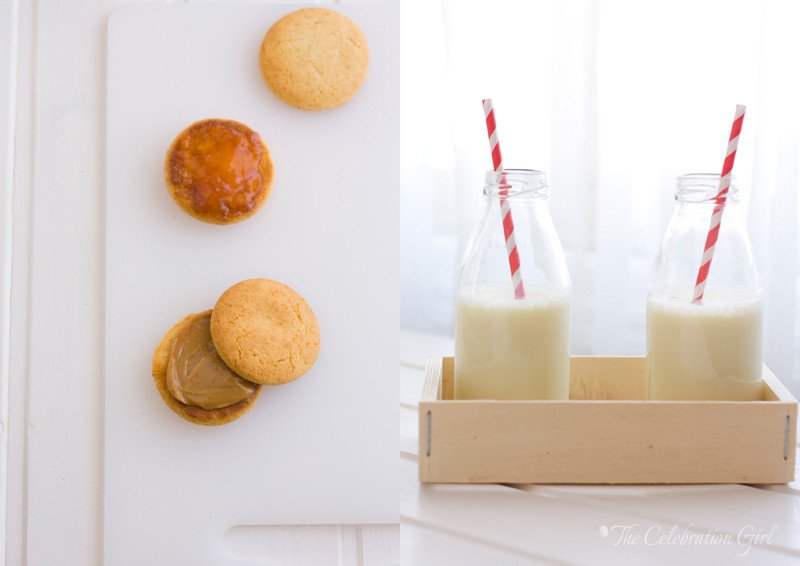
10) Add one tablespoon of jam or dulce de leche to one cookie, and sandwich it by placing another one on top. Now you have an alfajor! Continue until all cookies have been sandwiched together.
11) Prepare the glaze by adding the boiling water and lemon juice to the icing sugar and mixing well, until no lumps remain.
12) Place the alfajores on a wire rack and pour the glaze over them. Let the glaze cool and harden, and eat.
You may store them in the freezer for up to 3 months. I hope you will like them!
Buenas noches queridos amigos! Espero que esten pasando un hermoso fin de semana!La semana pasada tuvimos unos días increíblemente calurosos en Nicosia, con temperaturas que iban de los 40 and los 45.5 grados centígrados. El verano se ha instalado aquí definitivamente y eso significa, para nosotros, hacer todos los esfuerzos posibles por minimizar la entrada de calor a la casa. Por este motivo, limpiamos bien temprano a la mañana y luego intentamos mantener todas las persianas bajas, cocinar lo menos posible y, se imaginarán, evitamos prender el horno! Así que optamos por comidas livianas, que requieran mínima cocción, como ensaladas frescas, muchas frutas y helados palito de fruta, bien simples.A veces, sin embargo, nos agarren esos ataques de algo dulce-dulce y, para estos casos, estos alfajores son perfectos: son increiblemente fáciles de hacer y sólo requieren 5 a 7 minutos de horno. Una vez que estan cocidos y ya se han enfriado, se los une con mermelada de frutas o dulce de leche y se los cubre con el baño más sencillo que existe: azucar impalpable a la que se le agrega agua hirviendo y un poquito de limón. No pueden ser más sencillos!Seguramente habrán notado que llamé a estos alfajores
semi cordobeses y esto tiene una razón de ser. Hace ya bastante venía buscando una buena receta de los alfajores tradicionales de mi terruño (
de los que hablé en este post). Cuando vivía en Argentina nunca los hice porque, en caso de antojo, no tenia más que ir al kiosco a comprar uno, pero ahora que vivo en el exterior y que quiero transmitirle a mis hijos mis tradiciones culinarias, comencé a querer poder hacerlos en casa.
La búsqueda, sin embargo, no fue sencilla. Descubrí, entre otras cosas, que la cocina criolla tiene fama de “poco confiable” “traicionera” o “temperamental”. Ahora bien, honestamente me niego rotundamente a asignarle a una comida caracteristicas humanas y creo que lo que en realidad ocurre, que el motivo por el que las recetas “no siempre salen bien”es otro, y está ligado a la forma en que se transmiten las recetas: como parte del acervo familiar de cada uno. Las recetas no se escriben, se aprenden mirando a nuestros mayores, cuando somos chicos, y haciéndolas con ellos, cuando crecemos. En mi casa, por ejemplo, rara vez mediamos ingredientes meticulosamente, ni escribiamos instrucciones detalladas. Simplemente
sabíamos cómo debía quedar el plato y cómo solucionar posibles problemas, porque lo veníamos haciendo toda nuestra vida.
Escribo estas líneas y recuerdo una anecdota, muy ilustrativa, que involucra a mi abuela. Un día, allá por el año 1997, días antes de que yo fuera a partir de Argentina por unos meses, caí en la cuenta de que nunca había anotado algunas de aquellas deliciosas recetas que mi abuela no hacía tan frecuentemente y que, por lo tanto, yo no conocía de memoria. Así que me senté con ella en la cocina de su casa, con un cuadernito que aún conservo, y una pava de mate, a intentar que ella me explicara su recetario personal. Nuestros dialogos terminaron siendo algo más o menos asi:
Yo: Bueno, a ver, rosquitas. ¿Qué ingredientes llevan?
Abuela Antonia: 6 huevos, 3 cucharadas de alcohol, 1/2 kilo de harina
Yo: Y como las hago?
Abuela Antonia: Mezclá todo hasta que te quede una masa suave. Pero si ves que la masa está muy seca, agregá un huevo
Yo: (confundida)…pero cómo sé si la masa está seca como para agregarle un huevo o si sólo tengo que seguir trabajandola
Abuela Antonia: ah, no sé! Yo sólo sé!
Obviamente terminamos haciendo las rosquitas juntas y en ese momento tomé muchisimas más notas para complementar las instrucciones iniciales dadas por mi abuela. Ella conocía tan bien cómo hacer la receta que le resultaba dificil ponerse en mi lugar, o sea, en el lugar de una persona que no supiera aquello que ella sabía tan a la perfección.
La mayoría de las recetas que traigo de casa son así. Hablan de “un chorrito de leche”, “un poquito de harina” o mencionan 100 grs de chocolate, pero no cuentan todos esos “poquitos extra” que se van agregando durante la preparación, conforme cómo el plato “debe quedar”. Esto funciona de maravillas con las recetas familiares, porque uno las conoce de memoria y no necesita una receta detallada, pero se transforma en un problema para alguien que nunca hizo el plato antes. La gente tiende a transmitir sólo los ingredientes iniciales y los procedimientos básicos, olvidando transmitir tambien, la mayor parte de las veces, aquellos datos extra que son vitales para obtener un buen resultado. Y en esos casos, claro, los fiascos son momumentales y uno se queda mirando el horroroso resultado final y preguntándose qué habrá ocurrido.
Dejenme decirles que, en la busqueda de esta receta he tenido muchos de esos fiascos, que, aun esta receta misma me dio varios dolores de cabeza al comienzo, hasta que logré “rellenar los espacios vacíos”, y que aún no logro dar con una buena receta de colaciones. Y más aún, todavía no considero que mi búsqueda del perfecto alfajor cordobés haya culminado. Estos alfajorcitos son deliciosos, y tienen una textura muy similar…pero el gusto no es exactamente el del alfajor cordobés tradicional, en mi opinión, y es por este preciso motivo que los llamé “semi-cordobeses”. Dicho esto tambien les digo que no dejen de probarlos porque son realmente muy, muy ricos!
Aquí está la receta:
Ingredientes
– 500 grs de harina cuatro ceros
– 10 grs de bicarbonato de amonio o 12 grs de bicarbonato sódico ( que es menos oloroso)
– 10 grs de polvo de hornear
– 120 grs de margarina o manteca
– 2 huevos
– 200 grs de azucar
– 50 grs de miel
– 15 grs de extracto de malta
– mermelada de frutas o dulce de leche para unir las tapitas. Yo usé mermelada de membrillo, de damascos y dulce de leche. Las mermeladas tradicionales son membrillo, damascos, pera y manzana.
– 4 tazas de azucar impalplable
– 3/4 taza de agua hirviendo
– 1 cucharada de jugo de limón
Preparación:
1) Mezcle la harina con el polvo de hornear y el bicarbonato
2) Coloque la harina sobre la mesada en forma de corona (haciendo un huevo en el medio)
3) Agregue, en el hueco mencionado, la manteca o margarina, los huevos, el azucar, la miel, y el extracto de malta. Mezcle los ingredientes húmedos con las manos y, una vez incorporados, comience a agregar de a poco el harina, moviendola hacia el centro en pequeñas cantidades, hasta formar una masa uniforme.
4) Cubra el bollo de masa con papel film y lleve a la heladera por 20 minutos.
5) Mientras tanto, prepare las placas para horno recubriendolas con papel de hornear (antiadherente).
6)Unos minutos antes de sacar la masa de la heladera, precaliente el horno a maximo/250C
7) Saque la masa de la heladera y estirela con palote de amasar hasta que tenga un ancho de 1/2 cm. Corte circulos de aproximadamente 4 cms de diametro, coloquelos sobre la placa y lleve la placa al freezer por 5 minutos. NOTA: las tapitas crecen en el horno, asi que coloquelas suficientemente separadas la una de la otra o se unirán al cocerlas. Asimismo, no omita ponerlas en el freezer o perderan la forma!
8) Cocine las tapitas en horno fuerte por 5 a 7 minutos, hasta que esten apenas doradas. Tenga cuidado, se doran muy rápido, vigílelas!
9)Retire del horno, transfiera a una rejilla, y deje enfriar totalmente.
10) Una vez que las tapitas estén frias, unte la mitad con una cucharada de la mermelada/dulce de su elección, y cierrelas con las tapitas restantes, haciendo un sandwich. Una vez haga esto, usted tendrá en sus manos alfajores!
11) Prepare el baño de azucar agregando el agua hirviendo y el limon al azucar impalpable y revolviendo bien hasta que no queden grumos.
12) Coloque los alfajores sobre una rejilla y cubralos con el baño de azucar. Deje que el baño se seque y endurezca y disfrute!
Pueden guardarlos en el freezer por 3 meses. Espero que les gusten!

Have a wonderful weekend and a great start of the new week!


