by Marcela M. | Dec 4, 2012 | Blog, Christmas and NYE, cookies, Holidays, Recipe Box, Recipes, Sweets

Good morning friends! It’s day 4 of the advent, and it’s only 20 days until Christmas eve, can you believe it? I know it’s a real cliché, but I have no idea where time went this year. Let’s make the most of this last month, shall we?
I hope you have your cookie doughs ready because we are going to put them to good use today. So, take them out of the freezer or refrigerator and gather your cookie cutters, a few sugar pearls and nonpareils because we will start making pretty cookies for your assorted cookie box.
We will start by the simpler cookies and, in following posts, I will show you other techniques and ideas and we will increase difficulty as we go. As I have mentioned before, I want to encourage you to bake with your children and, for this reason, I decided to include easy cookies that you can make even with toddlers. When baking with small children, though, I would recommend you to bear in mind two things: 1) Forget about the mess and about the end result. You can always bake perfect cookies later. Baking with children is more about having fun and letting them be creative in the kitchen, letting them familiarize themselves with the tools of the craft and about sharing special moments, building memories. 2) Make extra dough, because they will soon discover that unbaked cookie dough tastes delicious!
I used a few of the cookie cutters I had, just to give you an idea but, as you will soon discover, many more combinations are possible. You could also dye some of the dough in red or green or whatever color you are using for your party and thereby increase the possibilities. Also, for the cookies to keep their shape, refrigerate, refrigerate, refrigerate! Do not skip this step!
Here are some ideas:
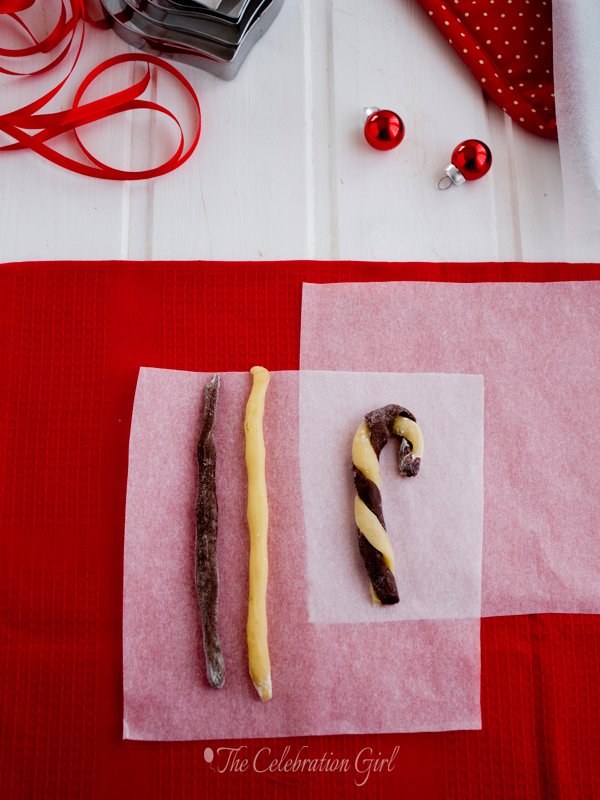
1) Candy cane cookies: There are no pictures of the finished product because my children ate them before I could take pictures (ahem) but they look the same as the one you see already shaped in the picture above. I used vanilla and chocolate sugar cookie doughs, but you could use other combinations, for eg: gingerbread and vanilla, orange and chocolate, plain vanilla and red dyed dough, etc. Making them is very easy: take a small piece of each dough between you hands and shape them as cilinders.Place them next to each other and braid them. Roll the resulting bi-color cilinder a couple of times, to integrate it, and then twist down the upper part, forming a cane. Cut the ends to keep them even. Put in the freezer for 20 minutes and bake.
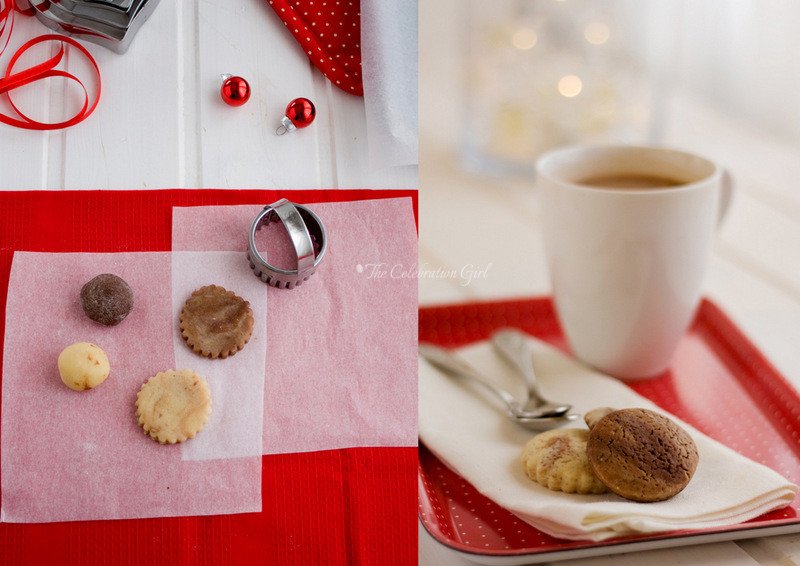
2) Marbled cookies: Take two pieces of dough of different colours, join them by the side and twist a few times. Don’t overdo it or they will merge and you will a have dough in a lighter version of the darker color, not a marbled one. Roll, cut, refrigerate and bake.
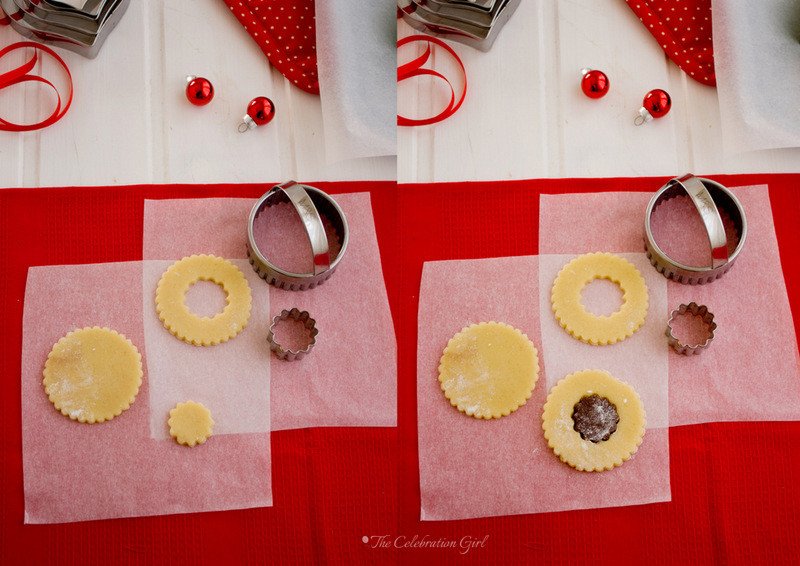
3) Cut out cookie combinations: To make these cookies you will need 2 cookie cutters of the same shape, but different sizes. Roll your cookie doughs and cut a shape with the bigger cutter. Place it in the baking tray and, once there, cut a smaller shape from the same cookie, leaving a “hole” inside. You need to do this when the big cookie is already in the baking tray or it may break or lose shape when transferred. Cut a big cookie of a different color, and repeat the process. Then mix and match the insides. They will merge in the oven and attach to the bigger cookie. Another option that I didn’t have the time to photograph but looks really pretty is to insert crushed hard candy in the hole, to get a vitreau effect. Note: If you don’t have cookie cutters, you can use other utensils. In the past I have used the lid of a marmalade jar to trace a big circle and the lid of a vanilla extract jar to trace the small one.

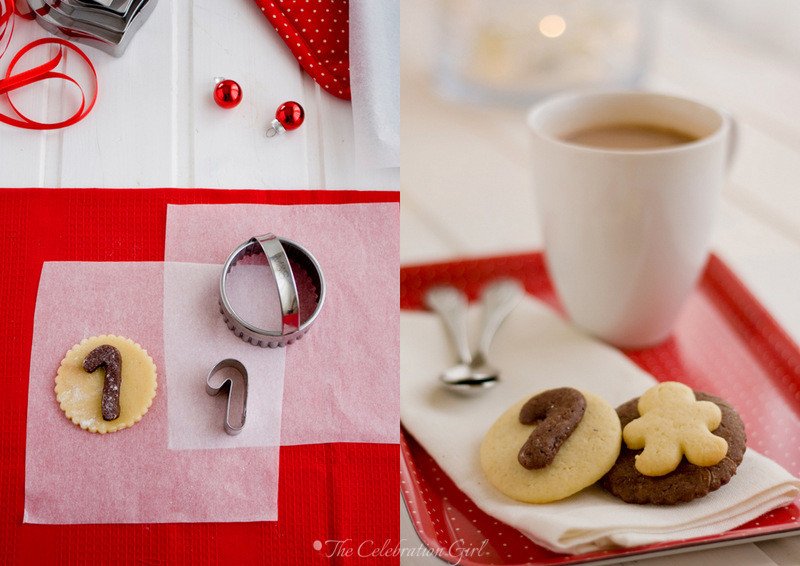
4)3D shape cookies: Cut a small shape in a different color than that of the main cookie, brush it with water and place it on top of the big cookie before baking. They will get attached once baked.
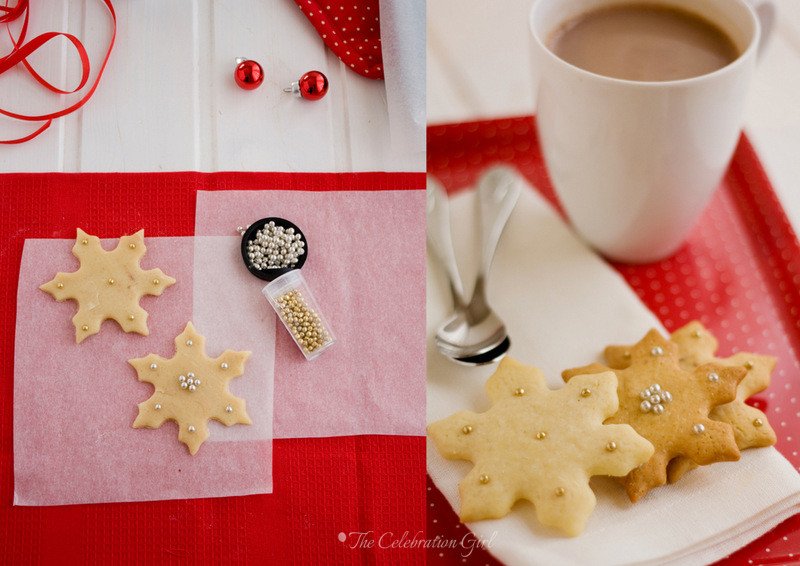
5)Sugar pearls decorated cookies: Did you know that sugar pearls can be added without glaze or icing? They can! Just play with the design and attach them before baking by pressing them lightly into the dough.
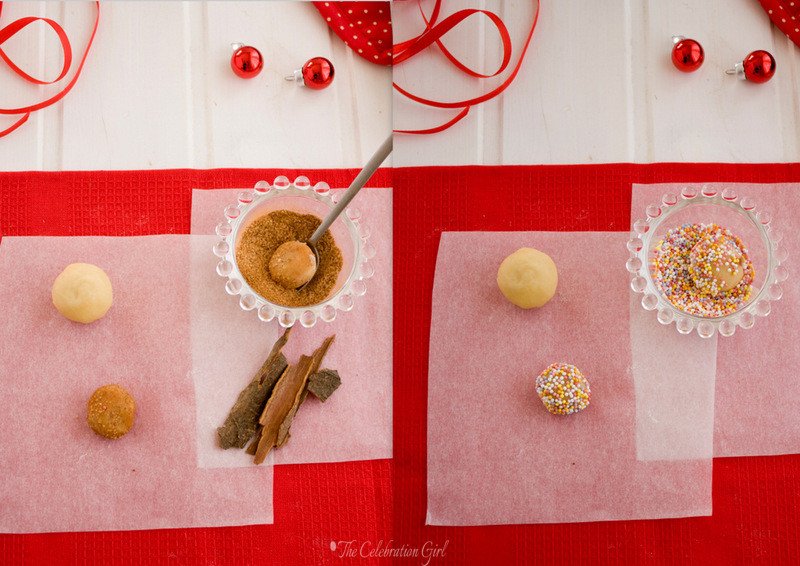
6) Cookie “Truffles”: No, they are not truffles, but they look like them before baking, don’t they? In order to make these cookies, make small balls of dough and roll them in non pareils, sugar pearls, or a combination of 1 tablespooon of sugar, 1/4 teaspoon of cinnamon and a pinch of cardamom before baking. They will expand in the oven,but the colder they are when you start baking them, the more they will keep their shape.
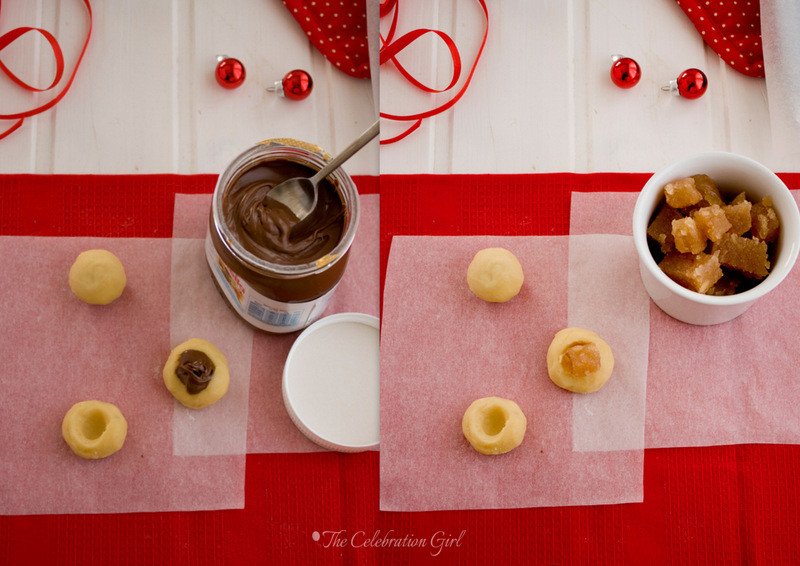
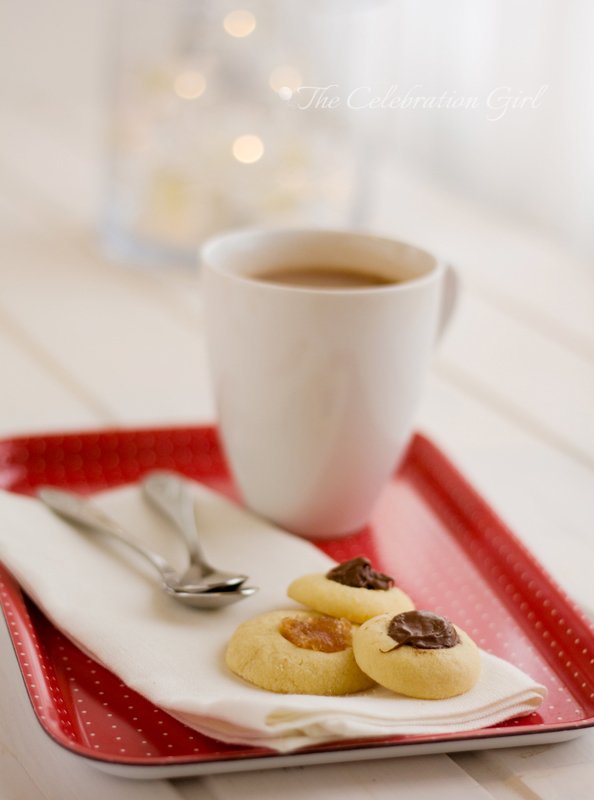
7) Thumbprint cookies or “Pepas”: Pepas is how we call these type of cookies in Argentina and they are normally filled with a square of quince paste, which is a staple food in many Argentinian households (mine is home made, recipe coming soon!). I prefer to make them using the almond shortbread dough, and I like to vary the fillings, using nutella or caramel as well as quince. To make them, roll a ball of dough and press with your thumb (hence the name) or index finger to create a well in the middle. Fill the well with the jam or sweet paste of your choice and bake.
Are you ready to start baking?
Con sabor latino…
Buenos días queridos amigos! Hoy es el 4to día del adviento y faltan sólo 20 días para la nochebuena ¿Pueden creerlo? Sé que lo que voy a decir es un cliché, pero realmente no sé en qué momento pasó el año. Seamos conscientes de la velocidad a la que pasa el tiempo y aprovechemos al máximo este último mes de 2012, si?
Espero que tengan listas las masas de galletitas que compartí con ustedes ayer, porque hoy vamos a usarlas. Así que saquenlas del freezer o heladera y junten sus cortantes, granas, perlas y azucar decorativo porque vamos a comenzar a hacer lindas galletitas surtidas para sus cajitas navideñas.
Hoy vamos a comenzar con las galletitas más fáciles y, en posts sucesivos, les voy a ir mostrando otras maneras de decorarlas, en orden de complejidad creciente. El motivo por el que incluí estas galletitas tan sencillas es porque quiero incentivarlos a cocinar con niños, y estas pueden hacerse aún con los más chiquitos. Ahora bien, al cocinar con niños pequeños, es bueno tener dos cosas en mente: 1) Olvidense del orden y del resultado final. Dejenlos crear. Si queremos galletitas perfectas, podemos hacerlas nosotros solos cuando ellos duermen. Dejemos que cocinar con niños sea un acto creativo, orientado a pasar un momento divertido juntos, a que se familiaricen con los instrumentos de cocina, a que le “agarren el gusto”a cocinar, a construir recuerdos familiares hermosos. 2) Hagan masa extra, porque los chicos son vivísimos y se dan cuenta MUY pronto que la masa de galletitas cruda es deliciosa!
En este post yo usé algunos cortantes que tenía en casa, a modo de ejemplo, pero como verán son posibles muchísimas combinaciones más. Tambien pueden, por ejemplo, teñir parte de la masa de vainilla de otro color, como rojo o verde o cualquier otro que vayan a usar en la decoración, aumentando así las posibilidades creativas. Recuerden, eso sí, que para que las galletitas mantengan su forma es fundamental refrigerarlas, refrigerarlas, refrigerarlas! No omitan este paso!
Ahora sí, vamos a las ideas:
1) Galletas “baston”: No tengo fotos del producto combinado porque mis hijos se las comieron antes que pudiera sacarlas (ejem), pero se ven iguales a la foto del bastoncito armado antes de hornear. Yo usé masas de vainilla y chocolate, pero tambien podrian usar otras combinaciones, como vainilla y gengibre, chocolate y naranja o teñir parte de la masa de rojo y combinarla como un baston de caramelo tradicional. Para hacerlas, tomen una poco de masa de cada color y denle forma de cilindro. Coloquen los dos cilindros, uno al lado de otro, unanlos en la parte de arriba y comiencen a trenzarlos hacia la derecha, pasando la masa de la izquierda por encima de la de la derecha. Una vez trenzados, haganlos rodar un par de veces para que no queden junturas y doblen la parte superior hacia abajo. Corten los bordes para que queden parejos, coloquen en una placa, refrigeren y horneen.
2) Galletas marmoladas:Tomen dos pedacitos de masa de diferentes colores, unanlos por el costado y retuerzanlos un par de veces. No retuerzan mucho o en lugar de galletitas marmoladas tendrán simplemente una masa de color más claro que la oscura. Estiren con palote, corten, coloquen en una placa, refrigeren y horneen.
3) Galletas combinadas: Para hacer estas galletitas necesitarán dos cortantes de igual forma pero de distinto tamaño. Hacerlos es muy sencillo: estiren una de las masas con palote y corten galletitas con el cortante más grande. Coloquen las galletitas en la placa y, una vez allí, usen el cortante pequeño para sacar una galletita mas pequeña del centro de la más grande. Les sugiero hacerlo una vez que la galletita grande ya esté en la placa porque, de lo contrario, ésta puede romperse o perder la forma al transferirla ya cortada. Luego, repitan el proceso con la masa del otro color e inviertan los centros. Las dos partes se unirán al hornear, dejandoles una galletita divertida de dos sabores y colores. Otra opción muy linda que no tuve tiempo de fotografiar es colocar caramelo duro picado (destrozado con mortero) en el hueco, para lograr un efecto vitreau. Nota: si no tienen cortantes de galletitas, pueden usar otros instrumentos de cocina. En el pasado yo he hecho estas galletitas usando la tapa de un frasco de mermelada para el circulo grande y la tapa de un frasco de esencia de vainilla para el más pequeño.
4) Galletas con formas en 3D: Sencillísimas, sólo hay que cortar una formita en un color de masa diferente al de la galleta principal, y pegarla con agua a la más grande antes de hornear ( Se unirán en el horno)
5) Galletas decoradas con perlas de azucar: ¿Sabían que no hace falta glasa ni glacé para pegar perlas de azucar? Pues así es! Solo tienen que colocarlas sobre la masa cruda, conforme el diseño que prefieran, y presionar apenas con el dedo sobre las mismas para insertarlas en la masa. Luego refrigeren, horneen y listo.
6) “Trufas”de galletita: No, no son verdaderas trufas pero lo parecen antes de ser horneadas, no? Para hacerlas, hagan una bolita de masa, y ruedenla en granas, nonpareils, perlas de azucar o en una combinación de 1 cucharada de azucar, 1 cuarto de cucharadita de canela molida y 1/8 de cucharadita de cardamomo. Se expandirán en el horno, pero tienden a conservar mejor la forma cuanto más fría está la masa.
7) Pepas: Estas galletitas son muy comunes en Argentina, rellenas con un cuadradito de dulce de membrillo (que es un clásico de nuestra gastronomía). Mi dulce de membrillo es casero y la receta será publicada pronto! Yo prefiero hacer estas galletitas con la receta de las galletitas mantecosas de almendra, que compartí con ustedes ayer, combinando distintos sabores para el relleno. El clásico membrillo, nutella o salsa de caramelo quedan deliciosos. Para hacerlas, hagan una bolita de masa y, luego, presionen con el pulgar o el índice para ahuecar la masa en el centro, y rellenen el mismo con el dulce o mermelada deseado. Refrigeren, horneen, y listo!
Estan listos para empezar a hornear?
by Marcela M. | Dec 3, 2012 | Blog, Christmas and NYE, cookies, Cooking basics and tutorials, Holidays, Recipe Box, Recipes, Sweets
Good morning friends! I hope you had a lovely weekend!
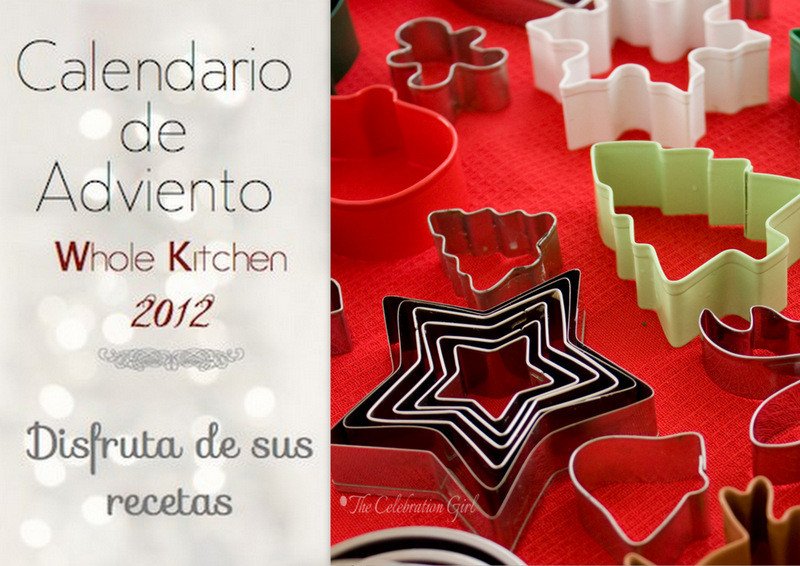
Today’s post participates in Whole Kitchen’s 2012 Advent calendar . A few days ago, Silvia contacted me to offer me to participate in it and I, of course, accepted! So today, get your aprons ready because we start baking! (Amigos hispanoparlantes, el texto en español está al final del post!)
I thought it was best to begin the holiday baking season with the basics: 3 simple cookie recipes and a few explanations on how to adapt they are adapted. I wanted to give you my staple recipes, the ones that are simple enough to make in whim, yet delicious, reliable and versatile to allow multiple modifications. In following posts, I will show you a few ideas for combining and decorating them, with varying degrees of difficulty, so that you can make a box of assorted cookies without spending days in the kitchen.
Let’s get started!
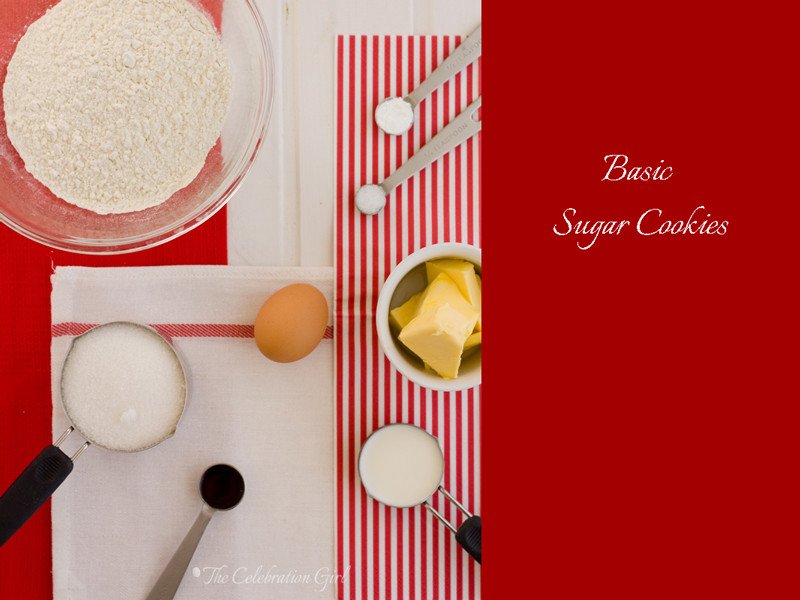
The first recipe is for the all time classic Sugar Cookie. The first time I made them was just a few years ago, inspired by some of my favorite bloggers and following to the letter the recipe for Martha Stewart’s Ideal Sugar Cookies. As time went by, I introduced a few little modifications: I normally double the amount of vanilla and, if baking with my children, who love to spread flour everywhere, I add more milk than usual to prevent the cookies from becoming too hard once baked. Also, since my son doesn’t tolerate dairy products too well, I frequently use margarine instead of butter, and vegetable milk instead of cow’s milk. The texture is different when baking with margarine, but the recipes turn out delicious nonetheless. One important note, though, is that margarine should not be beaten extensively or the final product becomes oily (and we don’t want that!). So, if that’s what you are using, cream it with sugar for a maximum of 3 minutes.
Take this as your basic recipe, and then start playing with it. You could use it as a basis for making sugar orange or lemon cookies, for example, by simply adding a teaspoon of orange or lemon zest and replacing the milk for lemon or orange juice, or you could make coffee flavored cookies by replacing 1 teaspoon of the milk for espresso. The possibilities are really endless. Just make sure that you maintain the balance between liquid and dry ingredients and that your replacements respect the original ratios.
Here’s the basic recipe (adapted from Martha Stewart):
Ingredients: 2 cups all purpose flour, 1/4 tsp salt, 1/2 tsp baking powder, 113 grs butter (1/2 cup) or margarine , 1 cup sugar, 1 beaten egg, 4 tbp milk or 1/4 cup milk ( this is the amount I use when I bake with my children because I know they will add too much flour when rolling and cutting. Please note that Martha’s original recipe calls for 2 tablespoons only), 1 teaspoon vanilla extract.
Preparation: 1) Pre heat the oven to 175 C. 2)Cream butter and sugar until the butter becomes almost white. Note that if you are using margarine, you should cream it for a maximum of 3 minutes 2) Add milk, vanilla and the beaten egg. Incorporate. 3) Whisk or sift together the dry ingredients: flour, salt and baking powder and add them to the batter, making sure not to overmix. 4) Extend plastic wrap on the kitchen’s counter, pour the dough in it, wrap it and refrigerate for a couple of hours. If you are baking this cookies in the summer and you live in very hot climates, I recommend putting it in the freezer for 1 hour instead. 5) When you are ready to bake the cookies, flour the kitchen counter, and roll using a rolling pin, considering that thicker cookies are moister and chewier, and thinner cookies are crispier. Cut the cookies using a cookie cutter or a knife, place on a baking sheet covered in baking paper and refrigerate. Do not skip the refrigerating step or your cookies will lose shape in the oven! I normally place them in the freezer for 20 minutes before baking. 6) Bake for 10-15 minutes. Do not let them brown.Let cool on a wire rack and eat or decorate.

Now let’s say you want to make chocolate sugar cookies instead, how do you adapt the basic recipe? It’s also very simple. As you can see from the pictures above, most ingredients remain the same, and a few new ones are added, namely cocoa, brown sugar and an extra egg to make up for the added dryness. Remember, it is a matter of ratios and balance between the different ingredients. Cocoa is a dry ingredient, so it counts as if we had increased the amount of flour. Brown Sugar gives the recipe a darker color, a stronger flavour (because it contains molasses) and, as sugar in general, acts as a binding agent. Having added these two ingredients, the recipe would be too dry if you didn’t add an extra egg, but if you prefer to keep the quantities intact and you don’t want to add an extra egg, you could do so by reducing 20% of the flour and replacing it by cocoa, and replacing 1/3 of the granulated sugar and replacing it with brown sugar. That is really all it takes.
Here’s the recipe (as I normally do it)
Ingredients: 2 cups flour, 1/2 cup cocoa, 1/2 tsp baking powder, 1/4 tsp salt, 113 grs butter or margarine, 1 cup granulated sugar, 1/3 cup brown sugar, 2 beaten eggs, 2 teaspoons milk, 1 teaspoon vanilla.
Preparation: 1) Pre heat the oven to 175 C. 2)Cream butter and the two sugars until light and fluffy. Note that, if you are using margarine, you should cream it for a maximum of 3 minutes 2) Add milk, vanilla and the beaten eggs. Incorporate. 3) Whisk or sift together the dry ingredients: flour, cocoa,salt and baking powder and add them to the batter, making sure not to overmix. 4) Extend plastic wrap on the kitchen’s counter, pour the dough in it, wrap it and refrigerate for a couple of hours. If you are baking this cookies in the summer and you live in very hot climates, I recommend putting it in the freezer for 1 hour instead. 5) When you are ready to bake the cookies, pour cocoa powder on the kitchen counter. I prefer to use cocoa instead of flour when making chocolate cookies because this prevents them from getting a white coat and accentuates the flavor 6) Roll using a rolling pin, considering that thicker cookies are moister and chewier, and thinner cookies are crispier. 7) Cut the cookies using a cookie cutter or a knife, place on a baking sheet covered in baking paper and refrigerate. Do not skip the refrigerating step or your cookies will lose shape in the oven! I normally place them in the freezer for 20 minutes before baking. 8) Bake for 10-15 minutes. Do not let them brown.Let cool on a wire rack and eat or decorate.
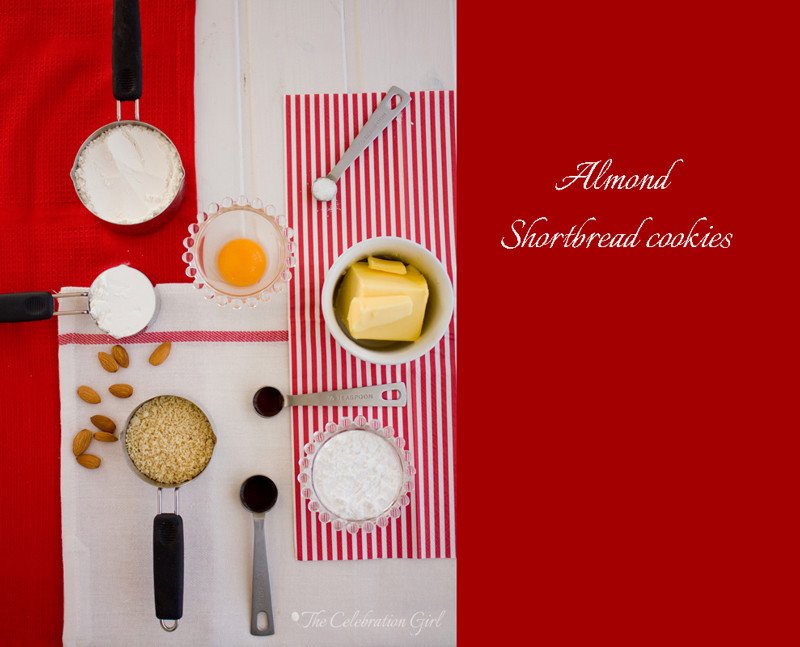
Today’s final recipe is another holiday classic, shortbread cookies, that I have adapted by including finely ground almonds in it. The main difference between sugar and shortbread cookies lies in the proportion between butter and sugar: Sugar cookies use double the amount of sugar than that of butter, and in shortbread cookies this ratio is reversed. Notice also that, in this recipe we also reduce 1/8 of the amount of dry ingredients (almonds count as dry ingredients and so does cornstarch) and that there’s a correlative reduction in the wet ingredients: instead of one egg, we use only an egg yolk and we omit the milk altogether. These cookies don’t require baking powder either, so they won’t rise. The result is a richer cookie, with a softer flavor, ideal for combining with fillings and chocolate.
As I mentioned before, I have modified this recipe by using almonds and almond extract, but you could omit them and use only flour, or replace these with other nuts (hazelnuts are also delicious).
Here’s my recipe for Almond shortbread cookies:
Ingredients: 1 cup flour, 1/2 cup finely ground almonds, 1/2 cup icing sugar, 1/4 cup cornstarch, 1/4 tsp salt, 113 grs butter, 1 egg yolk, 1/2 teaspoon vanilla, 1/2 teaspoon almond extract
Preparation: 1) Put the finely ground almonds, flour, cornstarch, salt and icing sugar in the food processor and pulse until combined. 2) Add the wet ingredients and pulse until the dough separates from the bowl 3) Remove the dough from the food processor and knead it on the counter. 4) Cover in plastic wrap and refrigerate for two hours. 5) Pre heat the oven to 175 C. Remove the dough from the refrigerator, roll on a floured surface and cut in the desired shapes. Place the cookies on a baking sheet lined with baking paper and bake for 10-15 minutes. Let cool on a wire rack and eat or decorate.
Tomorrow I’ll start showing you some ways in which you can play with these recipes!
Now, please tell me: Do you bake cookies for the holidays? What are your favorite recipes? Do you like to decorate them and, if so, how do you do it?
Have a lovely Monday!
Con sabor latino…
Buenos días queridos amigos y bienvenidos sean todos aquellos nuevos lectores que llegan desde Whole Kitchen! Espero que hayan pasado un hermosísimo fin de semana.
El post de hoy participa en el Calendario de Adviento 2012 de Whole Kitchen . Hace unos días, Silvia me contactó para preguntarme si quería participar en el mismo y yo, por supuesto, acepté! Así que preparen sus delantales, porque hoy vamos a hornear!
Para inaugurar la temporada de cocina de la época navideña, pensé que sería mejor empezar por la base: 3 recetas simples y un par de explicaciones acerca de cómo introducir variaciones a las mismas. Quise compartir con ustedes aquellas recetas a las que vuelvo una y otra vez, aquellas que son lo suficientemente simples como para hacer en menos que canta un gallo, a la vez que confiables, deliciosas y versátiles como para permitir que cada uno deje volar su creatividad. En posts sucesivos voy a mostrarles ideas de cómo combinarlas y cómo decorarlas con distintos grados de dificultad, para que estas fiestas puedan tener una caja de galletitas variadas sin necesidad de pasar horas y horas en la cocina.
Comencemos!
La primera receta que quiero compartir con ustedes es la de las clásicas galletitas de azucar. La primera vez que la hice fue apenas unos años, y en esa ocasión y muchas otras, seguí al pie de la letra ESTA receta de la inigualable Martha Stewart. A medida que el tiempo pasó, fui introduciendo algunas modificaciones, por ejemplo suelo duplicar la cantidad de vainilla y, si preparo la receta con mis hijos, suelo duplicar la cantidad de leche porque tienden a agregar mucha harina cuando estiran la masa y me ha ocurrido que si sigo la receta al pie, quedan un poco duras. Tambien suelo hacerlas con margarina y leche vegetal porque mi hijo, sin llegar a ser alergico, nunca a tolerado muy bien que digamos los lacteos. Debo aclarar que la textura resultante es un poco diferente cuando uno trabaja con margarina, pero creanme que son deliciosas de todas maneras. Una advertencia importante, sin embargo, es que la margarina no debe batirse mucho tiempo con el azucar, como hacemos con la manteca, porque si no las galletas resultaran oleosas. Si usan este ingrediente, recuerden no batirla más de 3 minutos.
Les sugiero tomar esta receta como base y luego experimentar con otros sabores. Por ejemplo, si quieren hacer galletitas de limon o de naranja, pueden agregar una cucharadita de té de ralladura de limón o naranja, y reemplaza la leche por jugo de limón o naranja. Si quieren hacer galletitas de café, pueden reemplazar una cucharada de leche por una de café espresso…y así sucesivamente. Las posibilidades son enormes! Sólo tengan en cuenta que, para que la receta resulte bien, es necesario mantener el equilibrio entre los ingredientes secos y líquidos, y que los reemplazos mantengan las raciones originales.
Esta es la receta para las galletitas de azucar básica (adaptada de Martha Stewart)
Ingredientes:2 tazas de harina todo uso, 1/4 cucharadita de sal, 1/2 cucharadita de levadura química (Polvo de hornear Royal), 113 grs de manteca o margarina vegetal, 1 taza de azucar blanca, 1 huevo batido, 4 cucharadas o 1/4 taza de leche (puede ser vegetal. Tengan en cuenta que la receta original sólo requiere dos cucharadas y que yo sólo la duplico porque mis hijos tienden a agregar demasiada harina luego. Si no cocinan con niños o si sus niños son disciplinados al agregar harina, es mejor mantener la cantidad original), 1 cucharadita de vainilla.
Preparación: 1) Bata la manteca pomada con el azucar hasta que la preparación resulte en una crema blancuzca y esponjosa 2) Agregue leche, vainilla, y el huevo batido e incorpore 3) Mezcla con batidor de alambre o cierna los ingredientes secos: harina, sal y levadura química, y agreguelos en dos veces. Mezcle sólo hasta que todos los ingredientes estén incorporados. 4) Envuelva la masa en papel film y lleve al refrigerador por al menos dos horas. Si están haciendo esta receta en verano o en climas muy cálidos, yo prefiero poner la masa una hora en el freezer. Es más facil trabajarla luego! 5) Cuando quiera hornear las galletas, retire la masa del freezer y estirela con palote sobre una superficie lisa. Tenga en cuenta que si la estira levemente gruesa las galletitas resultaran mas humedas, y si la estira finita, resultaran crocantes. 6) Corte las galletitas usando un cortante especial o cuchillo, colóquelas sobre una placa para horno cubierta con papel de hornear y refrigere. Es muy importante que no omita este paso! Si las galletitas no son refrigeradas pierden la forma en el horno! Yo suelo colocar la placa en el freezer durante 20 minutos para obtener mejores resultados. 7) Hornee a 175 C durante 10/15 minutos. No deje que tomen color (eso las vuelve duras). Deje enfriar sobre una rejilla y coma o decore.
Ahora bien, digamos que queremos hacer galletitas de chocolate ¿cómo transformamos la receta original? Es de verdad muy sencillo. Como pueden ver si comparan las dos primeras fotos, la mayor parte de los ingredientes se mantienen constantes y sólo se agregan tres: cacao, azucar morena, y un huevo más para compensar por las nuevas adiciones. Recuerden que modificar recetas es una cuestión de mantener proporciones y equilibrio entre los diferentes ingredientes. Como el cacao es un ingrediente seco, su adición cuenta como si hubieramos agregado harina. El azucar moreno cambia el sabor de la receta (porque contiene melaza), contribuye a que las galletitas tengan un color más oscuro y, como todo azucar en general, ayuda a que los ingredientes “liguen”. Habiendo agregado estos ingredientes, es necesario entonces sumar un huevo más para que la masa no resulte seca. Ahora bien, si prefieren usar uno solo (cuantas veces nos hemos encontrado con un solo huevo en la cocina, verdad? Yo,muchas!), modifiquen las cantidades de harina y de azucar blanca: reduzcan 20% la cantidad de harina y reemplacenla por cacao, y reduzcan 1/3 de la cantida de azucar blanca y reemplacenla por azucar moreno. Es tan sencillo como eso!
Esta es mi receta para galletitas de chocolate
Ingredientes:2 tazas de harina todo uso, 1/2 taza de cacao amargo, 1/4 cucharadita de sal, 1/2 cucharadita de levadura química (Polvo de hornear Royal), 113 grs de manteca o margarina vegetal, 1 taza de azucar blanca, 1/3 taza de azucar morena, 2 huevos batidos, 2 cucharadas de leche (puede ser vegetal), 1 cucharadita de vainilla.
Preparación: 1) Bata la manteca pomada con los dos azucares hasta que la preparación resulte esponjosa. Recuerden no batir más de 3 minutos si usan margarina 2) Agregue leche, vainilla, y los huevos batidos e incorpore 3) Mezcla con batidor de alambre o cierna los ingredientes secos: harina, cacao, sal y levadura química, y agreguelos en dos veces. Mezcle sólo hasta que todos los ingredientes estén incorporados. 4) Envuelva la masa en papel film y llevela al refrigerador por al menos dos horas. Si están haciendo esta receta en verano o en climas muy cálidos, yo prefiero poner la masa una hora en el freezer. Es más facil trabajarla luego! 5) Cuando quiera hornear las galletas, retire la masa del freezer y estirela con palote sobre una superficie lisa. Tenga en cuenta que si la estira levemente gruesa las galletitas resultaran mas humedas, y si la estira finita, resultaran crocantes. 6) Corte las galletitas usando un cortante especial o cuchillo, colóquelas sobre una placa para horno cubierta con papel de hornear y refrigere. Es muy importante que no omita este paso! Si las galletitas no son refrigeradas pierden la forma en el horno! Yo suelo colocar la placa en el freezer durante 20 minutos para obtener mejores resultados. 7) Hornee a 175 C durante 10/15 minutos. No deje que tomen color (eso las vuelve duras). Deje enfriar sobre una rejilla y coma o decore.
La última receta que les traigo hoy es la de otro clásico de está epoca: las galletitas de manteca o shortbread cookies, la que yo he modificado para transformarla en galletitas mantecosas de almendras. La diferencia principal entre las galletitas de azucar y las de manteca radica en la proporción entre estos dos ingredientes: las galletitas de azucar usan el doble de azucar que de manteca, y en las de galletitas de manteca esta proporción se invierte. Noten tambien que en estas galletitas reducimos 1/8 la cantidad de ingredientes secos, y teniendo en cuenta todo lo anterior (menos ingredientes secos y menos azucar), debemos reducir tambien los ingredientes líquidos, por lo que en lugar de un huevo entero usaremos sólo una yema, y omitiremos la leche. Las galletitas resultantes son más densas y de un sabor más neutro, no tan dulces,por lo que son ideales para combinar con rellenos y chocolate.
Como mencioné antes, yo he modificado la receta incluyendo almendras molidas en la misma. Si prefieren no hacerlo, pueden reemplazar la cantidad de las mismas por harina común (todo uso), bien pueden experimentar con otras nueces (yo las hecho tambien con avellanas molidas y quedan muy bien, por ejemplo).
Aquí está mi receta para galletas de almendras y manteca:
Ingredientes: 1 taza de harina, 1/2 taza de almendras molidas bien finitas, 1/4 taza de almidon de maiz (maizena), 1/2 taza de azucar impalpable, 1/4 cucharadita de sal, 113 grs de manteca, 1 yema de huevo, 1/2 cucharadita de extracto de vainilla, 1/4 cucharadita de extracto de almendras.
Preparación: 1) Coloque almendras, harina, sal, azucar y almidón de maiz en el bowl de la procesadora y pulse hasta que estén bien combinados. 2) Agregue todos los ingredientes húmedos (manteca, huevo y extractos) y pulse hasta que la masa se separe de las paredes del bowl. 3) Retire la masa de la procesadora y trabajela sobre la mesada hasta formar un bollo. 4) Envuelva la masa en papel film y lleve al refrigerador por dos horas. 5) Espolvoree harina sobre una superficie lisa, y estire la masa con palote. Corte de la forma deseada, coloque en una placa para horno cubierta con papel de hornear y hornee a 175 C por 10-15 minutos. No deje que tomen color. Deje enfriar sobre una rejilla y coma o decore.
Mañana comenzaré a mostrarles algunas formas en que pueden jugar con estas recetas.
Ahora cuentenme: ¿hornean galletitas para las fiestas? ¿cuales son sus recetas favoritas? ¿suelen decorarlas y de qué manera?
Que tengan un hermoso día lunes!
by Marcela M. | Nov 22, 2012 | Blog, Breads, Recipe Box, Recipes, Uncategorized

Good morning friends! I am running behind in posting this week and I apologize! With autumn comes cold weather and with it come colds and runny noses, and sometimes fever! Nonetheless, I am getting back on track and I’ll post again later today, as was originally planned.
Now let’s move on to today’s post, shall we? Those who follow me on Facebook and twitter already know this, but for those of you who don’t, here’s the big news I announced on Monday: I am going to be collaborating, on a permanent basis, with a lovely project, a website called Petit-On, created by the adorable Raquel Bermejo (who some of you may already know from the blog Peque a la moda).

Every month, I will contribute a child friendly recipe for the “Cooking” section of the blog, and by child friendly I mean, not only recipes that children may like, but also recipes that can be done with them, with the aim of encouraging children to cook. Each recipe will share a common ingredient will all other recipes published that month by the other contributors, who are bloggers I read, follow and love, such as Elena, from Delicious Stories, Lili, from La cocina de color lila , Laura from Coure coulants and Cristina from La mujer del fotógrafo es química. And, since Petit-On is published in Spanish, I will share them in English here as well, so that you can also make them.

The common ingredient for November was chestnuts, and I contributed these easy and delicious spiced apple, maple and chestnuts muffins. They are very simple and can even be made the night before, so they are ideal for those lazy Sunday morning when we crave something sweet. Just leave them in the fridge in an airtight container, and add the apple, chopped chestnuts and syrup right before baking!
Here’s the recipe
Spiced Apple, maple and chestnut muffins (serves 12. Inspired by the Better Homes and Gardens Cookbook’s Apple Muffins)
Ingredients: 2 cups bread flour, 4 teaspoons baking powder, 1/2 teaspoon cinnamon, 1/4 teaspoon cardamom, 1/4 teaspoon salt, 1/4 cup sugar,1 XL egg, 1/3 cup oil or 60 grs melted butter or margarine (whichever you prefer), 1 cup milk (it may be soy almond, rice or oats milk), 1 granny smith apple, diced, 1/3 cup chopped chestnuts (you may roast them first to release their wonderful aroma), maple syrup (optional)
Preparation: 1)Pre-heat the oven at 200C 2) Sift flour, cinnamon, cardamom, sugar and salt and place them in a big bowl 3) Beat the egg. Add milk and oil and mix well. If you use melted butter/margarine instead of oil, remember that it should not be hot when adding it to the egg or it will cook it! 4) Make a hole in the middle of the dry ingredients and pour the wet ingredients in it. Mix only until combined (do not beat!) 5)Add apple and chestnuts and mix until just combined 5) Pour the batter in the muffins cases, filling them 2/3 only. 6) Pour 1 teaspoon maple syrup in each muffin case and mix it with the rest of the batter with a toothpick or chopstick, making eights. 7) Bake for 10-15 minutes, or until a toothpick comes out clean.

Amigos hispanoparlantes: Este post contiene la traducción de la receta que presenté en Petit-On. Para leerla en español, vayan al posr original, AQUI. Nos vemos más tarde con otra receta simple y riquísima!

See you later today with another easy, yummy recipe!
by Marcela M. | Nov 15, 2012 | Blog, Recipe Box, Recipes, Salads and dips, Savories

I have a confession to make: I am already 100% in Christmas mood, I am writing this post while listening to Christmas songs and, as soon as I finish, I am probably either going to make a Christmas card or find wonderful seasonal inspiration on pinterest.
Nicosia’s shops are already full of red and white decorations, there are trees and lights everywhere and, for the first time, Luka and Zoe are realizing what is going on and are getting excited about the holidays, which makes it ten times better. They must be learning some Christmas songs at school, because for the past few days they have come home singing “Santa is here”. Their understanding of the holiday, though, is a bit off, I must admit: Zoe calls all angels “fairies” and Luka sings “Tinker bells, tinker bells all around the World” instead of the more traditional Jingle Bells, but what matters to us is that they are excited about it and curious about the whole experience.
I, myself, have been crafting and planning a few surprises for you because I want to make the most of my favorite season. This year I have celebrated everything good, big or little, and I have made my very best to appreciate and to cherish the good, the bad and the ugly that 2012 brought with it… and sometimes this hasn’t been easy. So I want December to be especially about joy, about love, about family, about gratefulness.
But I’m running ahead: we are still in November and I am actually enjoying this month a lot. The weather is really lovely these days, especially early in the mornings when it gets a bit chilly. I like to take daily walks to the park nearby in the early hours of the day, and I love seeing the grass and the flowers shine with the morning dew, the little birds fly from tree to tree, and the park’s cats wake up a bit reluctantly. The air is fresh and clean at that time of the day and the minutes seem to stretch, to last longer.
Autumn food is also so delicious! I love seeing the stalls full of apples, pears, persimmons, pumpkins, nuts and citrus. I love that I want to turn the oven on and start baking cookies and that I can have cup after cup of homemade chai without tiring of it. I love that it is cold, but not too much, so we can still eat a warm salad (such as the one of this post) and feel satisfied.
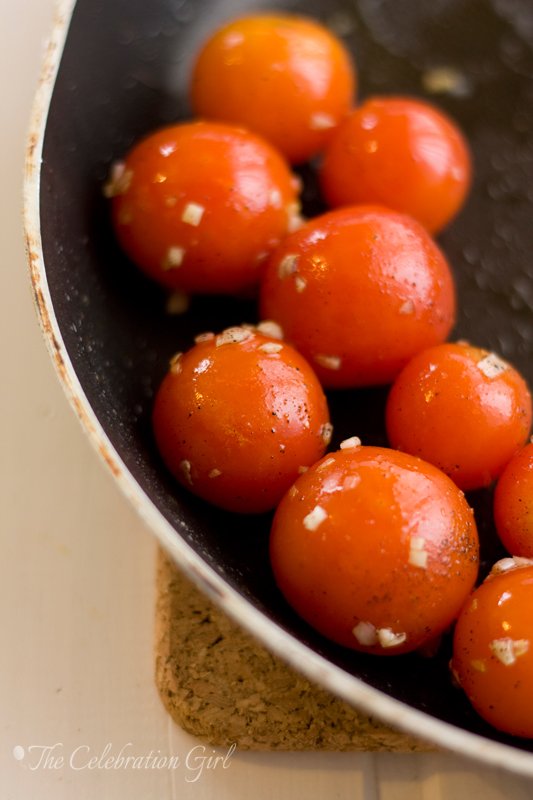
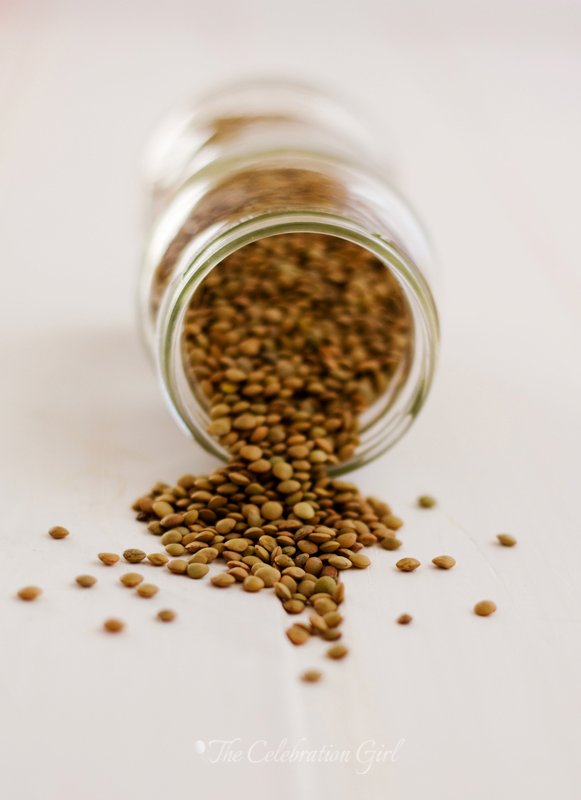
Today’s salad is definitely one of my favorites. It is flavorful, hearty, healthy and nutritious and a delicious meal on its own. I like to eat it warm in Autumn and Winter, but it is also delicious when cold, so it would make a good doggy bag lunch for the school or office. Furthermore, you can pair it with rice (I prefer brown), for a better protein intake and, if you have a citrus or a kiwi as dessert, you will help your body absorb the lentil’s iron better. I hope you like it!
Here’s the recipe:
Lentil, rocket and sautéed cherry tomatoes salad (serves 4)
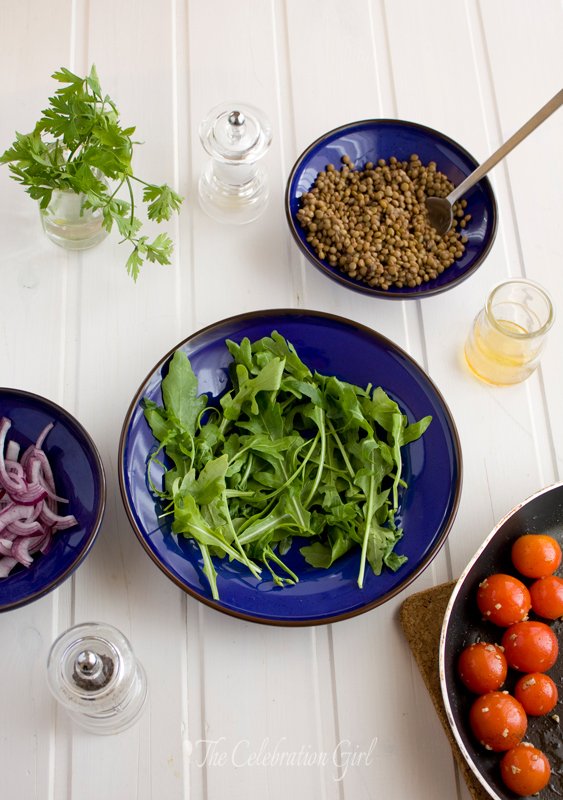
Ingredients: 1 cup lentils (soaked for 4 hours and cooked until soft and tender), 200 grs cherry tomatoes, 2 cloves of garlic, 1 red onion (sliced),200 grs of rocket leaves, 1 bunch of fresh parsley, 1 teaspoon olive oil and 2 teaspoons of acetto balsamico (for a simple vinaigrette) salt and pepper to taste.
Preparation: 1) Soak the lentils in water for about 4 hours. Drain them, wash them and put them in a pan. Cover them with water and bring them to the boil. Cook until soft and tender. 2) Peel and chop the garlic cloves. Put a teaspoon of olive oil in a frying pan and, when warm, throw the garlic in it, and cook it so that it releases its flavor but make sure not to let it brown. Add the whole cherry tomatoes and sautée them for about 5 minutes. 3) Wash and dry the rocket leaves and place them on a serving plate. 4) Wash and slice the red onion and add it to the salad. Add the rest of the ingredientes.. 5) Prepare the vinaigrette by mixing oil, acetto, salt and pepper and add it to the salad. Mix well. Season with fresh parsley to taste.

Con sabor latino…
Tengo que hacerles una confesión: ya me encuentro 100% en modo navidad. Es más, estoy escribiendo este post mientras escucho canciones navideñas y, ni bien termine, voy a hacer tarjetas navideñas o buscar inspiración en pinterest.
Los negocios de Nicosia ya están llenos de decoraciones rojas y blancas, hay árboles decorados y luces navideñas en todas partes y,por primera vez, Luka y Zoe están comprendiendo de qué se trata todo esto y están llenos de expectativa y hasta creo que en la guardería están aprendiendo canciones navideñas, porque vienen todos los días cantando “Santa está aquí”. He de confesar que su comprensión de las fiestas es bastante poco ortodoxa, sin embargo, porque Zoe cree que los ángeles son hadas y Luka canta “Tinkerbell, Tinkerbell all around the world”, en lugar de Jingle Bells, pero lo que a nosotros nos importa es que disfruten de este período, y nos alegra enormemente que estén expectantes y curiosos.
Yo, por mi parte, he estado haciendo manualidades y preparando un par de sorpresitas para ustedes, porque quiero aprovechar al máximo ésta que es mi época favorita del año. Este año hice el propósito de celebrar todas las cosas buenas, grandes o pequeñas, y he puesto lo mejor de mí para apreciar lo bueno, lo malo y lo feo que 2012 ha traido consigo…y ésto por momentos no ha sido sencillo. Así que este año más que nunca, quiero hacer de diciembre un mes de dicha, de alegría , de amor, de familia, de agradecimiento.
Pero me estoy adelantando: Aún estamos en noviembre y, a decir verdad, estoy disfrutando muchísimo este mes. El clima está hermoso, especialmente temprano por la mañana, cuando está fresquito. Me gusta salir a caminar al parque que se encuentra cerca de mi casa en las primeras horas de la mañana, ver cómo el pasto y las flores brillan cuando los rayos de sol iluminan el rocío, cómo los pajaritos vuelan de rama en rama, y cómo los gatos del parque se despiertan a regañadientes. A esa hora, el aire es fresco, limpio, y pareciera que los minutos se estiraran y duraran más.
Estos días disfruto tambien de los sabores del otoño, que tanto me gustan. Adoro ver los puestos llenos de manzanas, peras, persimones, cítricos, nueces de todas clases y calabazas. Adoro tener ganas de prender el horno para hacer galletitas, y que puedo tomar taza tras taza de chai (té especiado indio) sin cansarme. Adoro que esté frío, pero no excesivamente, y poder disfrutar de una ensalada caliente como la de este post y sentirme satisfecha sólo con ella.
Esta ensalada es sin dudas una de mis preferidas. Está llena de sabores, es sustanciosa, saludable y nutritiva, y una comida entera por sí misma. Me gusta comerla caliente en otoño e invierno, pero tambien es riquísima fría, así que puede ser una opción muy buena para llevar en un tupper a la escuela o la oficina. Les sugiero acompañarla con arroz (yo prefiero integral), para un aporte proteico más completo y, tengan en cuenta que si comen de postre cítricos o un kiwi, ésto ayudará a que el cuerpo absorba mejor el hierro de las lentejas. Espero que les guste!
Aquí está la receta:
Ensalada de lentejas, rúcula y tomatoes cherry saltados (para 4 personas)
Ingredientes: 1 taza de lentejas ( remojadas durante 4 horas y hervidas hasta que estén tiernas), 200 grs de tomates cherry, 2 dientes de ajo, 200 grs de rúcula, 1 cebolla colorada, cortada en rodajas, 1 manojo de perejil fresco, 1 cucharita de aceite de oliva y 2 cucharaditas de acetto balsamico para hacer una simple vinagreta, sal y pimienta a gusto.
Preparación: 1) Poner las lentejas en remojo durante 4 horas. Transcurrido este tiempo, colarlas, lavarlas y colocarlas en una olla. Cubrirlas con agua y cocinarlas hasta que estén tiernas. 2) Colocar en una sarten 1 cucharadita de aceite de oliva y, cuando esté caliente, agregar el ajo picado. Cocinar unos breves minutos para que desprende su aroma pero teniendo cuidado de que no se vuelva marrón. Agregar los tomates cherry enteros (para que no se desarmen, no queremos una salsa!) y saltearlos unos 5 minutos removiendo la sarten de cuando en cuando. 3) Lavar y secar las hojas de rúcula y colocarlas en el plato en que se servirá la ensalada 4) Pelar, lavar y cortar en rodajas la cebolla colorada. Agregarla al plato con la rúcula. Agregar los tomates y las lentejas 5) Preparar una vinagreta con 1 cucharadita de aceite de oliva, 2 cucharaditas de acetto balsamico y sal y pimienta a gusto. Mezclar bien, agregar a la ensalada e integrar todos los ingredientes. Sazonar con hojitas de perejil fresco.
Do you like to eat salads in coldish weather? What is your favorite Autumn savory food?
Les gusta comer ensaladas cuando el clima está fresco? Cual es su comida otoñal salada preferida?
by Marcela M. | Nov 13, 2012 | Blog, Mousses and ice cream, Recipe Box, Recipes, Sweets, Uncategorized
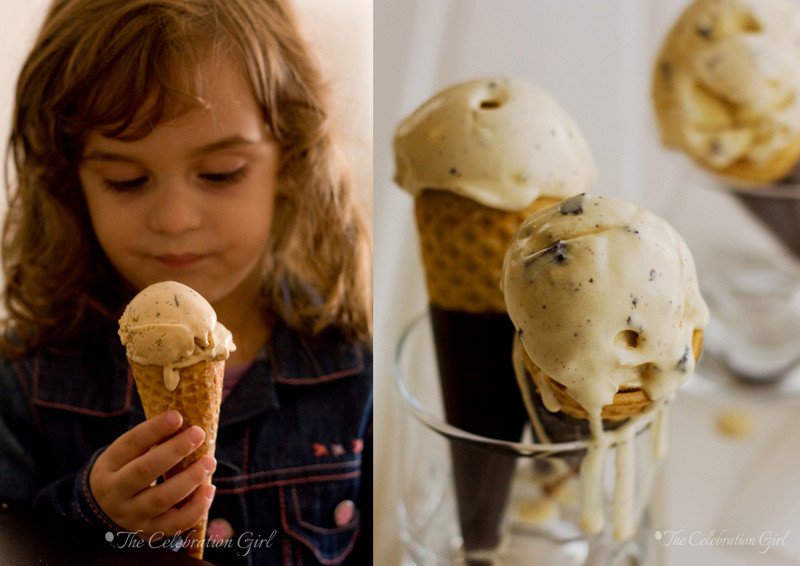
Ice cream has always been my favorite treat, regardless of the season. I have always craved it all year long, and Argentina’s abundance of truly great quality ice cream allowed me to indulge in it even in the middle of winter. When I was a little girl, an ice cream shop opened, for a couple of years, just around the corner from our home, and I remember going to it even in cold weather with my family, all of us covered in coats and scarves but still willing to enjoy a delicious scoop.
As I grew older, the all year craving didn’t stop but, for some strange reason I started associating ice cream with summer only. The end of summer was the end of ice cream for me and, as soon as the weather started to get cold, I switched to pies and cakes.

When we came to live in Cyprus, I learnt that summer did not end until October and that real autumn didn’t start until November, so I allowed myself a few more weeks of ice cream indulgence.Ice cream was the one thing I always loved about summer, even when, for most of my life, I was not really fond of summer itself. And even tough this year I embraced summer and enjoyed it to the core, I was so ready, so eager for Autumn to start that I stopped eating ice cream when the last bits disappeared from our freezer in late September.
But Autumn didn’t come in October. The month came and went and the weather was still in the thirty degrees Celsius range, we were still wearing short sleeved t-shirts and flip-flops at home and our sweaters remained stored in boxes in the upper part of our closets. I cursed global warming while longing for the chilly breeze that normally announces the start of the new season and then, when November arrived, I decided that I’d better accept and embrace the extended summer as well and I made ice cream again.
And, of course, the following day, Autumn arrived and I had this ice cream happily tucked in a blanket, watching the rain fall outside my window. Sometimes all it takes for things to change is to accept what we have and to let go of our resistance, don’t you think?
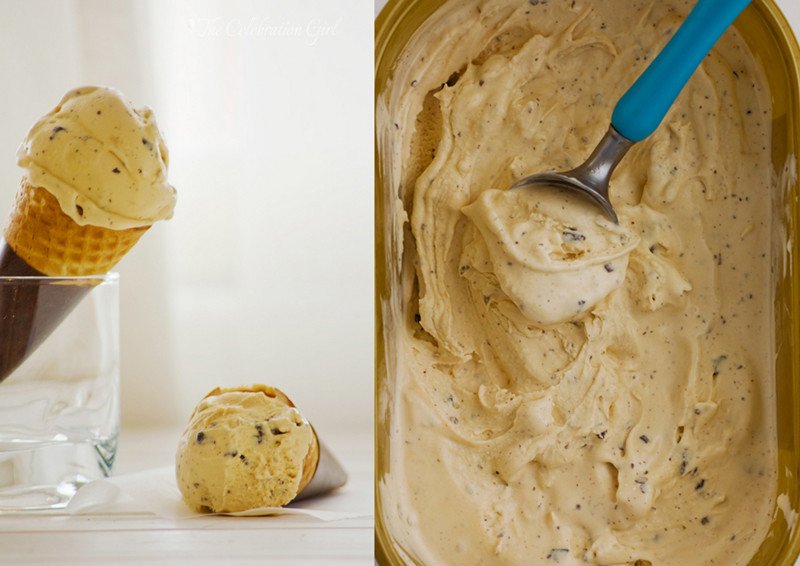
This recipe is a combination of two of my favourite ice creams: dulce de leche granizado and salted caramel. In fact, it looks like dulce de leche granizado (chocolate chunks dulce de leche ice cream) but it isn’t because it is not made with dulce de leche, but with salted caramel sauce instead.The result is less sweet, much quicker (if you,like me, cannot buy dulce de leche in the supermarket) and just as delicious.
Here’s the recipe
Salted caramel and chocolate chip ice cream
Ingredients:
For the salted caramel sauce: 200 grs white sugar, 90 grs unsalted butter, 120 ml heavy cream, 1 teaspoon fleur de sel (flower salt)
For the custard: 500 ml milk, 150 grs sugar, 6 egg yolks, 1 tablespoon vanilla essence, 300 ml cream,salted caramel, 100 grs dark chocolate
Preparation: 1)Make the caramel sauce: Put sugar in a sauce pan over the heat and let it burn until it liquifies and reaches amber color. Stir it from time to time with a heat proof spatula, from sides to center to make sure that it doesn’t burn , but don’t touch it too much or it may crumble. I highly recommend reading David Lebovitz’ tips on how to make caramel, which you can do HERE. Once it is liquid and dark brown, take the pan off the heat and add the butter, stirring with the spatula all the time. It will bubble and grow, so be careful! Once all butter has melted, add the cream and whisk until smooth. Add the salt and continue whisking. Let it rest and cool down at room temperature and make the custard.
2) Make the custard: 1) Put all the milk and 75 grs of sugar in a sauce pan and bring to the heat until you start seeing bubbles forming at the sides (do not let it boil) 2) Beat the egg yolks and the remaining 75 grs of sugar until foamy and, once this is done, pour the warm milk in slowly, whisking constantly. This will allow the eggs to temper, so that they don’t cook when we bring them back to the heat. 3) Pour the egg, sugar and milk mixture back in the saucepan, and bring it back to heat stirring with a wooden spoon as if you were drawing 8 in the pan until it the mixture thickens (it has to coat the spoon). 4) Once the custard thickens, prepare an inverted bath. Put ice and water in a big bowl and place a smaller bowl on top. Put a sifter/strainer over the smaller bowl and pour the custard over it. Passing the custard through the strainer will guarantee that the mixture we end up is smooth as we need it to be before churning the ice cream. 5) Add vanilla and the warm caramel and mix in thoroughly. Finally, add the cold cream, mix well, cover with foil wrap and put in the refrigerator for at least 8 hours to cool down completely.
3) Churn the ice cream in your ice cream machine according to the manufacturer’s instructions. Chop the dark chocolate with a knife and add it to the ice cream 5 minutes before the end of the churning process.
4) Pour the ice cream in an appropriate container and freeze it for at least 4 hours for it to reach scoop consistency.
If you don’t have an ice cream maker put the custard in the freezer as soon as it is ready instead of in the fridge. Remove it after 30 minutes and beat it vigorously with a whisk (if you have a hand held mixer, so much the better), to break the little pieces of ice that may have formed. Bring it back to the freezer and repeat this process 3/4 more times, every 30 minutes.
Con sabor latino…
El helado siempre fue mi “gustito” preferido, independientemente de la estación del año en que me encontrara. Siempre me encantó, siempre tengo ganas de comer helado, y la abundancia de helados riquísimos que hay en Argentina hacía que pudiera darme mi gusto preferido en cualquier época, incluso en medio del invierno. Recuerdo que, cuando era chiquita, una pequeña heladería abrió un local a la vuelta de nuestra casa, por un par de años, y recuerdo cuán maravilloso era ir allí en medio del frío helado del invierno, toda la familia cubierta con tapados y bufandas pero, aún así, deseosos todos de disfrutar una bocha de nuestro sabor favorito.
A medida que fui creciendo, sin embargo y por alguna extraña razón, comencé a asociar helado exclusivamente con verano. El fin del verano comenzó a ser tambien el fin de los helados y, tan pronto como el clima se tornaba fresco, yo re orientaba mis deseos golosos a pies y tortas.
Cuando vinimos a vivir a Chipre, aprendí que aquí el verano no se va hasta entrado octubre y que el verdadero otoño no llega hasta noviembre asi que comencé a permitirma unas semanas extra de indulgencia heladil. El helado era una de esas pocas cosas que me gustaban del verano, aunque el verano en sí no me gustara demasiado. Y a pesar que este año disfruté del verano como nunca antes, estaba tan lista para el otoño y tan deseosa de que éste llegara que dejé de comer helado cuando los ultimos restos de aquellos que habíamos preparado en agosto desaparecieron del freezer hacia fines de septiembre.
Pero el verano no se fue en octubre y el otoño no llegó cuando solía hacerlo. El mes llegó y pasó y el clima seguía rondando los 30 grados centígrados, aún usabamos remeras de mangas cortas y ojotas de entre casa, y nuestros sweaters permanecían guardados en cajas en la parte más alta de nuestros placards. Maldije el calentamiento global una y mil veces, buscando señales de brisa fresca en el aire de la tarde y luego, cuando llegó noviembre sin señales del otoño, me resigné , decidí aprovechar el veranito extendido, e hice helado nuevamente.
Y, como suele ocurrir, en otoño llegó al día siguiente. Y comí este helado sentada en el sillón, envuelta en una manta, viendo la lluvia caer tras la ventana. A veces todo lo que hace falta para que las cosas cambien es aceptar las cosas como son y dejarnos llevar, no?
Esta receta es una combinación de dos de mis sabores de helados preferidos: dulce de leche granizado y salsa de caramelo salada. Parece dulce de leche granizado pero no lo es porque no está hecho con dulce de leche, sino con salsa de caramelo. El resultado es menos empalagoso, mucho más rapido de hacer si, como yo, no pueden comprar dulce de leche en el supermercado, e igualmente exquisito. Espero que les guste!
Aquí está la receta:
Helado granizado de salsa de caramelo salada
Ingredientes:
Para la salsa de caramelo: 200 grs de azucar, 90 grs de manteca, 120 ml de crema de leche, 1 cucharadita de flor de sal
Para el helado: 500 ml de leche, 150 grs de azucar, 6 yemas, 300 ml de crema de leche, 1 cucharadita de esencia de vainilla, salsa de caramelo, 100 grs de chocolate amargo
Preparación: 1)Haga la salsa de caramelo: Coloque el azucar en un cazo/olla y llevelo a fuego hasta que se liquidifique y tome color ambar/marron oscuro. Remueva cada tanto con una espatula o cuchara de madera, desde afuera hacia el centro, pero no demasiado o el caramelo se volverá grumoso y no liquidificará. Les recomiendo que vean los tips de David Levobitz acerca de cómo hacer caramelo, que están llenos de fotos y consejos, AQUI. Una vez que la mezcla esté liquida y marrón oscura, retire la olla del fuego , agregue la manteca y revuelva fuertemente. Tengan cuidado, porque burbujeará y crecerá! Una vez que la manteca esté derretida, vierta la crema de leche, revolviendo con batidor de alambre para que quede lisa y uniforme, agregue la sal, y deje reposar y enfriarse a temperatura ambiente.
2) Prepare la crema inglesa: 1) Ponga en una olla la leche y 75 grs de azucar y lleve a fuego hasta que rompa el hervor. 2) Bata fuertemente las yemas con el resto del azucar hasta que estén espumosas. 3) Vierta la leche caliente sobre las yemas, batiendo constantemente. Esto ayudará a que las yemas tomen calor de a poco, y no se cocinen al llevarlas al fuego. 4) Vierta la preparación de yemas, azucar y leche en una olla y lleve a fuego nuevamente revolviendo con cuchara de madera en forma de ochos, hasta que la preparación espese y nape la cuchara. 5) Prepare un baño maría invertido. Coloque hielo y agua fria en un bowl grande, encima del cual deberá colocar otro bowl más pequeño. Coloque un colador/tamiz sobre el bowl mas pequeño y vierta la crema inglesa sobre el mismo. Esto ayudará a que si algun pedacito de huevo que se ha cocinado, éste no llegue a la crema del helado, y hará que nuestra crema sea bien lisita. 4) Agregue la vainilla y la salsa de caramelo tibia e incorpore. 5) Agregue la crema de leche fría e incorpore bien. Cubra con papel film y lleve a la heladera por 8 horas para enfriarla bien
3) Una vez que la crema esté bien fría, coloque en la máquina heladora siguiendo las instrucciones del fabricante. Yo uso el accesorio de la KitchenAid, con el cual lleva 20 minutos que la preparación esté lista. 5 minutos antes de terminar el proceso, corte a cuchillo el chocolate y agreguelo.
4) Coloque la preparación en un recipiente adecuado y lleve al freezer durante al menos 4 horas para que adquiera la consistencia adecuada.
Si no tiene máquina de hacer helados, coloque la crema en el freezer directamente. Retirela transcurridos 3o minutos y bata vigorosamente para quebrar los cristales de hielo (si tiene batidor de mano, mejor). Vuelva a colocarla en el freezer y repita este procedimiento 3 o 4 veces más, cada 30 minutos, hasta que el helado haya adquirido la consistencia deseada y se haya congelado.
What is your favorite ice cream flavor? Do you have ice cream all year long or only in Summer?
Cual es su sabor de helado favorito? Comen helado todo el año o sólo en verano?
by Marcela M. | Oct 25, 2012 | Blog, cookies, Recipe Box, Recipes, Sweets
Chocolate…is there anything better? I didn’t think so 🙂
I love all types of chocolate, but my favorite is very dark (over 75%), which lots of people find slightly bitter but I adore. I love it because it is bitter, intense and because it is better enjoyed in small quantities, letting it melt slowly in the mouth. I love it on its own, in truffles, and also paired with vanilla, coffee, caramel, berries… well, with pretty much everything. This is why I smiled really widely when I saw that Circulo Whole Kitchen’s sweet recipe for October was none other than the all-classic brownie.
When it comes to brownies, it turns out, preferences vary greatly. I like my brownies moist, with a fudge-like interior and a crispy top, and I like them very chocolatey. Actually, I don’t like any other flavors to compete with that of chocolate, which is why I don’t add espresso, nor nuts, but lots of people do. The basic recipe, which is the one I bring you today, is very, very simple (which makes it very versatile) and it can also be used as a base for a cake, by adding filling and frosting (such as the traditinal brownie cake, that consists on a brownie base, topped with dulce de leche and frosted with Italian Meringue, which is then swirled with dark chocolate…truly decadent!)
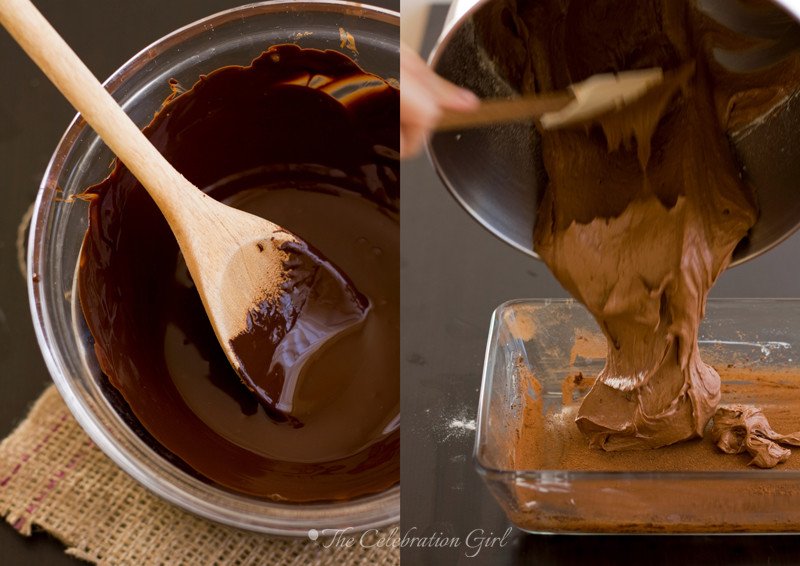
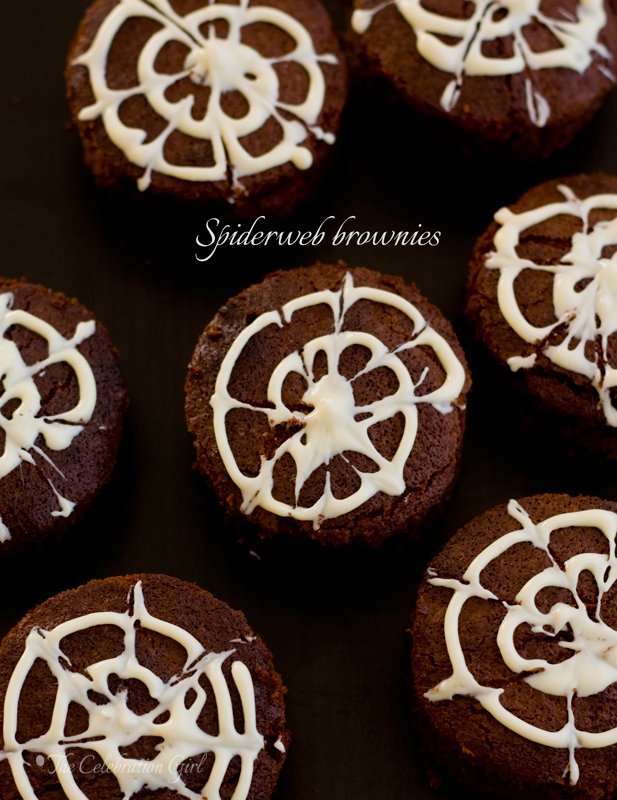
The ingredients are simple and straightforward: butter, sugar, dark chocolate, eggs and very little all purpose flour. Mix them, put the batter in the oven for just enough time for the brownies to cook, but not so much that they will get dry, cut, serve and enjoy! In this occasion, since Halloween is around the corner, I cut my brownies with a round shape (instead of the traditional square one) and added a small detail, a spiderweb, in white chocolate (see the picture tutorial below for instructions on how to achieve this look).
This is a great recipe to try with children, so why not get them involved in your Halloween preparations by making these brownies with them? Try it and let me know how it goes! I’m sure it will be fun!
Here is the recipe:
Fudgy, chocolatey brownies with a crispy top
Ingredients: 100 grs butter, 100 grs sugar, 2 eggs, 1 teaspoon vanilla extract, 100 grs dark chocolate (at least 70%, the best you can get), 65 grs all purpose flour. If you are doing the spiderweb decoration, add 100 grs white chocolate.
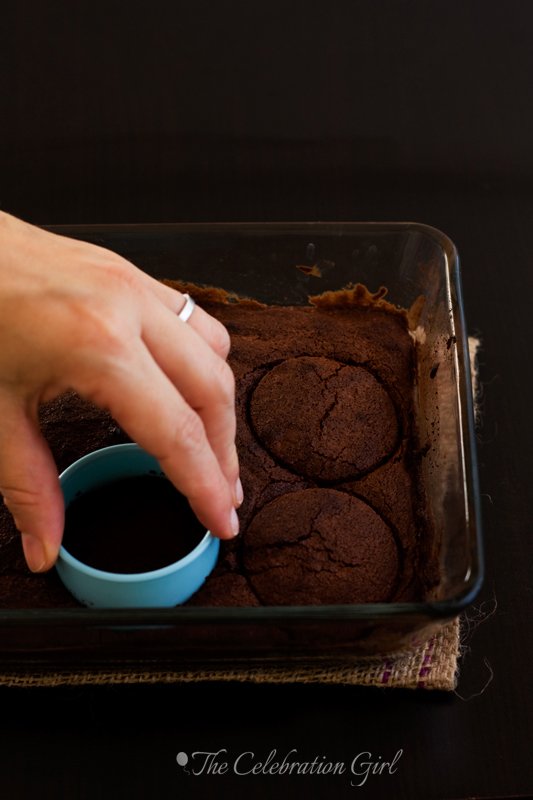
Preparation: Pre-heat the oven to 200 C. Melt the dark chocolate in a double boiler or at “bain marie” and, let it cool down. Cream butter and sugar until white and fluffy. Add the eggs, one by one, and vanilla extract, incorporating well. Add the melted chocolate, incorporate and, finally, add flour. Grease a squared pan and dust it with cocoa (I prefer cocoa to flour when baking chocolate treats). Pour the batter in the pan and put it in the oven for 15 minutes, until the top starts to get crispy. Watch them carefully, don’t let them get dry! Remove them from the oven, let them cool slightly and cut in round shapes with a cookie cutter (as in the picture above).
Decoration: Melt white chocolate in a double boiler. Let it cool down and put inside a squeeze bottle (I use Wilton’s), or a piping bag with a size 3 tip. Pipe a white spiral on top of the brownie and, immediately after, drag the chocolate from the center to the outside, forming lines cut the spiral, and form the spiderweb (see the pictures below for a step by step visual explanation). Let the chocolate cool down and harden, and enjoy!

Con sabor latino…
Chocolate…hay algo mejor? No, verdad? Ya me parecía 🙂
Adoro todos los tipos de chocolate, pero sin dudas mi preferido es el amargo bien amargo, con al menos 75% de cacao. Me encanta ese sabor intenso que hace que haya que saborearlo de a poco, en pequeñas cantidades, dejando que se derrita lentamente en la boca. Me encanta en todas sus formas: solo, trufado, y junto con sabores que saben acompañarlo, como vainilla, café, caramelo o frutos del bosque, entre tantos otros. Es por ello que sonreí de oreja a oreja cuando leí que la propuesta dulce del Circulo Whole Kitchen para el mes de octubre era, nada más ni nada menos, que las clásicas y chocolatosas brownies.
Las preferencias en materia de brownies varian ampliamente. Las que me gustan a mí tienen una textura húmeda, muy chocolatosa (porque uso chocolate amargo), y un capa crocante arriba. Me gusta que el chocolate sea no sólo el sabor predominante, sino el único, por eso no agrego espresso ni nueces, como suelen hacer muchos. La receta que les traigo hoy es mi receta de base y es muy simple y, por lo tanto, muy versatil: pueden usarla no sólo como barrita, sino tambien como base de una torta a la que sólo deberán agregarle relleno y cobertura (como con la tradicional torta brownie, que tiene una capa de esta masa, sobre la cual se agrega dulce de leche, y se finaliza con copos de merengue italiano rociados con hilos de chocolate negro…terriblemente decadente!)
La receta es simple, y sencillos son sus ingredientes: manteca, azucar, huevos, y muy poquita harina común, los que se mezclan, se colocan en una fuente y se llevan a horno por el tiempo suficiente para que se forme la capa craquelada arriba pero no tanto como para que la masa se seque. Una vez cocidas, se sacan del horno, se cortan, y se disfrutan! En esta ocasión, y teniendo en cuenta que Halloween está a la vuelta de la esquina, usé un cortante redondo para darles forma (como pueden ver en la foto de más arriba), y agregué un pequeño detalle, una tela de araña dibujada con chocolate blanco (pueden ver el tutorial de cómo hacerlo, paso a paso, en las fotos que se encuentra inmediatamente encima de estas palabras).
Esta es una receta ideal para hacer con niños, porque es sencillísima, y porque a todos les encanta el chocolate! ¿Se animan a prepararla con ellos? Seguramente se divertirán muchísimo!
Aquí está la receta:
Brownies húmedas, chocolatosas y crocantes
Ingredientes: 100 grs de manteca, 100 grs de azucar, 2 huevos, 1 cucharadita de extracto de vainilla, 100 grs de chocolate amargo (el mejor que consigan, 70%), 65 grs de harina común. Si quieren hacer la decoración de Halloween, agreguen 100 grs de chocolate blanco.
Preparación: Pre caliente el horno a 200C. Derrita el chocolate blanco a baño maría y deje enfriar. Bata la manteca y el azucar a punto crema, hasta que quede una preparación blanca. Agregue los huevos de a uno, incorporando bien luego de cada adición. Agregue la esencia de vainilla e incorpore. Finalmente, agregue la harina de golpe, y mezcle bien asegurandose de tener una masa uniforme. Enmantece un molde y espolvoreelo con cacao (cuando hago masas de chocolate prefiero usar cacao amargo en lugar de harina para que no queden areas blancas al desmoldar). Vierta la mezcla en el molde y coloque en el horno por 15 minutos, o hasta que la capa superior se craquele apenas. Tenga cuidado de no pasarse con el horno, porque si se secan, las brownies no son ricas! Retire del horno, dejelas enfriar y corte con un cortante de galletitas redondo.
Decoración: Derrita el chocolate blanco y dejelo enfriar. Una vez tibio, coloquelo en una botella especial (yo uso Wilton) o bien en una manga pastelera con una boquilla numero 3. Dibuje un espiral de chocolate sobre el brownie y, luego, usando un palillo escarbadiente, arrastre lineas de chocolate que corten el espiral, desde el centro hacia afuera, cpmo en las fotos del collage que se encuentra arriba de este texto en castellano. Deje que el chocolate se enfríe y endurezca, y disfrute!

I hope you like this recipe! Have a wonderful weekend! I’ll be back tomorrow with the winner of the giveaway, so stay tuned!
Espero que les guste esta receta! Que tengan un hermoso fin de semana y, estén atentos, porque volveré mañana anunciando el ganador del sorteo!


