by Marcela M. | Dec 22, 2011 | Blog, cookies, Europe, Holidays, Recipe Box, Recipes, Sweets, Travel, Uncategorized
Good afternoon dear friends!
I apologize for my silence over the past few weeks. I had originally intended to write a few posts before but, as it turns out, coming back home after a 7 week trip with twin toddlers required to readjust them to the old routine, to Nicosia’s weather and time zone (there is a 5 hours difference between Argentina and Cyprus) and to our normal life, in general. So these days we have been juggling regular work and study schedules with middle-of-the-night wake-up episodes, piles and piles of clothes for washing, folding, ironing and putting away, and a sort of “pre-spring”clean (always due after such long trips).
In spite of all these adjustments, it is wonderful to be back home, and coming back in the middle of the Holiday Season makes it extra special. We arrived to a beautifully-decorated Nicosia, with the streets full of lights and Christmas markets, and people singing carols in the streets of downtown. And this, for a Christmas Elf such as myself, is enough reason to be happy.
On Christmas’ eve it will actually be 4 years since I arrived to Cyprus (my husband had been here for 6 months already), so this time of the year is always one of memories of years past, a time to reflect on how much our life has changed since that day. Back in 2007 there was just the two of us, and an almost-empty apartment with a bed, a sofa, an outdoor table with 4 chairs for the balcony, and a Christmas Tree that my husband had arranged for me, to make me feel at home. In the year that followed we furnished our house, we had twins, we met new people, we adapted, and Cyprus started becoming our home.

Making a place one’s home involves incorporating new habits and letting go of some others. We change, sometimes imperceptibly, with every new country we live in and those mutations are only perceived when contrasted with people and places that we have met before. As Nelson Mandela said in “A long walk to Freedom”: There is nothing like returning to a place that remains unchanged to find the ways in which you yourself have altered”.
One of the ways in which we have changed is in the food we eat, particularly during holidays and other celebrations. We approach new places also through their food and, in the process of adapting, we incorporate new flavours, we make them our own, and they travel with us wherever we go. This is the case with the cookies I will share with you today, which have come to mean Christmas to me, as much as Panettone or Turrones (which are some of Argentina’s traditional holiday sweets ).
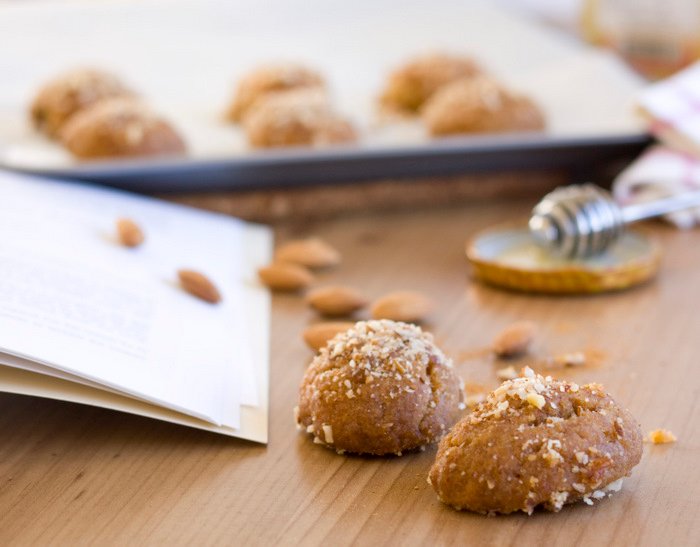
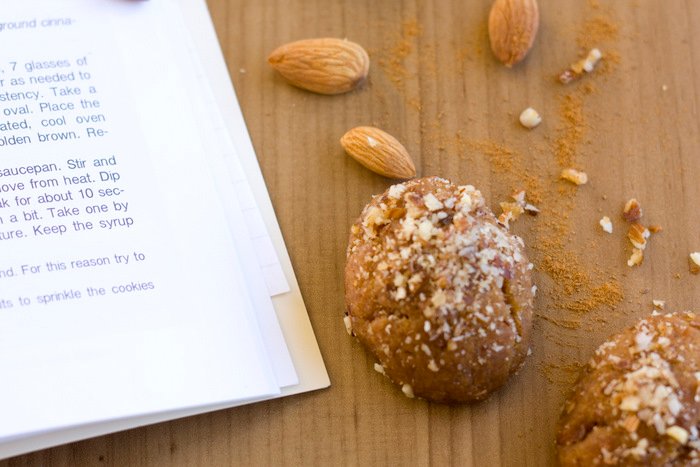
Melomakarona are, in fact, the cookies of advent. Greek Cypriots fast during this period (they adopt a vegan diet, eliminating all animal products) and, during that fast, they snack on these cookies, which are highly caloric. Everything in their flavour speaks of this season: they take cinnamon, clove, orange, honey and walnuts, and they are dipped in syrup for extra sweetness. If you are looking for a different cookie to bake these days, I highly recommend these ones. They will fill your home with true holiday cheer!
Here is the recipe I use, as was given to me by my neighbour (and adapted by her from the book “Cyprus cooking for friends“, by Sandra Lysandrou)
Ingredients
1 cup sugar
1 cup orange juice
3 cups vegetable oil (canola)
1/2 cup brandy
1 teaspoon ground cinnamon
1 teaspoon ground cloves
1 teaspoon salt
8 1/2 cups self raising flour
5 teaspoons baking powder
{For the syrup}
1 1/2 cups sugar
1 cup honey
1 1/2 cup water
{For topping}
1 cup finely ground walnuts mixed with 1 tablespoon of cinnamon (I like to mix walnuts and almonds)
Preparation:
a-Preheat the oven at 140 C/ 284F
b- In a large bowl, mix sugar, oil, juice, brandy, spices, 7 cups of flour, baking powder and salt. Work the dough, adding the extra flour as needed, until it becomes fluffy. The dough must be oily, not dry, so stop adding flour when it becomes just workable.
b- Form the melomakaronas by taking small pieces of dough and shaping them into ovals with your hands. Note that this is a dough made with self-raising flour and a fair amount of baking powder as well, so the cookies will expand in the oven. It is consequently better to make them rather small, and to place them in an ungreased baking tray separated from each other, to give them place for growth. Bake them until the bottom is golden brown (approximately 30 minutes).
c- Allow the cookies to cool down completely and prepare the syrup by mixing sugar, water and honey and bringing them to the boil. Once the syrup boils, remove it from the heat and dip the cookies in it, soaking them for a few seconds. Note that it is very important that the cookies are completely cool when you do this, otherwise they will not absorb the syrup! For the same reason, you will need to reheat the syrup if it cools down before you are finished dipping the cookies.
d- Place the cookies on a wire rack to drain the excess syrup and sprinkle the crushed nuts mixture over them.
I hope you will like them !

by Marcela M. | Oct 10, 2011 | Blog, Pies, Recipe Box, Recipes, Sweets, Uncategorized
Good morning dear friends!
How are you today? How did you start this week? I hope you are all well and happy.
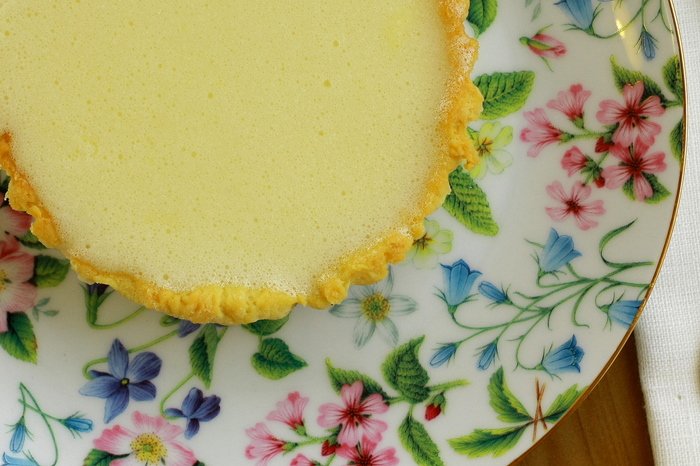
The weather in Nicosia is barely starting to get colder, so my recipes are still in a very summery mood. The one I bring you today was born from an experiment: I was going to meet some friends for tea, and wanted to bring something sweet for the occasion.
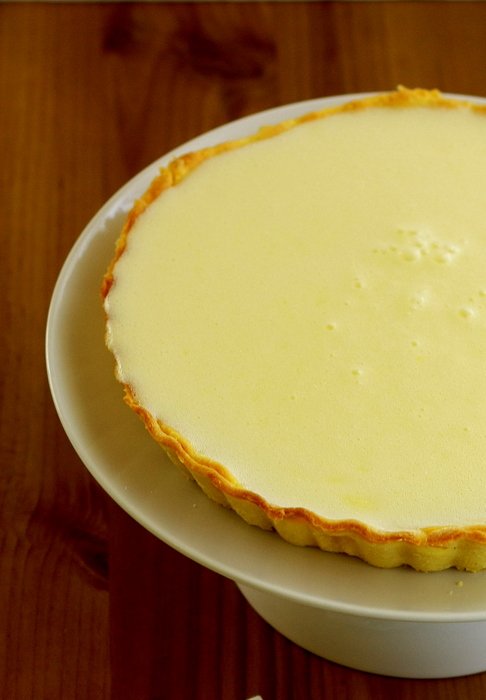
When I was wondering what recipe I could make, I recalled that I had Lemon Coconut Mousse leftovers in the freezer, and I thought I could use them to make a Lemon (coconut) mousse pie.
Since the mousse is very sweet and flavourful, I decided to bake a neutral crust that wouldn’t overpower the filling. The crust I made is the one I generally make with the traditional Lemon Meringue pie (crust, filled with lemon curd, topped with meringue), and which always turns out perfect. It is also a crust that is very easy to adapt: my basic chocolate crust is based on this one, for example.
So, first, I prepared the crust, baked it and let it cool completely. Then, I adapted the mousse. In order to firm it up and transform it into a proper pie filling, I added one envelope (30 grs) of clear, unflavoured gelatin dissolved in warm water to it (after defrosting), I mixed everything well, and I poured it on top of the baked crust.
Finally, I put the pie in the fridge for 3 hours, and it was ready!
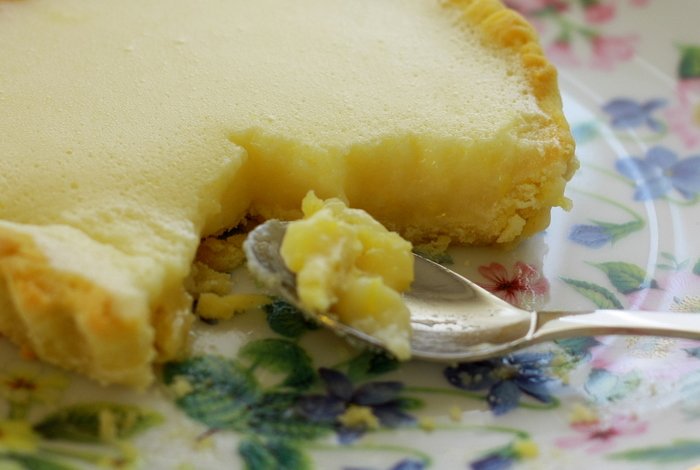
Here is the recipe:
1) Make the crust: Mix 200 grs flour, 100 grs butter and 2 spoons sugar, until you get a sand-like consistency. Add 1 egg and 1 egg yolk and incorporate them well into the dry ingredients, until you get a workable dough. Make a ball with it, cover it in foil and let in rest in the fridge for 15 minutes. After that, remove it from the fridge, extend it with a rolling pin and cover a 9- inch pie pan. Pinch the base of the crust with a fork in several places so that it doesn’t grow in the oven. Bake at 175C for 10/15 minutes, or until it becomes slightly golden in colour and separates from the pan. Remove from the oven and let it cool down completely.
2) Make the filling: Make the Lemon Coconut Mousse according to the instructions given HERE. Add 1 envelope of unflavoured gelatin, dissolved in 1/4 cup of warm water and 1/4 cup cold water, or as per product’s instructions. Mix well.
3) Assemble the pie: Pour the filling into the the baked crust. Put in the fridge for 3/4 hours
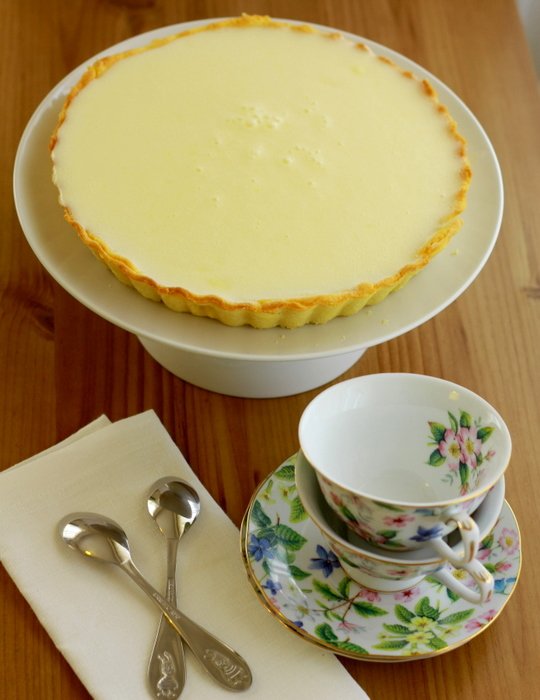
Optional: I like the pie just as it is, but you could also give it a different finish, such as the following:
a) Cover it in meringue,
b) Pipe whipped cream on top, and then sprinkle some lemon zest over it.
c) Top it with whipped coconut cream, and sprinkle shredded coconut, lemon zest or a combination of both over it.
I hope that you like it!
Have a wonderful week!
by Marcela M. | Oct 3, 2011 | Blog, Drinks, Recipe Box, Recipes, Uncategorized
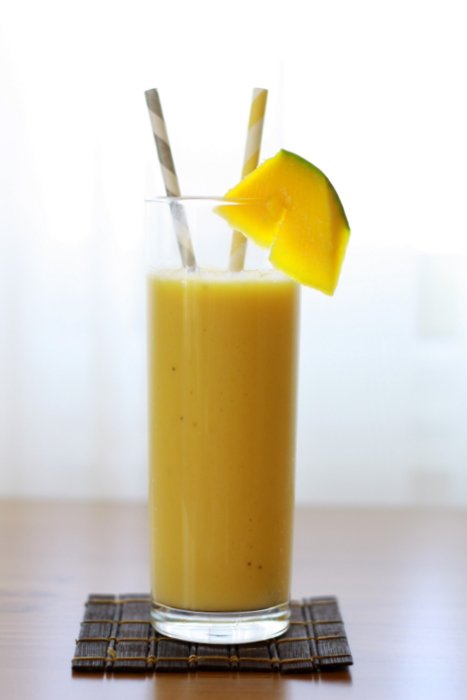
Good morning dear friends! I hope you had a lovely weekend.
As I mentioned two posts ago, I recently found tropical fruits in my local supermarket, and they brought memories of days past, memories of Ivory Coast. So I bought mangos, papayas, bananas…a bit too many of them, to be honest. At first, I ate them raw, and after a few days (when we got tired!) I started thinking about what to do with them.

I then recalled a simple fruit salad that I used to eat back in Abidjan and which consisted in dices of mango, papaya and banana, tossed together with a teaspoon of honey (I like acacia) dissolved in a the juice of half a lime (to kill the sweetness) and sprinkled with a few almonds on top. Simple and nice.
So I ate my fruit salad, and I was considering what to do with the remaining fruits when I thought that I could use the same ingredients in a different way. The weather is still warm in Nicosia, and we are still wearing our summer clothes, but we also know that it won’t last much longer, so I thought that this was my last chance of making a summery smoothie until next year.

So a tropical fruits smoothie I made!
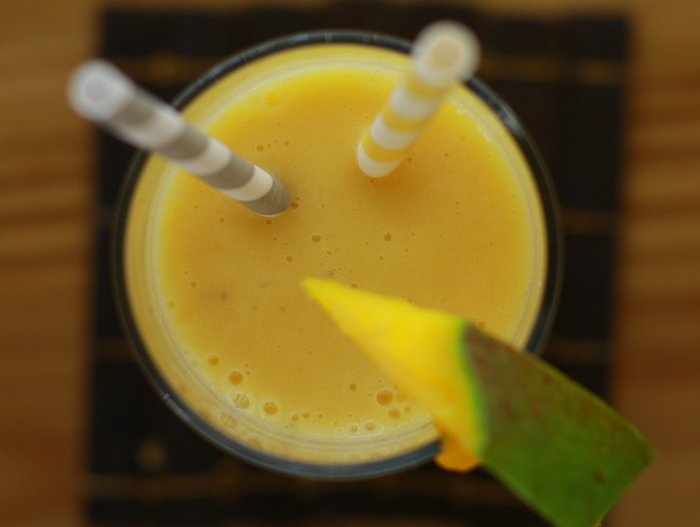
I chopped 1 mango, 1 papaya and 1 ripe banana, and I put them in the blender together with 1/2 cup of crushed ice, 2 teaspoons of acacia honey and 2 glasses of almond milk (if they don’t sell almond milk where you live,you can make your own following this recipe and instructions). I blended it all for a few minutes, until there were no more visible fruit chunks, and then I served it with a couple of straws (to make it more appealing to my children!)

It was a perfect way to say goodbye to the long days of summer, and to welcome autumn- even though there is still no sign of it.
Now may I ask something from you? My Owl cupcakes are competing in Sweetopia‘s Sweet of the week contest. Would you be so kind to vote for me, pleeeease? 🙂 Thank you! There are some really pretty confections competing this week so I’m sure you will enjoy taking a look at all entries.
Have a wonderful week!
by Marcela M. | Sep 8, 2011 | Blog, Main courses, Recipe Box, Recipes, Savories, Uncategorized
Hello dear friends! I hope you are having a lovely week
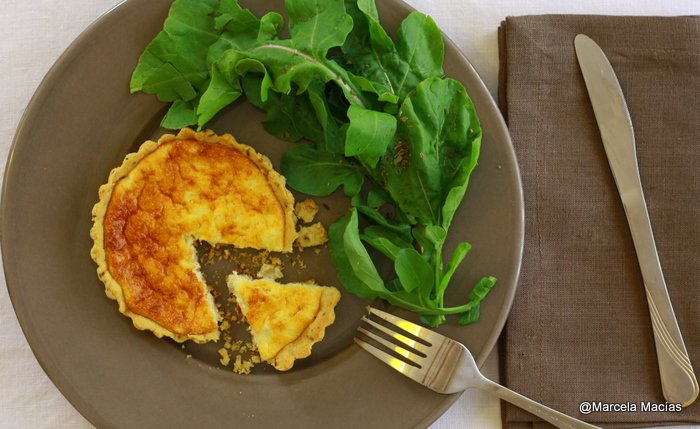
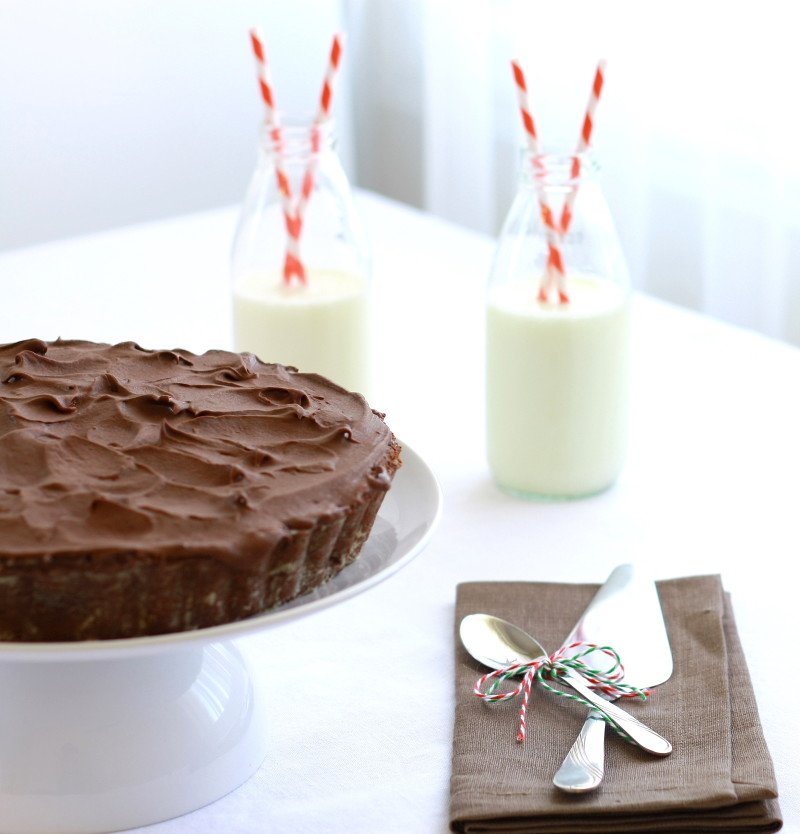
Today I have a BIG surprise, one that I have been dying to tell you about: Two of my recipes, with their pictures, are featured in the September issue of Whole Kitchen Magazine!!!
Last July, I was contacted by Silvia (who writes the beautiful blog Food and Cook, for Elle Magazine). Silvia is also one of the editors of Whole Kitchen and, to my surprise and utter delight, she asked me to collaborate with their September issue. I immediately said YES, of course! Whole Kitchen is a beautiful magazine, full of delicious recipes and gorgeous photography, edited by bloggers I have been following for a long time, and with amazing contributors, so it is a real honour to be able to be a part of it.
In this issue you will find one savory recipe from me: cheese and echalottes tartelettes, with a hint of cumin (pages 58-61)…
…And one dessert: Chocolate and pear mousse pie (pages 98-101)
This issue also includes great lunch-box ideas, as well as cookies, muffins and pies which could be prepared with children.It has also added a new section called ” Living”, with articles on fashion, beauty and wellness.
Silvia and Beatriz: thank you so much for letting me be a part of your beautiful magazine!
May you all have a wonderful weekend!
NOTE: For the recipe of Chocolate and Pear Mousse pie in English, click here.
by Marcela M. | Sep 5, 2011 | Blog, Cakes, Cooking basics and tutorials, Recipe Box, Recipes, Sweets, Uncategorized
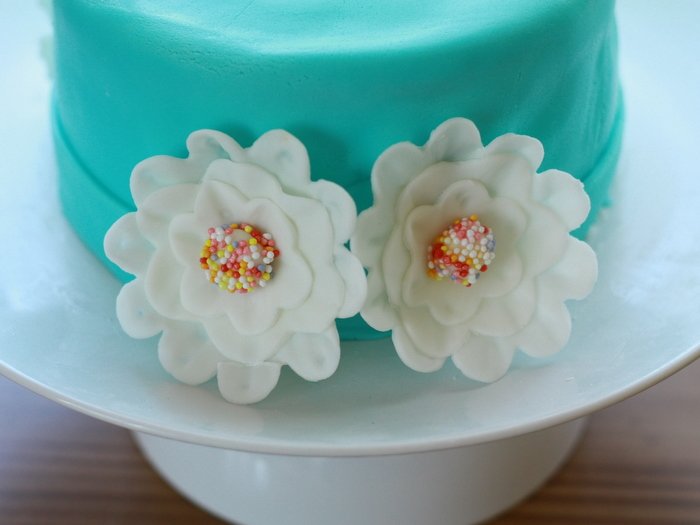
Good morning friends! I hope you had a great weekend and that you are ready to start a new week.
As I promised in my last post, here is the tutorial for making fondant flowers like the ones with which I decorated my daughter’s 3rd birthday cake. You will see that they are very easy to make, and that you can do so with tools that you most probably already have at home. I have included step-by-step pictures to make it easier to follow the instructions, but if you have any doubts, please do not hesitate to contact me!
So, let’s begin! Here is what you will need:
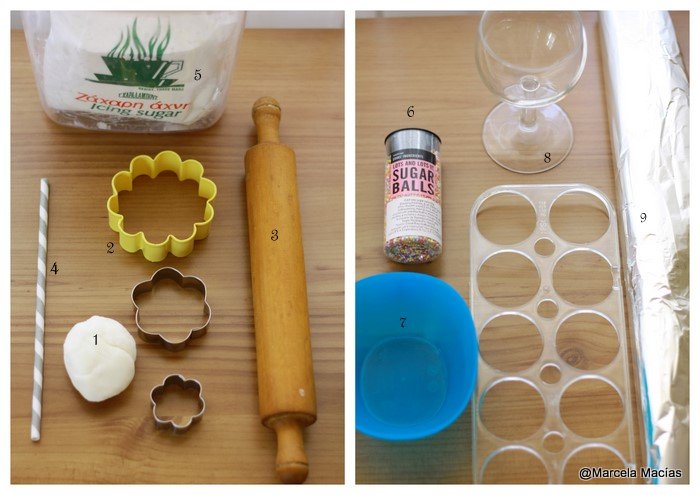
1- Fondant in whatever colour/colours you want your flower to be. I used only white, but you may combine different ones, according to the colours of your cake/what you have available.
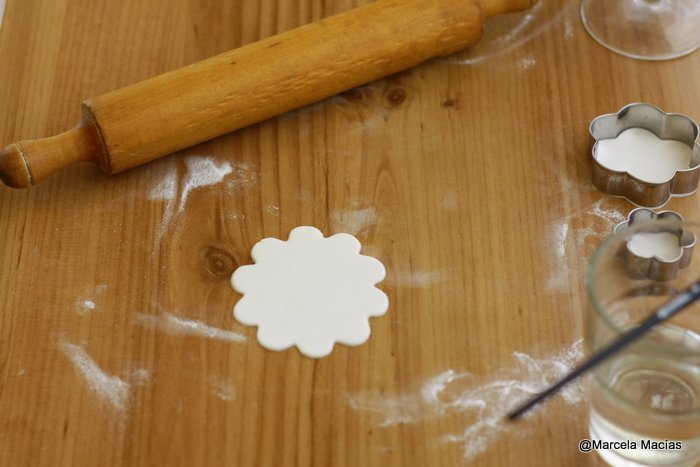
2- Flower cut-outs of 3 different sizes. I used cutters from 2 different sets: the bigger one is from this Wilton cookie cutter set, and the two smaller ones from this set, also by Wilton.
3- Rolling pin (the one in the picture was given to me by my grandmother, as a present, when I was 8 years old)
4- A paper straw. You can also use a lollipop stick. Or the back of a brush. Whatever you have on hand!
5- Icing sugar, so that the fondant doesn’t stick to the table. When the weather is too hot, I use a combination of icing sugar and cornstarch.
6- Non-pareils (I used multi-coloured ones)
7- A small bowl, for putting the non-pareils in it.
8- A glass/ an egg tray (from your fridge), depending on the size of your flowers, to shape them (I will show you how to do this)
9- Aluminium foil
10- Sugar syrup/sugar glue, and a small brush (not in the picture). To make sugar syrup, put sugar in a small pan, cover with water and bring to the boil until it thickens (about 5 minutes). This will help glue the different parts of the flower together, but I must warn you that it works only when fondant is not dry yet. Once the flowers are dry, use royal icing to attach them to the cake.
Instructions:
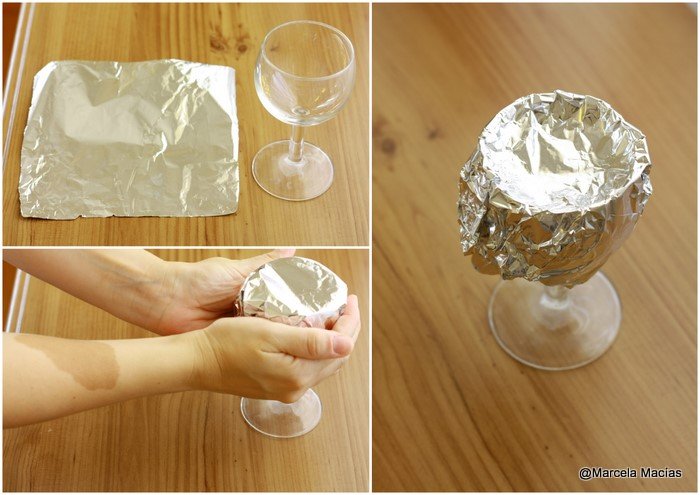
1- The first thing you will need to do, is to prepare the flower drying trays (which are the place where your flowers will dry, so that they will look like real flowers and not be flat). In order to do so, cut a rectangle of aluminium foil and, using your hands, place it on top of a cup. Once it is attached to the sides of the cup, lift it a little bit, very carefully, and curve the top by pressing in the middle with your fingers. It should look as in the picture on the right:
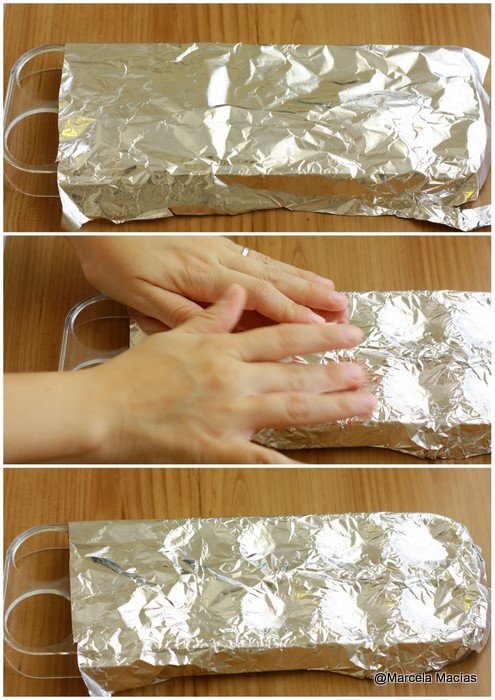
2- If you need to make several small flowers or blossoms, you may use an egg tray from your fridge. Cut aluminium foil to cover the tray (or as many holes as flowers you are planning to make) and, using the same method above, work it until you have the drying tray ready, as in the pictures below:
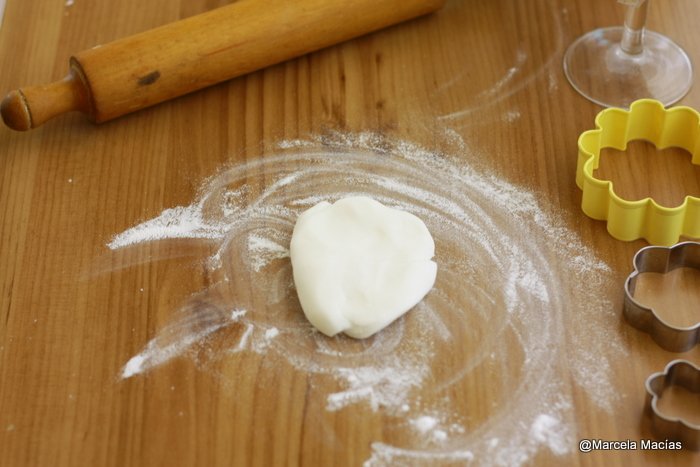
3- Now that your former/drying cup and tray are ready, it is time to make the flowers! Begin by kneading a little bit of fondant. Put some icing sugar on the table, and extend the fondant using a rolling pin. Roll it as thin as possible, so that the flower petals look more realistic.
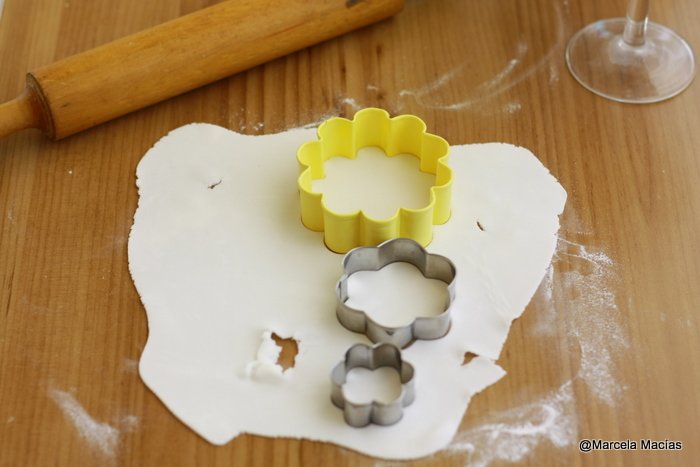
4- Cut the flowers in three different sizes. You will need one of each per flower.
5- Start by working on the biggest size. Leave the other two aside, and put the remaining fondant in a plastic bag so that it will not dry out.
6- Take the flower with your hands and, slowly and gently, press the petals with your thumbs, so as to make them thinner (If you have one, you may use a ball tool to do this instead)
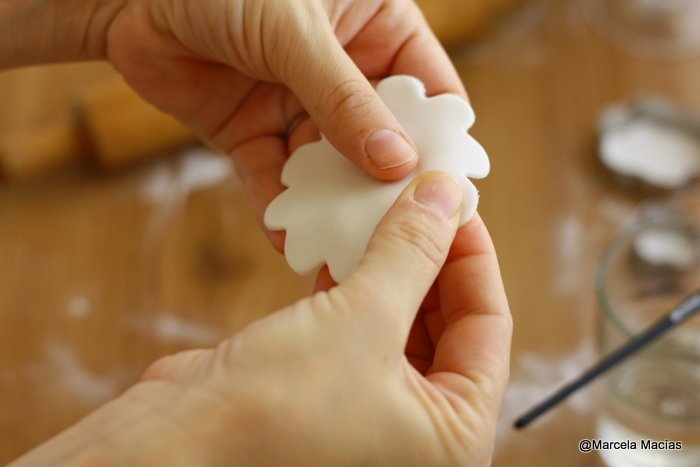
This is how the flower will look when you are done. It is very important that you do it slowly or the petals may break!
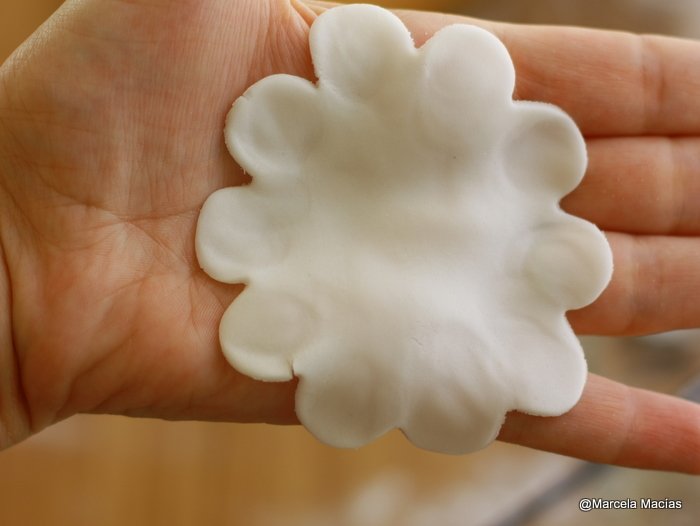
7- Gently (VERY gently) roll a paper straw, a lollipop stick or the back of your brush, on each petal. This will give the petals some shape.
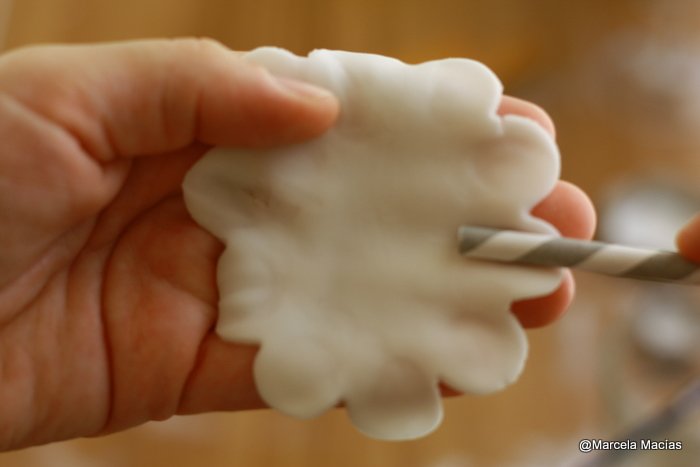
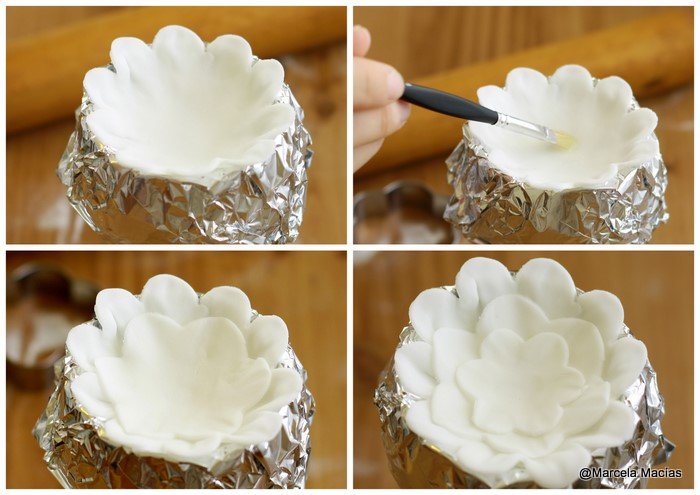
8- Place the petal in the drying cup, on top of the foil. Don’t worry, it won’t stick to it and, once it is dry (about 24 hours), you will be able to remove it easily.
9- Using the same method, shape the middle- sized flower.
10- Put a drop of sugar syrup in the center of the big flower and add the middle- sized flower to it. Make sure the petals of the smaller flower are placed between the petals of the bigger one. Press softly in the center for the petals to pop up.
11- Using the same method, shape the smallest flower.
12- Put a drop of sugar syrup in the centre of the middle-sized flower and add the smallest flower to it, as you did before. Press softly in the centre for the petals to pop up.
13- Now it is time to make the stigma (the centre of the flower). You will need a small ball of fondant, sugar syrup and non-pareils.
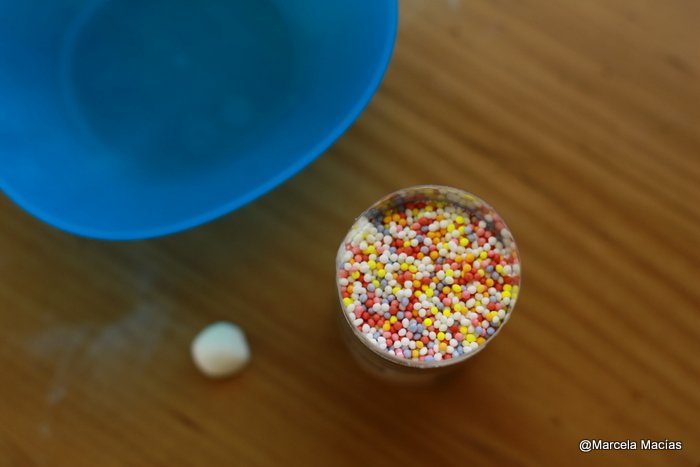
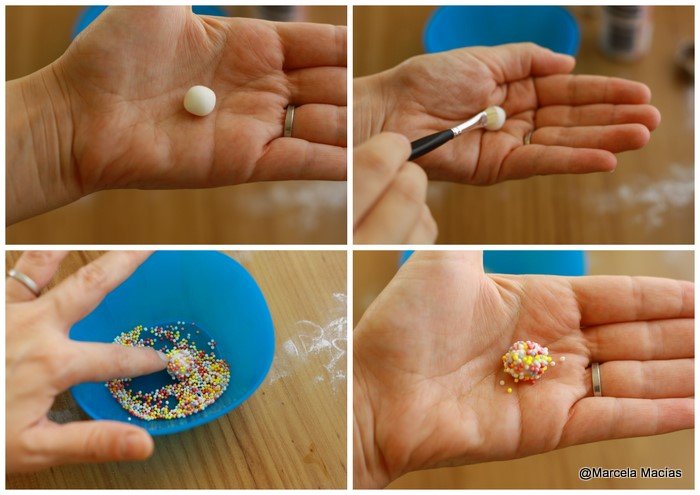
14- Make a small ball of fondant.
15- Brush it with sugar syrup
16- Put a few non-pareils in a small bowl. Place the fondant ball inside and roll it all over, until it getscompletely covered in non-pareils.
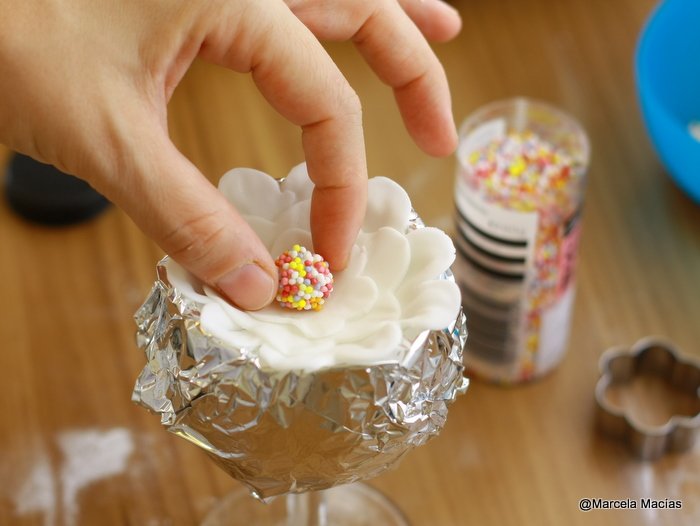
17- Put a drop of sugar syrup in the centre of the drying flower and place the stigma on top of it. Press softly so that it adheres to the flower.
18- Repeat the process to make as many flowers as you need in your decoration.
19 – Let dry for 24 hours, remove slowly from the drying cup and attach with royal icing to your cake.
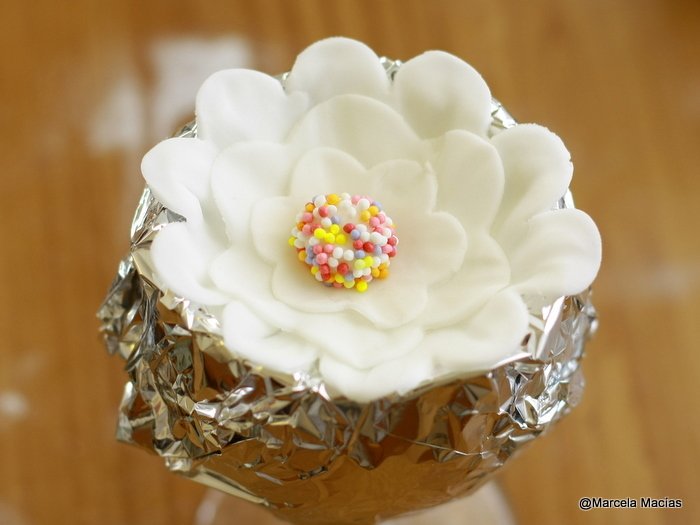
Very easy, isn’t it? I know how hard it can be to find gum-paste/fondant modelling tools in some countries, and how expensive these can be too, so I wanted to show you how you can get around buying them and still get some pretty flowers. I hope I achieved my goal!
May you have a wonderful week!
by Marcela M. | Aug 28, 2011 | Blog, Cakes, Parties, Recipe Box, Recipes, Sweets, Uncategorized
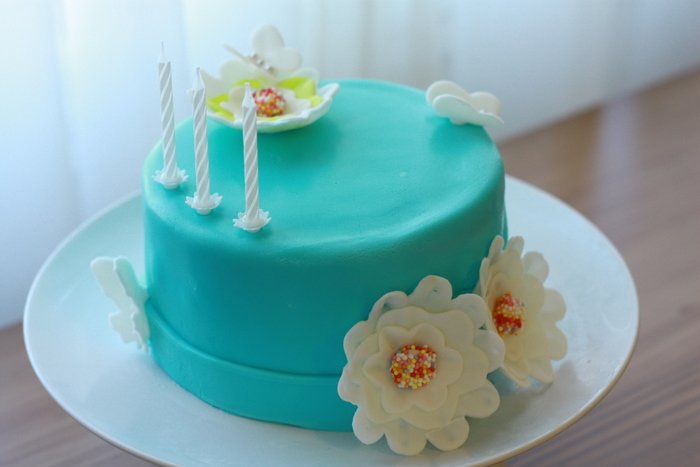
Hello dear friends! How are you today? How was your weekend? Are you ready to start this week? I hope you are and that it will be one full of wonderful surprises.
In this post I am showing the cake I made for my daughter, Zoe, for her birthday.
I changed the design in my mind many times, until I finally decided to improvise. One thing I knew: It had to have flowers and butterflies in it, because Zoe had loved the ones in the cake I made at the cake decorating course, last June. But until I started making the decorations, I didn’t really know what type of flowers I was going to make, or how many butterflies I wanted in it.
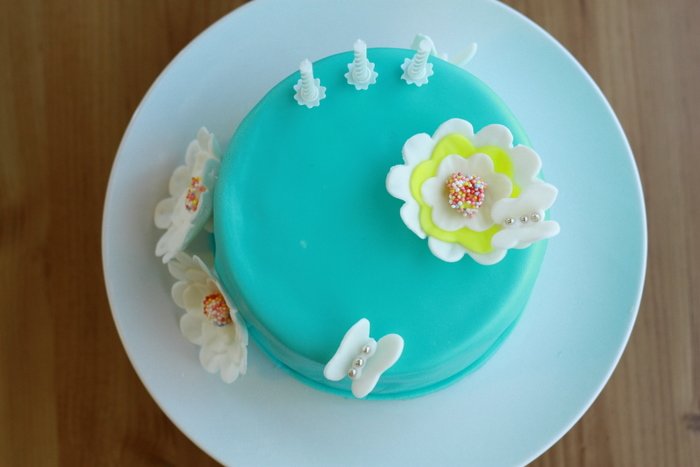
I do not own special tools for shaping neither butterflies nor flowers, and I did not have any gum paste or modelling paste on hand either. I could not buy any because neither of the cake shops I know in Nicosia were open (It is August, when most shops close), so I had to get creative. I did have fondant, food colouring, a few sugar pearls, non-pareils and sprinkles, as well as an internet connection to google ways of replacing what I didn’t have.

I started working on the flowers and butterflies the night before decorating the cake, to allow the fondant 24 hours drying time. I wanted to be able to place the decorations on the cake without fearing that they would lose shape. If I had used modelling paste, which dries faster, a few hours would have been enough. In my next post, I will show you step by step pictures of how I did it, and you will see how easy it is.
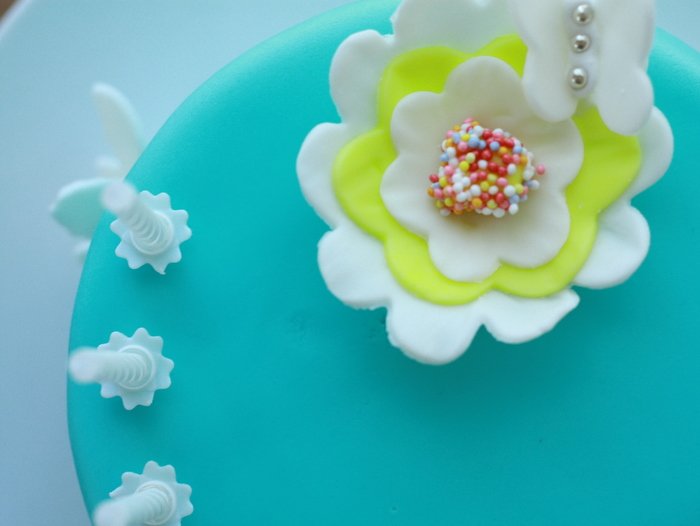
I dyed fondant using Wilton’s gel food colouring in Teal (my favourite colour) and covered the cake with it. I then rolled some more fondant and, using a small ruler, I cut a strip, like a ribbon, to cover the lower side of the cake, to give it a more finished look.
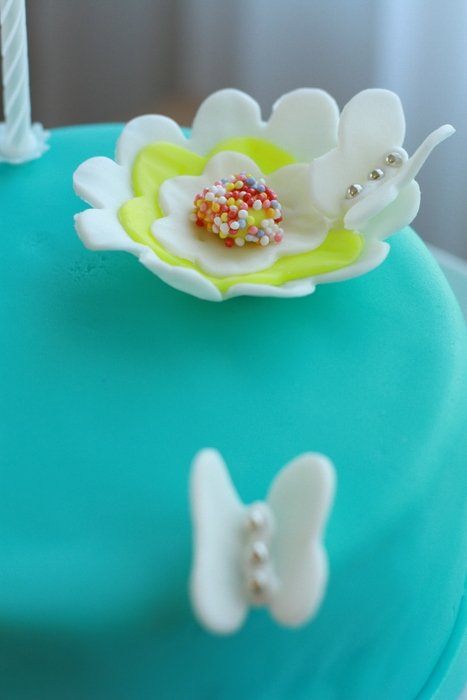
I then started playing around with the flowers and the butterflies until I was happy with the way the cake looked. I used 3 flowers and 3 small butterflies (as many as Zoe’s years), eventhough I had originally made 6 butterflies of different sizes.
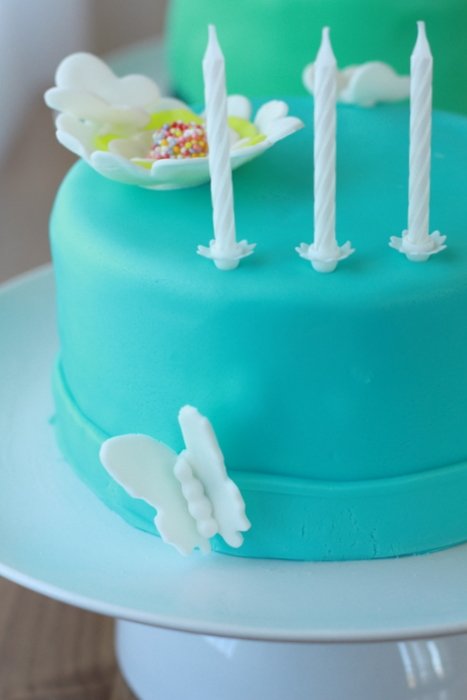
Finally, I added 3 white candles and the cake was ready!
Zoe saw her cake for the first time when I brought it to the living-room to sing the happy birthday, and for her to blow the candles. She was fascinated with the fire in the candles and with the decorations. As soon as the candles were blown, she grabbed the yellow and white flower and the butterfly that was attached to it, and started eating them. Luka followed her soon after with the rest of the butterflies. Then we cut the cake and ate it!
Have a lovely week and see you in a few days!


