Good morning friends! I hope you had a great weekend and that you are ready to start a new week.
As I promised in my last post, here is the tutorial for making fondant flowers like the ones with which I decorated my daughter’s 3rd birthday cake. You will see that they are very easy to make, and that you can do so with tools that you most probably already have at home. I have included step-by-step pictures to make it easier to follow the instructions, but if you have any doubts, please do not hesitate to contact me!
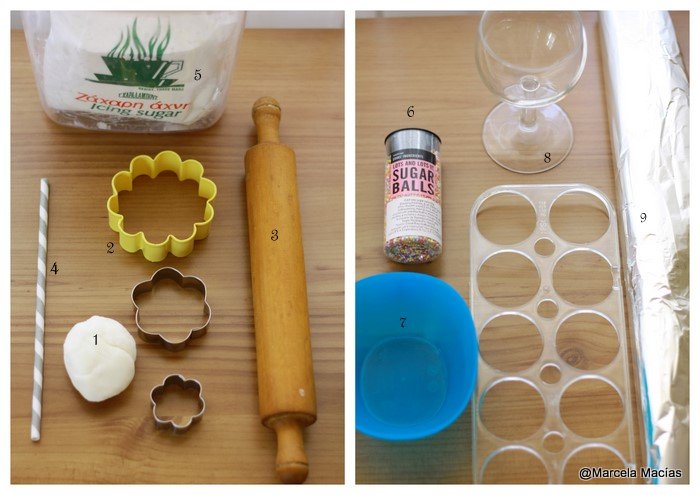
So, let’s begin! Here is what you will need:
1- Fondant in whatever colour/colours you want your flower to be. I used only white, but you may combine different ones, according to the colours of your cake/what you have available.
2- Flower cut-outs of 3 different sizes. I used cutters from 2 different sets: the bigger one is from this Wilton cookie cutter set, and the two smaller ones from this set, also by Wilton.
3- Rolling pin (the one in the picture was given to me by my grandmother, as a present, when I was 8 years old)
4- A paper straw. You can also use a lollipop stick. Or the back of a brush. Whatever you have on hand!
5- Icing sugar, so that the fondant doesn’t stick to the table. When the weather is too hot, I use a combination of icing sugar and cornstarch.
6- Non-pareils (I used multi-coloured ones)
7- A small bowl, for putting the non-pareils in it.
8- A glass/ an egg tray (from your fridge), depending on the size of your flowers, to shape them (I will show you how to do this)
9- Aluminium foil
10- Sugar syrup/sugar glue, and a small brush (not in the picture). To make sugar syrup, put sugar in a small pan, cover with water and bring to the boil until it thickens (about 5 minutes). This will help glue the different parts of the flower together, but I must warn you that it works only when fondant is not dry yet. Once the flowers are dry, use royal icing to attach them to the cake.
Instructions:
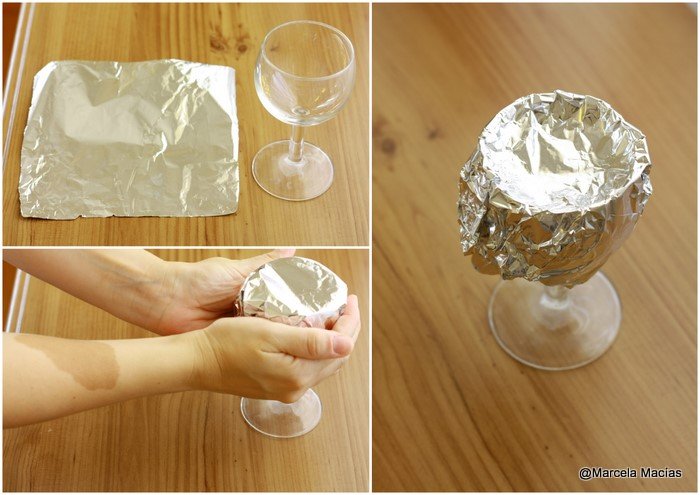
1- The first thing you will need to do, is to prepare the flower drying trays (which are the place where your flowers will dry, so that they will look like real flowers and not be flat). In order to do so, cut a rectangle of aluminium foil and, using your hands, place it on top of a cup. Once it is attached to the sides of the cup, lift it a little bit, very carefully, and curve the top by pressing in the middle with your fingers. It should look as in the picture on the right:
2- If you need to make several small flowers or blossoms, you may use an egg tray from your fridge. Cut aluminium foil to cover the tray (or as many holes as flowers you are planning to make) and, using the same method above, work it until you have the drying tray ready, as in the pictures below:
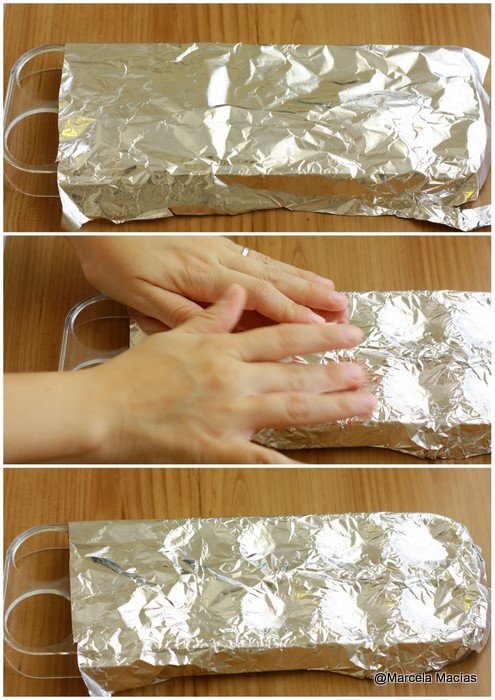
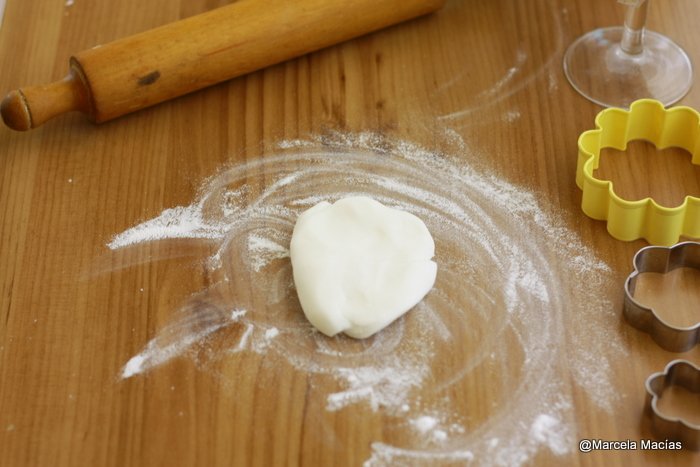
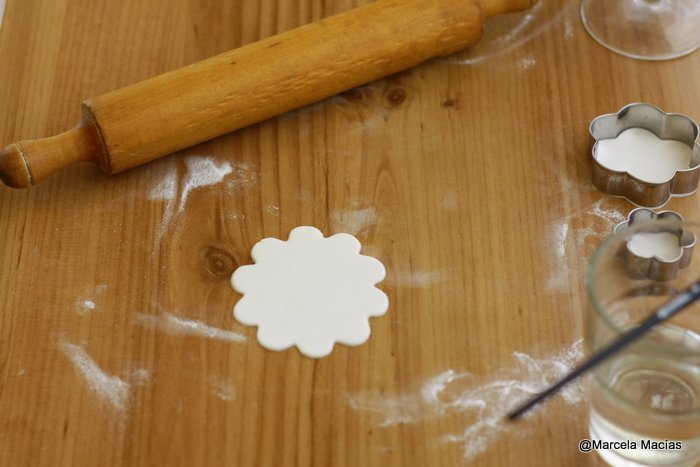
3- Now that your former/drying cup and tray are ready, it is time to make the flowers! Begin by kneading a little bit of fondant. Put some icing sugar on the table, and extend the fondant using a rolling pin. Roll it as thin as possible, so that the flower petals look more realistic.
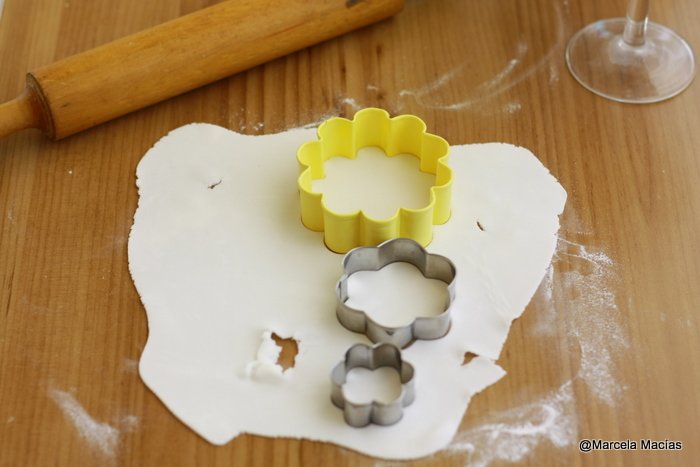
4- Cut the flowers in three different sizes. You will need one of each per flower.
5- Start by working on the biggest size. Leave the other two aside, and put the remaining fondant in a plastic bag so that it will not dry out.
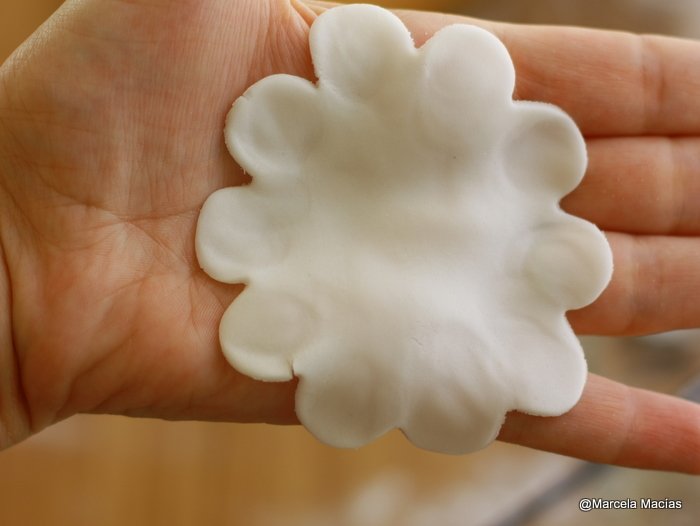
6- Take the flower with your hands and, slowly and gently, press the petals with your thumbs, so as to make them thinner (If you have one, you may use a ball tool to do this instead)
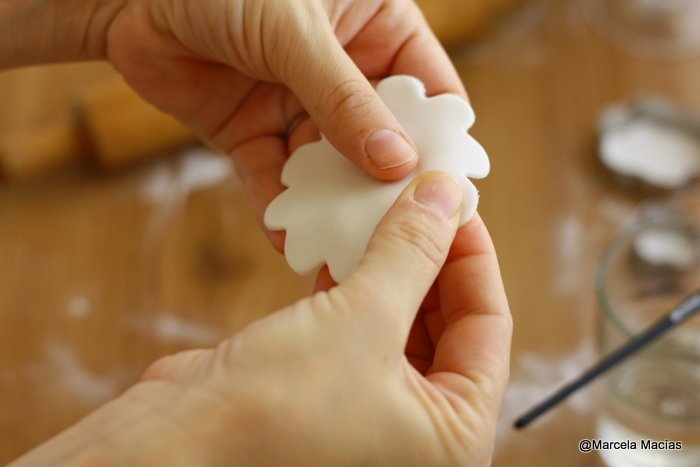
This is how the flower will look when you are done. It is very important that you do it slowly or the petals may break!
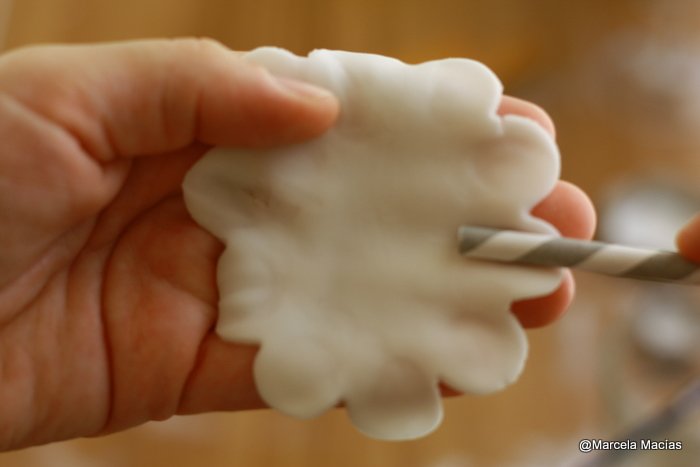
7- Gently (VERY gently) roll a paper straw, a lollipop stick or the back of your brush, on each petal. This will give the petals some shape.
8- Place the petal in the drying cup, on top of the foil. Don’t worry, it won’t stick to it and, once it is dry (about 24 hours), you will be able to remove it easily.
9- Using the same method, shape the middle- sized flower.
10- Put a drop of sugar syrup in the center of the big flower and add the middle- sized flower to it. Make sure the petals of the smaller flower are placed between the petals of the bigger one. Press softly in the center for the petals to pop up.
11- Using the same method, shape the smallest flower.
12- Put a drop of sugar syrup in the centre of the middle-sized flower and add the smallest flower to it, as you did before. Press softly in the centre for the petals to pop up.
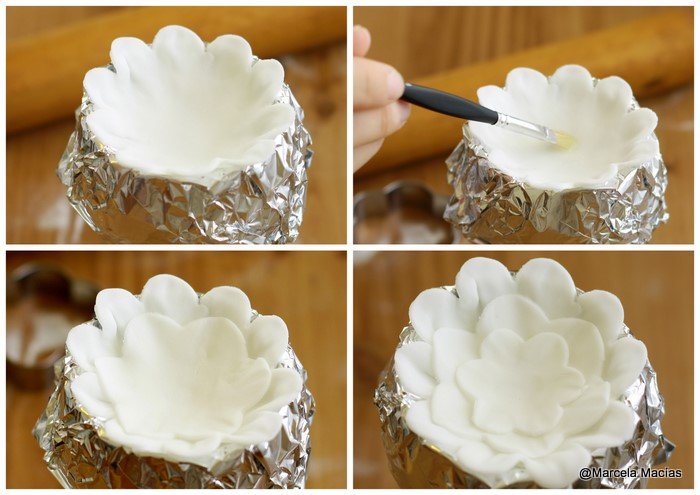
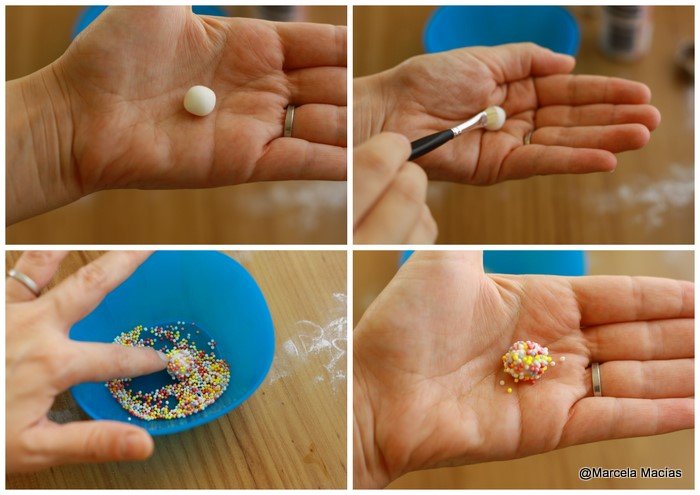
13- Now it is time to make the stigma (the centre of the flower). You will need a small ball of fondant, sugar syrup and non-pareils.
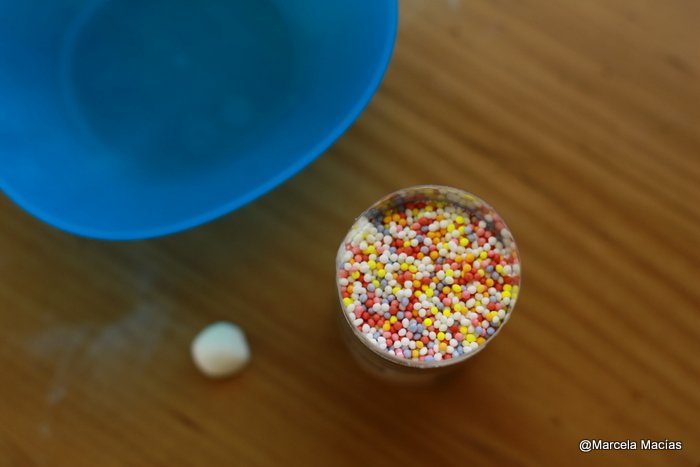
14- Make a small ball of fondant.
15- Brush it with sugar syrup
16- Put a few non-pareils in a small bowl. Place the fondant ball inside and roll it all over, until it getscompletely covered in non-pareils.
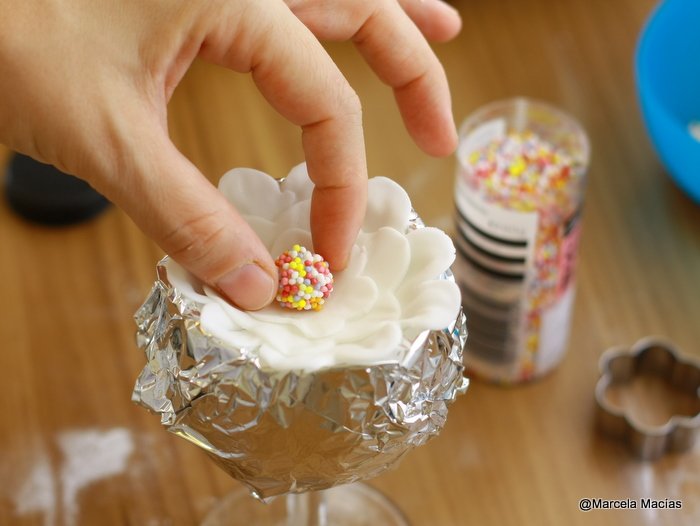
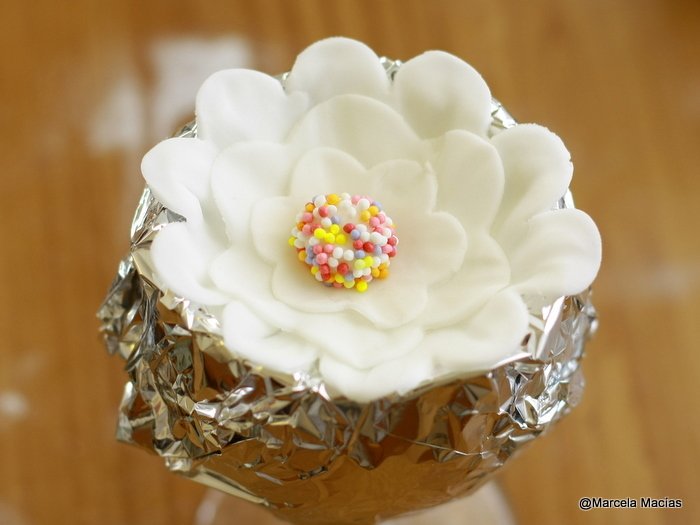
17- Put a drop of sugar syrup in the centre of the drying flower and place the stigma on top of it. Press softly so that it adheres to the flower.
18- Repeat the process to make as many flowers as you need in your decoration.
19 – Let dry for 24 hours, remove slowly from the drying cup and attach with royal icing to your cake.
Very easy, isn’t it? I know how hard it can be to find gum-paste/fondant modelling tools in some countries, and how expensive these can be too, so I wanted to show you how you can get around buying them and still get some pretty flowers. I hope I achieved my goal!
May you have a wonderful week!

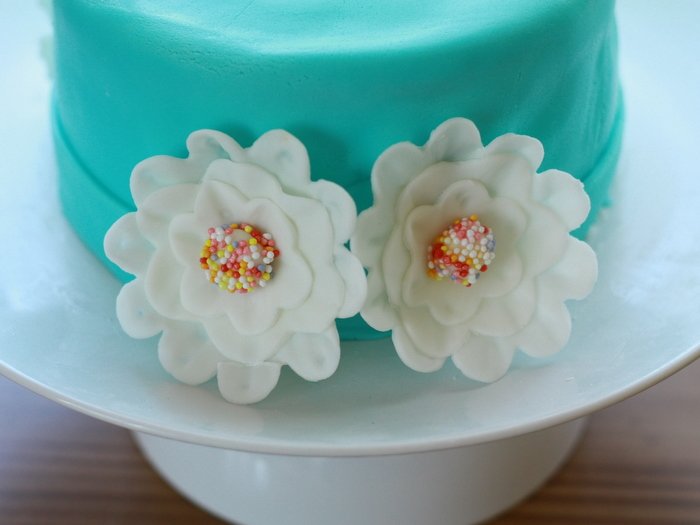
Me encantaron, voy a usar este tutorial a fin de mes que tenemos un cumpleaños 🙂
😀
PReciosassss!!
Gracias Pauli!
Oh my goodness! Awesome article dude! Thank you
so much, However I am going through difficulties with your RSS.
I don’t understand why I am unable to join it. Is there anybody else having similar RSS issues? Anybody who knows the solution can you kindly respond? Thanx!!
Hi! Thanks for commenting! Which browser are you using? Chrome has some issues, but Explorer and Firefox should be ok…let me know how it goes!