by Marcela M. | Apr 1, 2013 | Blog, Recipe Box, Recipes, Salads and dips, Savories
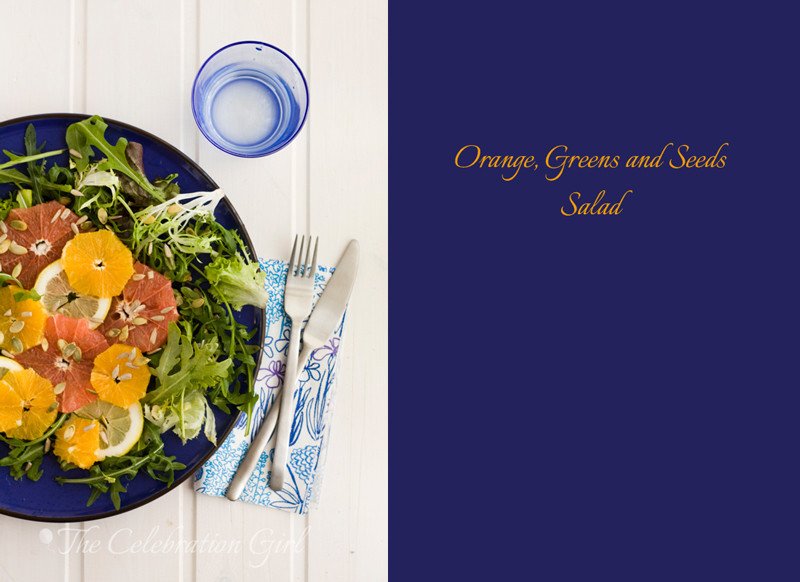
Good morning dear friends! I hope you had a lovely Easter, if it was celebrated yesterday in your part of the World. Easter in Cyprus (and Greece, Serbia, Russia, and other Orthodox countries) will be on May 5th only, but we celebrated it yesterday because our dearest friends (who are catholic), invited us for a lovely Easter party at their home. It is always nice to spend time with friends, but the warmer weather seems to invite leisurely afternoons even more, don’t you think?
I love Spring, I always have, but I like it even more since I came to live in Cyprus, because the weather is just so nice during this time of the year. And it’s not just the weather: right now, for example, the trees that line the streets of downtown Nicosia are full of pretty pink blooms, and some white and pink bougainvilleas are starting to appear here and there. It’s such a lovely sight!
This is why, as soon as April comes I am ready to pack away sweaters and scarves and to tread heavy “comfort” food, for salads, smoothies, and plenty of fresh fruits and vegetables. This year, I even decided to take it a step further and start the new season with a 5 day detox…sort of like a Spring Clean for the body. So, what is a detox? basically a few days of eating super healthy and avoiding certain food groups that are normally not easy to digest (such as wheat, dairy, sugar and, obviously, processed foods).
I have done detox diets before, for longer periods of time, and I credit this eating regime with helping me recover after I had malaria. They are great for going back to our healthy habits, trying new foods and exploring new ingredients. A salad is only boring if you use the same ingredients every time, but it takes just a few new veggies, a bunch of fresh herbs, a handful of seeds or toasted nuts- or some fruits even, and we have something completely different and incredibly yummy.
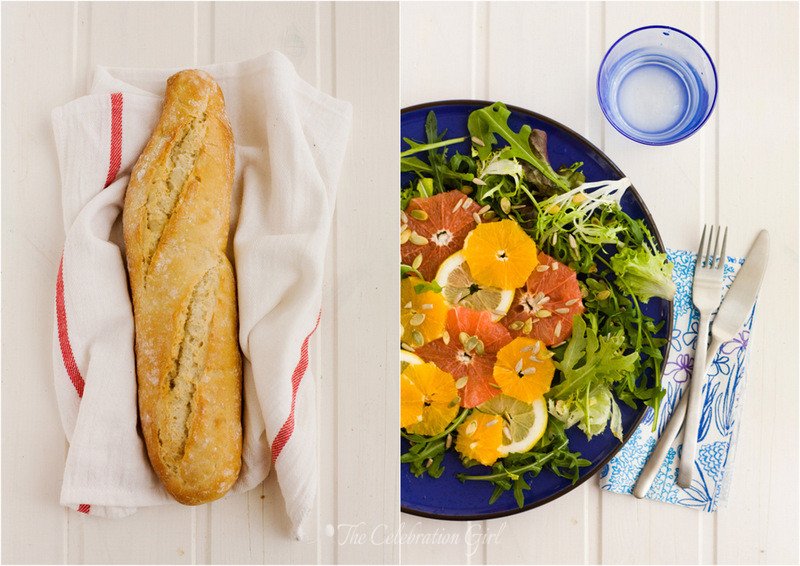
This salad was one of the discoveries I made while playing in the kitchen during my last detox, and it is one of my favorites. It is easy, tasty and full of vitamin C (which help me fight those nasty colds that some of us get at the end of the winter). If you are doing a detox, avoid the baguette, of course 😉
Here is the recipe:
Citrus, greens and seeds salad (serves 2)
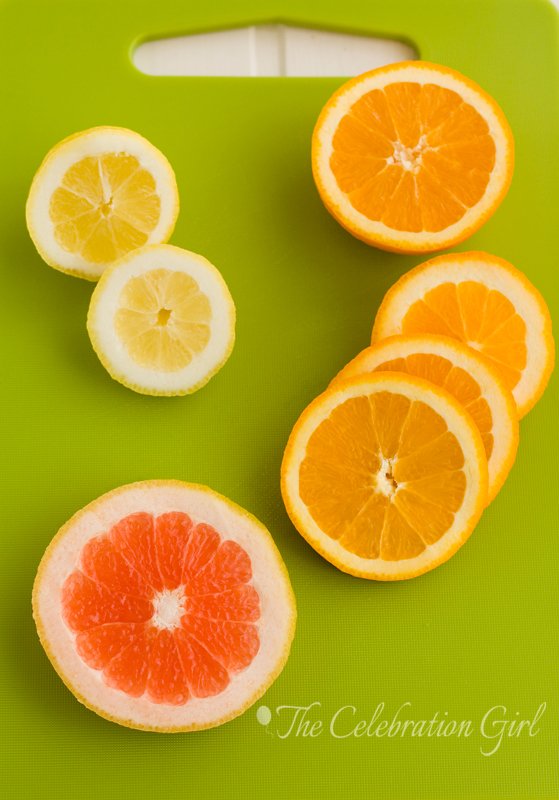
Ingredients: A big bunch of green leaves (Rocket/Arugula, Lettuce, Spinach), 1 orange, 1 grapefruit, 1 lemon, 1 tablespoon of sunflower seeds, 1 tablespoon of pumpkin seeds.
Preparation:
1- Wash the salad leaves and cut, if desired. Put them all in a big bowl.
2- Peel and slice the citrus fruits and the lemon. Add to the bowl.
3- Sprinkle the seeds on top and season with olive oil, salt and pepper to taste.
How about you: Have you ever done a detox? Do you also change your eating habits according to the seasons?
—————————————
NOTE: Did you notice the pink box at the end of this post and on the sidebar? I’m launching a newsletter! So, hop into the list if you want to receive news, tips and other cool stuff on a monthly basis! The first issue will be emailed next Wednesday, don’t miss it!
NOTE 2: The links above ARE NOT affiliate links. I just wanted to share the detox I’m doing in case you wanted to join me.
Con sabor Latino…
Buenos días queridos amigos! Espero que hayan pasado una hermosa Pascua, si es que en su país se celebró ayer. Aquí en Chipre (y en otros paises Ortodoxos, como Rusia, Serbia y Grecia), la Pascua se celebrará recien el 5 de mayo, pero nosotros celebramos ayer porque nuestros amigos más queridos nos invitaron a hacerlo con un hermoso almuerzo en su casa. Siempre es hermoso pasar tiempo con amigos, pero los días cálidos de primavera son especialmente aptos para pasar largas tardes conversando tranquilamente, no les parece?
A mí me encanta la primavera. Siempre me gustó, a decir verdad, pero me gusta aún más desde que vivo en Chipre, porque el clima en esta época es absolutamente delicioso. Y no sólo es bonito el clima: los arboles del centro, por ejemplo, se llenan de pimpollos rosados y las bouganvillas comienzan a mostrar sus flores blancas y fucsias aquí y allá. Es verdaderamente precioso!
Por este motivo, ni bien llega el mes de abril, yo siempre estoy lista para guardar sweaters y bufandas y cambiar la comida pesada por ensaladas, licuados y muchas frutas y verduras frescas. Este año, hasta decidí ir un poco más allá, y comenzar este mes con un detox de 5 días…algo así como una limpieza de primavera para el cuerpo! ¿Qué es un detox? Es un programa alimentario en el cual, por un período de tiempo, eliminamos aquellos grupos alimentarios que suelen ser dificiles de digerir (azucar, trigo, lacteos, alimentos procesados, entre otros). Yo he hecho dietas detox en otras ocasiones y a ellas les debo el haber recuperado la salud de mi hígado despues de haber tenido malaria. Son fantásticas para retomar buenos hábitos de comida ( o adoptarlos, si nunca los hemos tenido), probar recetas nuevas y explorar nuevos ingredientes. Una ensalada sólo es aburrida si usamos los mismos vegetales todas las veces, pero con algo tan sencillo como cambiar algunos ingredientes, agregar un manojo de hierbas frescas, unas nueces o semillas tostadas, y hasta -¿por qué no? – alguna fruta, un plato de todos los días se transforma en algo delicioso.
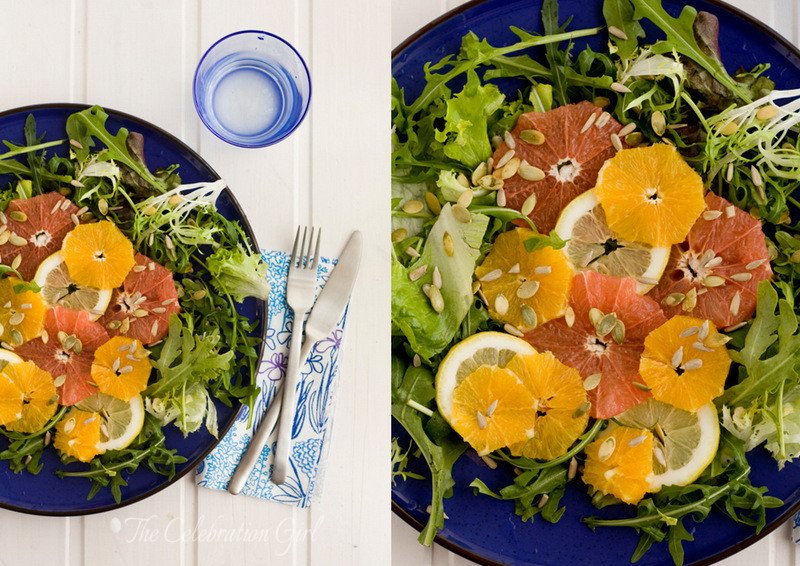
Esta ensalada que les traigo hoy fue uno de los descubrimientos que hice jugando en la cocina durante mi último detox y es una de mis favoritas. Es facil, deliciosa y está llena de vitamina C (lo que nos ayuda a combatir esos ultimos resfríos que algunos de nosotros solemos padecer a finales del invierno). Si están haciendo un detox, omitan baguettes como la de la foto, claro 😉
Aquí tienen la receta:
Ensalada de crítricos, semillas y hojas verdes (para 2 personas)
Ingredientes: Un manojo grande de hojas verdes (rucula, lechugas varias, espinaca), 1 naranja, 1 pomelo, 1 limón, 1 cucharada de semillas de zapallo, 1 cucharada de semillas de girasol, aceite de oliva, sal y pimienta para condimentar.
Preparación:
1- Lave bien y corte las hojas verdes, de ser necesario. Coloquelos en una ensaladera o bowl grande
2- Pele las frutas y el limón y córtelos en rodajas. Agreguelas a la ensaladera.
3- Espolvoree las semillas y sazone con aceite de oliva, sal y pimienta a gusto.
Ahora cuentenme ¿ Alguna vez hicieron un detox? ¿Cambian sus hábitos alimentarios de acuerdo a las estaciones?
—————————————-
NOTA: Notaron el rectangulo rosado con mi foto en la barra de la derecha y debajo de este post? Es para que puedan subscribirse a mi newsletter! Así que, si quieren recibir comunicaciones más personalidas, tips y otras cositas lindas, súmen su email a la lista! El primer número será enviado el próximo día miercoles, no se lo pierdan!
NOTA2: Los links de este post NO FORMAN PARTE DE PROGRAMAS DE AFILIADOS. Simplemente quise compartir con ustedes el detox que estoy haciendo, por si quieren sumarse!
by Marcela M. | Mar 17, 2013 | Blog, Gluten Free, Main courses, Recipe Box, Recipes, Savories
This week was a hectic and intense one, difficult at times, tiring at moments, empowering and happy at others. You know the ones: weeks of mixed emotions, lots to do and little sleep. We all have them, right? I know we do.
Last Tuesday night, after a couple of particularly intense days, I posted on the blog’s facebook page about it, mentioned that I needed chamomille tea to unwind and asked friends to share the strategies that they used to relax during or after difficult times. Most mentioned cooking and baking, some mentioned reading or painting mandalas, having a cup of tea, and sharing times with family or others that they love. I had only mentioned tea in my post, because it is what I was planning to do right away, but the reader’s beautiful responses left me reflecting about my own resources, my own set of grab and go strategies that have helped me during difficult times and the ones that, until today, I had only shared with those who know me well in my personal life, or who have specifically requested my help. Some of those practices (such as baking, watching a selection of my favorite feel good movies like Amélie or silly ones like Zoolander (it always makes me laugh so hard!), having a nice cup of tea) were put in place during happy times and took a whole different meaning during the bad ones; some others I discovered when things were already tough and I was desperately looking for means to stop me from drowning, and have stayed with me, as a core part of my life, ever since. This is the case of meditation and yoga.
The first time I remember hearing about yoga I was 17 years old. Our high school literature professor used to mention that he practiced yoga and meditation and I became curious about them but, back home, back then, yoga was considered an “exotic” discipline and it was not easy to find where to practice. Life continued, time went by, I tried a class at a local gym when I was 21 but run out of money at the end of the first month, and didn’t continue. Then, one day, when I was in the middle of one of the most difficult times in my life, I met the husband of one of my best friend’s on the street and he mentioned that he was going to an amazing yoga class, merely 3 blocks away from my house. I hadn’t thought about yoga in years and I was not looking for a class at the time but I somehow knew it was what I needed. I signed up for the class and fell completely in love with yoga. It was not the asanas, or the pranayams or the meditation…it was all of it together, it was how I felt during the practice but mostly how I felt (as a whole person) after them, the calmness, the peace, the grounding it brought into my life and that I had never experienced before.
I left Argentina the following year, first for Spain and shortly after for Ivory Coast. I bought yoga books and CDs and tried for a while to keep up with a regular home practice, but couldn’t. I didn’t know how, and it always seemed that there was something more important that I just had to do before or that I didn’t feel in quite the right mood…and then, as time went by, I ended up never finding the right time and never getting into the right mood. I knew I needed it, I missed it so much and yet, and yet…there was always an excuse. Excuses are ok under normal circumstances but one thing I discovered during those days is that, when everything around us seems to be falling apart, when are exposed to extreme suffering, poverty, chaos and fear, excuses have the potential to be truly damaging. Excuses, in those circumstances, prevent us from seeking that which we truly need, prevent us from connecting to our bodies, our minds and our souls, from finding the necessary calm and ease that is needed in order to do our work and live our life in a way that is healthy, sustainable and useful for those we are meant to serve. Despite my excuses, I knew I had to change and, by the time I arrived in Cyprus, on 24 December 2007, I was craving yoga. But before I could find a yoga class near my home, I got pregnant with Luka and Zoe and went into bed rest. And then they were born and I couldn’t find the time to attend a class anymore-or anyone to take care of them while I did, for that matter.
Then one day, when browsing the web in search for an article about Indian UN peacekeepers who were teaching yoga to kids in the Iraeli/Lebanese border, I came across Marianne Elliott’s blog, then called Zen Peacekeeping, and I was hooked. I read one blog post after another, feeling a connection that I had rarely felt before with anyone I had read online. There was a person I could identify with, someone who had been through similar experiences and who had come out of them with similar conclusions as myself. Her articles on yoga and body shame, yoga and real life, her whole series on self care , especially her article on why kindness (and not will power) is key to starting a healthy habit, her articles on courage, and even the ones on using twitter for good -and avoiding twitter overwhelm- all rang a bell and said things I wanted to express, better than I ever could.
And Marianne taught online yoga courses for those who, like me, wanted to establish a home yoga practice, but didn’t know how to get started.
I didn’t sign for her courses right away, because I was getting better at finding excuses (I had years of practice by now). Instead, I waited, and waited, and waited until I almost collapsed from anxiety and exhaustion.
I finally signed up after I saw a video when Marianne announced her course on 30 days of yoga for people who are too busy to do yoga. Do you identify with the title? Yes, so did I. I felt that I couldn’t commit to a full 90 minute class, not even to a 45 minute class…but I could commit, I needed to commit to as little as 5 minutes of yoga every day, 5 minutes of self care, 5 minutes just for myself, 5 minutes doing something I loved but had forgotten how to do.
If you are wondering how an online yoga course works, here is how it does now:

Back then, when I first did it, the interface was different, but basically there are videos with the practices (which you can download and keep forever), daily emails, a Facebook group, conference calls, Marianne’s assistance whenever this is needed and, in some cases, a beautiful ebook at the end of the 30 days. Not very different from any other online course you may have done in any other discipline. (What makes the courses different is Marianne’s kindness, but I’ll talk to you about that later).
So I made my commitment to myself, and I started the practices, as sent by Marianne and as recommended by her. The first week, nothing happened. “Where’s the calmness I am supposed to be feeling?????” , I kept thinking, because I was, if anything, more anxious than before. The second week, came the tears. The minute I would step on the rug where I used to practice yoga, I would start crying and I wouldn’t stop until after savasana. The practices were short, 10 minutes only, but something inside of me was being released. I cried all second and third week and then, on the fourth and last week, I started to feel at peace.
I still felt too busy for anything longer, but Marianne’s courses had shown me that I was never too busy to so some yoga and that any yoga was better than none. I had the videos, I had the emails, I had the proof, so I renewed my commitment and maintained my routine, of doing at least 10 minutes of yoga everyday and not beating myself up if that was all the yoga I could do. And it continued to work, to be what I needed. When I felt that I needed some more, I would combine the videos or double the number of sets of each practice. I felt at ease with my routine and I was happy.
Then, at the beginning of 2012, when our world fell apart, and I started feeling again like I had no time to sit on the mat, this time I knew (having practiced long enough the year before) that what I needed was, in fact, the exact opposite: I needed more yoga. So I registered for Marianne’s standard 30 days of yoga course (She also has courses for Beginners and classes of Curvy Yoga) and I committed to 45 minutes practices, 4 times a week.
Why am I talking to you about yoga and my experience today? Why am I talking to you about Marianne? Because this year I want to share with you everything that is good in my life, all the resources that have worked for me in the past, and that continue to support me in many ways. I wanted to share this with you so that you could get to know Marianne and her work, which I greatly admire . More importantly, I want to share Marianne’s courses with you because they have supported not only me, but also my children, who love the short routines of Busy Yoga and practice them on their own (please turn off the volume if you don’t to hear Luka and me singing Elmo’s songs while Zoe practices yoga in the video). I want to share her courses with you because they are the only ones to which I have been able to commit consistently and for a long period of time, and I want to do it because I know how important this can be and what a difference it can make to one’s life.
I want to share this with you because I know how easy it is to fall off the self care wagon and how damaging this can be. I want to share Marianne’s courses with you because, after I fell off, I needed a course rooted on kindness towards myself and others to get back on track, and because this may be your case too.
I wanted to share this with you today because Marianne’s latest edition of her yoga courses start tomorrow and I will be in them, again, and because it occurred to me that, perhaps, you may need something like what she offers, and you would like to join me there as well. And finally, I wanted to share this with you today to let you know that I know how it feels to let go of our good habits, to struggle to keep up with what is good for us, but that is never too late to get back on track.
Please, share with me in the comments below: which practices are essential to your well being? Do you also struggle to find time for them?
Now, while we talk, let’s cook something yummy, shall we?
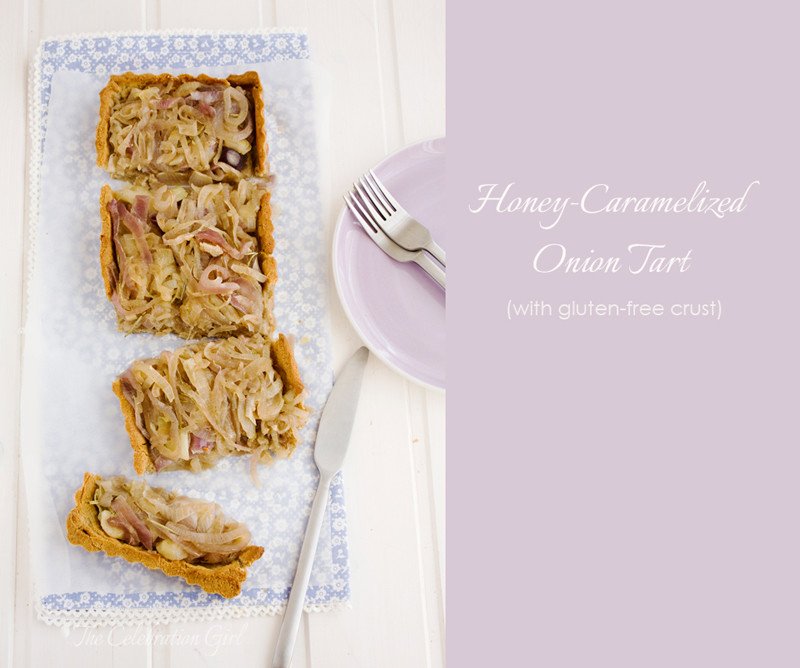
I made this tart a couple of weeks ago, on one of those lovely early Spring days that are so beautiful in Cyprus. Last December, my husband bought me Aran Goyoaga’s new book, Small Plates and Sweet Treats: My Family’s Journey to Gluten-Free Cooking, (which is one of the most beautiful cook books that I have ever seen) and I started looking forward to experimenting with gluten free cooking. I was so eager to start trying her recipes that, on the day of our wedding anniversary (January 26th), we traded our traditional fondant au chocolat, for Aran’s Almond butter, chocolate and beet molten cakes -and I believe these will be our new anniversary staple dessert.
I was a little bit scared of gluten free savory food, so it took me a while longer to begin experimenting with the small plates part of the book. I can find my way pretty easily around desserts and I have a natural instinct for knowing how to adapt sweet recipes, but I can’t really say the same about tart crusts, crackers, breads and other savory food. But I felt encouraged by the molten cakes’ success and I decided to try to make this tart (which is a classic at my home) with a gluten free & vegan crust (adapted from the one in Aran’s Zucchini,quinoa and goat cheese tart, if you have the book)
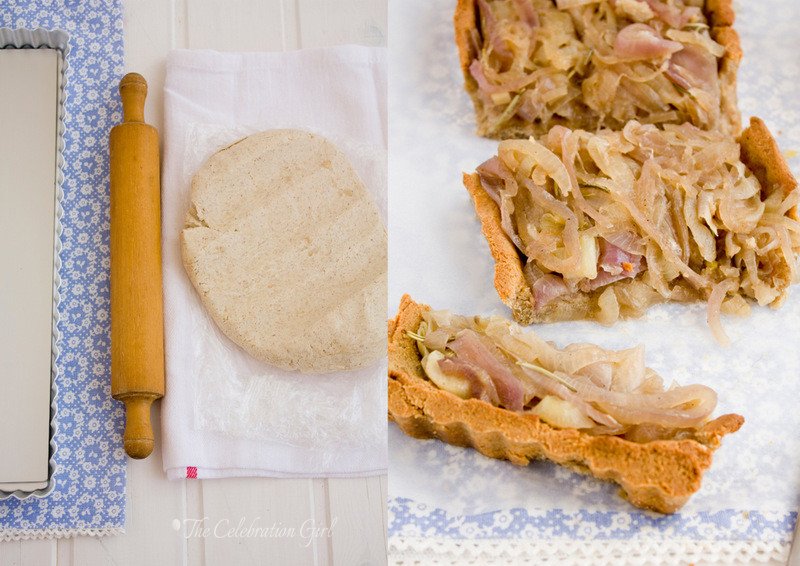
The preparation of the crust is fairly simple, but it takes a bit of time, because it has to be chilled twice and cooked for quite some time. I must also confess that, when I saw its texture, I freaked out: It felt like clay! I went ahead and put it in the oven because of how much I admire Aran’s work, but it was honestly a leap of faith- I was convinced I had made a mistake along the way and that it was going to turn out absolutely inedible. Fortunately for me, my fears were unfounded, based only on my lack of knowledge of gluten free cooking, and the crust turned out to be delicious. More importantly, this crust and the molten cakes got me hooked on experimenting with different flours (it’s so creative!), so you can expect more gluten free recipes in the future.
One word of caution regarding this crust, before leaving you with the recipe: You will want to respect the refrigerating times and make sure that it cooks well before adding the onion. The crust is delicious if it’s crispy but not so much if it isn’t, so bake it long enough before adding the filling to make sure that the bottom is crispy as well. Remember that, once you add the onion filling, the baking times are very reduced, so the crust will need to be ready before this happens or it will turn soggy. And we don’t want that to happen!
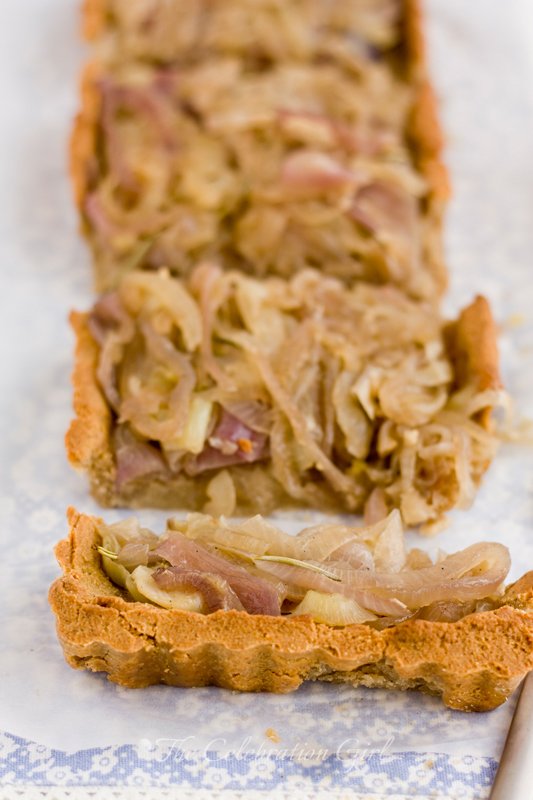
Now without further ado, here is the recipe:
Honey-caramelized onion tart, with gluten free crust
Ingredients:
For the crust: 60 grs buckwheat flour, 70 grs hazelnut flour, 140 grs quinoa flour, 140 grs brown rice flour, 1 teaspoon nutmeg, salt to taste, 120 ml olive oil, 250 ml cold water.
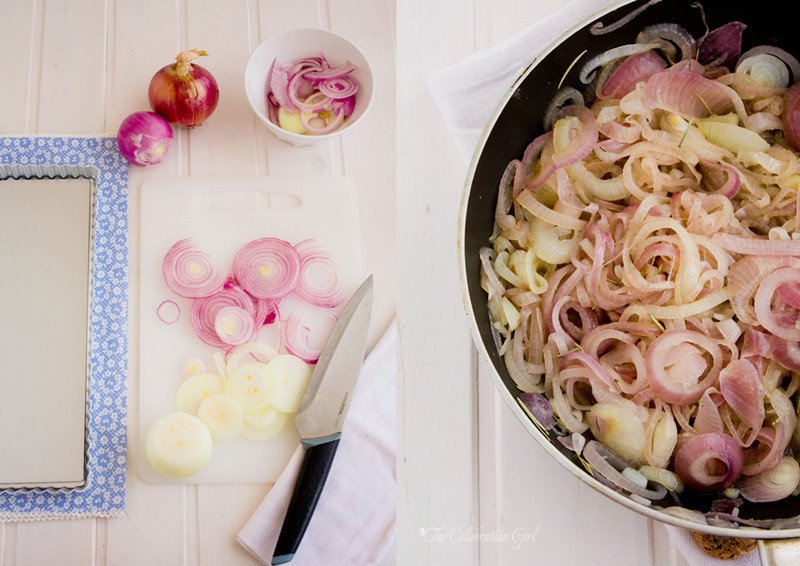
For the filling: 3 red onions, 3 yellow onions, 2 tablespoons honey, 2 tablespoons warm water, 1 tablespoon rosemary or thyme, vegetable oil of your choice.
Preparation:
1- Prepare the crust: Put all flours in the food processor and pulse a few times to air them. Add nutmeg, salt, olive oil and cold water and pulse until the dough comes together. Remove from the food processor, wrap it in foil and place in the refrigerator to chill for 1/2 hour.
2- Remove the dough from the refrigerator, and roll it on the counter (previously dusted with your favorite gluten free flour). Cover your desired tart mold with it, pinch it with a fork and place it in the refrigerator for another 30 minutes.
3- Pre heat the oven at 200C. Remove the tart mold from the refrigerator, cover with baking paper and add pie weights or dry beans (I used alubia beans) so that the dough doesn’t rise much in the oven. Bake the crust for 20 minutes.
4- Remove the beans or weights and continue baking for another 20 minutes, until golden. When ready, remove the crust from the oven and let it chill, but leave the oven on.
5- Prepare the filling: Peel and slice the onions. Put 3 tablespoons of oil in a frying pan and sautée the onions in it. Add rosemary, salt and pepper and let cook for about 5 minutes. Once the onions are tender and start to turn golden, add the honey (which must be liquid), mixed with two tablespoons of warm water. Stir and let it simmer for another 5 minutes.
6- Add the onion filling to the crust and place the tart again in the hot oven, for a final 5 minutes. Serve hot.
Have a beautiful week!
by Marcela M. | Feb 14, 2013 | Blog, Cakes, Gluten Free, Holidays, Recipe Box, Recipes, Sweets, Valentine's day, Vegan & Raw

Good morning dear friends! Happy Valentine’s day!
Do you celebrate this holiday or it is not a tradition where you live? As an Argentinian, I didn’t grow up with Valentine’s day and learn’t about it from movies and American TV shows. It was only in the late ’90s that it became more common to celebrate it, but that was only for those who had someone to celebrate it with and, until I met my husband, many years after that and in a different country, I didn’t. Most years, I would get together with my best friend (also single at the time) , cook together and watch movies that had nothing to do with romance, like the Lord of the Rings trilogy-extended edition. It was awesome. Rom-Coms could be watched any other day. We were not against the holiday, we were not a Valentine’s Grinch, we just felt that it was not for us. Like “
The day of the secretary” is not for you unless you are a secretary and you don’t expect your life to be different just because someone else is celebrating, I didn’t expect anything from Valentine’s day. But since everything seemed to be taken over by teddy bears and pink hearts, we made it ours by creating our own traditions.
The first Valentine’s day after I met my husband, which happened 3 weeks after we got married, we spent it apart. We were living in Ivory Coast at the moment, and had left to get married in Italy during our vacation time. But the day after we left there were riots that led to the evacuation of all non-essential staff of the organization where we worked and we got married on the day when our colleagues were being transported to Gambia. Then the call came: My husband had to go back, he was essential staff. I was not, so I had to stay behind. Argentina was too far away so, a mere two weeks after the wedding, we traveled to Belgrade (where my husband’s family lives) and I stayed with them for 3 weeks. My husband’s ethnic group has a tradition (no longer being followed anymore, from what I’m told) of bringing the bride back to her family a few weeks after the wedding, to give her the opportunity to change her mind, so we used to joke that he didn’t want to risk it, so he was leaving me with his family instead 😉
So Valentine’s day went by, uncelebrated, and maybe because of that, we never made a big deal about it. But we always have some treat, even if it’s just a block of dark chocolate, to mark the day, just because we take every opportunity to celebrate all that is good in our life.
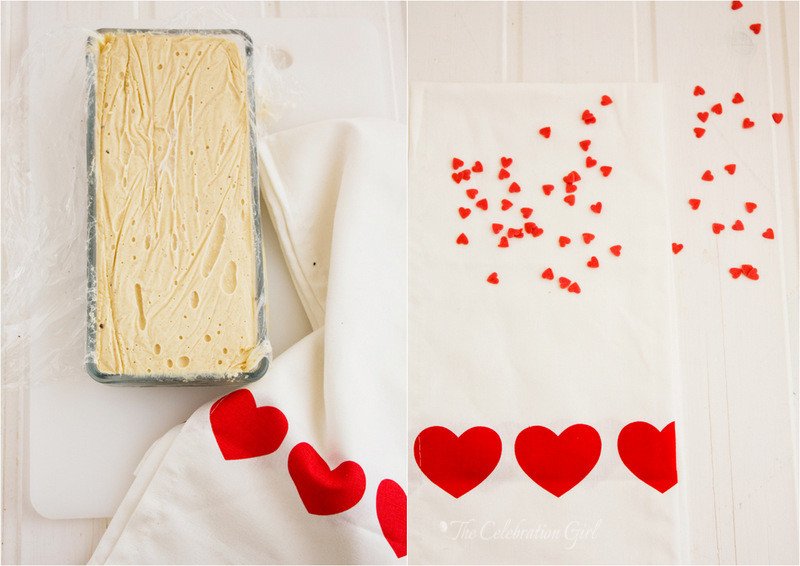
Today’s recipe is the one I prepared for my monthly contribution to Petit-On. The ingredient selected for February was cheese, which presented a problem for me, so I checked with Raquel to see if I could use substitutions, and she encouraged me to write this recipe.
If you are reading these words and have been reading this blog for a while, you are probably wondering why is cheese a problem for me. I have, after all, a recipe for the best cheesecake ever, which is also one of the most visited blog posts. The reason is that I can’t eat dairy without feeling pain in my breasts due to a condition called cystic fibrosis. We discovered it two years ago when I ran in panic to the doctor after finding a lump the size of a marble in my right breast. The doctor ordered a breast ultrasound and we found out that I have cysts in my breasts, which are not dangerous but fill with liquid during ovulation, which causes pain. Milk makes the pain bad, but cheese, cream and yogurt make it unbearable and, when I do eat them, I know it’s at my own risk and regret it later. Since then 95% of my diet is vegan (I didn’t eat meat or eggs from before discovering this condition) and I have been working on finding substitutions for my favorite treats (You may have noticed that I normally list ” butter or margarine”in the ingredients, and that is because I used to make it with butter but now use vegan margarine and know it can be done). Now let’s be honest: vegan cheese is not brie or camembert, but when the choice is feeling enormous pain and freaking out when doing my breast exam, vegan cheese does the trick.

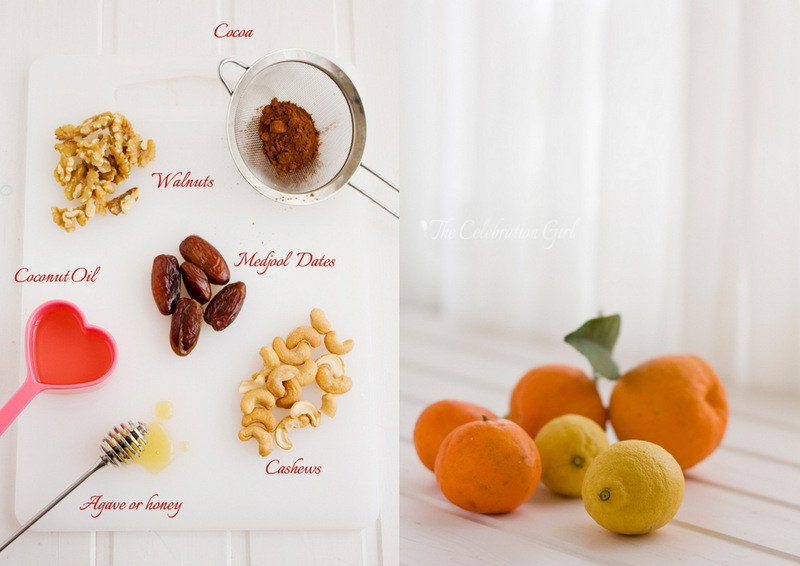
This recipe was created by adapting and modifying two recipes from Sara Britton, of the blog My New Roots. I had been wanting to try them for a while and found this to be the perfect opportunity to do so. And I love the result! It is called cheese brownie, because it has a raw brownie base,made only with walnuts, cocoa, dates and cocoa nibs for added crispiness. As Sara advises, Medjool dates are better because they are sweeter, but if you cannot find them or they are too expensive, simply add more quantity. Also, if you can, use good quality cocoa because it does make a difference.
The cream cheese filling is made with cashews, that were soaked overnight, agave nectar (or honey, if you are not vegan), coconut oil (which hardens at room temperature, so you will need to submerge the closed bottle in warm water for 10 minutes before using it), lemon juice (to give it the slightly bitter, characteristic “cheese”flavor) and orange and clementine juice and zest. I chose these flavors instead of the more traditional vanilla/fruits of the forest because citrus are in season and the trees that line my street are ripe with fruits. They also combine beautifully with the depth of dark chocolate.
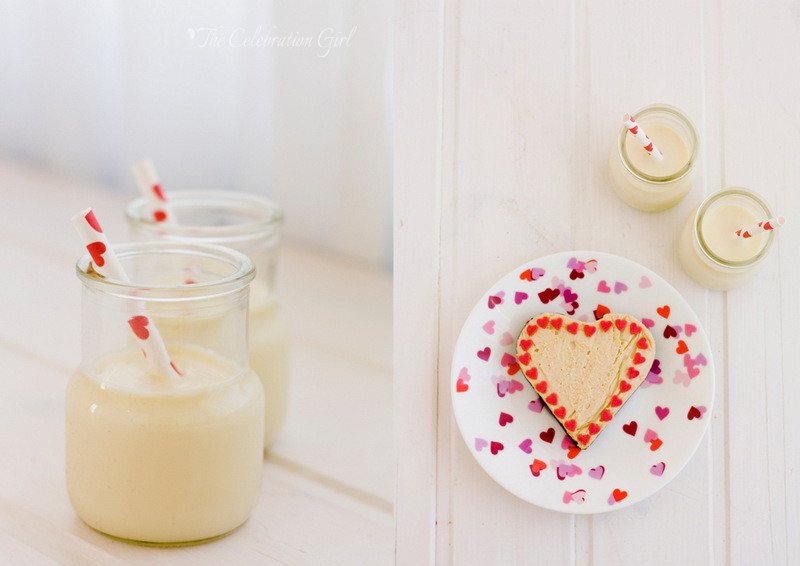
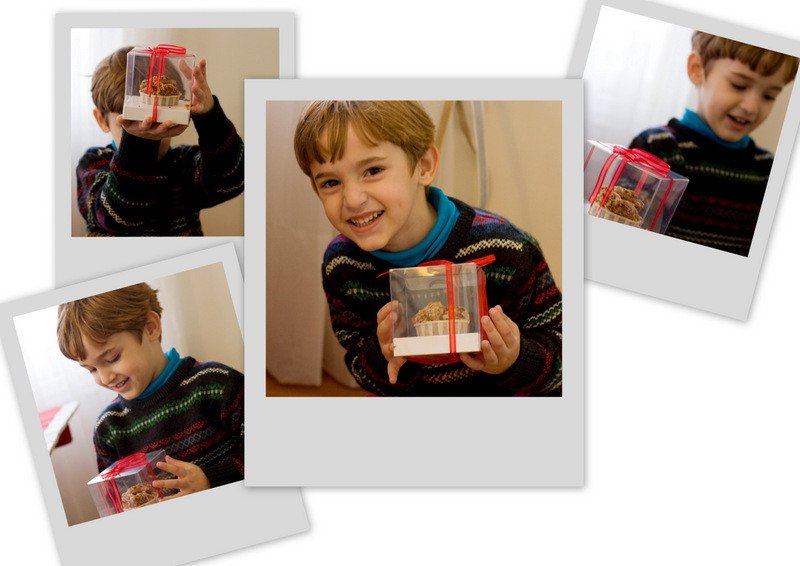
As you will see, the recipe is very, very easy and it only requires a food processor or blender to do all the work. Furthermore, because of its characteristics, it is very versatile, and can be shaped in any form you like and even cut using a cookie cutter. I made little hearts using small heart shaped pans for my children, and a bigger, rectangular one, which I then cut in small squares to eat as “cheese brownie bites”. Since today is Valentine’s day, I placed a few bites in a home made origami box lined with mini cupcake cases, to give as a small present. Do you like them?
Here is the recipe:
Orange and Clementine Cheese brownies (adapted and modified from My New Roots)
Ingredients:
For the crust: 1 cup walnuts, 1 1/2 cup dates (Medjool are best), unpitted and soaked in warm water for 10 minutes, 1/2 cup cocoa powder, 2 teaspoons cocoa nibs
For the filling: 2 1/2 cups raw cashews, soaked overnight, 2/3 cup coconut oil, 2/3 cup agave or honey, 1/2 cup lemon juice, 1/2 cup orange juice, juice of 1 clementine, zest of 1 orange and 1 clementine. NOTE: If you like sweeter desserts, reduce lemon juice to 1/3 cup and replace by orange juice.
Preparation:
1. Cover the pan you will use with foil, making sure to leave plenty at the sides. This will help you unmold the cake without needing to invert it (just pull the excess foil and lift, carefully, and it will come up.
2. Place walnuts in the bowl of the food processor and process until they turn into powder. Add cocoa and process 30 seconds to integrate (or pulse). Turn the processor on and start adding the dates, one at a time, until getting a sand-like dough that compacts when pressed between your fingers.
3. Pour the dough in the pan, extend it evenly and press with your fingers to shape it. Set aside.
4. Wash and dry the Food processor’s bowl and fill it with all the ingredients necessary for the filling. Just dump them all at once. Turn the food processor on, and let it work until the ingredients morph into a smooth cream. How smooth the filling will be depends greatly on how powerful is your food processor, so I joke that if it becomes very smooth, I made a vegan philly cheesecake and, if it’s a bit crumbly, I made a ricotta cake instead 😉
5. Pour the filling over the crust and smooth using a spatula.
6. Wrap the cake in the excess foil and place it in the fridge for at least 6 hours.
7. Take out of the freezer 30 minutes before serving. Cut with a warm sharp knife while still cold.

Amigos hispanoparlantes: La receta en castellano está en Petit-On! Pueden verla haciendo click AQUI.
by Marcela M. | Jan 31, 2013 | Blog, Cooking basics and tutorials, Recipe Box, Recipes

Good morning dear friends! How are you? Can you believe that the first month of the year is already gone? Am I the only one that feels that Christmas was, like, yesterday?
This past week I was hit by a cold, again. It seems that every virus that is going around finds a place in my throat because I have been coughing and coughing and coughing for a week now. It is getting better, fortunately, but a little bit of it still remains, which is why I haven’t posted here as planned- I was barely cooking. I have a pile of recipes I want to tweak and photograph for you, and I am hoping to be able to do it in the upcoming weeks.
The recipe I am bringing you today is the one I contributed to Petit-On in January. The monthly challenge involved recipes containing oats, an ingredient I love. In fact, my most iconic desert, nugatón , has oats as its main ingredient and I considered sharing that recipe instead for quite a while. I finally decided against it because it also takes great quantities of chocolate and butter and most of us are still detoxing from the holidays, am I right?
I started making my own granola and muesli 5 years ago, when I was living in Ivory Coast. They are both so easy to make, and making them at home allows me to become creative and vary nuts, seeds and spices to suit the season (and my own cravings!). This combination that I bring you today is ideal for winter, because it uses honey, ginger, cinnamon and cardamom, spices that pair very well with seasonal fruits like apples and pears. If you live in the Southern hemisphere, I recommend eating it with apricots or peaches, which also pair well with this spice blend.
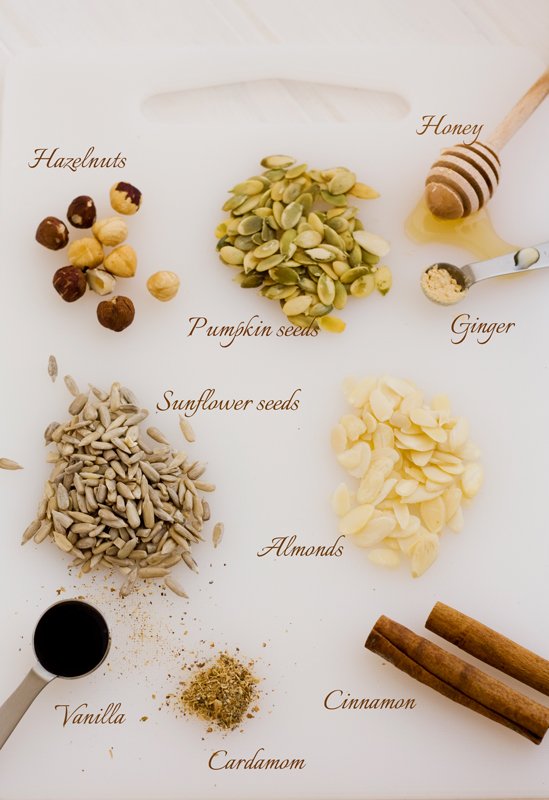
As you will see from the instructions, this recipe is very easy to make and all you need are a couple of bowls and an oven tray in order to do so. All you need to do is mix the dry and wet ingredients separately, then mix them and pour them in a lined (or non-stick) oven tray, then place it in the oven for about half an hour, turning the granola from time to time to make sure it browns evenly, without burning.
The recipe uses very little honey as a sweetener, so as to let the spices shines. I find that, when food is too sweet, the general sweetness tends to overpower the other flavors, so I like to opt for a milder sweet taste. Furthermore, there is also the sweetness of the dates and raisins so, fear not, it is delicious. If you like extra sweet food, you may add a few more spoons of honey, but I encourage you to try it this way first- you may be hooked! Also, if you are vegan, feel free to replace the honey by agave nectar, it works fine as well.
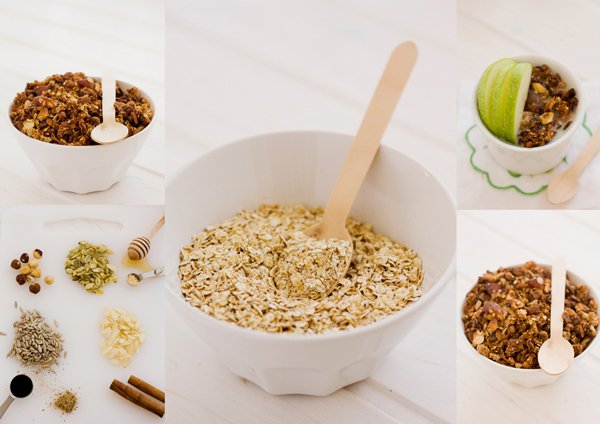
Here’s the recipe:
Spiced Granola
Ingredients: 2 cups rolled oats, 1/2 cup sliced almonds, 1/2 cup crushed hazelnuts, 1/4 cup pumpkin seeds, 1/4 cup sunflower seeds, 2 tablespoons oil, 2 tablespoons honey, 6 tablespoons water, 1 tablespoon vanilla extract, 1 teaspoon cinnamon, 1/2 teaspoon ground ginger, 1/4 teaspoon cardamom, 1/3 cup raisins, 1/3 cup medjool dates.
Preparation:
1- Pre-heat the oven to 200C. Line a baking tray with baking paper and set aside.
2- Put oats, almonds, hazelnuts, pumpkin and sunflower seeds in a bowl and mix.
3- In another bowl, place oil, honey, water, vanilla and spices. Mix well.
4- Add the wet ingredients to the dry ingredients and mix very well, until they are evenly soaked.
5- Pour the mixture on the lined oven tray and extend it evenly. Place the tray in the oven and bake for 20/30 minutes, or until evenly browned. It is very important to remove the tray after the first 10 minutes, and every 5 minutes after that, in order to turn the granola so that it browns evenly. If you just let it sit in the oven for the whole duration, the upper parts will burn! Hazelnuts are particularly sensitive to heat, so keep a close eye on them.
6- Once all granola is golden brown (but not burnt!), remove it from the oven and let it cool down on the counter.
7- Remove the date pits and cut the dates in fours.
8- Add raisins and dates to the granola and store in an airtight container.
9- Serve with milk or yogurt (I like almond milk) and fruit, if so desired.
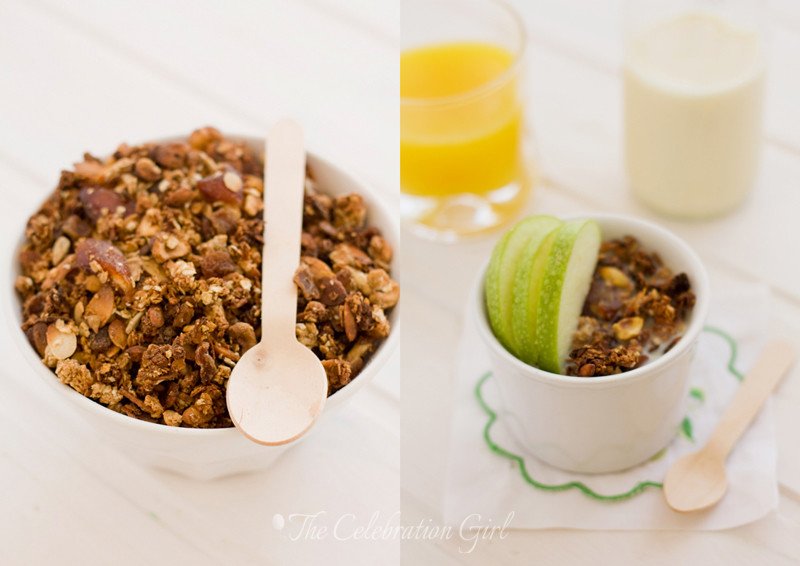
I hope you like this recipe. Have a wonderful weekend!
Amigos hispanoparlantes: Esta receta es la traducción de la que publiqué, en español, para Petit-On, y que pueden ver haciendo click AQUI.
by Marcela M. | Jan 25, 2013 | Blog, cookies, Recipe Box, Recipes, Sweets

Good afternoon dear friends! I hope you had a wonderful start of the New Year. I missed you these past days!
I hadn’t planned to take a break from blogging but, as you may know if you follow me on facebook , my children and I were hit hard by weather and, for the first time in years, I couldn’t lift a finger. It all started on Christmas day, when I lost my voice (a serious tragedy for a chatter like me, maybe not so much for my family ;). 10 days later, my daughter woke up with high fever, and Luka and I followed her a day after, with 40C. When, after a couple of days, the fever didn’t recede, we took the children to see the doctor, who also checked me. Luka and Zoe had what appeared to be just a flu but later developed into a ear infection requiring a full course of antibiotics and I, myself, had tonsillitis- so antibiotics were prescribed for me as well. Then, this week, just after we had finished her course of antibiotics, Zoe relapsed with 48 hs of non-stop cough and high fever and then, almost miraculously, her cough and her fever stopped, as suddenly as they had started. Now Luka seems to have caught the same virus and started having fever. Ahh, the joys of Winter…oh well.
Over the years since Luka and Zoe were born, there have been many minor health problems and a few scares as well, but this was the first time (since recovering from the cesarian) when I was not feeling well myself either when taking care of their own ailments. I don’t normally get ill, and entire winters go by without me catching a single cold (which I attribute to the ridiculous amounts of garlic I consume. Seriously, I’m sure Dracula has marked my house as a no-go area!). To be honest, I hate being sick and I’m not very good at it because I just.can’t .stay. in. bed. and when I absolutely have to, I am making mental lists of things I have to do the minute I am able to stand up and get going. So this period of common illnesses was a challenge for me, and all the more so because my husband was away from Cyprus this last week.
One of the things that was on my mental “to do”list while I was trying hard to lie in bed were these scones, Whole Kitchen Magazine’s January challenge. When I saw the recipe that was suggested for this month I was so happy! I love scones, they were always one of my favorite treats when I was growing up.I like them because they are not too sweet, and they admit so many variations that the possibilities for getting creative with them in the kitchen are almost endless. We can even get the same recipe and make them savory, with spices such as garlic and thyme, or rosemary, to accompany a hearty Winter soup.

It is for this reason that I opted to make a a traditional, plain vanilla recipe without glaze. I wanted to give you the basic recipe so as to allow for experimentation. I’ll show you some of my favorite variations in the future but, for now, I thought it would be nice to start small.
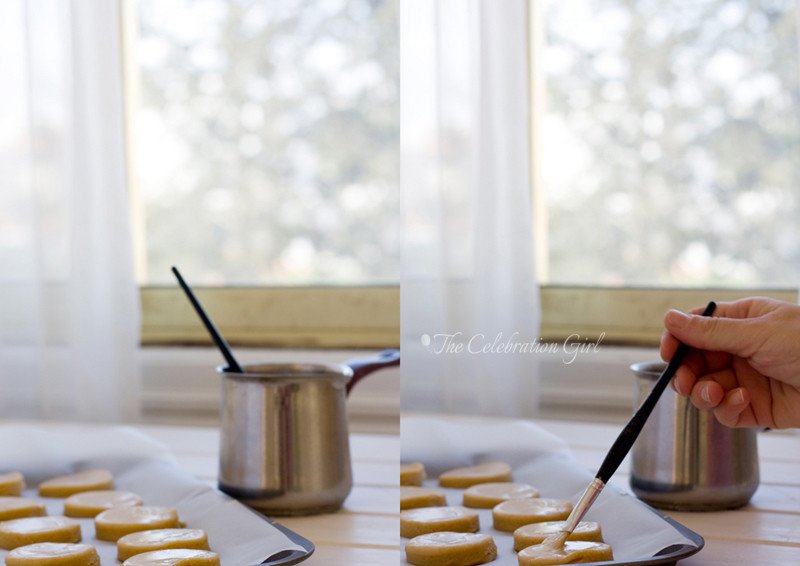
As you will see from the recipe, the procedure is fairly simple, but there are a couple of important steps to get them right: 1) Don’t over mix the batter, and don’t knead the dough. This is crucial. You should barely integrate the dry ingredients into the wet ingredients and then roll and fold no more than 3 times. If you have remaining dough after the first cut, roll once only and cut again. 2) Make sure to pre-heat the oven properly, so that you can pop them in the oven the minute they are ready, or otherwise they won’t rise properly. You can see the difference between the ones that were placed in the oven immediately and the ones that had to wait on the counter in the next picture. They still taste fine, but the texture is different. So, if you want perfect scones, make sure the oven is hot and ready and don’t waste time!
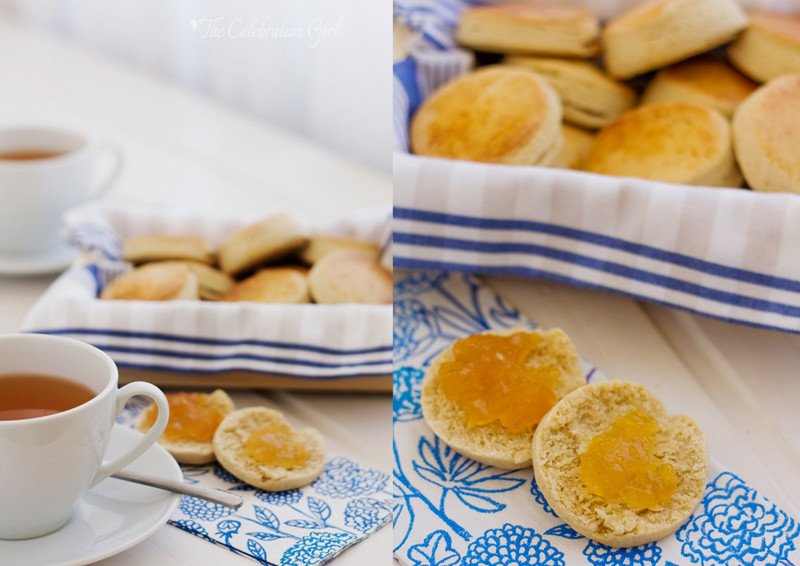
I like to eat them with jam ( some people also use clotted cream) and to accompany them with some nice tea. If shared with friends and loved ones, they taste better, of course 🙂
Now, one last important piece of information before leaving you with the recipe: Luka and Zoe’s baby sitter, who is an adorable Scottish lady, has asked me to request you to pronounce their name the ways Scots do, as if the E was not there (scons). She says English people pronounce them differently but that, since they are a Scottish treat and not an English one, she feels very strongly that they should be pronounced the Scottish way. So now you know 🙂
Here is the recipe:
Scones (makes around 30)
Ingredients: 500 grs all purpose flour, 2 teaspoons baking powder, 150 grs butter, 150 grs icing sugar, 3 egg yolks, 1 tablespoon vanilla extract, 125 cm3 warm milk + 1 egg yolk and 20 cm3 milk for brushing them before putting them in the oven.
Preparation:
1) Pre-heat the oven to 200C. Mix flour and baking powder and sift together over the counter. Make a well in the middle.
2) Add butter (softened at room temperature) and sift the icing sugar on top of it. Mix with your hands until creamy.
3) Add the egg yolks one, by one, and cream with your hands after each addition.
4) Add vanilla extract and milk. Mix until incorporated.
5) Fold the flour into the wet ingredients until fully integrated, without kneading.
6) Dust the countertop with flour and roll the dough to form a rectangle. Fold the dough in the middle and roll again. Fold and roll two more times, without leaving resting periods and then roll one final time, until getting a width of approximately 3cms.
7) Cut circles using a round cookie cutter and place the scones on a baking tray lined with baking paper.
8) Mix one egg yolk with 20 cm3 of milk and brush the scones with the mixture. Place the baking tray in the hot oven for 30/35 minutes (they will get golden on top).
9) Remove from the oven and place on a wire rack to cool completely.
Con sabor latino…
No había pensado tomarme vacaciones del blog pero, como seguramente sabrán si me siguen en facebook, mis hijos y yo caimos víctimas de unos virus fuertísimos y, por primera vez en muchos años, no podía ni moverme, mucho menos sentarme a la computadora, o sacar fotos. Todo comenzó el día de navidad, cuando me desperté sin nada, nada, nada de voz (lo que para alguien como yo es una tragedia aunque, posiblemente, para mi familia haya sido una bendición 😉 10 días más tarde mi hija empezó con fiebre, y 48 horas más tarde le seguimos Luka y yo, con temperaturas que llegaban a los 40 grados. Seguimos así un par de días, así que llevamos a los chicos a la pediatra, que me revisó a mí también de paso. Luka y Zoe tenían lo que parecía ser sólo una gripe pero luego derivó en una infección en el oído, y yo tenía amigdalitis, así que terminamos todos con antibioticos. Luego, esta semana que acaba de terminar, cuando apenas habíamos terminado el ciclo de antibióticos, Zoe cayó en cama nuevamente con 48 hs de fiebre y una tos terrible y constante y que cesaron tan abruptamente como habían comenzado. Eso sí, ahora parece que Luka está empezando con lo mismo…ahhh las bondades del invierno…qué se le va a hacer.Esta no es la primera vez que mis hijos están enfermos, claro está. Pero esta es la primera vez que yo he estado enferma al mismo tiempo. Por suerte, no suelo enfermarme nunca y normalmente el invierno pasa sin que yo me agarre ni un resfrío (lo que atribuyo a las enormes cantidades de ajo que consumo. En serio, yo creo que Drácula debe tener mi casa marcada para que los vampiros no se acerquen ni por casualidad). Quizás a causa de esto, detesto estar enferma y soy mala paciente porque no.puedo.quedarme.en.cama. y cuando no tengo más remedio que hacerlo me la paso haciendo listas mentales de cosas que quiero hacer ni bien pueda levantarme. Así que, como imaginarán, este período de enfermedades conjuntas fue un desafío para mí, más aún porque mi marido estuvo de viaje fuera de Chipre durante toda la semana pasada.Una de las cosas que estaba en mi lista mental de cosas para hacer cuando me sintiera mejor, eran estos scones que Whole Kitchen Magazine nos proponía a los miembros del círculo para el mes de enero. Me encantan los scones y han sido, desde siempre, una de mis galletitas preferidas. Me gustan porque no son demasiado dulces y porque admiten tantas variaciones que es facil ser creativo y experimentar con ellos, pudiendo incluso eliminar el azucar y hacerlos salados, con especias, para acompañar una rica sopa. Es por ello que la receta que les traigo hoy es muy simple: scones de vainilla sin baño alguno, porque quería darles la receta básica para que ustedes mismos puedan jugar con ellos de la manera que mejor les plazca, intercambiando sabores y agregando ingredientes si asi lo desean.Hacer scones es muy sencillo, pero deben observar dos reglas importantes: 1) No mezclen de más los ingredientes, y no amasen la masa. Esto es crucial. Los ingredientes secos tienen que ser apenas integrados a los húmedos y, luego, deben estirarlos con palotes y doblarlos por la mitad no más de 3 veces. Si tienen resto de masa, junten y estiren sólo una vez antes de volver a cortar. 2) Asegurense de precalentar el horno ni bien empiezan a trabajar en ellos, porque los scones tienen que ser introducidos en un horno bien caliente ni bien se terminar de hacer o quedarán chatos. Fijense en las fotos de más arriba, la diferencia en altura entre algunos de los scones: los chatos son los que tuvieron que esperan en la mesada mientras se hacía la primera tanda. Saben bien igual, pero la textura es diferente. Así que ya lo saben, si quieren scones perfectos, asegurense que el horno esté bien caliente a tiempo!Me gusta servirlos acompañados de mermelada y un rico té, y hay gente a la que tambien le gusta la crema/nata. Si se disfrutan en buena compañía, saben mejor, claro 🙂 Finalmente, antes de dejarlos con la receta, una última advertencia: la baby sitter de Luka y Zoe, que es una señora escocesa adorable, me pidió que les informara que la pronunciación correcta es SCONS y no SCOUNS, como lo promuncian los ingleses. “Los ingleses lo pronuncian mal, son dulces escoceses, no ingleses, y por eso su nombre debe ser pronunciado como lo hacemos nosotros”, me dijo. Así que ya saben 🙂
Scones (rinde alrededor de 30)
Ingredientes: 500 grs harina 0000, 2 cucharaditas de té de polvo de hornear (Royal), 150 grs manteca (o margarina), 150 grs azucar impalpable, 3 yemas, 1 cucharada sopera de vainilla, 125 cm3 de leche tibia + 1 yema y 20 cm3 de leche para pincelarlos antes de hornear.
Preparación:
1) Pre caliente el horno a 200C. Mezcle la harina y el polvo de hornear y ciernalos sobre la mesada. Haga un huevo en el medio de la montaña de harina, para quen quede como una corona.
2) Coloque la manteca (que debe estar a punto pomada) en el hueco y cierna el azucar impalpable encima de la misma. Mezcla manteca y azucar con las manos hasta obtener una crema.
3) Agregue las yemas, de a una, e incorporelas a la crema de manteca.
4) Agregue vainilla y leche a la crema, e incorpore.
5)Integre la harina a la crema, de a poco, y forme un bollo de masa, cuidando de no amasar en ningun momento.
6) Espolvoree la mesada con harina y, usando un palote de amasar, estire la masa hasta formar un rectangulo. Doble la masa por la mitad y estire nuevamente con palote. Vuelva a doblar y estirar dos veces más, sin dejar que la masa descanse y luego estire una última vez hasta tener una masa de un grosor de aproximadamente 3 cms.
7) Corte los scones usando un cortante redondo, y colóquelos en una placa para horno cubierta con papel pata hornear.
8) Mezcle una yema con 20 cm3 de leche y pincele los scones con dicha mezcla. Lleve la placa al horno caliente por 30/35 minutos o hasta que estén dorados arriba.
9) Retire del horno y coloque sobre una rejilla hasta que se enfrien completamente.
I hope you like this recipe! See you on Monday!
Espero que les guste la receta! Nos vemos el lunes!
by Marcela M. | Dec 20, 2012 | Blog, Breads, Holidays, Recipe Box, Recipes
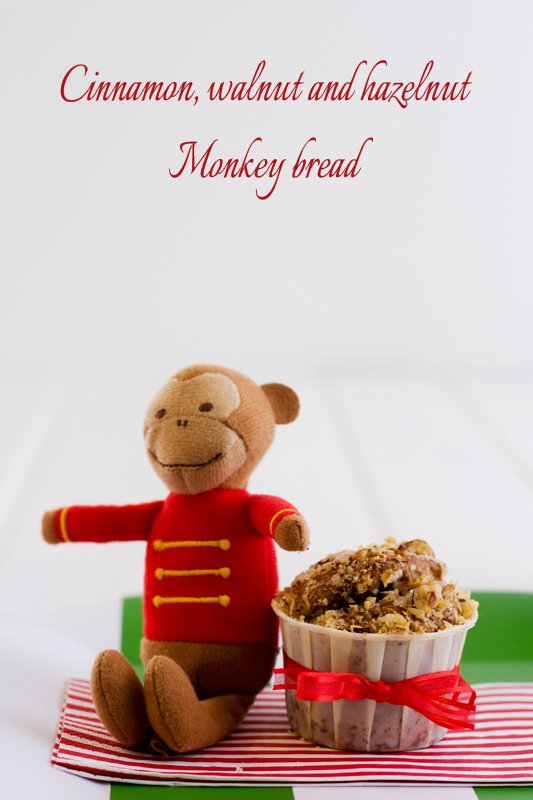
Good afternoon dear friends! I’m sorry for not publishing this post earlier, this month has been completely hectic and this week, even more so. But here I am, catching up as fast as I can to bring you all advent posts in time, to help you with your Christmas preparations!
Today’s post was prepared for my monthly contribution to Petit-on, where it appeared today. December’s chosen ingredient had been cinnamon, so I prepared a delicious Monkey Bread, adapted from a recipe that I saw Maru Botana prepare on TV many years ago. I scribbled the ingredients and a few instructions and made up for the rest the best I could. It turned out so good that I prepared it every year since then, in place of the more traditional “Pan Dulce” (which I never really liked).
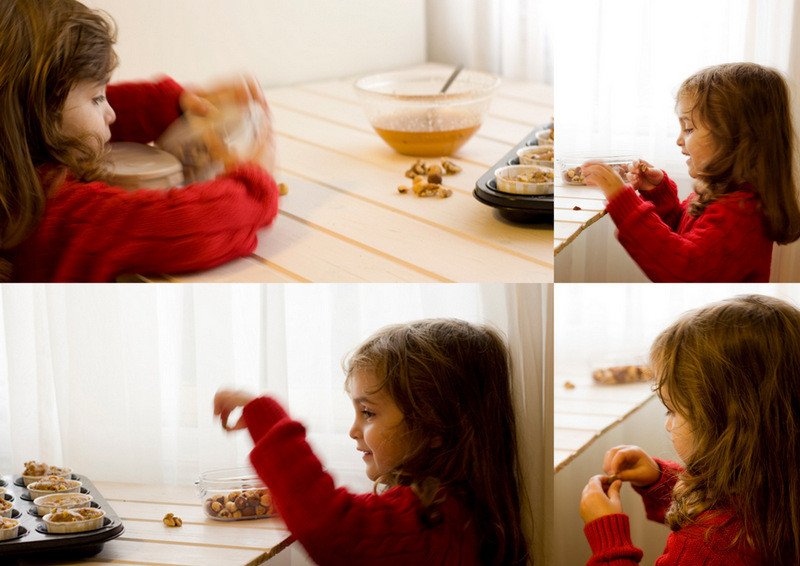
I had planned to prepare this recipe a few weeks ago, but one thing or the other prevented me from doing it. Luka and Zoe had been sick on and off all month (minor things, but staying at home nonetheless) and, while I normally do cook with my children, I rarely photograph food with them…for the sake of the photography equipment.
This time, however, time was running out, so I decided to give it a try. I started by preparing the dough with Luka as my assistant, who is actually very good at cooking and enjoys carefully measuring ingredients with me. His assistance, however, was intermittent, because they were showing Madagascar on TV so he kept running to the living room and back whenever he could hear a favorite scene. Zoe arrived from school when it was time to add the nuts, and the minute she saw the hazelnuts, she picked the whole jar and left saying “the mouse found a nut in the deep dark wood”. Fortunately, I managed to get just enough to finish the dish! Taking the pictures, as you can imagine, was another odyssey!
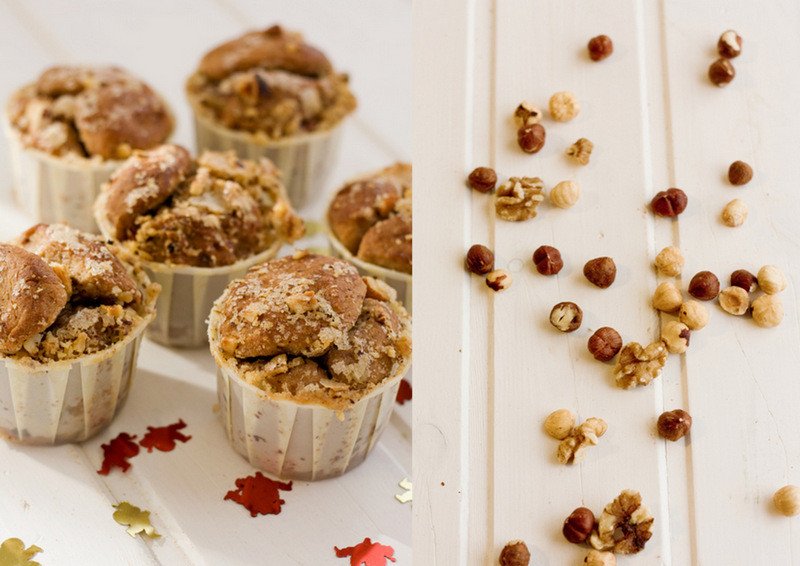
In this occasion, I baked this Monkey bread in muffin cases because I was planning to give them as gifts. I also like to do mini versions for placing in kid’s tables, just on top of their plates. I have found that children love mini desserts and are more likely to try anything that comes in a pretty packaging! If you prefer to bake it in the traditional way, I personally prefer spring form pans, because it keeps the shape better when served.
A couple of extra observations: the recipe uses butter and cow’s milk, but you can replace them by margarine and vegetable milk. Also, I used walnuts and walnuts, but almonds are also delicious. If you want to make it for someone who has a nut allergy, try replacing the nuts by raisins!
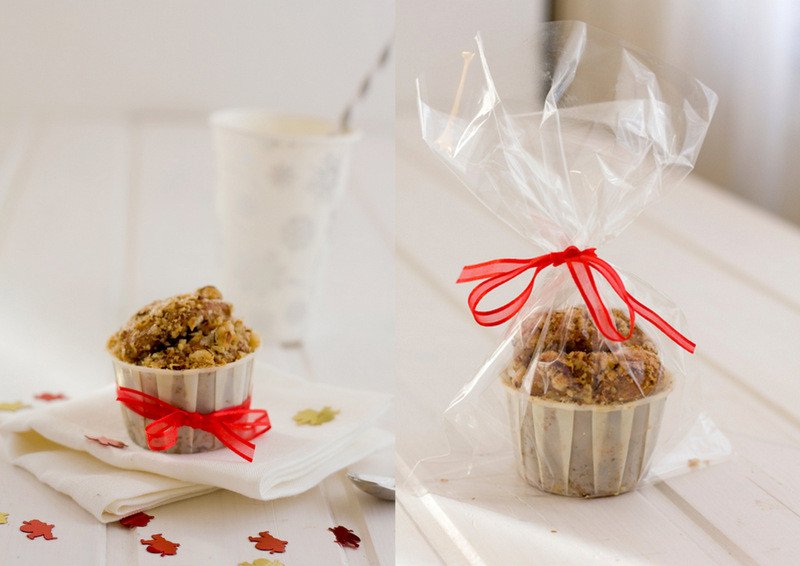
Here’s the recipe
Cinnamon, Walnuts and hazelnuts Monkey bread (adapted from Maru Botana’s recipe for Todo Dulce) Makes 16 mini breads.
Ingredients:
For the yeast: 30 grs fresh yeast, 1/2 tsp sugar, 1/3 cup warm water
For the bread: 1 cup milk, 160grs butter, 2 tbsp vanilla extract, 5 tbsp cinnamon, 2 eggs, 2 egg yolks, 5 1/2 cups all purpose flour, 2 cups assorted nuts or raisins, 180 grs melted butter, 1 cup sugar, 2 tbsp cinnamon.
For the glaze: 1 cup icing sugar, 1 tbsp cinnamon, warm water (as needed)
Preparation:
1) Put yeast, water and sugar in a bowl and let it ferment (approximately 5 minutes). Do not mix or touch it at all.
2) Put milk in a heat proof pan and bring it to the boil. Remove from heat and add butter. Let the butter dissolve.
3) Add cinnamon, vanilla and sugar to the milk. Stir to mix well.
4) Beat the eggs in separate bowl and add them to the milk, one by one, whisking so that no lumps are created.
5) Add 1/2 cup of flour and yeast. Mix well.
6) Add the rest of the flour and mix well, until the dough separates from the bowl.
7) Sprinkle flour on the countertop and put the bread on top. Knead it for 10 minutes, wrapping it on the flour.
8) Pour warm water on a bowl and dry it. This will heat the bowl, helping the bread rise. Put the dough in the bowl, cover and let it sit for a 1/2 hour, until it doubles in size.
9) Remove the bread from the bowl, tap it a couple of times against the countertop so remove air and knead again for a couple of minutes.
10) Divide the dough in two pieces and form two sausages with them. Cut small pieces of dough with your index and thumb and make small balls with them.
11) Mix the remaining melted butter, sugar and cinnamon in a bowl. Process the nuts, or chop them with a knife and put them in a separate bowl.
12) Pass the bowl by the butter mixture and then toss them in the bowl with nuts. Repeat with all the balls of dough.
13) Put the balls in a springform cake pan or in muffin cases. I could fit 4 small balls per muffin case and bake at 175 C. If you are baking one big bread, you will need to bake it for 45/50 minutes. This time is reduced to 20/30 minutes if you make mini breads, as I did. Once they are slightly golden on top, remove from the oven and let it/them cool.
14) Prepare a glaze with the sugar, cinnamon and a little bit of warm water (I used one tablespoon). Pour it on top of the bread using a spoon, if desired.
Amigos hispanoparlantes, pueden leer la receta en castellano AQUI.


