by Marcela M. | Dec 12, 2012 | Blog, Holidays, Parties
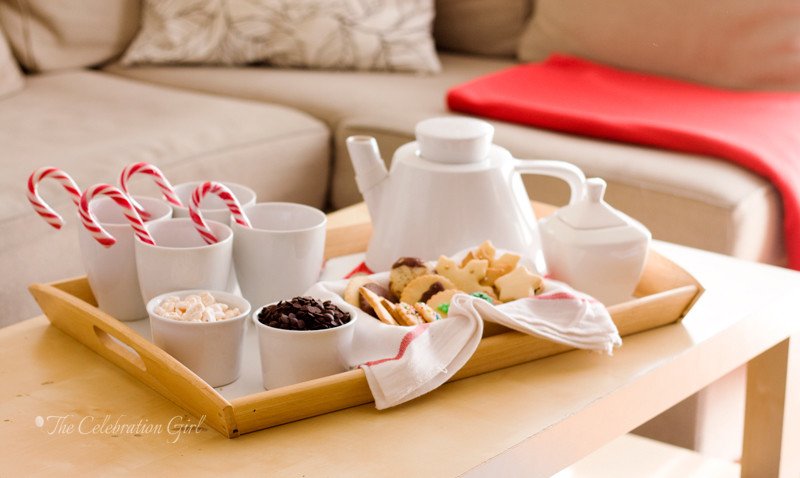
Good morning dear friends! It’s day 12 of the advent and there’s only 12 days left until Christmas’ eve! How are your preparations going so far? Are you managing to keep your zen this holiday season? Because this is what I want to talk to you about today.
Have you noticed how everybody seems desperate to get together in December but your January calendar is normally empty? Are you running here and there like a headless chicken, trying to get everything ready before the multiple end of the year celebrations? Did you start tons of decorating, crafting and baking projects but couldn’t finish any and now feel even more stressed out and overwhelmed than when you started? You are not alone. December can be both wonderful and extremely stressful at the same time, and it’s very easy to feel pressured to do things, to buy more…even connecting can feel like a chore when we have to do so with everyone, in special ways and in just 4 weeks time.
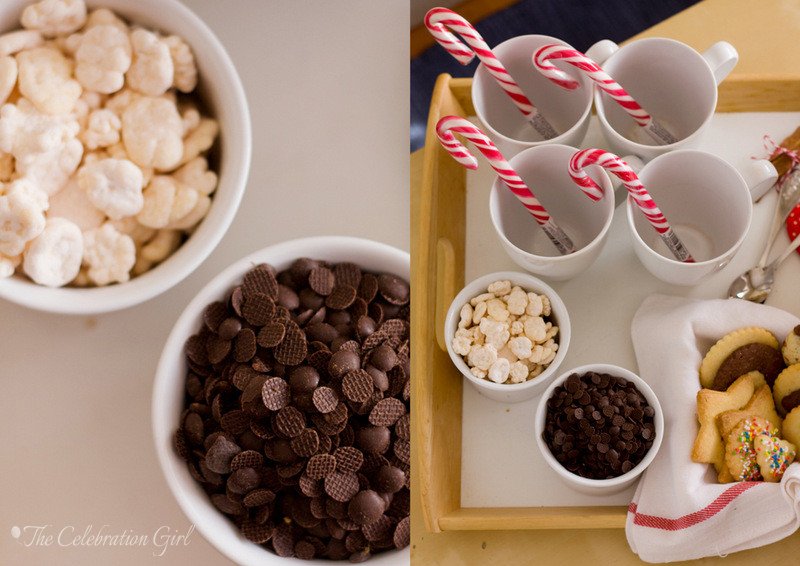
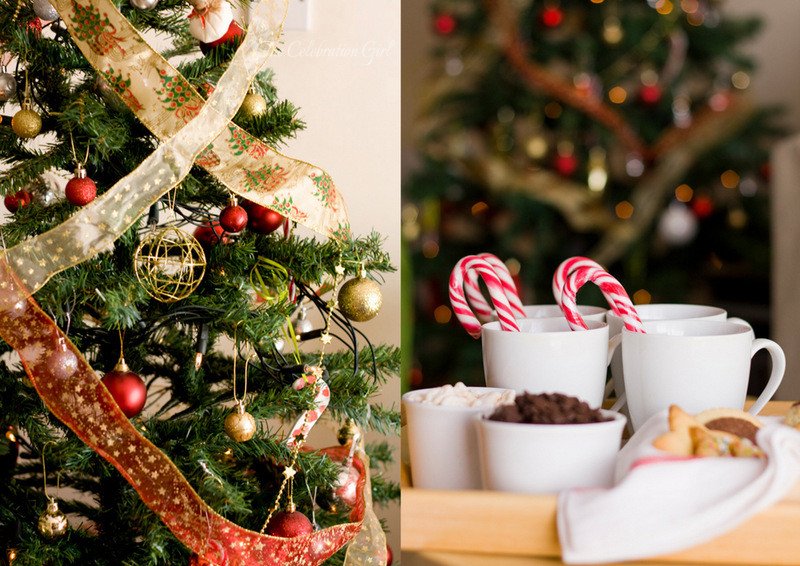
So, this advent, I wanted to bring you something really easy, really simple, that requires virtually no preparation at all but can be just as effective for connecting and having a nice time as the most elaborate celebration: A hot chocolate station that you keep ready for visitors, reading with the children, watching Christmas movies, or simply unwinding after a busy day. I chose hot chocolate because…well, because I love chocolate , but also because it releases endorphin in your brain, and it feels decadent, like a treat in itself. Also, hot chocolate is a winter classic which admits several variations: You can flavor it with peppermint, cinnamon, nutmeg and even pepper; you can add to it whipped cream, coconut cream, marshmallows, chocolate shavings; you can mix white and dark chocolate, you can make it with coco, you can drink it thin or thick, like in Spain or in Italy (where they boil chocolate, milk and sugar with a bit of cornstarch because they like “all things to be clear and chocolate to be thick”).
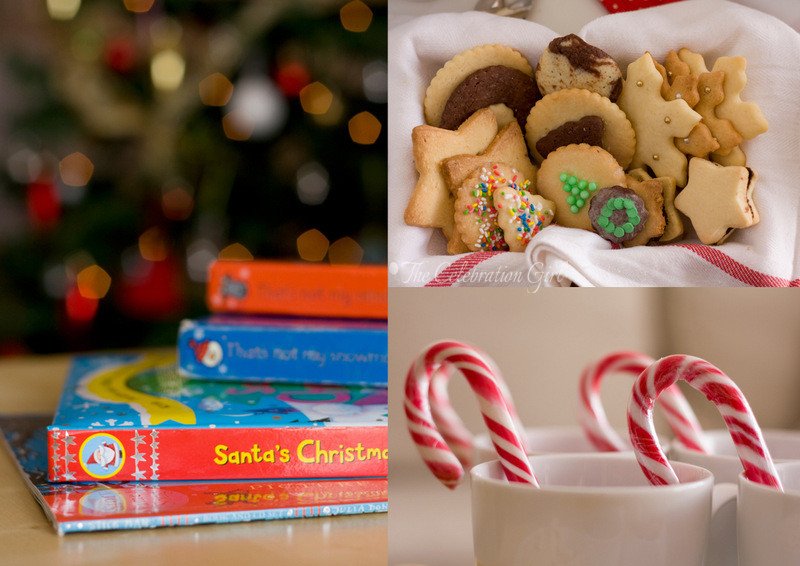
I wanted the setup to be really easy as well, something that you can pull off with no effort at all, so I thought about a tray, which can be carried around the house and moved if necessary…and you could even enjoy breakfast in bed during the weekends! What you need depends on your taste in chocolate, mine has: chocolate chips (because I like the creaminess they add), white chocolate snowflakes (they are like white chocolate chips, but fancier looking), cinnamon bark, candy cane, a jar of sugar, a box with assorted cookies (yes, that’s one of the times when those recipes and tutorials can be useful!) and a teapot where I put the milk I warm up right before serving. You could use powdered milk and just add boiling water, as well as use one of the many varieties of non-dairy milk (almond milk is my favorite for hot chocolate, but if you are unsure if a person has a food allergy, stick to rice milk instead). You could also add marshmallows (I didn’t make mine yet) and use a hot cocoa mix instead of chocolate chips. If you don’t like chocolate, you can keep a couple of your favorite tea bags, or coffee (little secret: the chocolate is the excuse).
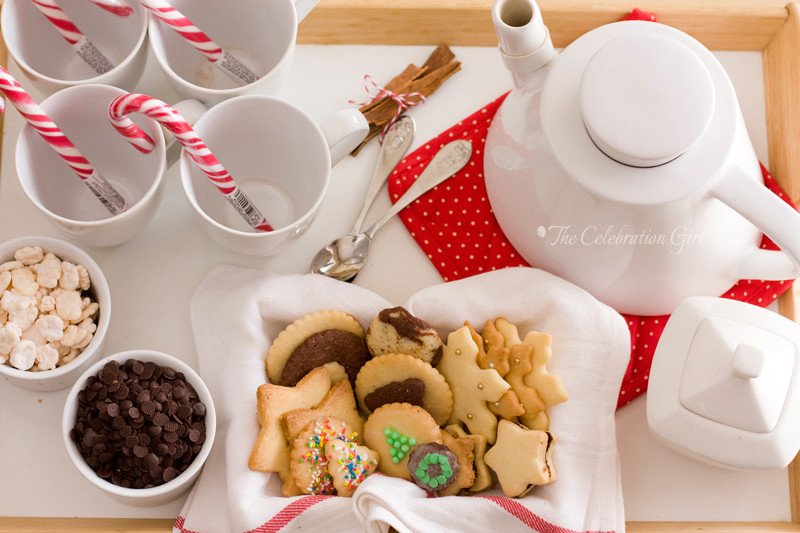
I find that having the tray already set up makes me look for ways to slow down, and just enjoy a cup of chocolate and a couple of cookies. It avoids the stress of having to think what to serve if someone comes home and it is a welcoming, nice excuse for a simple, fuss-free way to gather with loved ones. My former boss used to bake cookies and offer them to clients when it was time to give them some bad news. When people were happily munching and complimenting her baking skills, she would deliver the news and, she said, they were received better than if given without them. Small treats have that special power, of making good things seem better and hard things easier to bear, possibly because we associate them with our childhood, that time when the World seem huge and our homes were always a safe heaven.So this holiday season, let’s use those powers to bring us closer to the ones we love, to let us appreciate and enjoy all the blessings in our life.
Con sabor latino…
Buenos días queridos amigos! Día 12 del adviento, y ya faltan sólo 12 días más para la nochebuena. Cómo van sus preparativos? Están logrando mantenerse en estado zen estas fiestas? Porque de eso quiero hablarles hoy.
¿Se dieron cuenta que todo el mundo parece desesperado por juntarse en Diciembre pero la agenda está vacía para el mes de enero? ¿Estan corriendo como gallinas sin cabeza, para todos lados y sin parar, intentando dejar todo listo antes de todas las fiestas y celebraciones de fin de año? ¿Comenzaron millones de proyectos de decoración, cocina y manualidades sin poder terminar ni la mitad y ahora se encuentran más estresados que antes, frustrados y más agobiados que antes? No están solos, no son los únicos. El mes de diciembre puede ser maravilloso pero tambien puede ser extremedamente estresante y es muy facil sentirse presionado para hacer más cosas, comprar más objetos…hasta conectar con nuestros seres queridos puede sentirse como una obligación cuando tenemos que hacerlo con todo el mundo, de manera especial, y en el corto plazo de 4 semanas!
Por todo esto, este adviento quise buscar una manera muy pero muy facil, que no requiere prácticamente preparación alguna, pero que puede ser igualmente efectiva para juntarnos y pasar un momento agradable que la más elaborada de las celebraciones: una estación de chocolate caliente, siempre lista por si vienen visitas, para tomar mientras leemos con los niños, mientras miramos peliculas navideñas o bien para relajarnos al final del día. Elegí chocolate porque…bueno, porque me encanta, pero también porque llena nuestro cerebro de endorfinas, es decadente y, al tomarlo, sentimos siempre que nos estamos dando un gusto especial. Además,el chocolate caliente es un placer invernal que admite muchas variantes: podemos saborizarlos con menta, canela, nuez moscada y hasta pimienta; podemos agregarle crema batida, crema de coco, marshmallows (nubes), chocolate picado; podemos mezclar chocolate blanco y chocolate amargo; podemos hacerlo con cacao, podemos tomarlo ligero o bien espeso, como en España e Italia (donde es casi como un postre, porque le agregan fécula de maiz ya que ” las cosas deben ser claras y el chocolate, espeso”).
Quise, como les decía, hacer algo fácil de poner en práctica y versatil al mismo tiempo, y por eso elegí una bandeja, que puede moverse a través de la casa, y trasladarse de ser necesario…y que hasta podríamos transformar en un desayuno en la cama el fin de semana! El contenido de la misma depende de qué les guste más.La mía tiene: chispas de chocolate, porque me encanta la cremosidad que aportan, copos de nieve de chocolate blanco (como chispas, pero más vistosas), barras de canela, bastones de caramelo, una azucarera, una caja con galletitas surtidas (para esto sirven, por ejemplo todos esos tutoriales y recetas!) y una tetera donde coloco la leche, que caliento justo antes de servir (no tengo termo). Pueden usar tambien leche en polvo y simplemente agregar agua, así como una de las tantas variedades de leches vegetales (mi preferida para el chocolate caliente es la leche de almendras, pero si tienen dudas acerca de su invitado tiene alergias alimentarias, es preferible usar leche de arroz). Tambien pueden agregar marshmallows (yo aun no hice los míos), y optar por cacao en lugar de chispas de chocolate. Es más, si no les gusta el chocolate, pueden poner sus saquitos de té preferidos, o café (secreto: el chocolate es la excusa).
Yo siento que tener la bandeja ya lista y esperando me ayuda a desacelerar, a hacerme el tiempo para una tacita y un par de galletitas. Elimina el stress de tener que pensar qué ofrecer a las visitas, y es una linda excusa para juntarnos con seres queridos sin demasiada pompa ni preparativo. Escribo esto y recuerdo una anecdota de mi ultimo trabajo: Mi ex jefa (uno de los seres humanos mas maravillosos que he conocido) solía hornear galletitas cuando tenía que dar malas noticias a sus clientes. Preparaba una bandeja, les servía te, y cuando ellos estaban disfrutando y elogiandole sus dotes de repostera, ella decía lo que tenía que decir. Invariablemente, me comentaba, las noticias eran mejor recibidas que cuando no servía nada. Los pequeños gustos tienen ese poder especial de hacer que lo lindo sea más lindo y lo dificil más facil de llevar, quizás porque los asociamos con nuestra infancia, aquel tiempo en que el mundo parecia enorme y nuestra casa el lugar más seguro del mundo. En estas fiestas, usemos esos poderes especiales para acercarnos a quienes amamos, para pisar el freno, apreciar y disfrutar de todas las bendiciones que tenemos en nuestra vida.
by Marcela M. | Dec 10, 2012 | Blog, Crafts and DIY
Good evening dear friends! Here is finally day 10 of our advent calendar…only 14 days until Christmas’ eve!
As I mentioned in THIS post, last Friday I finished our Christmas stockings, and by ours I mean my husband’s and mine. Last year, Luka and Zoe received a beautiful stocking each as presents from their baby sitter, and I had not planned to make some for ourselves, being adults and all… but when Zoe saw theirs, she started asking about ours, and the rest is history!
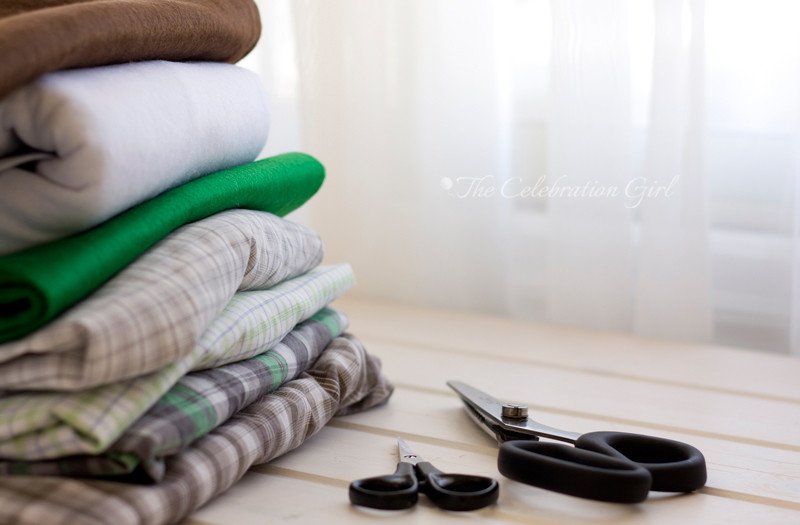
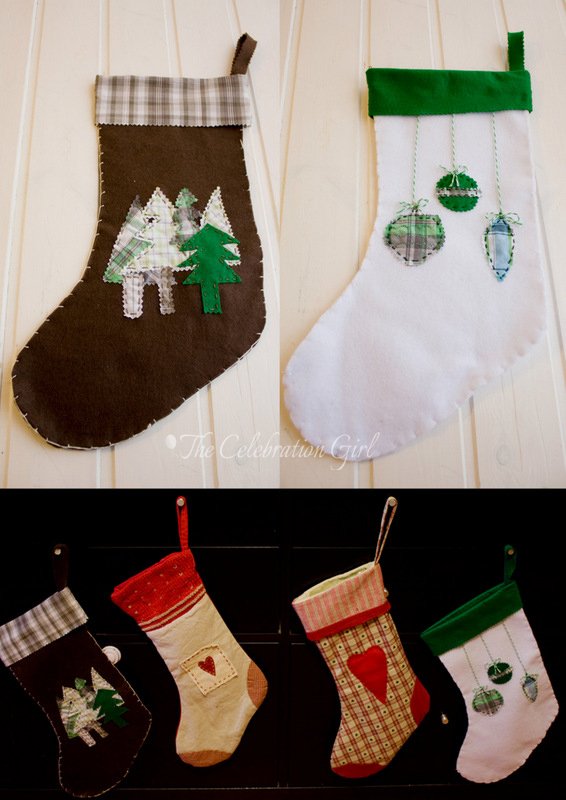
I made our stockings using scraps of felt from our felt board and fabric from some of my husband’s old shirts, which he wasn’t using anymore (he gave them to me for crafting purposes, I didn’t take them from his closet!). At first, I had planned to make them using the sewing machine,but it got broken half way, so I ended up making them by hand. They are far from perfect, because I am not a skilled sewer at all, but I had a lot of fun in the process, so I thought I would share the process with you, in case you want to make some for yourself and your family. It is a really fun craft project for a lazy afternoon with friends and, as you can see from the picture in this past post, which shows my unorthodox stocking from years ago, you can pretty much chose any design that you like best.
Let me walk you through every step:
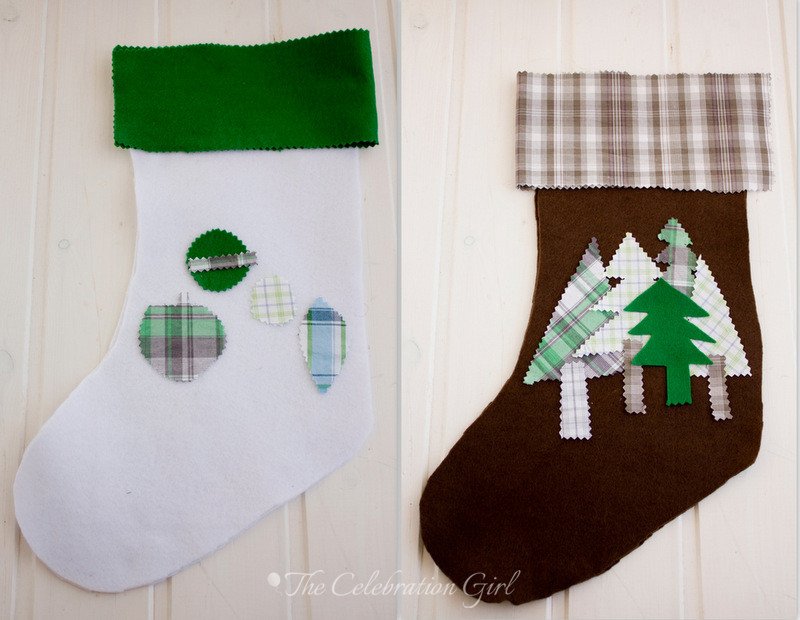
1) I started by making the template.I wanted to make sure that their size matched Luka and Zoe’s stockings, so I placed one of them on top of the felt and traced around it with a marker pen, then cut two pieces of each color (brown for my husband’s, white for me).
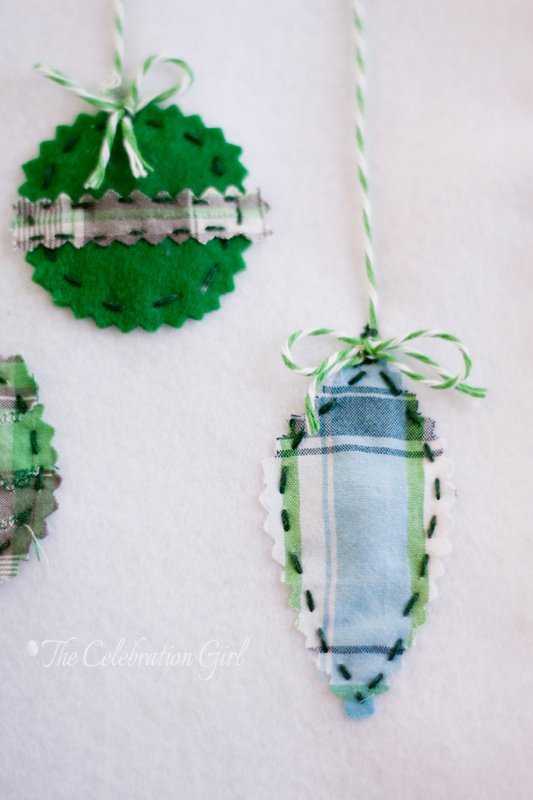
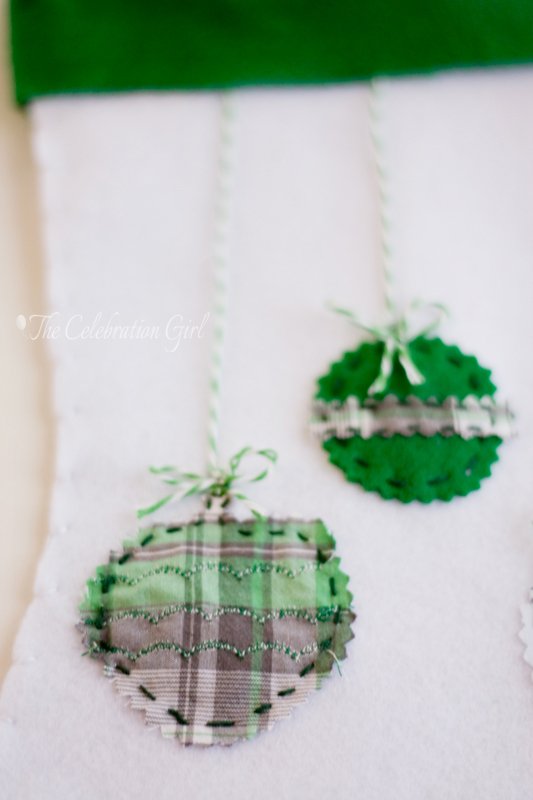
2) Then I took all of my husband’s old shirts and started thinking about the design itself. I settled for the ones in green fabric for both stockings (so that there would be some unity between them all), and made pine trees for my husband’s (to give it a masculine, lumberjack feeling), and baubles for myself. I cut the different parts using zig zag scissors, placed them on top of one side and played with different combinations until I found one that I liked.
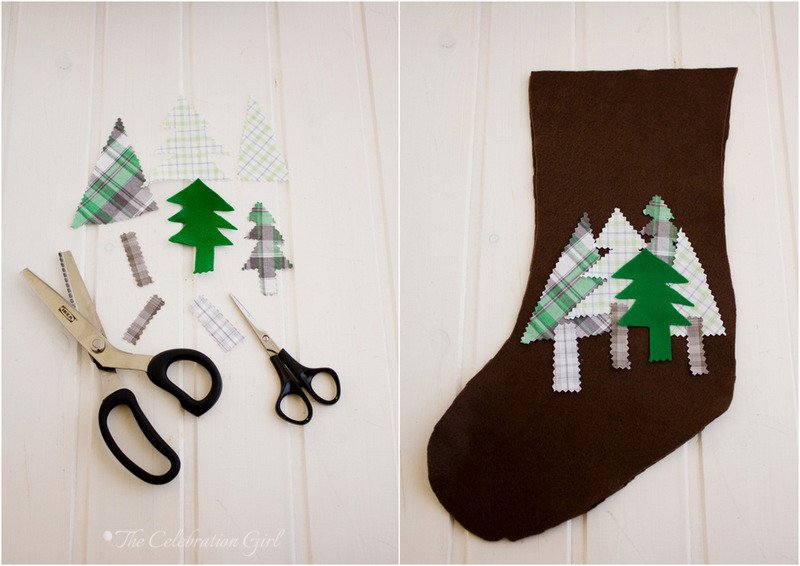
3) I then cut another piece of fabric to make the cuff: brown tartan for my husband’s and green felt for myself, and added it to the mock design to see whether I liked it. I did, so it was time to start stitching.
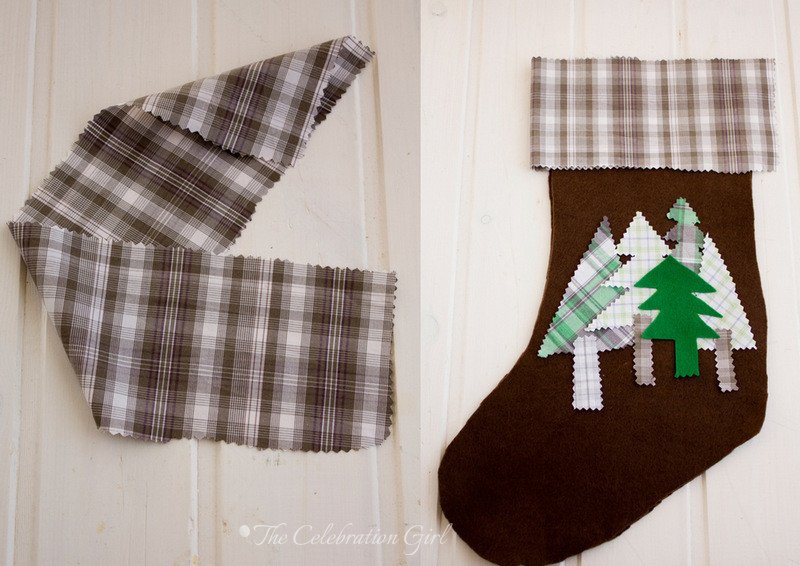
4) First I added the appliques to the fabric, starting by the ones at the bottom. I held each piece of fabric in place with pins, and sew them in place with a very simple running stitch . I did one tree at a time, taking my time, but it was done in no time because my design was not complicated at all.

5) Then I attached the cuff to the felt (one side at a time) and then joined the cuff, as seen in the pictures above. As you can see, I used a running stitch here as well because it doesn’t show, but you can attach it in a more proper way by using a sewing machine, or a back stitch (they do look better).
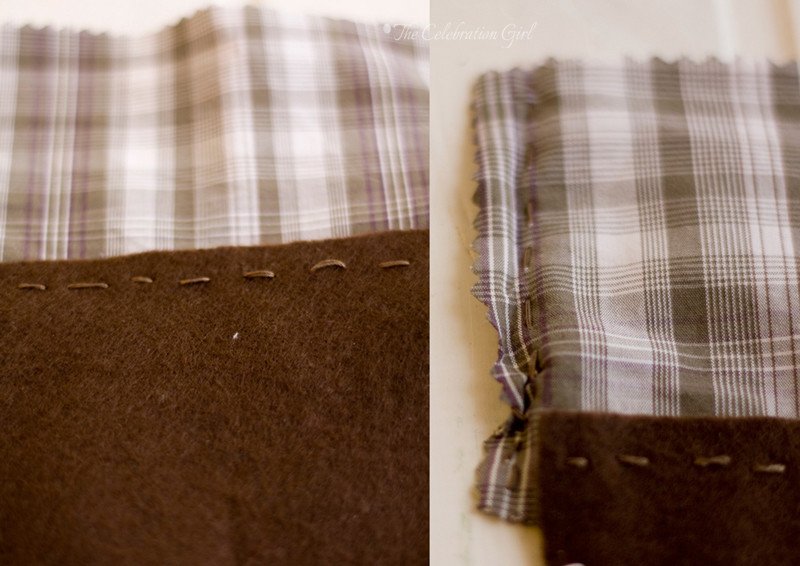
6) Then it was time to attach the two pieces of felt, to create the stocking. I did so with a blanket stitch. I used a contrasting thread color for my husband’s stocking, but kept the same one for mine.
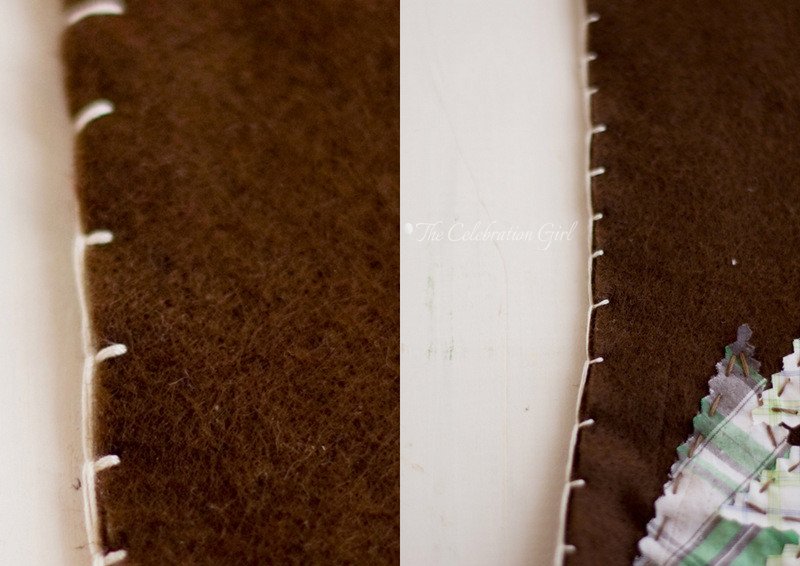
7) Finally, I added a loop, so as to be able to hang the stocking. I did this in the end, because I forgot to do it before, but ideally it should be done before attaching the cuff to the boot, so that the union remains invisible.
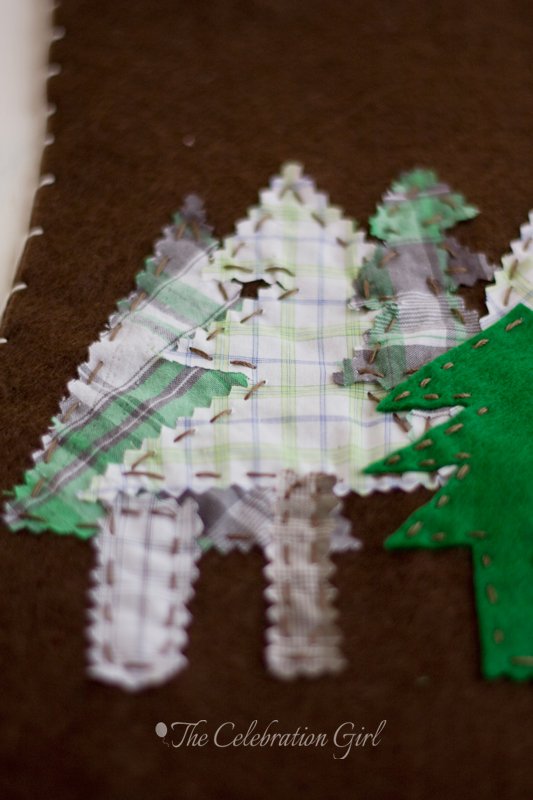
The procedure for making my own stockings was pretty much the same, but instead of starting a adding the appliques, I first made some designs in them with the embroidery stitches of my sewing machine, before it got broken. Then, I attached the appliques to the felt.
In order to make them look as if they were hanging, I made a bow with a piece of green twine and attached it to the bauble’s body with a few stitches. I then attached a long thread of twine to it, stitching it in two places only: a couple of stitched almost below the bow, and a couple of stitches on the other extreme, which remains unseen when the cuff is folded.
That was all! Overall, it took about 2 hours to finalize each stocking and they are now hanging in our living room, next to Luka and Zoe’s. I am planning to fill theirs with arts and crafts material (play dough, pencils, crayons, coloring pages) and, as for ours…I don’t know yet!
Do you hang stockings in your home? What do you fill them with, at Christmas?
Con sabor latino…
Buenas noches, queridos amigos! Aquí está, finalmente, el 10mo día de nuestro calendario de adviento,y ya faltan apenas 14 días para la nochebuena!
En ESTE post les mencionaba el otro día que el viernes pasado había estado cosiendo nuestras medias navideñas, y cuando digo nuestras quiero decir las de mi marido y mía propia. Ni había planeado hacer ninguna este año, porque Luka y Zoe ya tenian las suyas, que había sido regalo de su baby sitter de la navidad pasada, y no creía necesario hacer una para nosotros, siendo adultos y todo…pero cuando Zoe vió las de ellos y se dió cuenta que nosotros no teníamos empezó a preguntar por qué…y el resto es historia: a coser y hacerlas!
Hice nuestras medias usando retazos de tela que habian sobrado de nuestra felt board y tela de camisas viejas de mi marido, que él me había dado hace un tiempo para mis manualidades. Al comienzo había pensado coserlas a máquina, pero ésta se rompió a mitad de camino así que terminé haciendolas a mano. No son perfectas en absoluto y posiblemente haga nuevas en años sucesivos, porque no soy una costurera experta en lo más mínimo, pero hacerlas fue tan divertido que se me ocurrió compartir el proceso con ustedes, por si tienen ganas de animarse y hacer unas para ustedes y su familia. Es un proyecto muy divertido para una tarde con amigos y, como pueden ver en esta foto del post anterior, no es siquiera necesario hacerlas con motivos tradicionales, sino que pueden elegir cualquier diseño que les plazca!
Yo las hice de la siguiente manera:
1) Comencé por hacer el molde. Como mi objetivo era que tuvieran más o menos el mismo tamaño que las de Luka y Zoe, porque iban a estar colgadas al lado de ellas, lo que hice fue colocar una de sus medias sobre el paño y tracé el contorno con fibra. Luego corté dos medias iguales de cada color (elegí marrón para mi marido y blanco para mí)
2) Paso seguido, tomé todas las camisas viejas de mi marido y empecé a pensar en diseños. Me decidí por telas en tonos verdes para ambos, para que hubiera un poco de unidad, y recorté pinos para la media de mi marido (para darle un estilo más masculino, como de leñador), y adornos navideños para mí, con una tijera de zig zag. Luego coloqué las piezas sobre cada una de las medias y jugué con ellas hasta encontrar un diseño que me gustara.
3) Luego, corté un pedazo de tela en tono contrastante para hacer el puño. Lo agregué al modelo de la bota para ver si me gustaba el color y el tamaño, modifiqué lo que hacía falta, y luego comencé a coser.
4) Lo primero que cosí fueron los apliques, usando un punto bastilla, o de hilván, muy sencillo, comenzando por las piezas que iban en la parte de abajo del diseño. Sostuve cada pieza con alfileres,para que lograr que permaneciera en su lugar mientras la cosía, de a una por vez y tomandome mi tiempo, pero les aviso que estuvo todo listo en un dos por tres, porque no elegí un diseño complicado.
5) Luego uní el puño al cuerpo de la media, primero un lado y luego el otro, y finalmente uní los costados del puño.Como pueden ver aquí tambien usé el punto bastilla, porque no se iba a ver luego, pero la verdad es que queda más prolijo con otros punto más invisibles, o bien con un punto atrás de puntadas muy pequeñitas.
6) Finalmente, uní las dos partes del cuerpo de la media usando el punto de festón, que es el que se usa para mantas y botones. Para la media de mi marido elegí un color de hilo contrastante, pero para la mía decidí usar blanco, como el cuerpo de mi media.
7) Por último, agregué un lazo para poder colgarla. Debo aclarar que hice esto como último paso porque olvidé hacerlo antes, pero lo ideal es coserlo al cuerpo de la media antes de coser el puño, así no es visible la costura.
El procedimiento para hacer mi media fue básicamente el mismo, pero antes de pegar los apliques bordé unos detalles en los mismos con la máquina de coser (antes que se rompiera). Luego los pegué con el punto bastilla. Asimismo, como mi diseño eran decoraciones navideñas, agegué una cinta y un moño de hilo bicolor, para que pareciera que estaban colgando. Hice el moño con los hilos por separado y los pegué con un par de puntadas sobre cada adorno, y luego tomé un pedazo más largo de hilo, y lo pegué tambien con un par de puntadas invisibles en cada extremo (el extremo superior quedó debajo del puño).
Y eso fue todo! En total no debe haber llevado más de 2 horas por media y, ahora estan ambas colgadas del mueble de nuestro living-comedor, junto a las de Luka y Zoe. Estoy pensando llenar las de los niños con material de arte, como lápices, crayones, plastilina y hojas para colorear…y aún no sé qué poner en las nuestras!
¿Ustedes tienen la costumbre de colgar medias navideñas? ¿ Con qué regalos las rellenan?
by Marcela M. | Dec 5, 2012 | Blog, Holidays, Parties
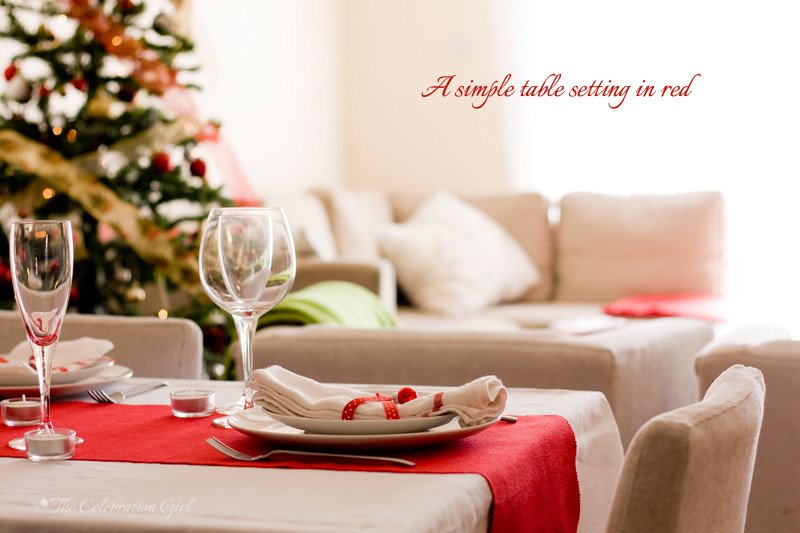
Good morning friends! It’s day 5 of the advent and today we will leave the baking and crafting aside for a while, and start focusing on ideas to set the table for Christmas. As I have mentioned before , I like my table settings to be simple, with just a few touches to make my family and guests feel special but without overdoing it, because I don’t want anyone to feel stressed over whether they spill some drinks on an expensive tablecloth, or afraid that a child may break a piece of heirloom china. In fact, we never bought expensive china or silverware because we knew we were not going to give them much use during our children’s early years. We believe the time for elaborate table settings may come in the future but, for now, we keep it simple, so that we can all relax and focus on the meal and the conversation.
Today’s post is the first of several table setting ideas I will present you during the advent, and they all have three things in common: they use white as a background, they are easy to put together, even at the last minute, and they are easy to reproduce on a tight budget. In order to set the table as I did today, all you need are a white tablecloth and napkins, white plates, glasses, a few candles and the following extras that are the ones that actually transform the table:
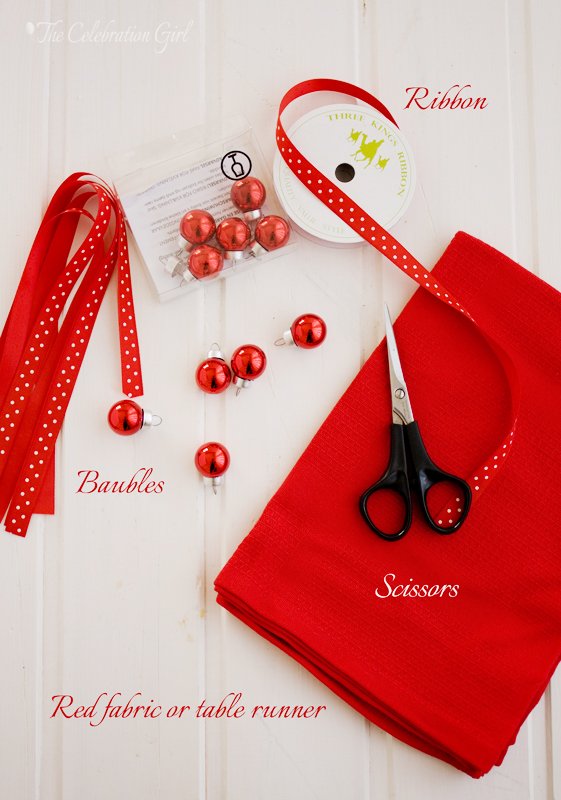
You will probably notice that I don’t use flowers or greenery as centerpieces and there are a couple of reasons for that: Some people are allergic to flowers, some others, while not allergic, are bothered by them because they feel that their smell interferes with that of the food, and in some countries they can be very expensive. So, since my goal for this year’s advent calendar was to provide you with ideas that anyone can reproduce at home, I skipped them.
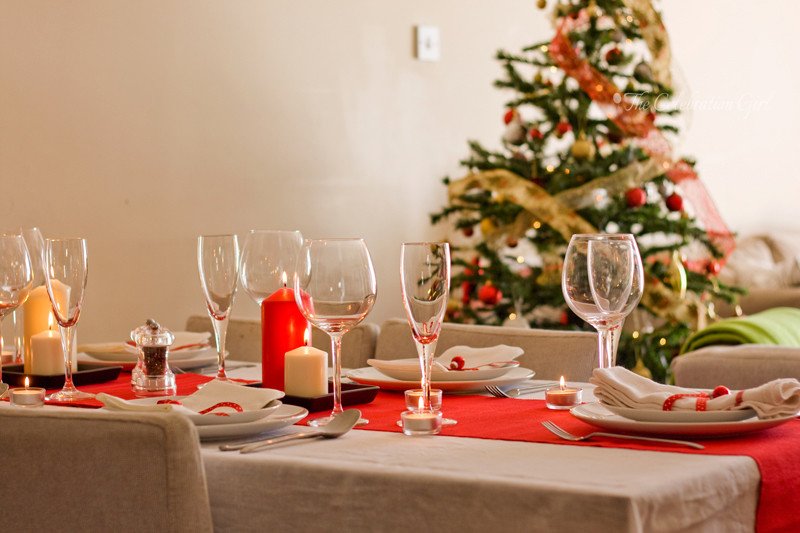
I started setting up this table by laying out our white linen tablecloth (which I love) and then placed two red table runners on the center of the table, to cut it horizontally. I could also have put them vertically, to run under the plates, but I felt that they cut the table visually, and made it look smaller. Then I set the plates, I placed the fork, knife and spoon in the international informal way (with the spoon next to the knife, on the outside) and I added the wine and champagne glasses.
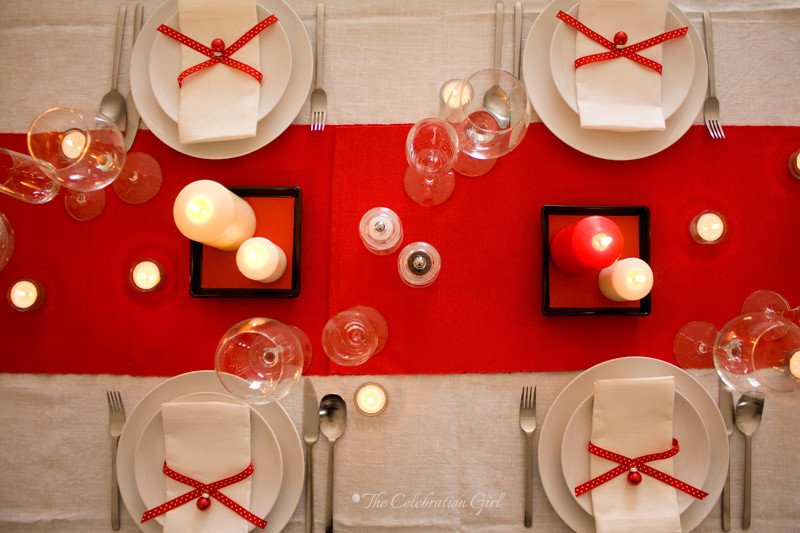
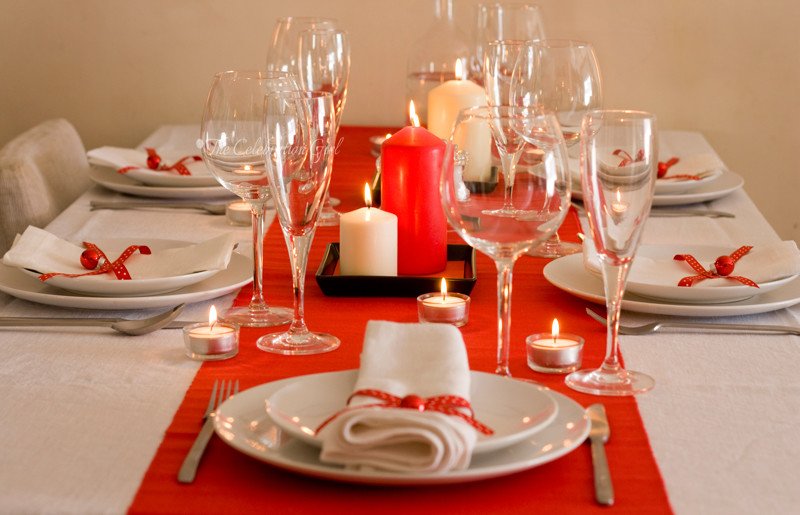
I placed the napkins on top of the plates, and wrapped them in red polka dot ribbon. I did not tie the ribbon, but just crossed the two sides and placed a miniature red bauble on top. Finally, I added the candles: one votive candle next to each plate and a few more scattered around the table, as well as bigger candles placed in small plates (found in the gardening section of Ikea), lined with red paper. I kept the touches of red small, as you can see, because it can be quite a dominant color, and I didn’t put many more candles because I wanted to leave space for placing the trays with the food, without having to alter the whole decoration.
Now I would like to know, how do you like to set up your table for the holidays? What colors do you use? Please, share!
Con sabor latino…
Buenos días queridos amigos! Es el 5to día del adviento, y hoy les propongo dejar de lado manualidades y cocina y ponernos a pensar en cómo pondremos la mesa en Navidad. Como he mencionado en otras ocasiones, prefiero que mis mesas sean sencillas, con sólo un par de detalles que hagan que mi familia y amigos se sientan especiales pero sin sobrepasarme, porque no quiero que nadie esté estresado acerca del vino que puede haberse volcado sobre el mantel carísimo, o preocupado porque un niño pueda romper un plato de porcelana heredado de la bisabuela. Nosotros no tenemos juego de porcelana ni cubiertos de plata porque yo estaba embarazada cuando estábamos comprando las cosas para nuestra casa, y sabíamos que iban a pasar varios años antes de poner usarlos sin preocupación, y queríamos (y queremos) poder relajarnos y disfrutar de los momentos especiales con la familia sin nervios. El tiempo de las mesas
elaboradas llegará en un futuro pero, por ahora, preferimos mantener nuestras mesas simples y sencillas, y concentrarnos en la comida y en la conversación.
El post de hoy no será el único de este estilo, porque en este adviento quiero que tengan muchas ideas que puedan adaptar a lo que tengan en casa, a su gusto y a su estilo. Todas las mesas tiene tres cosas en común: usan el color blanco como base, son fáciles de preparar, incluso a último minuto, y pueden reproducirse con un presupuesto limitado. Para poner la mesa como yo lo hice hoy, sólo necesitan: un mantel blanco, vajilla blanca, copas (las que tengan, mis platos y mis copas son de Ikea), velas, camino/s de mesa o tela roja de 50 cms de ancho y del largo de la mesa o superior (yo coloqué dos caminos, uno al lado del otro), cinta roja y mini ornamentos navideños, tambien rojos (los míos son tambien de Ikea).
Seguramente habrán notado que no suelo usar flores ni plantas en mis centros de mesa, y hay varios motivos para ello: Son preciosas y quedan divinas pero mucha gente es alergica, hay otros a quienes éstas les molestan porque consideran que su perfume interfiere con los aromas de la comida y les quita el apetito o los hace sentir mal y, finalmente, en algunos paises son carísimas. Así que, como mi objetivo para este calendario de adviento, es brindar ideas que puedan ser puestas en práctica por todo el que así lo desee, decidí omitirlas.
Al preparar esta mesa, empecé por los básicos: puse el mantel de lino blanco sobre la misma, y luego coloqué dos caminos de mesa, uno al lado del otro, cortando la mesa de manera horizontal. Podría haberlos colocado verticalmente, para que quedaran debajo de los platos, pero decidí no hacerlo porque me daba la sensación que cortaban visualmente la mesa, haciendola verse más chica. Luego coloqué los platos, dispuse los cubiertos conforme al sistema informal internacional (con la cuchara a la derecha, al lado del cuchillo, del lado de afuera) y agregué copas de vino y de champagne. Coloqué las servilletas sobre los platos y las envolví en la cinta roja, sin atarlas ( simplemente cruzando los extremos) y coloqué un pequeño ornamento rojo en el cruce. Finalmente, agregué una velita al lado de cada plato y algunas mas distribuidas alrededor de la mesa, así como también velas más grandes colocadas sobre platos pequeños (de la sección de jardinería de ikea), cuya base cubrí con papel rojo. Como pueden ver, este color está presente sólo en algunos detalles porque puede llegar a ser muy dominante, y la mesa no está repleta de velas porque quise dejar espacio para colocar las bandejas de comida sin tener que modificar toda la decoración al hacerlo.
Ahora cuentenme ¿cómo suelen decorar la mesa para navidad? ¿qué colores prefieren? Cuentenme, que soy curiosa!
by Marcela M. | Dec 2, 2012 | Blog, Crafts and DIY
Good morning dear friends, and welcome to the 2nd day of The Celebration Girl’s advent calendar! I hope you are having a lovely weekend.
We inaugurated the Christmas season in the best possible way: with a party! Luka and Zoe took part on a “decorate the tree” celebration, with music, baking (the cupcake below was decorated by Luka!) and dancing, so there we went yesterday morning. They have been very excited about the season for a while, because they have been learning Christmas carrols and songs at school since the beginning of November, but when they saw the tree and the rest of the decorations in place, on Friday, their excitement escalated to new heights. Luka woke up on Saturday morning worried that the tree may have “disappeared”overnight and went running to the living room, to verify that it was still there. And you should see how their faces light up when they see the lights, blinking before their eyes, with how much care they touch the ornaments, almost caressing them, and how they look at the star at the top with dreamy eyes. It is magical.
When we came back home, we made a felt tree and snowy woods for our Felt Board, as well as winter clothes for our felt people. Nothing fancy, just a few cutouts to mark the season. The way we do it is “on demand”: I get all scraps of felt out and a pair of scissors and Luka and Zoe either request some items or cut them themselves, if they can (they are still learning to use scissors and their training ones are not very good for cutting fabric). Each time we update the board, we spend a couple of hours doing so, and then we go back to it to rearrange everything. Our board landscapes are also a bit unorthodox, I must say. Right now, for example, the winter woods host a lion, a zebra, a hippopotamus and a giraffe because Madagascar is their current favourite movie 😉
A few of you have asked me about the activities that we have planned to include in our advent calendar. Here are a few of them: visit Christmas fairs (there are several, so we will see which ones we will attend when), learn to sing Christmas carrols, bake cookies, decorate cookies, decorate a gingerbread house, make cards to send to the family, make garlands, make tree ornaments, attend a chorus performance, drive through the city at night to see the Christmas lights, watch Christmas movies, make hot chocolate, wrap presents, and many more that I’ll share with you in the following days.
Now let’s begin crafting!
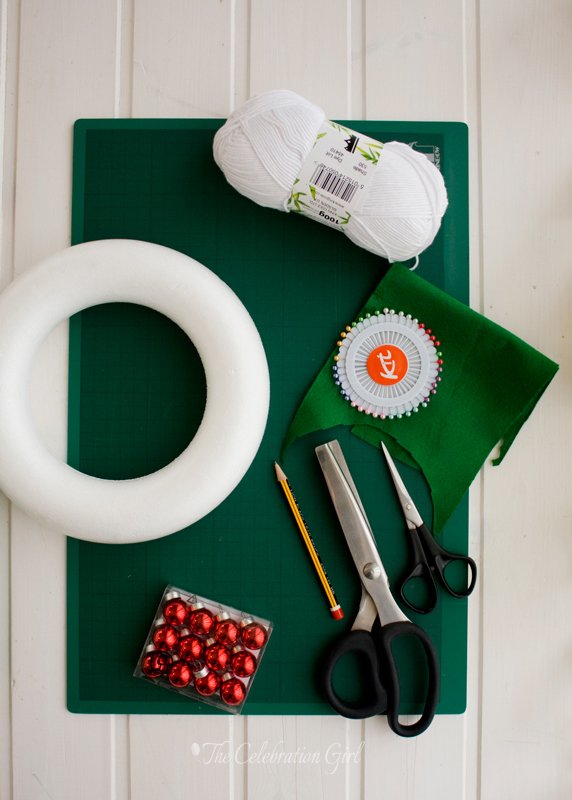
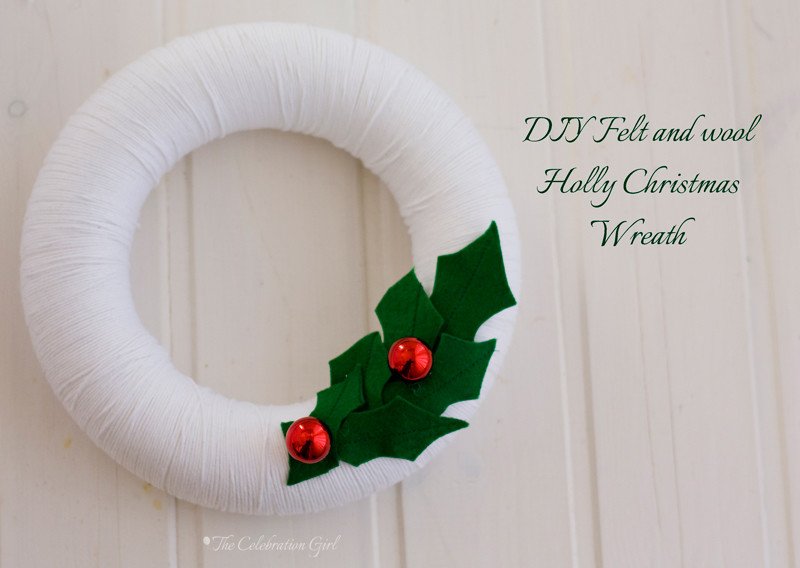
Making a wreath was another of my goals for this Christmas. We hadn’t bough one when we arrived to Nicosia, and for the past 5 years we had been using a cluster of ornaments and fake tree branches that, honestly, didn’t look very appealing. I wanted to change that and give our apartment door a nicer, festive look. I used what I had, as with the advent calendar: scraps of felt (from the children’s board), white wool that I received as a present, scissors, a glue gun for attaching the ornaments, pencil for tracing the shapes into felt, pins for attaching the template to the fabric, (not in the picture)and mini red ornaments. The only thing I bought at a local craft store was a Styrofoam wreath, which was quite inexpensive. I suppose there must be a way DIY that too, but I didn’t have the time to figure that out!
Here’s how I did our wreath:
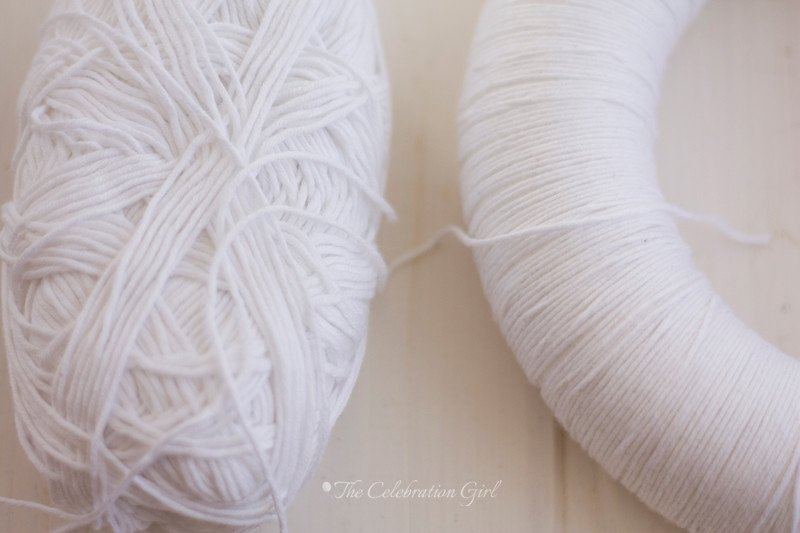
1) Wrap the wool tightly around the Styrofoam wreath. Using white on white is a little bit more forgiving, but if you are using another colour, make sure not to leave uncovered spots! I attached the last bit of thread with drop of hot glue.
2) Make a template for a holly leaf. I used a cookie cutter, and traced it into paper, then attached the paper to the fabric and cut the shapes with scissors. I used regular scissors, but they also look really pretty with zig zag ones.
3) Stitch the center of each leaf, to give it some shape. I did it using the sewing machine, but you do it by hand as well.
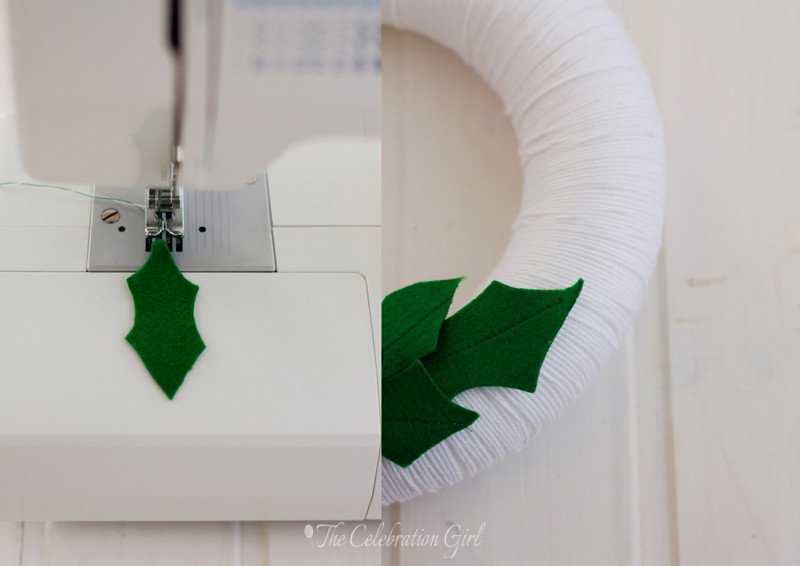
4) Attach the leaves to the wreath using a hot glue gun.
5)Remove the hangers from the ornaments. Put a drop of hot glue in the place where you plan to attach them, and place the ornaments on top of it, aperture facing down. Ready!
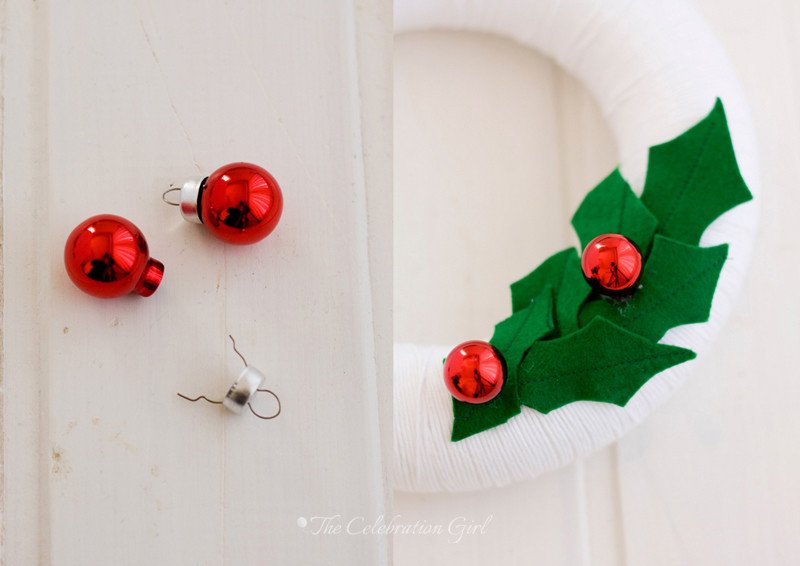
Do you hang wreaths in your door? Do you change them every year or do you use the same one? What colors do you use? Please, share!
See you tomorrow with the first recipes!

Con sabor latino…
Buenos días queridos amigos, y bienvenidos al 2do día del calendario de adviento de The Celebration Girl! Espero que estén pasando un fin de semana maravilloso!
Nosotros inauguramos la temporada navideña de la mejor manera: con una fiesta! Luka y Zoe participaron en una celebración dedicada a “decorar el arbol”de navidad, que incluía música, cocina (la cupcake de la tercera foto fue decorada por Luka!) y baile, así que allí fuimos ayer por la mañana. Hace ya un tiempo que venían excitados acerca de todo lo relativo a la navidad, porque en la escuela han estado aprendiendo villancicos y otras canciones navideñas desde principios de noviembre, pero cuando vieron el arbol y todas las decoraciones en pie, el viernes, esa excitación escaló hasta las nubes. Luka incluso se despertó ayer por la mañana preocupado por si el arbol habia desaparecido durante la noche, y fue corriendo al living a ver si allí estaba aún. Tendrían que ver cómo sus caritas se iluminan cuando ven las lucecitas titilar delante de sus ojos, con cuanto cuidado tocan las decoraciones, casi acariciandolas, y cómo miran la estrella con ojos soñadores. Es mágico.
Cuando regresamos a casa, luego de la fiesta, hicimos un arbol de felpa para nuestra felt board, un bosque nevado y ropa de invierno para los habitantes. Nada sofisticado, sólo un par de recortes para marcar la estación. La forma en que lo hacemos es “a demanda”: yo saco todos los sobrantes de felpa y tomo las tijeras, y Luka y Zoe me van diciendo qué quieren que recorte, o bien recortan ellos mismos lo que pueden (aun están aprendiendo a usar las tijeras y las suyas, de entrenamiento, no son buenas para cortar tela). Cada vez que actualizamos nuestra board pasamos al menos un par de horas sentados juntos alrededor de la mesa, y luego acomodamos y re acomodamos las piezas una y otra vez. Eso sí, nuestros paisajes son bastante poco ortodoxos: en este momento, por ejemplo, los bosques de invierno alojan un leon, una zebra, una jirafa y un hipopótamo porque su película favorita es Madagascar 😉
Algunos de ustedes me han preguntado cuales son las actividades que pensamos incluir en nuestro calendario de adviento. Aquí hay algunas: visitar una feria de navidad (hay varias a lo largo del mes), aprender a cantar villancicos, decorar tarjetas para mandar a la familia, hornear galletas, decorar galletas, decorar una casita de gengibre, leer un nuevo libro de navidad (compramos uno nuevo cada año), hacer guirnaldas, mirar películas navideñas, preparar chocolate caliente, envolver regalos, y otras que les iré comentando a medida que vayan pasando los días.
Ahora sí, pongamos manos a la obra para hacer la corona navideña!
Hacer una corona era uno de mis objetivos para este año. Cuando llegamos a Nicosia, hace 5 años, no compramos ninguna y, desde entonces, hemos tenido en la puerta sólo un manojo de ornamentos y ramas de plastico no demasiado bellas. Quise cambiar eso, quise darle a la puerta de nuestro departamento un aire festivo y por eso hice esta corona. Usé para la misma, como para el calendario, cosas que ya tenía en casa: retazos de felpa que me habian sobrado de la board, ornamentos viejos, lana que me habian regalado hace un tiempo, tijeras, una pistola de cola/pegamento caliente, un lapix para dibujar el modelo de las hojitas y alfileres para sostener el modelo a la tela al cortar. Sólo compré la rosca de tergopol, que salió unos pocos euros. Supongo que debe haber una manera de hacerla casera tambien, pero la verdad no tuve tiempo de averiguar cómo hacerlo!
Aquí les dejo el paso a paso:
1) Envuelvan la rosca de telgopor con la lana, cuidando que no queden espacios entre vuelta y vuelta. Si usan blanco sobre blanco, como yo, pueden dejar un espacio de vez en cuando porque no se notará tanto, pero tengan mucho más cuidado si usan lana de otro color! Cuando terminé de envolver toda la rosca, yo pegué el ultimo hilo con una gota de pegamento caliente.
2) Hagan un modelo para las hojas de muerdago. Yo usé un cortante de galletitas, lo tracé en papel, y luego adherí el papel a la tela con alfileres para cortar. Yo usé tijeras comunes, pero tambien quedan muy bonitas cortadas con tijeras de zig zag.
3) Hagan una línea de puntadas por el medio de cada hojita, para darles textura. Yo lo hice a máquina, pero pueden hacerlo tranquilamente a mano (sólo lleva más tiempo)
4)Adhieran las hojitas a la corona con una gota de pegamento caliente.
5) Retiren los cabitos de los ornamentos. Coloquen una gota de pegamento caliente en el lugar donde quieren colocarlos, y adhieranlos al mismo, teniendo cuidado que el hueco quede cabeza abajo. Y listo!
Ustedes cuelgan coronas en sus puertas? Hacen una nueva cada año o usan la misma? De qué color es la que tienen este año Cuentenme!
Nos vemos mañana con las primeras recetas!
by Marcela M. | Dec 1, 2012 | Blog, Crafts and DIY

Good morning friends! It’s Christmas time, yay! I looooove this time of the year! The streets and shops are full of lights and just looking at them makes me happy!
Welcome to the first post of TCG’s virtual advent calendar, where you will get 25 posts full of holiday cheer, 1 during each day of the advent. Posts will include crafts, recipes, DIY gift ideas, table settings, stories about my own Christmases and traditions, and much more. I have made an effort to make sure that what I share with you is doable wherever you live, because the readership of this blog comes from very different places, and I know it can be frustrating to fall in love with an idea only to discover that we cannot do it because we can’t get the necessary materials at home. So all recipes will be fairly simple, all crafts will be made with recycled materials that you most probably already have at home and most gifts ideas will be handmade, because these are tough financial times for most parts of this world.I hope you will like it!
Now let’s start by decorating the house!
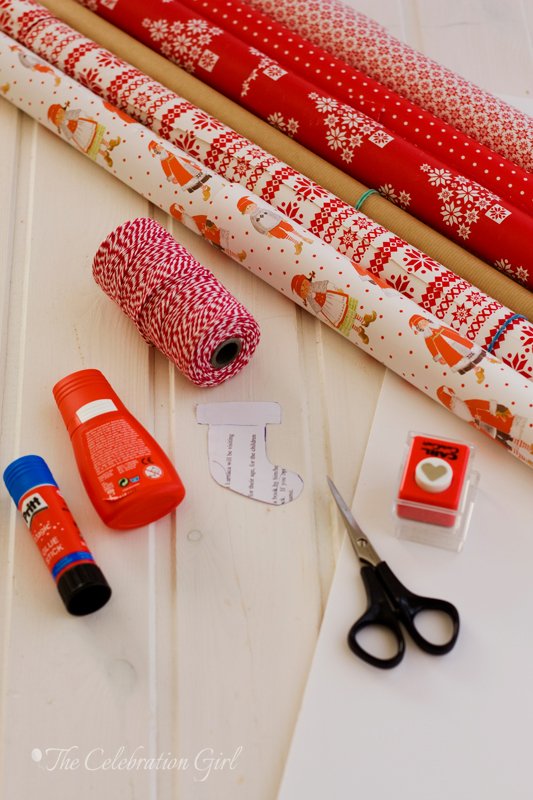
Today’s post is a DIY for a very easy advent calendar that I made for us this year and that it’s easy enough for you to make at home with your children, if you don’t have one ready yet.
This is, in fact, my very first advent calendar. Ever. I never saw them in Argentina, when I was growing up, nor do I think they are a part of our Christmas tradition. I knew they existed because my mom was subscribed to Good Housekeeping Magazine and, every December, we would see the beautiful ideas from editors and readers but, for some strange reasons, I never thought of making one myself. Until this Christmas!
As I mentioned above, this year I wanted all my crafts to be made with recycled materials, so I used scraps of different wrapping papers from last Christmas, a foam board that I had used for an art project (you can also use a Styrofoam board), red and white twine, a mini heart punch, scissors and glue. These are the papers I had at home, but you can use any paper and color you have. If you can’t find twine, you can use any other thread, preferably thick as the ones used for embroidering, or yarn, or ribbon, or you can omit it altogether and simply pin the shapes to the board. If you don’t have a heart punch (I know in many countries punches can be pricey or very hard to get), you can just cut any shape of your choosing with scissors.
Here is how I made it:
1)First, I covered the board with Kraft paper. If the papers you chose for the stockings are very colorful chose a neutral background for the board so that they don’t clash. If you are planning to use neutral colors for the stockings, you may chose a more vibrant one as background.
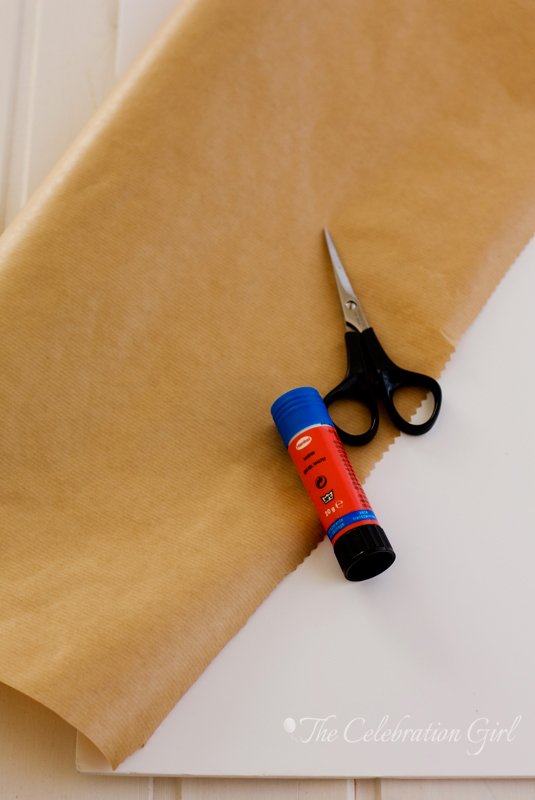
2) I then drew a template for a stocking, according to the size of my board, I checked to see that it was small enough so that I could fit 25 of them and trimmed it as necessary. Then I chose 5 different papers and traced 10 stockings with my template in each of them (5 looking to the left and 5 looking to the right). I cut them all and glued them to form a stocking. I put glue only on the bottom and on the left and right side, so that they could be opened as a real stocking. I am planning to insert a paper each day with a Christmas related activity (more on that later)
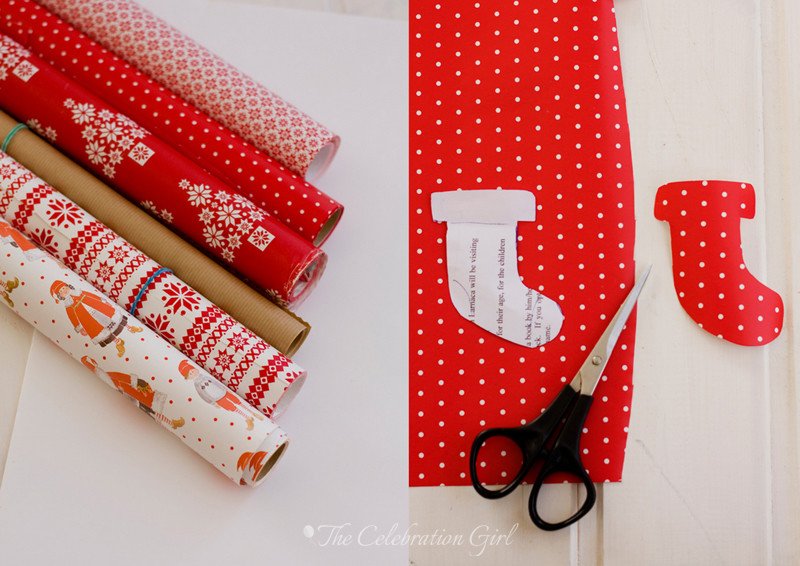
3) Once the stockings were ready, I punched 25 hearts and I glued them to each stocking. I didn’t write the numbers until I arranged all stockings on the board.
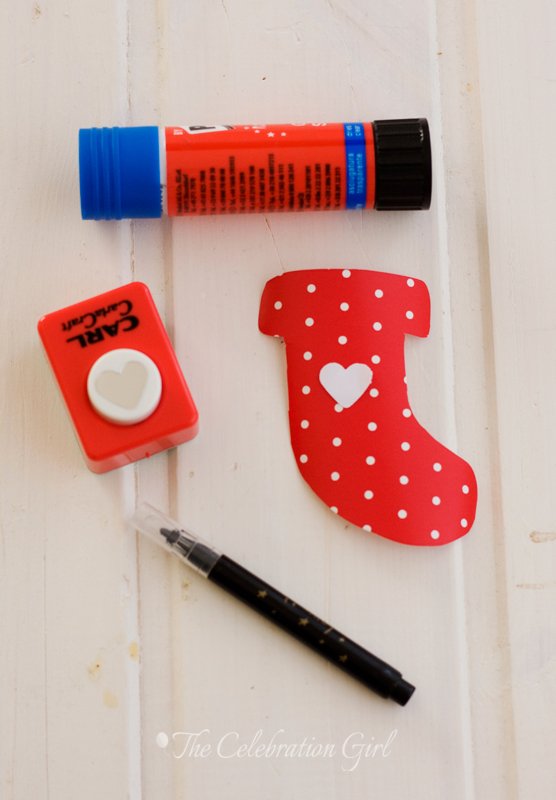
4) I arranged the stockings on the board, mixing the designs, then I cut a strip of paper to “hang”the stockings and I passed twine by it. I glued the twine at the sides, and at the end of each side, I glued a ribbon made with the same twine.
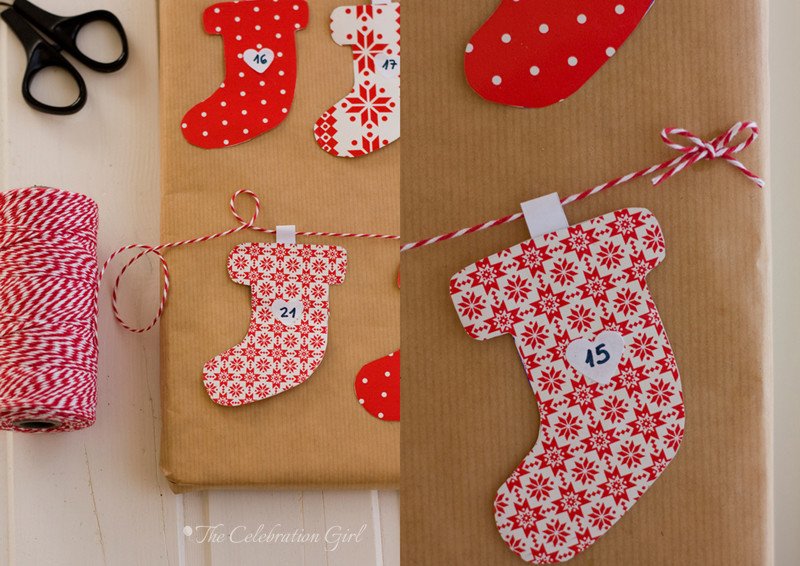
And that was it!
Here’s how it looks:
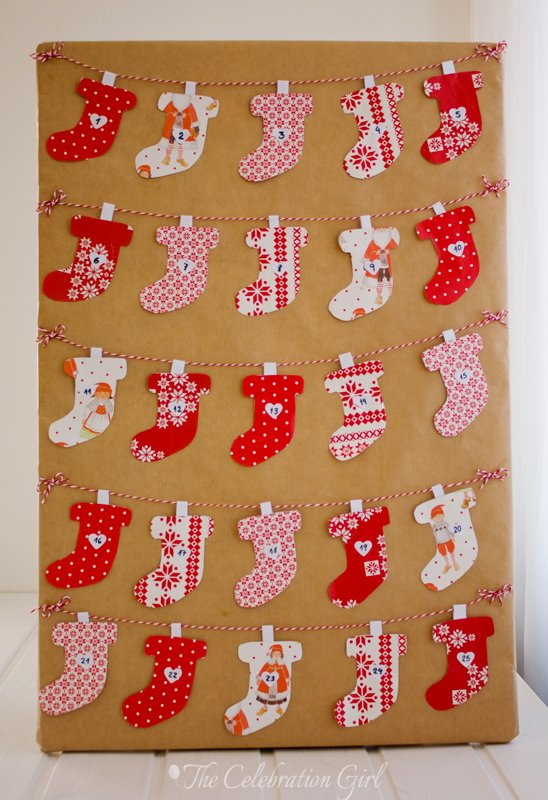
Since the stockings are very small, we are not planning to add presents in them. We want to encourage our children to think about Christmas as a time for sharing, for being with family, so what we planned were advent activities instead. Each day, we will add a strip of paper with the activity to the corresponding stocking. Some activities will come with a present: a “tool”for making the designed activity, some will not. We are hoping to make this our advent tradition, one that will help build meaningful memories together.
Now I would love if you would share with me YOUR traditions for this time of the year: Do you use advent calendars? Do you buy them or do you make them yourselves? What are you favorite advent activities and traditions? And your favorite food? I would love to know!
Have a beautiful Saturday and see you tomorrow with another advent post!
Con sabor latino…
Buenos días amigos! Llegó el adviento y ya la navidad se siente en las calles, qué felicidad! Amo esta época del año!
Bienvenidos al primer post del calendario de adviento virtual de TCG, uno en el cual tendrán 25 posts llenos de espíritu festivo, 1 durante cada uno de los días que dura el adviento. Los posts incluirán recetas, manualidades, ideas para regalos hechos en casa, formas de poner la mesa, historias acerca de mis navidades y tradiciones y muchas cosas más. Este año quise asegurarme que todo lo que compartiré con ustedes pueda ser hecho en cualquier lugar que se encuentren, porquelos lectores de este blog vienen de lugares muy diferentes, y sé por experiencia propia cuan frustrante es enamorarse de una idea para luego desilusionarse porque no se encuentran los materiales donde uno vive. Así que las recetas serán sencillas (nadie tiene tiempo para cosas complicadas en esta época!), las manualidades estarán hechas con material reciclado que seguramente tienen en casa, y la mayor parte de las ideas de regalos serán para hacer a mano, porque estos son tiempos financieros muy complicados para la mayor parte del mundo. Espero que les guste!
Ahora comencemos por decorar la casa!
El post de hoy es un DIY para un calendario de adviento, el que hice yo este año para mi casa. En realidad este es mi primer calendario de adviente. En toda mi vida. No recuerdo haberlos visto nunca durante mi infancia en Argentina, ni creo que formen parte de la tradición argentina para estas fechas. Los conocía, sí, porque mi mamá estaba suscripta a la revista Good Housekeeping y, cada diciembre, veía en sus páginas las bellas ideas que editores y lectores contribuian pero, por alguna extraña razón, nunca se me ocurrió hacer uno…hasta este año!
Como mencioné más arriba, este año quise hacer todo con material reciclado, y este calendario no fue la excepción. Por ello utilicé materiales que tenía en casa: restos de papeles de regalos de la navidad pasada, una placa que había usado para un proyecto de arte viejo (pueden usar una placa de tergopol), hilo, tijera, plasticola y un troquel en forma de corazón. Si no encuentran el hilo de dos colores ( En Argentina vi que lo vendia como “hilo encerado”, del que se usa en las carnicerías), puede usar cualquier otro hilo más o menos grueso, tipo hilo de bordar, o yute, o una cinta…o bien omitirlo y pegar las formas a la placa con una chinche! Si no tienen troquel o son muy caros, pueden cortar el corazon o un circulo con la tijera.
Aquí estan las instrucciones para hacerlo:
1) Primero cubrí la placa con papel Kraft. Si usan papeles muy coloridos, traten de elegir un color neutro para el fondo, pero si los papeles son más bien neutros, pueden elegir un fondo vibrante para que resalte.
2) Despues dibujé ( a mano) una bota en una hoja de papel para que me sirviera de modelo. La medí de acuerdo al tamaño de la placa, para asegurarme de poder hacer caber 25 medias en la misma, y luego corté 10 por cada color (5 orientadas hacia la derecha y 5 hacia la izquierda, para luego poder unirlas). Luego las corté y las uní colocando plasticola sólo en la parte de abajo y los costados (para que pudieran abrirse luego)
3) Una vez que las medias estuvieron listas, corté los corazones y los pegué a las medias. No puse los números hasta ordenar las medias en la placa, para asegurarme que me gustaba como quedaban una al lado de la otra.
4) Ordené las medias en la placa, y escribí los números con fibra negra. Luego, corté tiritas de papel blanco, y las pegué a las medias. Pasé el hilo por medio de las tiritas (5 por cada linea) y lo pegué a los costados. Finalmente hice moños con el mismo hilo y los pegué al final de cada tira.
Y eso fue todo!
Como las mediecitas son muy chiquitas, no pondremos regalos en ellas. Queremos incentivar la idea de que las fiestas son para compartir momentos con la familia, por eso decidimos concentrarnos en hacer actividades juntos, y cada día agregaremos a la media correspondiente un papelito con alguna “actividad del adviento”. Algunas actividades vendran con regalito: un “instrumento”para llevarlas a cabo, otras no. Tenemos la esperanza que estos se transforme en una tradición familiar y que nos ayude a crear recuerdos hermosos junto a nuestros hijos.
Ahora me encantaria que me contaran SUS tradiciones para esta epoca: Usan calendarios de adviento? los compran o los hacen en casa? cuales son sus tradiciones y actividades preferidas en esta epoca del año? Y las comidas que más les gustan? Me encantaría que las compartieran conmigo!
Que tengan un hermoso sábado! Nos vemos mañana!
by Marcela M. | Oct 15, 2012 | Blog, Crafts and DIY
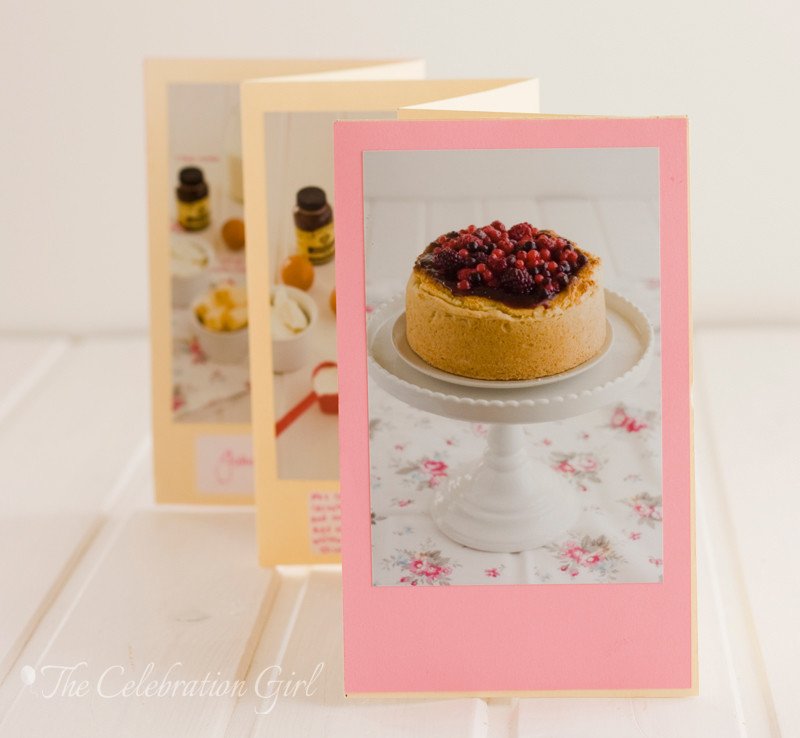
Earlier this year, when summer was coming to an end and we were getting ready for our children to go back to school, my dear friend Amanda posted something on her facebook wall that called my attention. It was a link to a blog I didn’t know about, called Far Far Away and written by a girl named Fiona who, in the post Amanda had linked to, was talking about her grandmother, about baking together and the wonderful memories built around the kitchen, about recipe boxes and real paper recipe cards, about letters and about sharing. In that same post, Fiona kindly shared a recipe that her grandmother had received as part of a “Favourite recipe club” that had had women mailing recipes all over the country decades ago, and she had the most wonderful idea: organizing a recipe swap herself, the old fashioned way, one which required a recipe to be handwritten in some nice paper, put on an envelope, and posted in the mail.
I immediately loved the idea because, you see, I’m a romantic. And, as much as I adore the internet and the endless possibilities it has brought into our lives, I miss the magic of handwritten letters and postcards, the expectation of waiting for the postman, the extra care that we used to put in finding a pretty paper and a pen with nice ink to write a special note, the special feeling we used to get when noticing the handwriting of someone we loved in an envelope addressed to us, and how much closer that made us feel.
Fiona’s idea reminded me of my teenage years, when I met my pen pal, Avinash (from India) and how his letters opened a new world to me. I met Avi through International Youth Service, a Finnish organization that sought to connect people from all over the world, for them to become pen pals (pretty much the only way to do it in those pre-internet times). Back then, letters would take a long time to travel from Argentina to India and back, but every two months I would go to the post office with my heart full of expectation, eager to see what Avi had written to me. Our letters were normally 10/11 pages long because there was so much we wanted to tell each other! We always added pictures, paper clippings from magazines, recipes, little gifts that wouldn’t get confiscated by the post office, whatever could help the other get closer to our culture, to our daily life . Every letter was special, every letter was treasured and even now, 20 years later, when we are both married with children, and with less time to keep in touch, whenever I open the box where his letters are stored, I can still feel as excited and as happy as I did when I was 16 years old. Avinash and I never met face to face, but he is and will always be a very important part of my life.
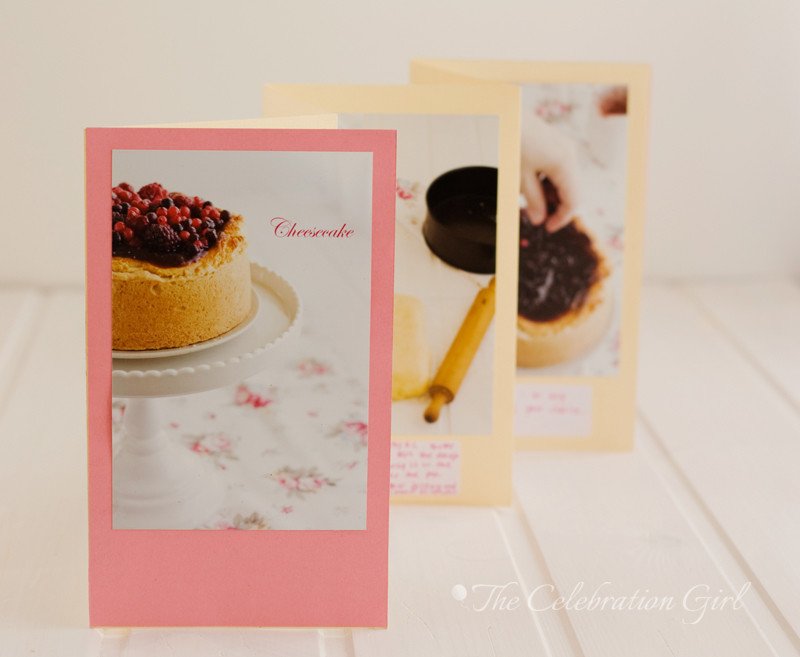
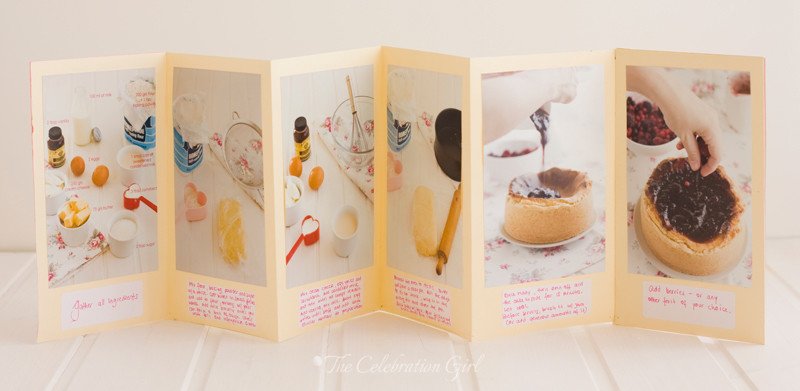
I registered for the swap and, at about the same time, I saw a recipe keeping idea that I loved in the August edition of Martha Stewart Living magazine: a Family Recipe Album. One special album for each special recipe, with step by step pictures of the way the recipe is made, put in an accordion folded piece of paper, and with the instructions added in small labels, under each picture. And when I saw this idea, I thought about all those recipes from my grandmothers that I used to love and that are now lost forever because I didn’t record them in time, or with enough detail, and I thought about how nice it would be for me now to have their picture at work (even if only one of their hands) , to be able to feel them even closer every time I make the dish.
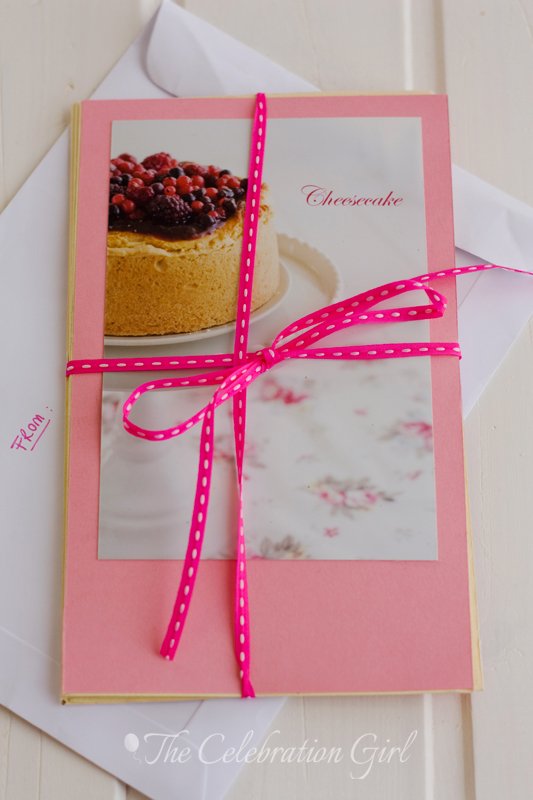
So I made Alison (the girl assigned to me for sending her a recipe) a little album of my favourite cheesecake (the one I shared with you back in June) with some extra pictures and, since it took me a while to complete the project, I also added the recipe for alfajores cordobeses, written in a cheery recipe card designed by Mayi Carles (It’s free printable, which you can find HERE) . I put them in an envelope, wrote a little note and walked to the post office to chose the stamps and put it in the mail box.
And all of this got me thinking…Holiday season is almost upon us and, with it, the chance to cook together, to craft together, to share special moments with the persons that we love. How about taking this opportunity to record those memories in ways that will allow us to pass down our family traditions to next generations? Let’s make these holidays special, let’s record, in whatever way we chose, the moments that fill our heart with joy, the things that make each of our loved ones special in our eyes, the tiny things, the daily things. Maybe one day, decades down the road, a girl or a boy will open a little box, like Fiona did back in the springtime, and be transported to a time they didn’t know, or to one they did and loved, and shared with us.
Have a wonderful week!
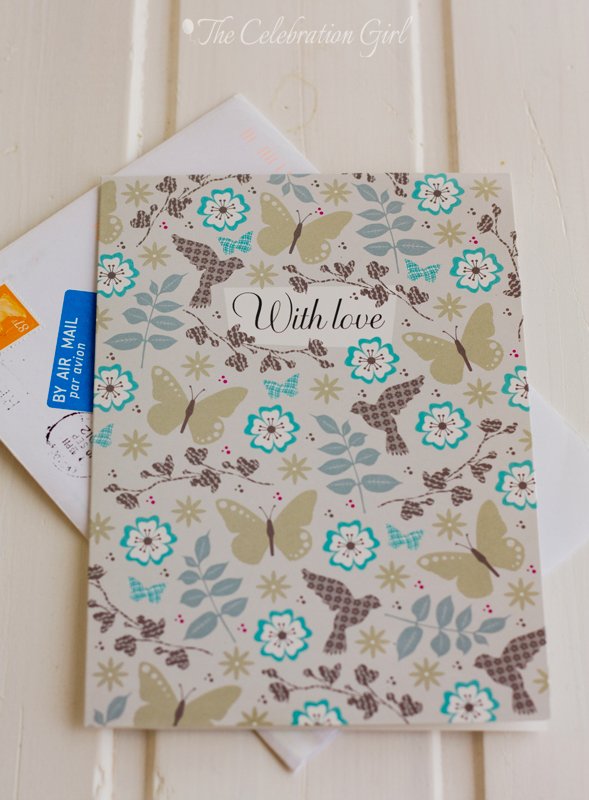
PS: The lovely card at the bottom of this post is the one I received as part of the swap, with a yummy recipe that looks perfect for the holiday season! I’ll check with its author whether it is ok for me to share it with you here!
Con sabor latino…
Este año, cuando el verano estaba a punto de terminar y comenzábamos a prepararnos para la vuelta al colegio de mis hijos, mi querida amiga Amanda publicó algo que llamó mi atención en su página de facebook. Era un link a un blog llamado Far Far Away, escrito por una chica llamada Fiona, en el cual ella hablaba de su abuela, de cómo solían cocinar juntas y de los hermosos recuerdos forjados alrededor de la cocina, de recetarios y cajas de recetas, de cartas escritas en papel y del acto de compartir. En ese mismo post, Fiona nos acercaba una receta que su abuela había recibido como parte de un “club de recetas preferidas”, gracias al cual, décadas anteriores, mujeres de todo el pais habian intercambiado las mismas, enviándolas a gente desconocida, llevando y trayendo sabores nuevos a otras casas. Y Fiona tuvo una idea maravillosa: organizar un intercambio a la vieja usanza, con recetas escritas de puño y letra, en un papel bonito, puestas en un sobre, y enviadas por correo.
Inmediatamente me enamoré de la idea porque soy una romántica incurable y, si bien adoro internet y las posibilidades que nos brinda, aún extraño la magia de las cartas escritas a mano, la expectativa con que solíamos esperar la llegada del cartero, el cuidado especial que poníamos en elegir un papel bello y una lapicera de tinta bonita para escribir una notita, la sensación incomparable de ver la letra de alguien que amábamos en un sobre dirigido a nosotros y cuánto más cercanos eso nos hacía sentir de las personas queridas.
La idea de Fiona me recordó a mi adolescencia, cuando conocí a mi amigo por carta, Avinash (de la India) y cómo sus cartas me abrieron un mundo nuevo. Conocí a Avi gracias a International Youth Service, una organización finlandesa que se encargaba de poner en contacto gente de todas partes del mundo para ser amigos por correspondencia (la unica forma de conocer gente de otros lugares en esos tiempos pre-internet). En esa epoca, las cartas tardaban meses en hacer el recorrido Argentina-India y viceversa, pero cada dos meses, invariablemente llegaba el ansiado momento de caminar hacia el correo, con el corazón lleno de expectativa, ansiosa por ver qué habría escrito mi querido Avinash. Nuestras cartas eran largas, habitualmente de 10/11 páginas, porque teniamos muchas cosas que contarnos, y siempre incluiamos fotos, recortes, recuerdos y todo aquello que nos parecía que podía acercar al otro a nuestra cultura y nuestra vida cotidiana. Cada carta era especial, cada carta era un tesoro y, aun hoy, 20 años despues y cuando ya ambos estamos casados y con hijos, abrir la cajita en que sus cartas están guardadas es verme transportada a mis 16 años y a la alegría que sentí con cada una de ellas. Avinash y yo nunca nos conocimos personalmente, pero gracias a sus cartas él es, y será siempre, una persona muy importante en mi vida.
Al mismo tiempo que me registré para el intercambio de recetas, ví en la edición de agosto de la revista Martha Stewart Living, una idea que me encantó: la revista proponía hacer un album de fotos de cada receta familiar, con una foto por cada paso de la misma, colocadas en papel doblado en forma de acordeón, y con una etiqueta pequeña que contuviera las instrucciones correspondientes a cada foto. Cuando ví esta idea pensé en todas esas recetas de mis abuelas que hemos perdido para siempre por no haberlas registrado a tiempo, o con suficiente detalle, y en cuan hermoso hubiera sido tener una foto de ellas haciendolas, aunque más no fuera una foto de sus manos, para sentirlas más cerca cada vez que fuera a hacerlas yo misma.
Por eso hice un pequeño album de mi cheesecake para Alison (la chica a quien debía enviarle mi receta), con unas fotos más que aquellas que compartí con ustedes en Junio y, como envié la misma tarde, agregué tambien la receta de los alfajores, escrita en unas tarjetas gratis, preciosas, diseñadas por la talentosísima Mayi Carles. Las coloqué en un sobre, junto con una pequeña notita, y caminé hacia el correo a comprar las estampillas y ponerlo en el buzón.
Y todo esto me dejó pensando…la epoca de las fiestas está casi aquí y, con ella, la oportunidad de cocinar y de compartir momentos especiales con nuestros seres queridos ¿por qué no tomar esta oportunidad para registrar todos esos momentos, todos esos recuerdos de forma que podamos transmitir a generaciones futuras nuestras tradiciones familiares? Hagamos estas fiestas especiales, usemoslas como oportunidad para dejar memoria de todos esos momentos que llenan nuestro corazón de alegría, de todas esas pequeñas cosas que hacemos juntos, de todo aquello que hace especiales a quienes amamos, de todas esas cosas pequeñas, diarias, que nos hacen quienes somos. Quizas un dia, décadas mas adelante, eso que registramos hoy haga que una chica o un chico, como Fiona en la última primavera, se vean transportados a tiempos que no conocieron o a tiempos que amaron y compartieron con nosotros.
Que tengan una semana maravillosa!
Pd: la última foto de este post muestra la hermosa tarjeta que recibí como parte del intercambio. Pediré autorización para compartir la receta, que se ve deliciosa, con ustedes!
PS2: ¿Ya se inscribieron en el sorteo por un puesto en Merry click? Si lo lo hicieron, aun tienen tiempo,solo tienen que ir a este post y seguir las instrucciones!


