Good morning friends! It’s Christmas time, yay! I looooove this time of the year! The streets and shops are full of lights and just looking at them makes me happy!
Welcome to the first post of TCG’s virtual advent calendar, where you will get 25 posts full of holiday cheer, 1 during each day of the advent. Posts will include crafts, recipes, DIY gift ideas, table settings, stories about my own Christmases and traditions, and much more. I have made an effort to make sure that what I share with you is doable wherever you live, because the readership of this blog comes from very different places, and I know it can be frustrating to fall in love with an idea only to discover that we cannot do it because we can’t get the necessary materials at home. So all recipes will be fairly simple, all crafts will be made with recycled materials that you most probably already have at home and most gifts ideas will be handmade, because these are tough financial times for most parts of this world.I hope you will like it!
Now let’s start by decorating the house!
Today’s post is a DIY for a very easy advent calendar that I made for us this year and that it’s easy enough for you to make at home with your children, if you don’t have one ready yet.
This is, in fact, my very first advent calendar. Ever. I never saw them in Argentina, when I was growing up, nor do I think they are a part of our Christmas tradition. I knew they existed because my mom was subscribed to Good Housekeeping Magazine and, every December, we would see the beautiful ideas from editors and readers but, for some strange reasons, I never thought of making one myself. Until this Christmas!
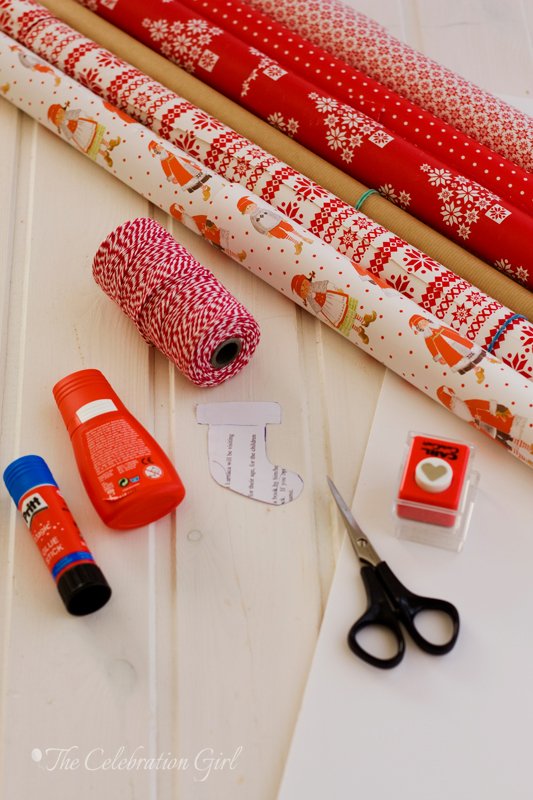
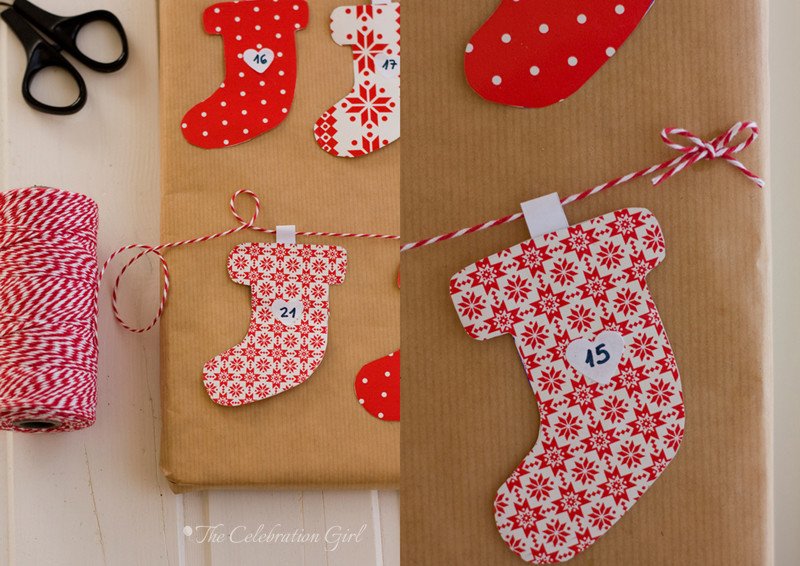
As I mentioned above, this year I wanted all my crafts to be made with recycled materials, so I used scraps of different wrapping papers from last Christmas, a foam board that I had used for an art project (you can also use a Styrofoam board), red and white twine, a mini heart punch, scissors and glue. These are the papers I had at home, but you can use any paper and color you have. If you can’t find twine, you can use any other thread, preferably thick as the ones used for embroidering, or yarn, or ribbon, or you can omit it altogether and simply pin the shapes to the board. If you don’t have a heart punch (I know in many countries punches can be pricey or very hard to get), you can just cut any shape of your choosing with scissors.
Here is how I made it:
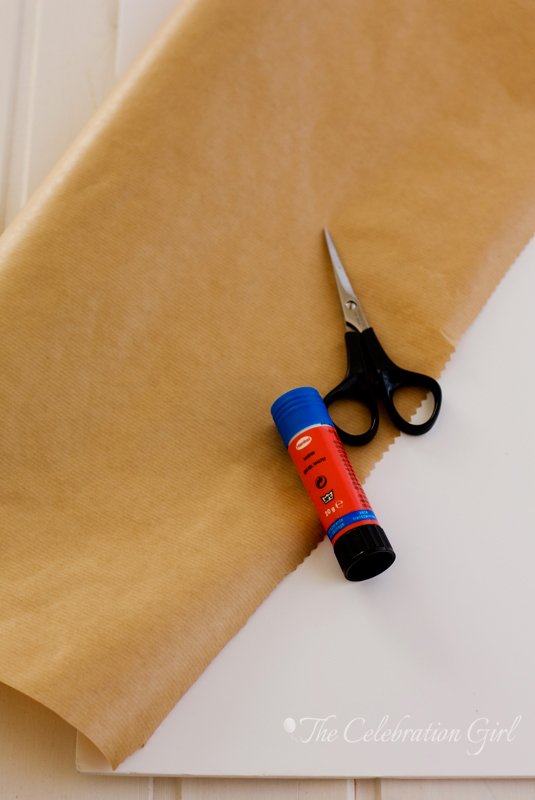
1)First, I covered the board with Kraft paper. If the papers you chose for the stockings are very colorful chose a neutral background for the board so that they don’t clash. If you are planning to use neutral colors for the stockings, you may chose a more vibrant one as background.
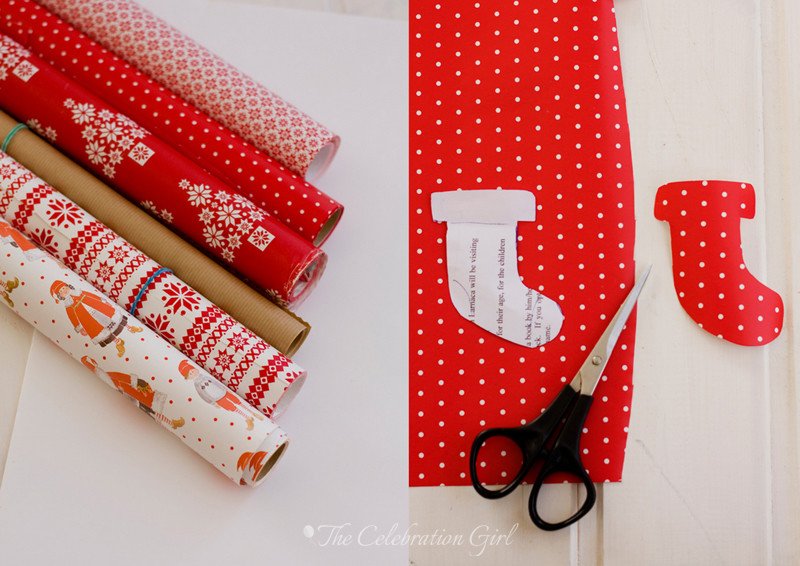
2) I then drew a template for a stocking, according to the size of my board, I checked to see that it was small enough so that I could fit 25 of them and trimmed it as necessary. Then I chose 5 different papers and traced 10 stockings with my template in each of them (5 looking to the left and 5 looking to the right). I cut them all and glued them to form a stocking. I put glue only on the bottom and on the left and right side, so that they could be opened as a real stocking. I am planning to insert a paper each day with a Christmas related activity (more on that later)
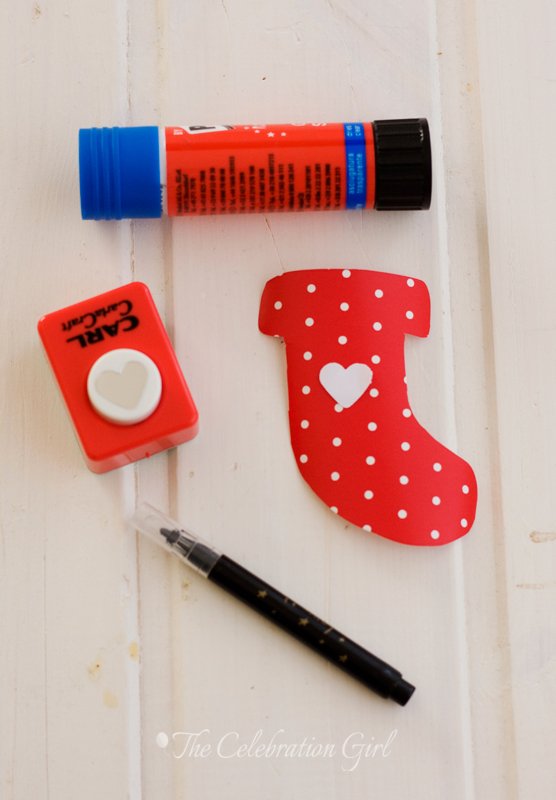
3) Once the stockings were ready, I punched 25 hearts and I glued them to each stocking. I didn’t write the numbers until I arranged all stockings on the board.
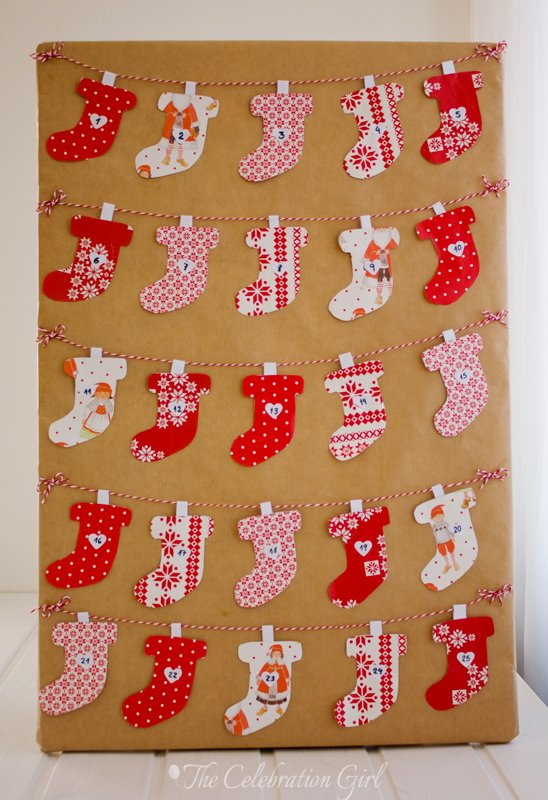
4) I arranged the stockings on the board, mixing the designs, then I cut a strip of paper to “hang”the stockings and I passed twine by it. I glued the twine at the sides, and at the end of each side, I glued a ribbon made with the same twine.
And that was it!
Here’s how it looks:
Since the stockings are very small, we are not planning to add presents in them. We want to encourage our children to think about Christmas as a time for sharing, for being with family, so what we planned were advent activities instead. Each day, we will add a strip of paper with the activity to the corresponding stocking. Some activities will come with a present: a “tool”for making the designed activity, some will not. We are hoping to make this our advent tradition, one that will help build meaningful memories together.
Now I would love if you would share with me YOUR traditions for this time of the year: Do you use advent calendars? Do you buy them or do you make them yourselves? What are you favorite advent activities and traditions? And your favorite food? I would love to know!
Have a beautiful Saturday and see you tomorrow with another advent post!
Con sabor latino…
Buenos días amigos! Llegó el adviento y ya la navidad se siente en las calles, qué felicidad! Amo esta época del año!
Bienvenidos al primer post del calendario de adviento virtual de TCG, uno en el cual tendrán 25 posts llenos de espíritu festivo, 1 durante cada uno de los días que dura el adviento. Los posts incluirán recetas, manualidades, ideas para regalos hechos en casa, formas de poner la mesa, historias acerca de mis navidades y tradiciones y muchas cosas más. Este año quise asegurarme que todo lo que compartiré con ustedes pueda ser hecho en cualquier lugar que se encuentren, porquelos lectores de este blog vienen de lugares muy diferentes, y sé por experiencia propia cuan frustrante es enamorarse de una idea para luego desilusionarse porque no se encuentran los materiales donde uno vive. Así que las recetas serán sencillas (nadie tiene tiempo para cosas complicadas en esta época!), las manualidades estarán hechas con material reciclado que seguramente tienen en casa, y la mayor parte de las ideas de regalos serán para hacer a mano, porque estos son tiempos financieros muy complicados para la mayor parte del mundo. Espero que les guste!
Ahora comencemos por decorar la casa!
El post de hoy es un DIY para un calendario de adviento, el que hice yo este año para mi casa. En realidad este es mi primer calendario de adviente. En toda mi vida. No recuerdo haberlos visto nunca durante mi infancia en Argentina, ni creo que formen parte de la tradición argentina para estas fechas. Los conocía, sí, porque mi mamá estaba suscripta a la revista Good Housekeeping y, cada diciembre, veía en sus páginas las bellas ideas que editores y lectores contribuian pero, por alguna extraña razón, nunca se me ocurrió hacer uno…hasta este año!
Como mencioné más arriba, este año quise hacer todo con material reciclado, y este calendario no fue la excepción. Por ello utilicé materiales que tenía en casa: restos de papeles de regalos de la navidad pasada, una placa que había usado para un proyecto de arte viejo (pueden usar una placa de tergopol), hilo, tijera, plasticola y un troquel en forma de corazón. Si no encuentran el hilo de dos colores ( En Argentina vi que lo vendia como “hilo encerado”, del que se usa en las carnicerías), puede usar cualquier otro hilo más o menos grueso, tipo hilo de bordar, o yute, o una cinta…o bien omitirlo y pegar las formas a la placa con una chinche! Si no tienen troquel o son muy caros, pueden cortar el corazon o un circulo con la tijera.
Aquí estan las instrucciones para hacerlo:
1) Primero cubrí la placa con papel Kraft. Si usan papeles muy coloridos, traten de elegir un color neutro para el fondo, pero si los papeles son más bien neutros, pueden elegir un fondo vibrante para que resalte.
2) Despues dibujé ( a mano) una bota en una hoja de papel para que me sirviera de modelo. La medí de acuerdo al tamaño de la placa, para asegurarme de poder hacer caber 25 medias en la misma, y luego corté 10 por cada color (5 orientadas hacia la derecha y 5 hacia la izquierda, para luego poder unirlas). Luego las corté y las uní colocando plasticola sólo en la parte de abajo y los costados (para que pudieran abrirse luego)
3) Una vez que las medias estuvieron listas, corté los corazones y los pegué a las medias. No puse los números hasta ordenar las medias en la placa, para asegurarme que me gustaba como quedaban una al lado de la otra.
4) Ordené las medias en la placa, y escribí los números con fibra negra. Luego, corté tiritas de papel blanco, y las pegué a las medias. Pasé el hilo por medio de las tiritas (5 por cada linea) y lo pegué a los costados. Finalmente hice moños con el mismo hilo y los pegué al final de cada tira.
Y eso fue todo!
Como las mediecitas son muy chiquitas, no pondremos regalos en ellas. Queremos incentivar la idea de que las fiestas son para compartir momentos con la familia, por eso decidimos concentrarnos en hacer actividades juntos, y cada día agregaremos a la media correspondiente un papelito con alguna “actividad del adviento”. Algunas actividades vendran con regalito: un “instrumento”para llevarlas a cabo, otras no. Tenemos la esperanza que estos se transforme en una tradición familiar y que nos ayude a crear recuerdos hermosos junto a nuestros hijos.
Ahora me encantaria que me contaran SUS tradiciones para esta epoca: Usan calendarios de adviento? los compran o los hacen en casa? cuales son sus tradiciones y actividades preferidas en esta epoca del año? Y las comidas que más les gustan? Me encantaría que las compartieran conmigo!
Que tengan un hermoso sábado! Nos vemos mañana!


Loved it! Easy, pretty and cheap! Great idea
I remember chocolate advent calendars from childhood, as something half magical and half exotic that my uncles would sometimes bring to us or send from Switzerland, but it was not a thing of every year. At catechism we also did color-it-yourself advent calendars with chores / activities every day (things like water the plants, make your bed, be nice to a stranger…).
Later, my mom made one out of felt, where we would take an ornament from the date in the calendar and secure it with a pin on a felt-tree, and it would only add to the excitement of the knowledge that Christmas day was close.
For preparing advent, my school organized every year a family trip to the woods so that every family would collect pine branches and pine nuts to make their own, fresh wreath. Then we would take it home and light a candle every Sunday of advent. I have nice memories of those outings, mostly it was a big picnic – pot luck with class mates and you got to see the brother-of-your classmate whom you secretly had a crush on 🙂 Oh junior high school.
Nosotros sí que hacemos calendario de adviento. Este año tenemos dos (uno de chocolate regalado y otro casero muy chulo)
Lo que + me gusta hacer con los peques es la carta para los Reyes Magos, es tan chulo escribirla y ver como la meten en el buzón con la ilusión…
Besitos, bonita
Raquel
Marce, q hermosa idea!! Yo recuerdo haber hecho uno en la escuela primaria, q como era un Deutsche Schule estaban mas afines con estas tradiciones…
Asi que hoy me levante y fui a cprar unos papeles de navidad y ya emprendi el proyecto. Demorare un tiempo, pq la idea de q realmente tga un significado trascendente para los nenes y quiero involucrarlos en el mismo.
Ansiosa de ver el de mañana.
Best wishes and even better good ideas for you!!
I have that same red and white wrapping paper as you. What great taste we have! 😉
🙂