Good morning dear friends, and welcome to the 2nd day of The Celebration Girl’s advent calendar! I hope you are having a lovely weekend.
We inaugurated the Christmas season in the best possible way: with a party! Luka and Zoe took part on a “decorate the tree” celebration, with music, baking (the cupcake below was decorated by Luka!) and dancing, so there we went yesterday morning. They have been very excited about the season for a while, because they have been learning Christmas carrols and songs at school since the beginning of November, but when they saw the tree and the rest of the decorations in place, on Friday, their excitement escalated to new heights. Luka woke up on Saturday morning worried that the tree may have “disappeared”overnight and went running to the living room, to verify that it was still there. And you should see how their faces light up when they see the lights, blinking before their eyes, with how much care they touch the ornaments, almost caressing them, and how they look at the star at the top with dreamy eyes. It is magical.
When we came back home, we made a felt tree and snowy woods for our Felt Board, as well as winter clothes for our felt people. Nothing fancy, just a few cutouts to mark the season. The way we do it is “on demand”: I get all scraps of felt out and a pair of scissors and Luka and Zoe either request some items or cut them themselves, if they can (they are still learning to use scissors and their training ones are not very good for cutting fabric). Each time we update the board, we spend a couple of hours doing so, and then we go back to it to rearrange everything. Our board landscapes are also a bit unorthodox, I must say. Right now, for example, the winter woods host a lion, a zebra, a hippopotamus and a giraffe because Madagascar is their current favourite movie 😉
A few of you have asked me about the activities that we have planned to include in our advent calendar. Here are a few of them: visit Christmas fairs (there are several, so we will see which ones we will attend when), learn to sing Christmas carrols, bake cookies, decorate cookies, decorate a gingerbread house, make cards to send to the family, make garlands, make tree ornaments, attend a chorus performance, drive through the city at night to see the Christmas lights, watch Christmas movies, make hot chocolate, wrap presents, and many more that I’ll share with you in the following days.
Now let’s begin crafting!
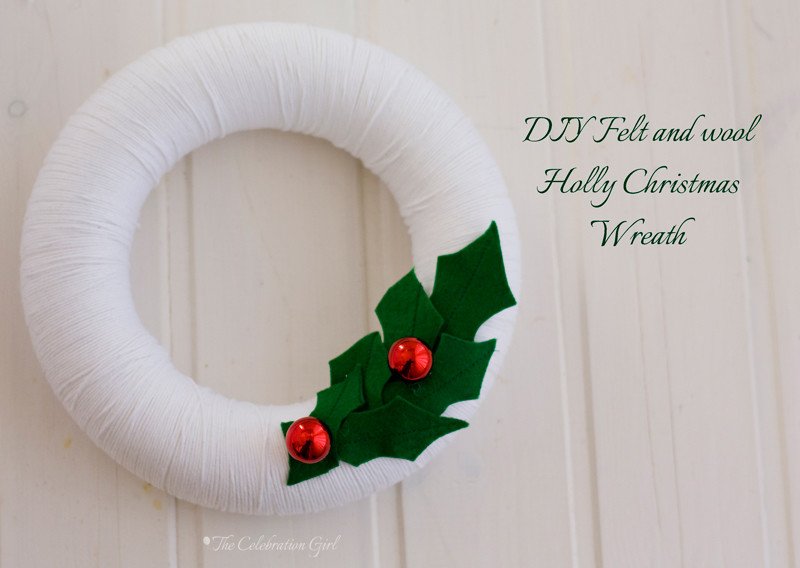
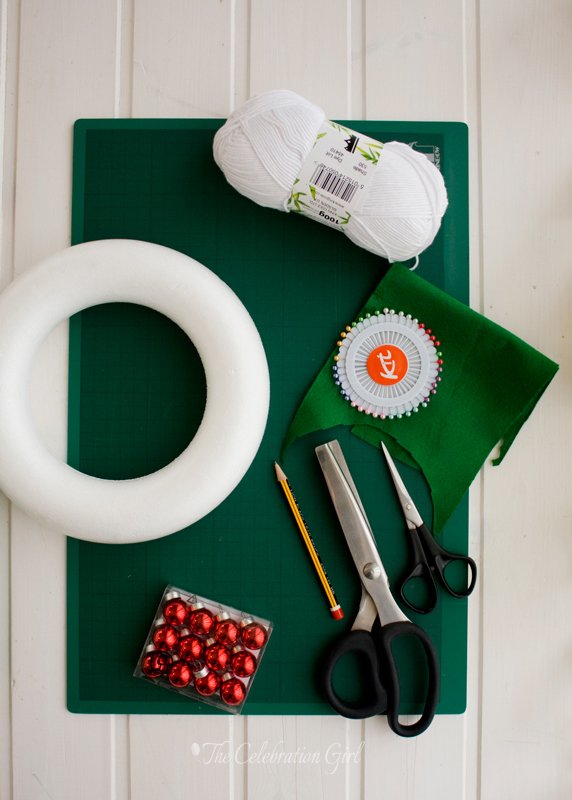
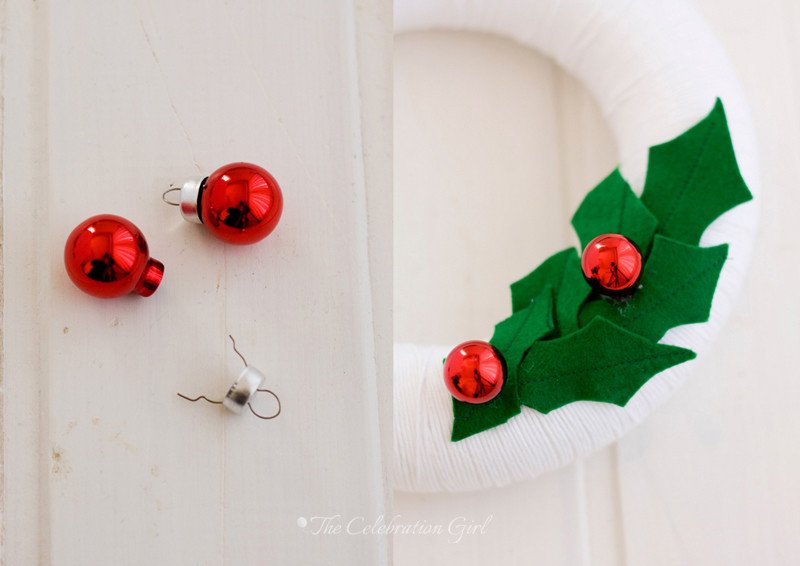
Making a wreath was another of my goals for this Christmas. We hadn’t bough one when we arrived to Nicosia, and for the past 5 years we had been using a cluster of ornaments and fake tree branches that, honestly, didn’t look very appealing. I wanted to change that and give our apartment door a nicer, festive look. I used what I had, as with the advent calendar: scraps of felt (from the children’s board), white wool that I received as a present, scissors, a glue gun for attaching the ornaments, pencil for tracing the shapes into felt, pins for attaching the template to the fabric, (not in the picture)and mini red ornaments. The only thing I bought at a local craft store was a Styrofoam wreath, which was quite inexpensive. I suppose there must be a way DIY that too, but I didn’t have the time to figure that out!
Here’s how I did our wreath:
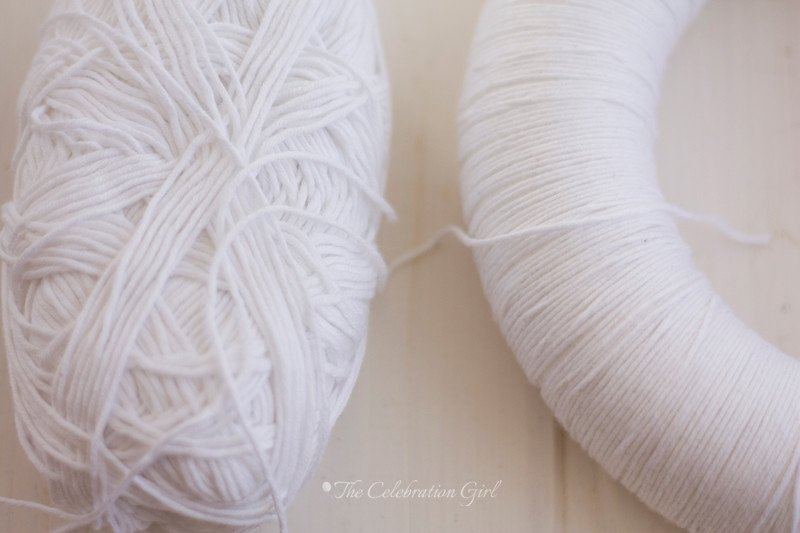
1) Wrap the wool tightly around the Styrofoam wreath. Using white on white is a little bit more forgiving, but if you are using another colour, make sure not to leave uncovered spots! I attached the last bit of thread with drop of hot glue.
2) Make a template for a holly leaf. I used a cookie cutter, and traced it into paper, then attached the paper to the fabric and cut the shapes with scissors. I used regular scissors, but they also look really pretty with zig zag ones.
3) Stitch the center of each leaf, to give it some shape. I did it using the sewing machine, but you do it by hand as well.
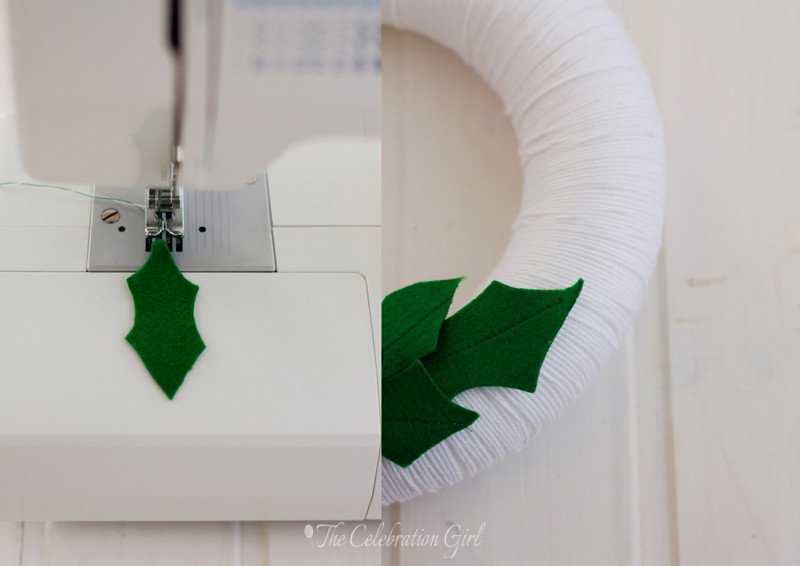
4) Attach the leaves to the wreath using a hot glue gun.
5)Remove the hangers from the ornaments. Put a drop of hot glue in the place where you plan to attach them, and place the ornaments on top of it, aperture facing down. Ready!
Do you hang wreaths in your door? Do you change them every year or do you use the same one? What colors do you use? Please, share!
See you tomorrow with the first recipes!
Con sabor latino…
Buenos días queridos amigos, y bienvenidos al 2do día del calendario de adviento de The Celebration Girl! Espero que estén pasando un fin de semana maravilloso!
Nosotros inauguramos la temporada navideña de la mejor manera: con una fiesta! Luka y Zoe participaron en una celebración dedicada a “decorar el arbol”de navidad, que incluía música, cocina (la cupcake de la tercera foto fue decorada por Luka!) y baile, así que allí fuimos ayer por la mañana. Hace ya un tiempo que venían excitados acerca de todo lo relativo a la navidad, porque en la escuela han estado aprendiendo villancicos y otras canciones navideñas desde principios de noviembre, pero cuando vieron el arbol y todas las decoraciones en pie, el viernes, esa excitación escaló hasta las nubes. Luka incluso se despertó ayer por la mañana preocupado por si el arbol habia desaparecido durante la noche, y fue corriendo al living a ver si allí estaba aún. Tendrían que ver cómo sus caritas se iluminan cuando ven las lucecitas titilar delante de sus ojos, con cuanto cuidado tocan las decoraciones, casi acariciandolas, y cómo miran la estrella con ojos soñadores. Es mágico.
Cuando regresamos a casa, luego de la fiesta, hicimos un arbol de felpa para nuestra felt board, un bosque nevado y ropa de invierno para los habitantes. Nada sofisticado, sólo un par de recortes para marcar la estación. La forma en que lo hacemos es “a demanda”: yo saco todos los sobrantes de felpa y tomo las tijeras, y Luka y Zoe me van diciendo qué quieren que recorte, o bien recortan ellos mismos lo que pueden (aun están aprendiendo a usar las tijeras y las suyas, de entrenamiento, no son buenas para cortar tela). Cada vez que actualizamos nuestra board pasamos al menos un par de horas sentados juntos alrededor de la mesa, y luego acomodamos y re acomodamos las piezas una y otra vez. Eso sí, nuestros paisajes son bastante poco ortodoxos: en este momento, por ejemplo, los bosques de invierno alojan un leon, una zebra, una jirafa y un hipopótamo porque su película favorita es Madagascar 😉
Algunos de ustedes me han preguntado cuales son las actividades que pensamos incluir en nuestro calendario de adviento. Aquí hay algunas: visitar una feria de navidad (hay varias a lo largo del mes), aprender a cantar villancicos, decorar tarjetas para mandar a la familia, hornear galletas, decorar galletas, decorar una casita de gengibre, leer un nuevo libro de navidad (compramos uno nuevo cada año), hacer guirnaldas, mirar películas navideñas, preparar chocolate caliente, envolver regalos, y otras que les iré comentando a medida que vayan pasando los días.
Ahora sí, pongamos manos a la obra para hacer la corona navideña!
Hacer una corona era uno de mis objetivos para este año. Cuando llegamos a Nicosia, hace 5 años, no compramos ninguna y, desde entonces, hemos tenido en la puerta sólo un manojo de ornamentos y ramas de plastico no demasiado bellas. Quise cambiar eso, quise darle a la puerta de nuestro departamento un aire festivo y por eso hice esta corona. Usé para la misma, como para el calendario, cosas que ya tenía en casa: retazos de felpa que me habian sobrado de la board, ornamentos viejos, lana que me habian regalado hace un tiempo, tijeras, una pistola de cola/pegamento caliente, un lapix para dibujar el modelo de las hojitas y alfileres para sostener el modelo a la tela al cortar. Sólo compré la rosca de tergopol, que salió unos pocos euros. Supongo que debe haber una manera de hacerla casera tambien, pero la verdad no tuve tiempo de averiguar cómo hacerlo!
Aquí les dejo el paso a paso:
1) Envuelvan la rosca de telgopor con la lana, cuidando que no queden espacios entre vuelta y vuelta. Si usan blanco sobre blanco, como yo, pueden dejar un espacio de vez en cuando porque no se notará tanto, pero tengan mucho más cuidado si usan lana de otro color! Cuando terminé de envolver toda la rosca, yo pegué el ultimo hilo con una gota de pegamento caliente.
2) Hagan un modelo para las hojas de muerdago. Yo usé un cortante de galletitas, lo tracé en papel, y luego adherí el papel a la tela con alfileres para cortar. Yo usé tijeras comunes, pero tambien quedan muy bonitas cortadas con tijeras de zig zag.
3) Hagan una línea de puntadas por el medio de cada hojita, para darles textura. Yo lo hice a máquina, pero pueden hacerlo tranquilamente a mano (sólo lleva más tiempo)
4)Adhieran las hojitas a la corona con una gota de pegamento caliente.
5) Retiren los cabitos de los ornamentos. Coloquen una gota de pegamento caliente en el lugar donde quieren colocarlos, y adhieranlos al mismo, teniendo cuidado que el hueco quede cabeza abajo. Y listo!
Ustedes cuelgan coronas en sus puertas? Hacen una nueva cada año o usan la misma? De qué color es la que tienen este año Cuentenme!
Nos vemos mañana con las primeras recetas!

WOW!!!
Pero que chula la rosca 🙂 Me he enamorado, Marcela, es genial.
Un besito
Raquel
WOW!!!
Pero que chula la rosca 🙂 Me he enamorado, Marcela, es genial.
Un besito
Raquel
Una corona es lo que queria hacer! Pero para afuera y entonces necesita resistir hielo y nieve, no es facil! Pero creo que se como…aunque ya no sera este año porque compre una de berries artificiales. Te quedo bella, Marce!
Que bonita te quedo! Y me parece muy original, definitivamente tengo que despertar mi neurona artistica.
Felicidades!