by Marcela M. | Oct 30, 2012 | Blog, cupcakes, Parties, Sweets, Uncategorized
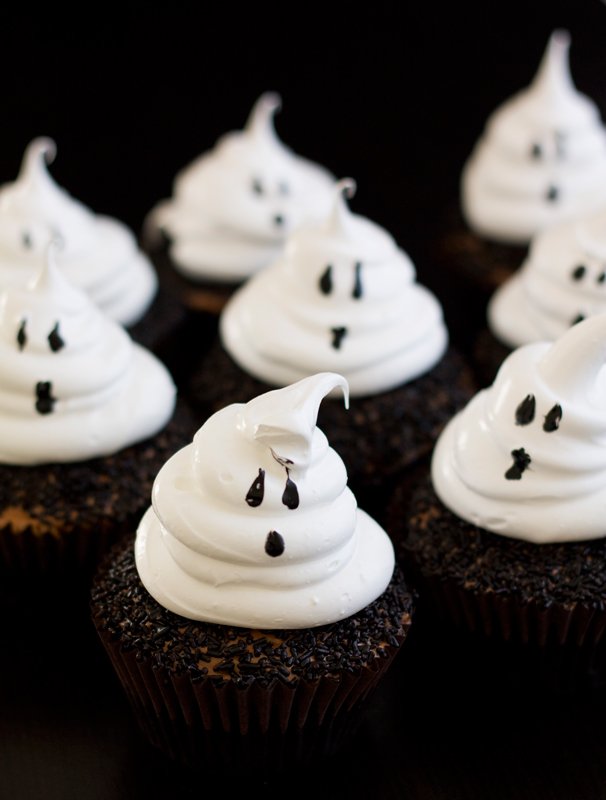
Halloween is almost here!
Today was a day full of holiday expectation: Luka and Zoe were playing with their costumes all afternoon (Zoe will be a witch – we almost named her Hermione, so what else could she be?, and Luka will be a vampire) and relinquished them reluctantly at bedtime, which made me very happy. They also brought back from school jack-o-lantern masks and bats they had made by stamping their hands on paper, and adding googly eyes, and wanted to read Room on the Broom by Julia Donaldson over and over again. This morning I had made the cupcakes above for them to bring to school tomorrow (inspired by these ones by Jenny Steffens) and, as you can imagine, it was a little difficult to keep them away from the refrigerator and to convince them to wait until tomorrow to have one at school! But that is what holidays are all about, don’t you think? Special days, with special traditions that we share with family and friends, and to which we look forward to year after year.
Last year, right before leaving for our family trip to Argentina, I wrote a post with a list of links to parties, food, ideas and free printables from around the web and, this October, that post was one of the ones that got more views. So I thought to do the same this year, in case you need some quick last minute inspiration. Here it goes (click to be redirected!) :
– I love these free printable Halloween candle wrappers and these printables lanterns too
– This post by none other than Amy Atlas has great dessert table ideas and free printables as well
– This witch crash cake has to be my all time favourite (and it looks super easy as well!)
– These Halloween ideas from The TomKat Studio for the DIY network are also great and easy to do
– An easy ghostly treat: mini marshmallows, clear bags, marker and black ribbon!
– No time for baking? Store bought cupcakes, cupcake liners and just a few extra supplies is all you need to make these witch hat cupcakes
–These extra cute owl mini cupcakes have been all around the web and only require oreos and m&ms to decorate them
This is a great video by Wilton on how to decorate easy halloween cupcakes
If you need more inspiration, don’t forget to check the rest of my Halloween pinterest board, and my post from last year!
Enjoy the holiday and, if you are in the USA NE region, stay safe!
* For the cupcakes above I used my favourite chocolate cupcake recipe, from Vegan cupcakes take over the world. I then frosted the cupcakes with milk chocolate swiss meringue buttercream (using a spatula, nothing fancy), covered them in chocolate vermicellis (store-bought), and finally piped a swiss meringue ghost. To make swiss meringue for 15 cupcakes I used 110 grs of egg whites and 220 grs of sugar (let me know if you need instructions on how to make it!). I drew the eyes and mouth with a toothpick dipped in black food coloring.
Con sabor latino…
Halloween ya casi está aquí!
Hoy fue un día lleno de esa hermosa anticipación que se siente con las fiestas: Luka y Zoe jugaron con sus disfraces toda la tarde (Zoe será una bruja (como que casi casi la llamamos Hermione!) y Luka un vampiro) y me los entregaron a regañadientes a la hora de ir a dormir, lo que me hizo muy feliz. Hoy tambien trajeron de la escuela manualidades alusivas: un antifaz de calabaza tallada, y un murcielago hecho con la impresion en papel de sus manitos y ojitos saltarines (de esos de plástico, que se mueven para todos lados), y quisieron leer una y otra vez el cuento Room on the Broom (lugar en la escoba) de Julia Donaldson. Esta mañana, mientras ellos estaban en la escuela, yo les había hecho las cupcakes fantasmagoricas que ilustran este post, para que las lleven mañana a la escuela (y que están inspiradas en estas de Jenny Steffens) y, como podrán imaginarse, con tanta expectativa, a duras penas pude mantenerlos alejados de las mismas, y convencerlos que esperaran a mañana para comerlas! Aunque de eso se trata, no? Las fiestas son justamente esa expectativa, esas tradiciones, ese momento especial compartido con seres queridos, que hacen que las esperemos año a año y que la sola idea de su llegada nos llene el corazón de recuerdos alegres y esperanzas.
El año pasado, como estábamos de viaje para esta época, publiqué un post con links a las mejores ideas halloweenescas que había encontrado en la web y, este año, desde octubre, ese post ha sido uno de los más buscados y leidos. Por eso este año, se me ocurrió hacer lo mismo, pero actualizado. Internet está llena de ideas fantásticas, asi que, si necesitan inspiración de último minuto, chequeen los links que dejé más arriba (en la versión en inglés). No se van a arrepentir!
Y si necesitan aún más ideas, pueden ver el resto de mi pinterest board de halloween, y el post del año pasado, del que les hablaba!
Espero que disfruten muchísimo de este Halloween y que el paso de Sandy los encuentre sanos y salvos!
* Para hacer las cupcakes de las fotos usé mi recete de cupcakes de chocolate favorita (de Vegan cupcakes take over the world) . Las cubrí con swiss meringue buttercream de chocolate y luego les espolvorée granas de chocolate arriba. Para terminar, usando la manga sin boquilla, puse un copón de merengue suizo (hecho con 110 grs de claras y 220 grs de azucar para 15 cupcakes), a los que les dibujé ojos y boca con un palillo escarbadiente mojado en colorante alimentario negro.
by Marcela M. | Oct 25, 2012 | Blog, cookies, Recipe Box, Recipes, Sweets
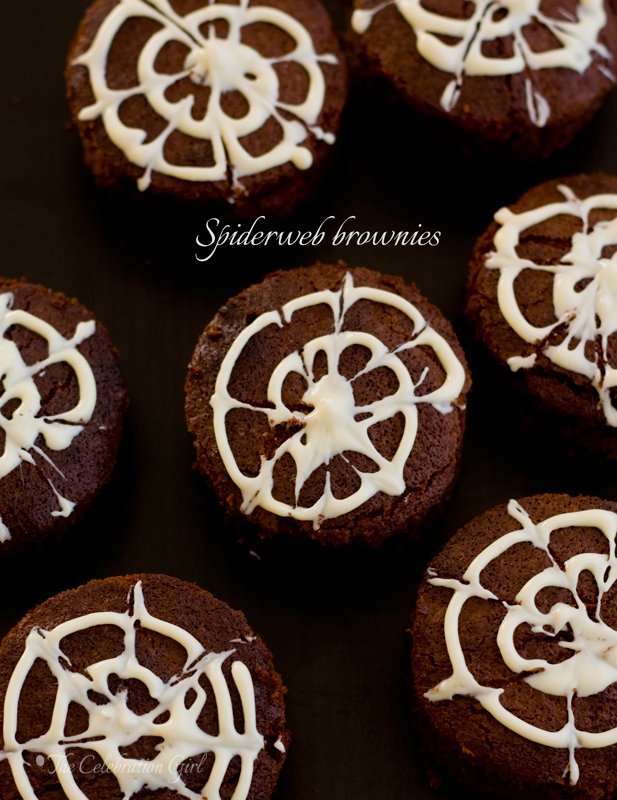
Chocolate…is there anything better? I didn’t think so 🙂
I love all types of chocolate, but my favorite is very dark (over 75%), which lots of people find slightly bitter but I adore. I love it because it is bitter, intense and because it is better enjoyed in small quantities, letting it melt slowly in the mouth. I love it on its own, in truffles, and also paired with vanilla, coffee, caramel, berries… well, with pretty much everything. This is why I smiled really widely when I saw that Circulo Whole Kitchen’s sweet recipe for October was none other than the all-classic brownie.
When it comes to brownies, it turns out, preferences vary greatly. I like my brownies moist, with a fudge-like interior and a crispy top, and I like them very chocolatey. Actually, I don’t like any other flavors to compete with that of chocolate, which is why I don’t add espresso, nor nuts, but lots of people do. The basic recipe, which is the one I bring you today, is very, very simple (which makes it very versatile) and it can also be used as a base for a cake, by adding filling and frosting (such as the traditinal brownie cake, that consists on a brownie base, topped with dulce de leche and frosted with Italian Meringue, which is then swirled with dark chocolate…truly decadent!)
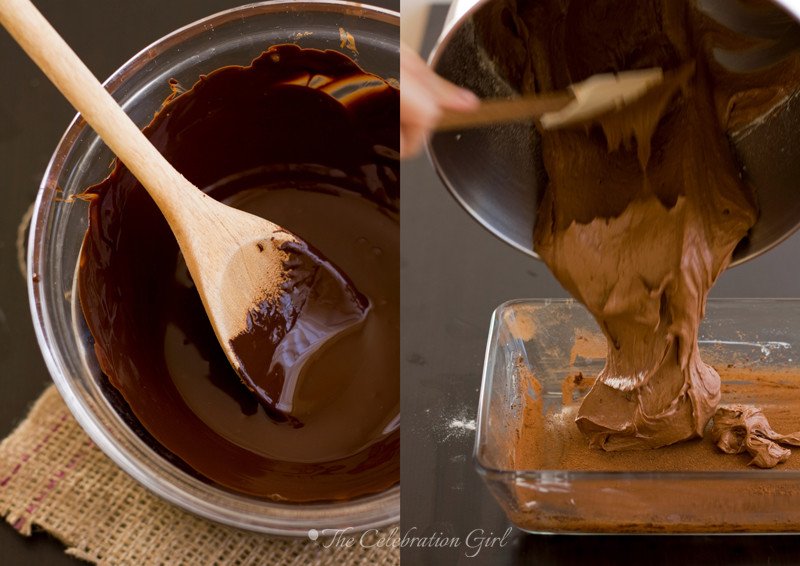
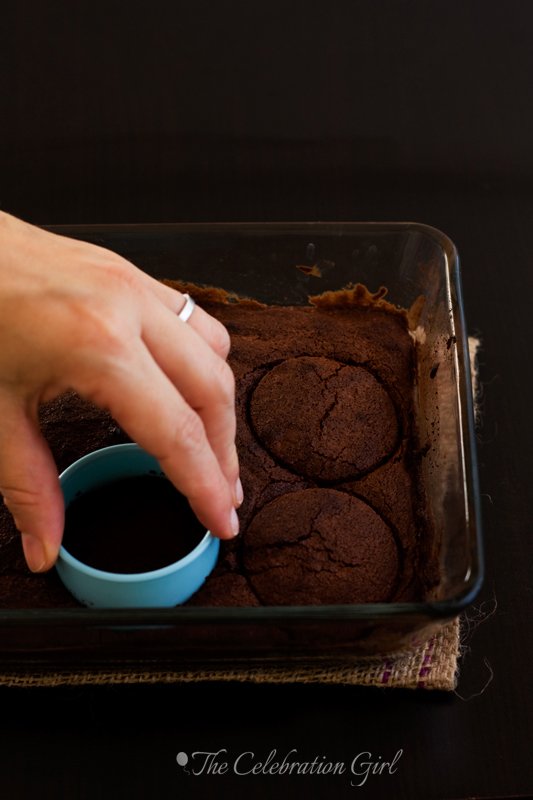
The ingredients are simple and straightforward: butter, sugar, dark chocolate, eggs and very little all purpose flour. Mix them, put the batter in the oven for just enough time for the brownies to cook, but not so much that they will get dry, cut, serve and enjoy! In this occasion, since Halloween is around the corner, I cut my brownies with a round shape (instead of the traditional square one) and added a small detail, a spiderweb, in white chocolate (see the picture tutorial below for instructions on how to achieve this look).
This is a great recipe to try with children, so why not get them involved in your Halloween preparations by making these brownies with them? Try it and let me know how it goes! I’m sure it will be fun!
Here is the recipe:
Fudgy, chocolatey brownies with a crispy top
Ingredients: 100 grs butter, 100 grs sugar, 2 eggs, 1 teaspoon vanilla extract, 100 grs dark chocolate (at least 70%, the best you can get), 65 grs all purpose flour. If you are doing the spiderweb decoration, add 100 grs white chocolate.
Preparation: Pre-heat the oven to 200 C. Melt the dark chocolate in a double boiler or at “bain marie” and, let it cool down. Cream butter and sugar until white and fluffy. Add the eggs, one by one, and vanilla extract, incorporating well. Add the melted chocolate, incorporate and, finally, add flour. Grease a squared pan and dust it with cocoa (I prefer cocoa to flour when baking chocolate treats). Pour the batter in the pan and put it in the oven for 15 minutes, until the top starts to get crispy. Watch them carefully, don’t let them get dry! Remove them from the oven, let them cool slightly and cut in round shapes with a cookie cutter (as in the picture above).
Decoration: Melt white chocolate in a double boiler. Let it cool down and put inside a squeeze bottle (I use Wilton’s), or a piping bag with a size 3 tip. Pipe a white spiral on top of the brownie and, immediately after, drag the chocolate from the center to the outside, forming lines cut the spiral, and form the spiderweb (see the pictures below for a step by step visual explanation). Let the chocolate cool down and harden, and enjoy!

Con sabor latino…
Chocolate…hay algo mejor? No, verdad? Ya me parecía 🙂
Adoro todos los tipos de chocolate, pero sin dudas mi preferido es el amargo bien amargo, con al menos 75% de cacao. Me encanta ese sabor intenso que hace que haya que saborearlo de a poco, en pequeñas cantidades, dejando que se derrita lentamente en la boca. Me encanta en todas sus formas: solo, trufado, y junto con sabores que saben acompañarlo, como vainilla, café, caramelo o frutos del bosque, entre tantos otros. Es por ello que sonreí de oreja a oreja cuando leí que la propuesta dulce del Circulo Whole Kitchen para el mes de octubre era, nada más ni nada menos, que las clásicas y chocolatosas brownies.
Las preferencias en materia de brownies varian ampliamente. Las que me gustan a mí tienen una textura húmeda, muy chocolatosa (porque uso chocolate amargo), y un capa crocante arriba. Me gusta que el chocolate sea no sólo el sabor predominante, sino el único, por eso no agrego espresso ni nueces, como suelen hacer muchos. La receta que les traigo hoy es mi receta de base y es muy simple y, por lo tanto, muy versatil: pueden usarla no sólo como barrita, sino tambien como base de una torta a la que sólo deberán agregarle relleno y cobertura (como con la tradicional torta brownie, que tiene una capa de esta masa, sobre la cual se agrega dulce de leche, y se finaliza con copos de merengue italiano rociados con hilos de chocolate negro…terriblemente decadente!)
La receta es simple, y sencillos son sus ingredientes: manteca, azucar, huevos, y muy poquita harina común, los que se mezclan, se colocan en una fuente y se llevan a horno por el tiempo suficiente para que se forme la capa craquelada arriba pero no tanto como para que la masa se seque. Una vez cocidas, se sacan del horno, se cortan, y se disfrutan! En esta ocasión, y teniendo en cuenta que Halloween está a la vuelta de la esquina, usé un cortante redondo para darles forma (como pueden ver en la foto de más arriba), y agregué un pequeño detalle, una tela de araña dibujada con chocolate blanco (pueden ver el tutorial de cómo hacerlo, paso a paso, en las fotos que se encuentra inmediatamente encima de estas palabras).
Esta es una receta ideal para hacer con niños, porque es sencillísima, y porque a todos les encanta el chocolate! ¿Se animan a prepararla con ellos? Seguramente se divertirán muchísimo!
Aquí está la receta:
Brownies húmedas, chocolatosas y crocantes
Ingredientes: 100 grs de manteca, 100 grs de azucar, 2 huevos, 1 cucharadita de extracto de vainilla, 100 grs de chocolate amargo (el mejor que consigan, 70%), 65 grs de harina común. Si quieren hacer la decoración de Halloween, agreguen 100 grs de chocolate blanco.
Preparación: Pre caliente el horno a 200C. Derrita el chocolate blanco a baño maría y deje enfriar. Bata la manteca y el azucar a punto crema, hasta que quede una preparación blanca. Agregue los huevos de a uno, incorporando bien luego de cada adición. Agregue la esencia de vainilla e incorpore. Finalmente, agregue la harina de golpe, y mezcle bien asegurandose de tener una masa uniforme. Enmantece un molde y espolvoreelo con cacao (cuando hago masas de chocolate prefiero usar cacao amargo en lugar de harina para que no queden areas blancas al desmoldar). Vierta la mezcla en el molde y coloque en el horno por 15 minutos, o hasta que la capa superior se craquele apenas. Tenga cuidado de no pasarse con el horno, porque si se secan, las brownies no son ricas! Retire del horno, dejelas enfriar y corte con un cortante de galletitas redondo.
Decoración: Derrita el chocolate blanco y dejelo enfriar. Una vez tibio, coloquelo en una botella especial (yo uso Wilton) o bien en una manga pastelera con una boquilla numero 3. Dibuje un espiral de chocolate sobre el brownie y, luego, usando un palillo escarbadiente, arrastre lineas de chocolate que corten el espiral, desde el centro hacia afuera, cpmo en las fotos del collage que se encuentra arriba de este texto en castellano. Deje que el chocolate se enfríe y endurezca, y disfrute!

I hope you like this recipe! Have a wonderful weekend! I’ll be back tomorrow with the winner of the giveaway, so stay tuned!
Espero que les guste esta receta! Que tengan un hermoso fin de semana y, estén atentos, porque volveré mañana anunciando el ganador del sorteo!
by Marcela M. | Oct 22, 2012 | Blog, cookies, Holidays, Recipe Box, Recipes, Sweets, Uncategorized
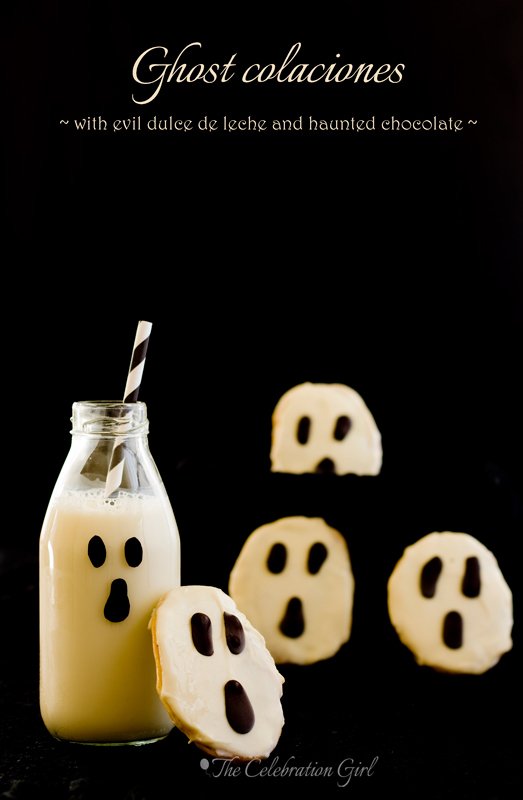
Good evening friends! Can you believe that it’s only 9 days until Halloween? I know I can’t, but I’m excited about it! This is going to be our children’s first full costume and trick or treat celebration, and I’m eager to see how they respond to all the activities at school.The holiday, I should note, is not celebrated in Cyprus (no trick or treating from door to door), but they will have a special party at their nursery and it promises to be fun. I bought their outfits earlier today…and I hope they will agree to wear them! 🙂
Halloween was not celebrated massively in Argentina either, when I was growing up, but my mother did organize a party every year at the institute for learning English as a second language, which she owned. So, every October 31st, her students and us (her children) dressed up in spooky costumes and celebrated it. It was all very funny because October is Springtime in Argentina and, of course, there were no pumpkins to carve at this time of the year, nor did any shops have any decorations that we could use, so we had to do as we could with a few sheets of black and orange cardboard paper. I still smile when I remember how crazy people thought we all we were, walking dressed as ghosts, witches, pirates and skeletons, on our way to the house where the party was held.
Things have changed in the last 20 years (20 YEARS!!), and Halloween parties are more popular, but, in the spirit of those first celebrations I attended, I thought it would be fun to use this opportunity to share with you the recipe for a delicious, classic cookie from Cordoba, Colaciones, and to “halloweenize” it ( I just invented that word :))
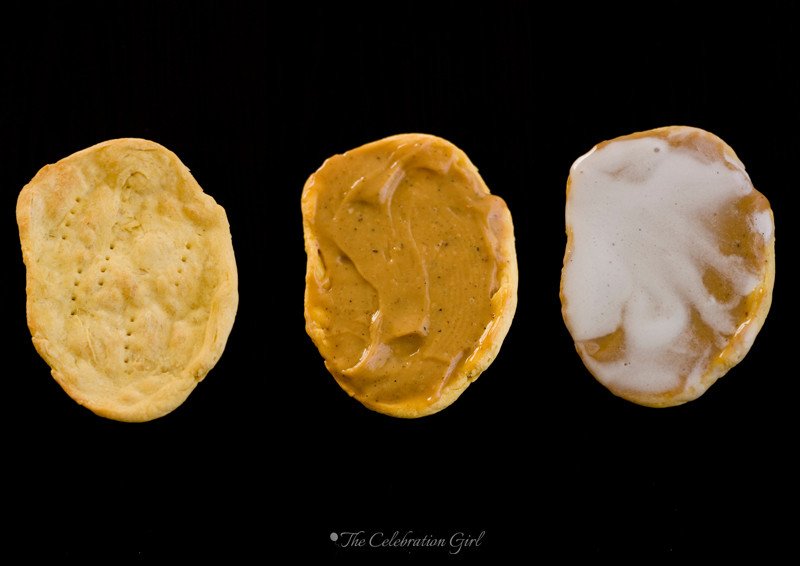
This recipe has been adapted from the one of a famous Argentinian pastry chef called Maru Botana (you can find the original one here), and it is the best one I ever tried. Colaciones’ dough is very peculiar: it doesn’t take any oil or butter, nor does it take any sugar or salt It is just a combination of eggs, egg yolks, flour and a white alcoholic beverage of your choice (the original recipe calls for cherry brandy, but you can also use another type of brandy or gin or vodka). Eggs are beaten, flour and brandy is added and then the dough is kneaded and shaped in the traditional way. One word of caution: do not put the dough in the freezer! I did it because I didn’t have time to finish making them in the same day, and when I thawed it, I had to start all over, because it had become too hard. If you need to make the colaciones in advance, it is better to prepare the dough and bake the cookies in one take. You can store the already baked shells in an airtight container (such as freezer bags), and then fill them with dulce de leche (as is traditional in Córdoba) or quince jam (as they do in some Northern cities of Argentina) and glaze them a few hours before it’s time to serve them.
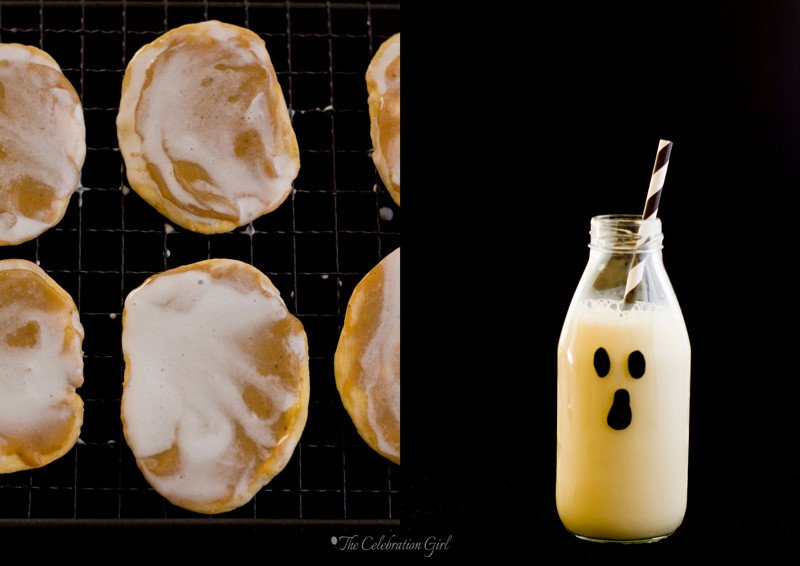
Colaciones’ traditional glaze is a simple combination of a beaten egg white, icing sugar and boiling water. In this occasion, however, I chose to cover them in white chocolate for a smoother, more even finish, because I didn’t want the dulce de leche to be visible. Then, I drew a ghostly face with dark chocolate, using just a regular teaspoon (no fancy decorating items required!). So, if you are looking for an easy, delicious, untraditional sweet for your Halloween celebrations, give colaciones a try! You will love them!
Here’s the recipe:
Colaciones cordobesas (makes 64 cookies of approximately 5 cms) Recipe adapted and translated from Maru Botana’s
Ingredients: 2 eggs, 4 egg yolks, 1 tablespoon of brandy/gin/vodka, 300 grs all purpose flour, 500 grs dulce de leche (if you can find dulce de leche repostero/baker’s dulce de leche, it is better, but any other will work as well), 1 beaten egg white, 2 cups of icing sugar, 2 tablespoons of boiling water (alternatively, if you want to glaze them with white chocolate, you will need approximately 600 grs and 200 grs dark chocolate to draw the spooky face in all 64 cookies).
Preparation: Beat eggs and egg yolks to the ribbon (it takes about 10 minutes). Add flour and brandy, mixing well, until you get a workable ball of dough. Knead the dough and extend it with a rolling pin. Cut the cookies using a round cookie cutter and then work each with your hands, to extend them and make them thinner (as thin as possible, or they will be too hard once baked). The dough is hard to work with, shaping the cookies takes some effort!. Once they are thin, place them on a baking tray covered with baking paper, and pinch them with a fork. Bake them at 175C for about 10 minutes. They will dry and curve in the oven and, once they do this, they are ready. Remove from the oven, let them cool well and fill with a teaspoon of dulce de leche. Next, prepare the glaze of your choice. For the traditional glaze, beat an egg white until firm, add two cups of sugar to “dry”the egg white and then, slowly, add the boiling water. I needed two tablespoons, but you may need more or less, so do it slowly. If you notice that the glaze is too thin and won’t cover the cookies properly, you may add more icing sugar. Note, however, the traditional glaze does not provide an all white, perfect coverage so, if that’s what you are aiming for, I suggest covering the cookies in white chocolate instead. Whichever glaze you chose, let it harden before drawing the spooky face on it.
Decoration: Melt dark chocolate and and let it cool down. Once it’s cool, draw a ghostly face on the cookies, by adding little bits of chocolate with a teaspoon.
Con sabor latino…
Buenas noches amigos! ¿Pueden creer que faltan apenas 9 días para Halloween? A mí me resulta increible, pero en casa estamos super excitados al respecto porque esta va a ser la primera vez que Luka y Zoe van a festejarlo con disfraces y golosinas, y tenemos muchas ganas de ver cómo reaccionan ante todo el despliegue de actividades que están organizando en su escuela. En Chipre no se festeja Halloween masivamente, como en otros países, así que no hay pedidos de golosinas a los vecinos ni nada de eso, pero sí van a tener su primera fiesta en la escuela, y promete estar divertida. Esta mañana, sin ir más lejos, les compré sus primeros disfraces- ahora sólo queda esperar que ;es gusten y se los pongan!
Halloween tampoco se celebraba mucho en Argentina, cuando yo era adolescente, pero mi mamá sí organizaba una fiesta todos los años, en su instituto de inglés. Así que, cada 31 de octubre , sus alumnos y nosotros (sus hijos), nos disfrazábamos y lo celebrábamos. Era todo muy gracioso porque, como octubre es primavera en Argentina, no había zapallos que decorar, y al no ser una fiesta tradicional nuestra, tampoco había en los negocios golosinas especiales, ni decoraciones alegóricas, así que nos arreglábamos simplemente con algunas cartulinas negras y naranjas, y el talento de mi madre para transformar el salón en dos segundos, con lápices y tijeras. Escribo estos recuerdos y sonrío pensando en cómo la gente nos miraba como si estuvieramos locos, al vernos caminar hacia el instituto de inglés vestidos como brujas, fantasmas, y esqueletos.
Todo esto ha cambiado en los últimos 20 años (20 AÑOS!) y ahora Halloween es mucho más común pero, en honor a esos primeros festejos de mi vida, se me ocurrió aprovechar esta ocasión para traerles una receta tradicional Argentina (Cordobesa!) y “halloweenizarla” (sí, inventé esa palabra :))
La receta de hoy ha sido adaptada de la de Maru Botana, una famosa chef pastelera Argentina, y es sin dudas la mejor que he probado. La masa de las colaciones es muy peculiar: no lleva aceite, ni manteca, ni azucar, ni sal. Es sólo un conjunto de huevos, yemas, harina y algún licor blanco de su elección. La receta original de Maru lleva aguardiente de cerezas, pero yo la he hecho también con brandy, gin o vodka. El procedimiento consiste en batir mucho huevos y yemas (aproximadamente 10 minutos con batidora), hasta lograr el punto “letra”, que es cuando al levantar el batidor se forma una cinta de liquido que no se corta, y con la cual puede dibujarse sobre el resto de la preparación (=formar letras). Luego, se agregan harina y aguardiente y se forma n bollo de masa, que se estira, se corta y se da forma con las manos antes de llevar al horno. Aprovecho para hacerles una advertencia: no coloquen la masa en el freezer. Si no tienen tiempo de hacer todas las colaciones en un mismo día, es preferible que hagan la masa, y cocinen las galletitas en el momento, y luego las guarden en el freezer, ya cocidas, en un recipiente hermético o en bolsas especiales. Luego, pueden descongelarlas dentro del recipiente, y retirarlas unas horas antes de servir, para rellenarlas con dulce de leche (como en Cordoba) o con dulce de membrillo (como en algunas provincias del norte de Argentina) y cubrirlas con glaseado.
El glaseado tradicional de las colaciones es uno muy simple a base de clara batida a punto nieve, azucar impalpable y agua hirviendo. En esta ocasión, sin embargo, yo elegí cubrirlas con chocolate blanco para darles un finalizado más parejo y uniforme, ya que no quería que se transparentara el dulce de leche del relleno. Luego, derretí chocolate negro y dibujé la carita del fantasma con el mismo, usando una cuchara de café (no hace falta manga ni nada especial!). Si estan buscando una receta diferente para sus celebraciones, prueben estas colaciones que seguro les encantan!
Para ver la receta original, hagan click en ESTE LINK. Normalmente no suelo publicar recetas de otros autores y el unico motivo por el que lo hago en esta ocasión es porque he agregado notas a la forma de preparala y precisado cantidades de glaseado, que quiero compartir con ustedes, y creo que sería muy confuso tener que ver dos páginas al mismo tiempo para entender una receta. Sin embargo, no dejen de ver la pagina de Maru, porque tiene unas recetas fantasticas y precisas, que vale la pena intentar!
Colaciones cordobesas (para 64 galletitas, aproximadamente), adaptada de una receta original de Maru Botana
Ingredientes: 2 huevos, 4 yemas, 1 cucharada sopera de brandy/aguardiente/gin/vodka, 300 grs de harina común (todo uso), 500 grs de dulce de leche (si consiguen dulce de leche repostero, mejor, pero si no el otro sirve igual), 1 clara batida a nieve, 2 tazas de azucar impalpable, 2 cucharadas soperas de agua hirviendo. Si quieren cubrirlas con chocolate blanco, como hice yo, necesitaran 600 grs del mismo para todas las galletitas, y 200 grs de chocolate negro para dibujar la carita fantasmagórica.
Preparación: Batan los huevos y las yemas a punto letra, aproximadamente 10 minutos con batidora. Agregue el brandy y el harina, de a poco, integrando bien, hasta que pueda formar un bollo de masa con las manos. Estiren con palote de amasar y corten circulos con un cortante redondo (yo use uno de 4 cms). Luego, trabajen la masa con los dedos (vean la foto de más arriba), estirandola para que quede bien finita. Cuiden que la masa quede bien fina, porque si está demasiado gruesa, las colaciones quedarán duras unas vez cocidas. Les advierto que la masa es dura y darles forma requiere esfuerzo! Una vez que esten bien finitas, coloquenlas en una placa para horno cubierta con papel de hornear, y pinchenlas con el tenedor. Cocinenlas a 175C durante aproximadamente 10 minutos. En el horno las galletitas van a secarse y arquearse y, una vez que lo hagan, estarán listas. Retirenlas, dejenlas enfriar, y luego rellenenlas con una cucharada de dulce de leche cada una. Preparen el glaseado batiendo una clara a punto nieve. Agreguen 2 tazas de azucar impalpable, para “secar” la clara, y luego, muy poquito a poco, agreguen el agua hirviendo. Tengan cuidado aquí de que el glaseado no les quede muy “chirle” o “fino”, porque se ser asi no cubrirá bien las colaciones. Si se pasan con el agua, no se hagan problemas, agreguen un poco mas de azucar. Tengan en cuenta que el glaseado tradicional no provee una cobertura perfecta, el dulce de leche suele transparentarse un poco. Si las quieren bien blancas, opten mejor por bañarlas en chocolate blanco, como hice yo.Sea cual sea el glaseado que elijan, recuerden dejarlo secar bien, para que endurezca, antes de decorar con la carita de chocolate.
Decoración: Derritan el chocolate amargo/ semi amargo a baño maría, y dejenlo enfriar. Una vez frío, coloquen un poco de chocolate en una cuchara de té y dibujen, despacito, una carita fantasma sobre las colaciones (es muy facil, es solo cuestion de hechar pequeñas cantidades de chocolate muy de a poco, moviendo la cuchara a lo largo, para “estirar” ojitos y boca)
Do you celebrate Halloween? What do you normally bake for the occasion?
Celebran Halloween? Qué dulces suelen preparar para esta ocasión?
by Marcela M. | Oct 18, 2012 | Blog, Cakes, Recipe Box, Recipes, Sweets, Uncategorized

Have you ever had a cake once and then dreamed about it for a long, long time, wishing you had the recipe? This is what happened to me with this cake.
The first time I had it, I must have been around 6 years old. We had gone to the house of one of my mother’s friends, Cecilia, and she served us this cake. I remember falling in love with its flavor immediately and I never forgot about it. Years later, Cecilia came home and baked it with us, but we were so into the conversation that we didn’t write the recipe down. “It’s easy! we will remember!”we thought but, of course, we didn’t. As time went by, we started doubting our own memories ( “How much honey did it take? One cup? No, it was two..or maybe one… I can’t say for sure” “What was it that Ceci had added to the honey that made it bubble?” ), until after a couple of failed attempts we recognized we didn’t remember how the cake was made at all. My mother and Cecilia lost contact for a while and I lost hope of getting this recipe.
Then, one day, just a few years ago, my mom surprised me sending me this recipe by email! She had met Cecilia, asked her for it and wrote it down for me! I baked it the following day and it was as good as I remembered.
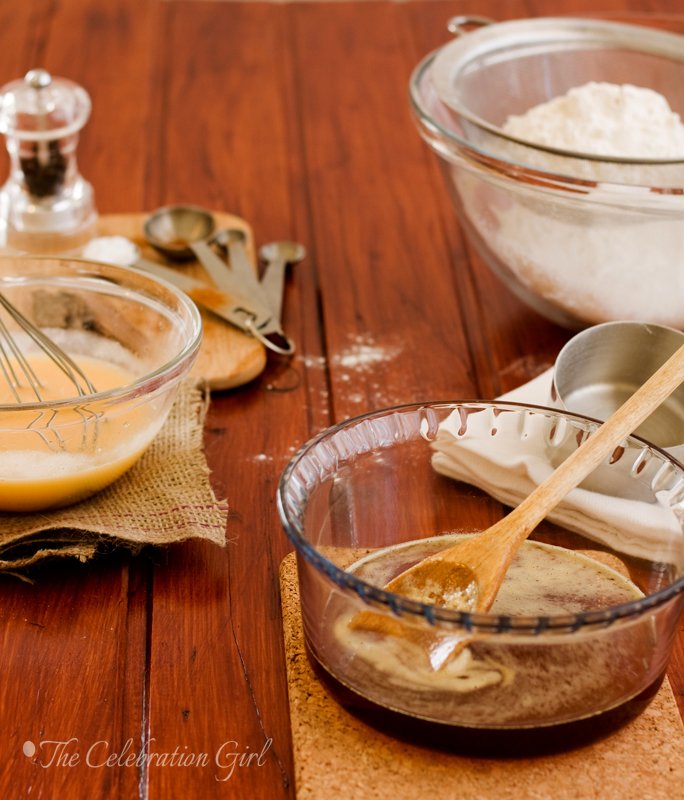
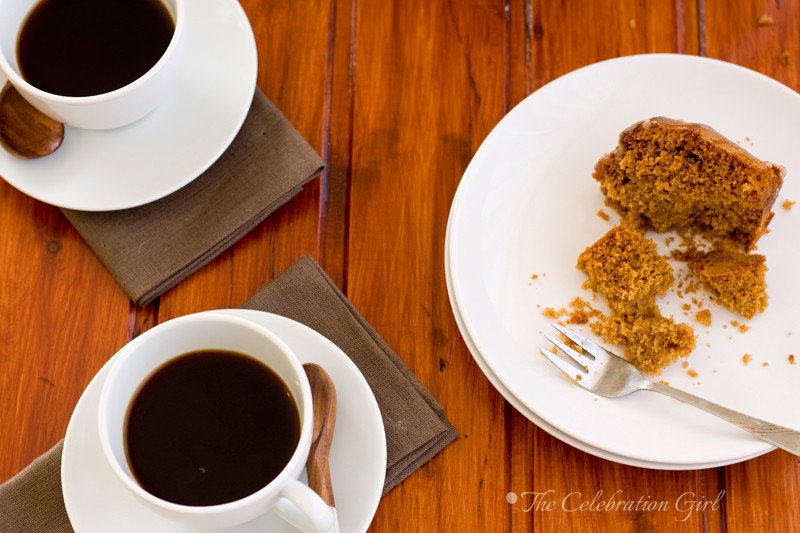
This is a really, really easy cake and it is ideal for eating when the weather starts to cool down, wrapped in a blanket, reading a good book by the window, or to share with friends while having coffee. I like it so much because of its ingredients: honey, cinnamon and pepper so, if you like Christmas cookies, you will most probably like this cake too. But there’s more: This cake is sweet, but not too sweet and spicy but not too spicy . It’s just perfect!
In this occasion I covered it with a cinnamon glaze, but this is completely optional: the cake doesn’t need it and it is just as delicious without it.

Now, without further ado, here’s the recipe:
Cecilia’s honey cake (serves 12)
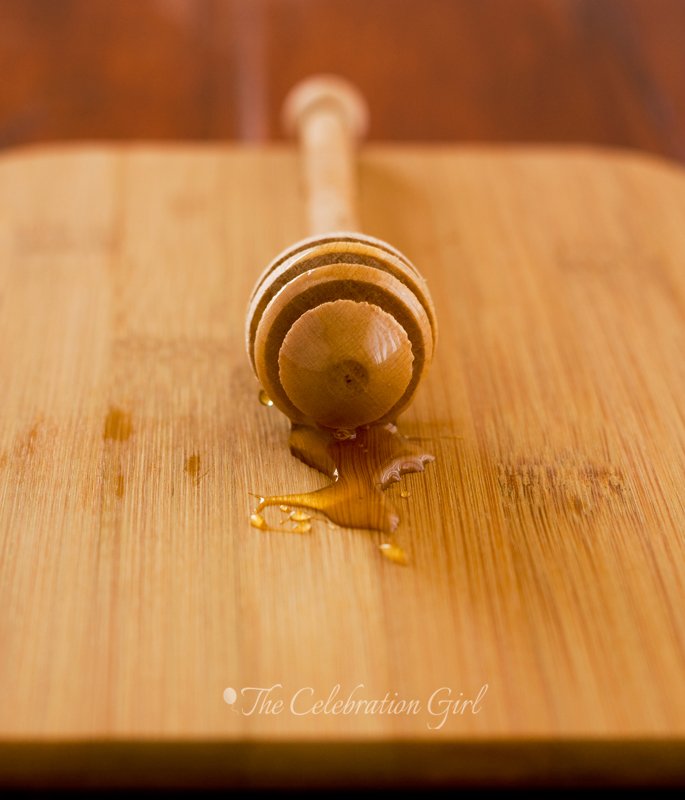
Ingredients: 125 ml of honey ( 1 small glass), 1 teaspoon of baking soda, 125 ml oil (canola/ sunflower), 2 eggs, 2 teaspoons of sugar, 2 cups of self-raising flour, 1 teaspoon baking powder (see note), 1 teaspoon of ground cinnamon, 1/4 teaspoon of ground black pepper.
Preparation: Put the honey in a small saucepan, add enough water to barely cover the honey and bring to the boil. When it starts boiling (when the first bubbles appear at the sides of the pan), remove from the heat and add the baking soda. It will grow and bubble a lot, so keep mixing with a wooden spoon until it stops. Let it cool down, until warm but not hot. In the meantime, beat eggs, sugar and oil in a separate bowl and add to the honey once this is warm. Sift flour, cinnamon, pepper and baking powder and add to the liquid ingredients, little by little, mixing until no lumps remain. Pre-heat the oven at 175 C. Grease and flour a 6 inch pan, pour the preparation in it and bake for about 40 minutes, or until a toothpick inserted in the middle comes out clean.
Note: If you are making this recipe in Argentina, you do not need to add baking powder to the self-raising flour. I used Blancaflor without needing it!
For the cinnamon glaze: Mix 1 cup of icing sugar and 1 tablespoon of cinnamon and add boiling water until reaching a spreadable consistency (I needed 3 tablespoons, but it may vary. Pour over the cake, let it cool down and slightly harden and enjoy!
I hope you like this recipe as much as I do and let me know if you make it (you can add pictures to the facebook page!).Have a great weekend!
Con sabor latino...
¿Alguna vez les pasó eso de comer una torta deliciosa y soñar con ella por mucho tiempo, deseando tener la receta para poder hacerla una y otra vez? Eso es precisamente lo que me ocurrió a mí con esta torta de miel.
La primera vez que la probé debo haber tenido unos 6 años. Habíamos ido de visita a la casa de una amiga de mi mamá, llamada Cecilia, y ella nos ofreció esta torta que había preparado. Qué delicia! Quedé inmediatamente enamorada de su sabor y nunca lo olvidé. Cada vez que mi mamá se encontraba con su amiga, yo recordaba esta torta deliciosa y le pedía la receta, pero siempre lo olvidaba. Un día Ceci hasta vino incluso a hacerla a casa pero, inmersas en la conversación, olvidamos anotar la receta. “Es facil, nos vamos a acordar’pensamos pero, por supuesto, no lo hicimos. Con el tiempo, nuestros recuerdos comenzaron a tornarse borrosos y fuimos olvidando detalles importantes. “¿ Llevaba una o dos tazas de miel? ¿qué era eso que Cecilia agregaba a la miel que la hacía borbotear?” empezamos a preguntarnos, hasta que un día, luego de varios intentos fallidos, tuvimos que reconocer que no teníamos idea de cómo se hacía. Cecilia y mi mamá perdieron contacto por un tiempo,y yo perdí la esperanza de volver a probar la adoraba torta de miel.
Luego, un día, hace unos años, mamá me sorprendió enviandome esta receta por email. Se había re encontrado con Cecilia, le había preguntado la receta y, esta vez sí, la había anotado para mí. La hice al día siguiente de recibirla, y sabía tan rica como la recordaba!
Esta es una de esas tortas fáciles, fáciles, fáciles, y es ideal para comer cuando el clima comienza a tornarse más fresco, envuelto en una manta, leyendo un libro al lado de la ventana, o compartiendo con amigos alrededor de tazas de café caliente. Me encanta por sus sabores: miel, canela,pimienta, y si a ustedes les gustan las típicas galletitas navideñas, seguramente también la amarán. Pero ese no es el único motivo: Esta es una torta dulce, pero no demasiado dulce, y especiada, pero no demasiado especiada. Es perfecta!
En esta ocasión la cubrí con un glaseado de canela, pero si quieren consumir menos azucar pueden obviarlo tranquilamente: la torta no lo necesita y es igualmente maravillosa sin él.
Ahora sí, sin más prolegómanos, aquí está la receta:
Torta de miel (para 12 personas)
Ingredientes: 125 ml de miel, 1 cucharadita de bicarbonato sódico, 125 ml de aceite, 2 huevos, 2 cucharaditas de azucar, 2 tazas de harina leudante, 1 cucharadita de polvo de hornear (ver nota), 1 cucharadita de canela molida, 1/4 de cucharadita de pimienta molida.
Preparación: Colocar la miel en una cacerola pequeña, cubrirla apenas con agua, y llevarla a fuego moderado. Cuando rompa el hervor, retirar del fuego y agregar el bicarbonato, revolviendo siempre para que no rebalse (el bicarbonato hará que la miel crezca y burbujee alocadamente). Dejar reposar hasta que esté tibia. Mientras tanto, batir en un bowl los huevos, el aceite y el azucar. Agregar a la miel cuando ésta esté tibia. Cernir harina, polvo de hornear, canela y pimienta y agregar a los ingredientes líquidos poco a poco, incoporando bien hasta que no queden grumos. Precalentar el horno a 175C. Engrasar y enharinar un molde de unos 12/15 cms de diametro y verter la mezcla en el mismo. Llevar a horno moderado por aproximadamente 40 minutos o hasta que, al insertar un cuchillo en el medio, éste salga limpio.
Nota: Si hacen esta receta en Argentina, no hace falta que agreguen polvo de hornear a la harina leudante, yo he usado harina Blancaflor sin necesidad de hacerlo.
Glaseado de canela: Mezclar una taza de azucar impalpable con 1 cucharada sopera de canela. Agregar agua hirviendo de a poco, hasta que adquiera consistencia de glaseado. Verter sobre la torta, dejar que enfríe y servir!
Espero que les guste esta receta tanto como a mí y cuentenme si la hacen! Pueden subir fotos a la página de facebook, me encantaría ver sus re-creaciones de esta torta (y de todas mis otras recetas!).
Que tengan un hermoso fin de semana!
by Marcela M. | Oct 8, 2012 | Blog, Main courses, Recipe Box, Recipes, Savories, Uncategorized

Most of my childhood memories seem to be highly sensorial and related to nature, and many, many of them are related specifically to food.
When I was growing up, we used to spend our Summers and our weekends (during the rest of the year) in a house located in the hills of Córdoba, my home province. The house, which was big enough to host cousins and other relatives who visited us every vacation, was settled in a small commune where all neighbours knew each other and where all children were friends.The garden that surrounded it had a swimming pool and trees that we would climb in the hot summer afternoons, and even an orchard with red and white plums, peaches, apricots, quinces, apples and walnut trees.
My memories of those times are deeply marked by that house: the cold shock of the first splash in the pool, the sound of shared laughter and of our dog’s noisy bark (he hated it when we jumped into the pool and even fell into the water a couple of times, while chasing us) . I remember the warmth of the towels in which my mom would wrap us after the last swim of the day, the roughness of the branches of the magnolia tree that was our hideout, and the wonderful smell of its flowers, carried inside the house by the early morning breeze.
Foodwise, I was, back then, an extremely picky eater who would only taste two fruits (apples and bananas) so I did not take advantage of our orchard as I should have. But I still remember the exuberant, beautiful look of the baskets full of produce, how their smell filled the kitchen, especially in the mornings, and how the fruits felt in my small hands when peeling them for making huge quantities of jams and marmalades, that would then be gifted to friends and stored for the winter months. I remember how, in January, we used to buy watermelons and cantaloupes by the side of the road, when coming from the city, and how my father’s fingers would get full of pink sticky juice while eating them at the garden table, after siesta, and the delicious taste of the afternoon’s chocolate milk and cookies, which filled my empty stomach after hours of swimming, running and playing.
Autumn memories, in turn, bring back the smell of freshly sharpened pencils, the sound of dead leaves crunching under my shoes, the weird texture of the spider web paper that we used to protect school books, the perceived freezing cold of our bedsheets at night, and the welcomed warmth of blankets and covers.
Autum was back to school time, so our time in the country side was limited to weekends, and from those days, I remember the apples fallen all around the orchard trees, the fun of cracking walnut shells, and the trips to the communal fig tree, to collect fruit for conserves (we used to make jars of figs in syrup). I remember the home-made bread that we would buy by the side of the road, in the same small shops where we bought watermelons and cantaloupes in summer time and, most of all, I remember soup.
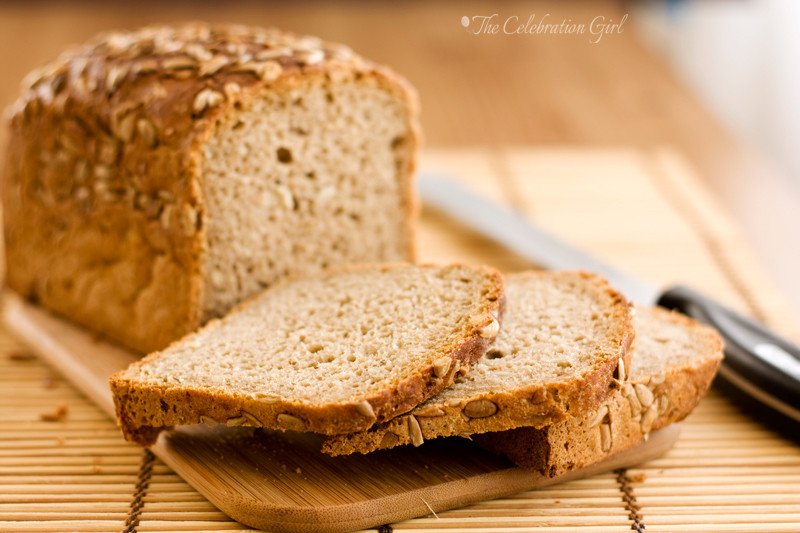
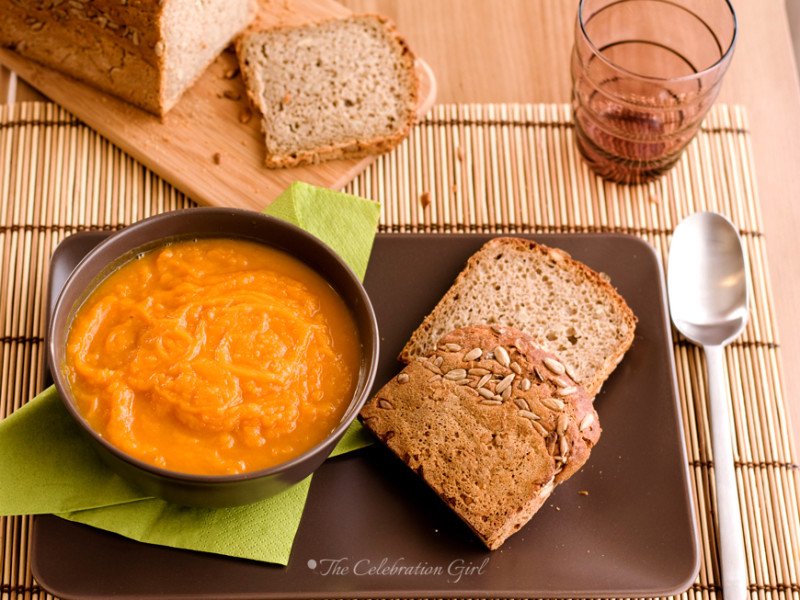
In those early years of my life, my family had a tradition: every Sunday evening, when we returned from the country side, my father and my mother would make soup while we watched V alien invasion. I remember that soup as the perfect one, because it was full of flavours I loved: leek, onions, butternut squash or pumpkin (depending on what we could get), potatoes, carrots and green beans. I don’t remember whether other vegetables were included because, being the picky eater that I was, I probably left those uneaten if there were, but it doesn’t matter. The vegetables were roughly chopped, and cooked in vegetable stock for what seemed like ages for my hungry young self and, once ready, we would eat it with bread (often, the remains of the home-made bread bought on the road).
These are the flavours present in the soup that I bring you today except, this time, I omitted peas and potatoes and I processed all ingredients, once cooked, for a smoother feel. The result is a hearty soup which, I hope, will bring you warmth in the cold days to come.
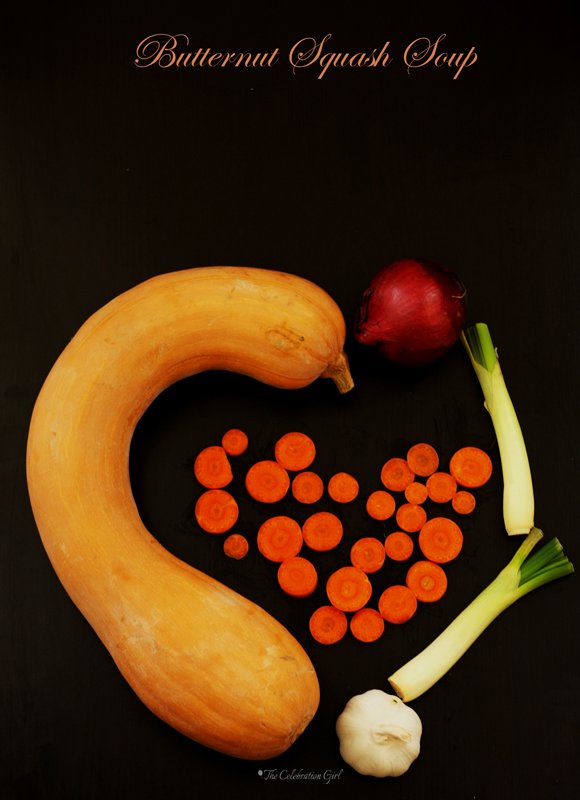
Here is the recipe (for 2 persons):
Ingredients: 4 thick slices of butternut squash, 1/2 red onion. 1 leek, 2 carrots, 1 garlic clove, 1 tablespoon of olive oil, 1 tablespoon of dried vegetable stock.
Preparation: 1) Dice onion, pumpkin slices and leek. Crush the garlic clove and slice the carrots, then cut each slice in fours. 2) Put olive oil in a saucepan and, once it is warm, add onion and garlic and leave until golden (stirring with a wooden spoon so that they don’t burn) 3) Add the rest of the vegetables and cover with water mixed with the vegetable stock. 4) Cover the saucepan, turn the heat to minimum and let it simmer for 30-40 minutes, or until the vegetables are soft. 5) Once the soup is ready, turn off the heat and process with an immersion food processor. If you don’t have an immersion food processor, let the soup cool down, transfer to the bowl of a regular food processor, process, and then re-heat for a few minutes before serving.

Con sabor latino…
Mis recuerdos de la infancia son sumamente sensoriales y relacionados con la naturaleza y, muchos de ellos, están especificamente ligados a la comida.
Cuando yo era niña, solíamos pasar los veranos, y los fines de semana (durante el resto del año), en una casa que se encontraba en las sierras de Córdoba, mi provincia natal. La casa, que era lo suficientemente grande para alojar primos y demás parientes que nos visitaban cada año, estaba ubicada en una pequeña comuna donde todos los vecinos se conocían y todos los niños eramos amigos. El jardín de dicha casa, que era grande, tenía una pileta de natación y arboles a los que trepábamos para guarecernos del calor de las tardes de verano, y hasta una quinta de árboles frutales que incluía ciruelos blancos y rojos, durazneros, quinotos, nogales, membrillos y manzanos.
Mis recuerdos de ese tiempo están muy marcados por esa casa: el shock helado del primer chapuzón en la pileta, el sonido de la risa compartida y del ladrido ruidoso de nuestro perro (que odiaba que nos lanzáramos a la pileta y, por eso, nos perseguía desde el borde- y que hasta se cayó al agua más de una vez). Recuerdo la calidez de las toallas con que mi mamá nos envolvía por la noche, cuando terminábamos de nadar y jugar, la aspereza de las ramas de la magnolia donde solíamos escondernos, y el aroma maravilloso de sus flores (aún mis preferidas), que inundaba la casa, traído por la brisa de la mañana.
En lo que hace a la comida, en ese entonces yo era mañosísima y sólo probaba dos frutas (manzanas y bananas), por lo que no aprovechaba como hubiera debido la abundancia de la quinta. Pero, a pesar de ello, aún recuerdo la exuberancia de los canastos llenos de frutas, cómo sus aromas inundaban la cocina, sobre todo por la mañana, y las texturas diferentes en mis pequeñas manos, al pelar las distintas frutas para hacer toneladas de mermeladas y jaleas que luego regalaríamos a amigos, y guardaríamos en frascos para el invierno. Recuerdo cómo, en enero, solíamos comprar sandías y melones al costado de la ruta, y cómo las manos de mi padre se llenaban de ese jugo pegajoso y rosado , al comerlos después de la siesta; y recuerdo el sabor delicioso de la leche chocolatada y las galletitas de la merienda, que llenaban mi estómago hambriento despues horas de nadar, correr y jugar.
Mis recuerdos del otoño por su parte, tienen el aroma de lápices nuevos, el sonido de las hojas muertas crujiendo bajo mis zapatos, la extraña textura del papel araña con el que forrábamos libros y cuadernos, el frío helado de las sábanas, al entrar a la cama por la noche, y la bienvenida calidez de las colchas y frazadas que nos abrigaban.
El otoño era una epoca escolar, así que nuestro tiempo en el campo se limitaba a los fines de semana y, de esos días, recuerdo las manzanas caidas alrededor de los árboles de la quinta, lo divertido que era romper cascaras de nueces , y los viajes a la higuera comunal para buscar frutas suficientes para preparar tarros de higos en almibar. Recuerdo el pan casero que comprábamos al costado de la ruta (en los mismos puestos que vendían sandías y melones durante el verano) y, por sobre todas las cosas, recuerdo la sopa.
En esa primera infancia, mi familia tenía una tradición: cada domingo por la noche, al regresar del campo, mi mamá y mi papá preparaban una sopa mientras nosotros (mi hermano y yo) veíamos V invasión extraterrestre. Recuerdo esa sopa como la perfección absoluta, porque incluía todos mis sabores preferidos: puerros, cebollas de verdeo, calabaza o zapallo (lo que encontráramos), cebollas, papas, zanahorias y arvejas. A decir verdad, no recuerdo si había algún otro ingrediente porque como era muy mañosa, si lo había, seguramente no lo habré comido! En la sopa de mi infancia, estos ingredientes eran cortados en cubos y se los cocinaba en un caldo de verduras por lo que, en mis recuerdos de niña hambrienta, parecían añares y, una vez lista, solíamos comerla acompañada con pan (generalmente el mismo pan casero que había sobrado del campo).
Estos son los sabores que están presentes en esta sopa que hoy les traigo. Esta vez, sin embargo, omití papas y arvejas y licué los ingredientes, una vez cocidos, para darle una textura cremosa. El resultado es una sopa sustanciosa, que espero les brinde calor en los fríos días por venir.
Aqui está la receta:
Ingredientes: 4 rodajas gruesas de calabaza, 1 puerro, 1/2 cebolla colorada, 2 zanahorias, 1 diente de ajo, 1 cucharada de aceite de oliva, 1 cucharada de caldo de verduras disecado.
Preparación: 1) Corte en cubos la calabaza, el puerro y la cebolla. Machaque el ajo y corte las zanahorias en rodajas, y luego cada rodaja en 4 pedazos 2) Ponga el aceite de oliva en una olla, y agregue la cebolla y el ajo, cocinandolos hasta que estén dorados (revuelva con cuchara de madera para que no se quemen). 3) Agregue el resto de las verduras y cubra con agua, en la que habrá disuelto previamente el caldo. 4) Cubra la olla, ponga el fuego a mínimo y deje cocer por 30 a 40 minutos, o hasta que las verduras estén tiernas. 5) Una vez cocidos los ingredientes, retire la olla del fuego y, usando una procesadora de mano, procese los ingredientes hasta que esten disueltos. Si no tiene procesadora de mano, deje enfriar la sopa, coloquela en el bowl de una procesadora tradicional, procese y luego caliente nuevamente antes de servir.
May you have a wonderful week! I’ll come back on Thurday with a surprise I hope you will like!
Que tengan una semana maravillosa! El jueves estaré de vuelta con una sorpresa que espero que les guste!
by Marcela M. | Jul 21, 2012 | Blog, cookies, Recipe Box, Recipes, South America, Sweets, Travel, Uncategorized
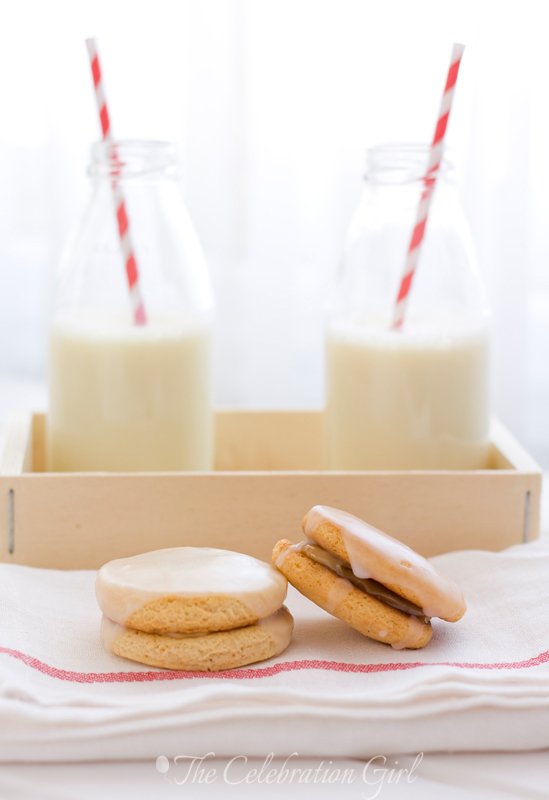
Good evening dear friends! I hope you are having a lovely weekend.
Days have been incredibly HOT in Nicosia this past week, with temperatures ranging from 40 to 45.5 degrees celsius. Summer is definitely here and this means doing our best to minimize as much as possible the heat that comes into the house. This is why we clean early in the morning, and then try to keep all window shutters down, to turn the stove on as little as possible and, you guessed it, we avoid baking! We tend to opt for meals that require minimal cooking, such as fresh salads, and, for dessert, we eat fruits and simple home-made fruit lollies.
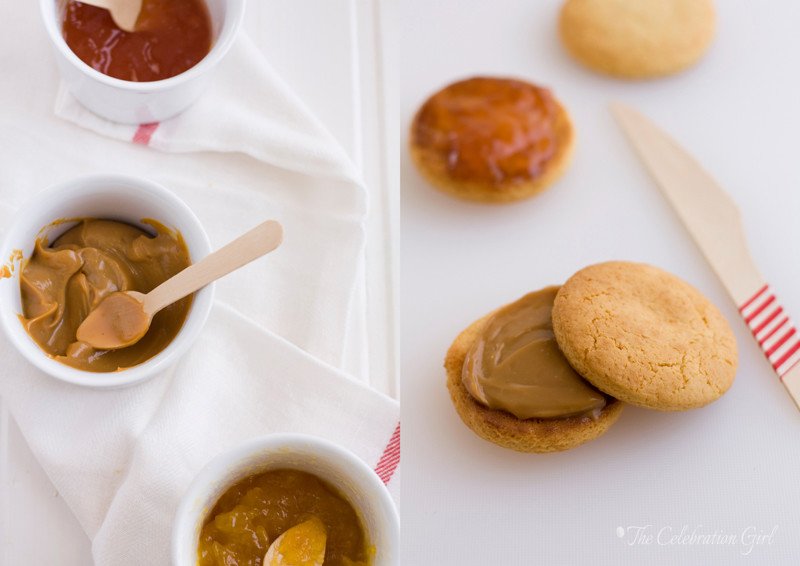
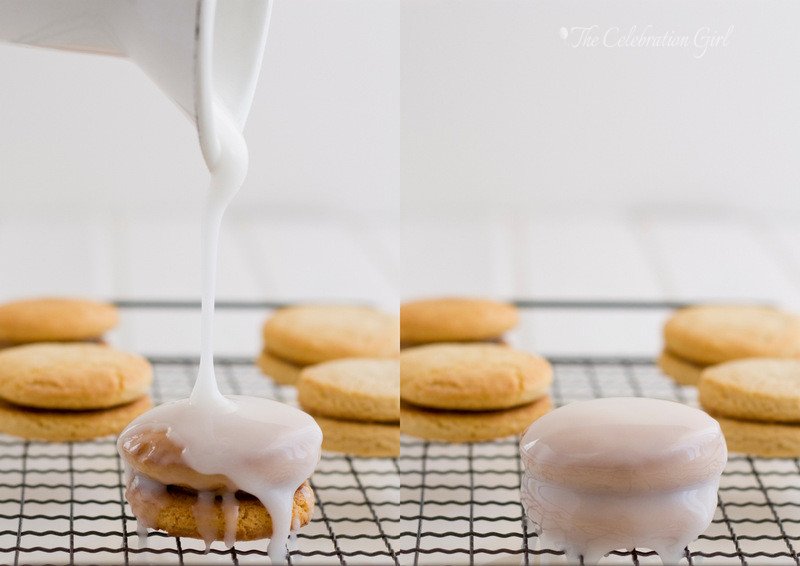
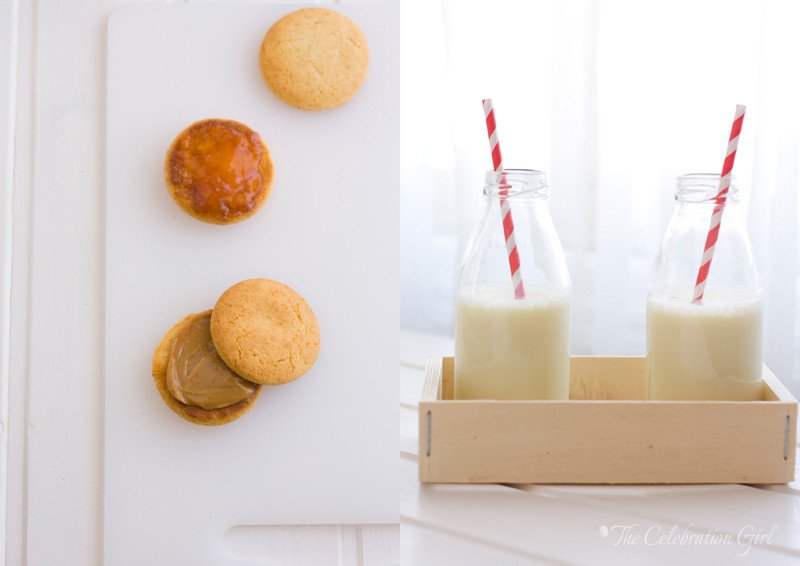
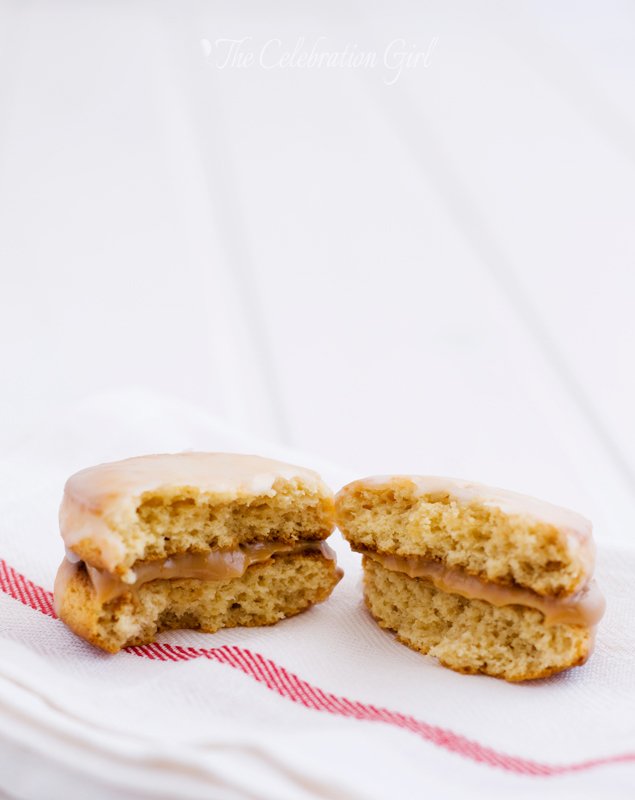
Sometimes, however, we do crave a little baked treat and, for those occasions, these alfajores are perfect: they are incredibly easy and they take only 5 to 7 minutes in the oven to be ready. After they have cooled down, they are sandwiched with fruit jam or dulce de leche and covered in the simplest glaze of all: icing sugar to which we just add a few tablespoons of boiling water and a sprinkle of lemon juice. They couldn’t be easier!
You may have noticed that I called these alfajores “semi cordobeses” , and there is a reason for that. I had been looking for a while for a recipe of the particular type of alfajores from my home city. I never had one because, when I lived there, I always bought them from a nearby store but, now that I live abroad and that I have children whom I would like to introduce to my culinary traditions, I wanted to be able to make them at home.
The search, however, proved to be difficult. It turns out that Argentina’s cocina criolla (créole cuisine) is famous for being “unreliable” or “moody”. Now, I honestly refuse to attribute human characteristics to any recipe and I believe, instead, that what happens is product of the typical way recipes are transmitted back home: as part of family heritage. Recipes are learned, first, by watching our elders prepare them at home and, later, by making them together with them when we are older. At my own home, for example, we rarely measured ingredients and recipes were rarely written down. We just knew how they were supposed to turn out and how to fix common problems, because we had been making them our whole life.
This reminds me of an anecdote from my grandmother. One day, back in 1997, I was about to leave Argentina for a few months when I realized that I had never written down some of her delicious staple recipes and that I would not necessarily remember how they were done because they were not everyday dishes. So I sat down with her, in her kitchen, armed with a notebook and a mate, and she started trying to explain to me how the recipes were done. Our dialogues went more or less like this:
Me: So, let’s see, “rosquitas“. What ingredients do they take?
Grandma Antonia: 6 eggs, 3 tablespoons of alcohol, 1/2 kilo of flour.
Me: And how do I make them?
Grandma Antonia: Just mix everything until you get a smooth dough. But if you feel that it turns out to be too dry, add another egg.
Me: (confused) But how do I know if the dough is too dry and I should add another egg or if I should just keep mixing??
Grandma Antonia: I don’t know! I just know!
Of course, we ended up making rosquitas together and I took many more notes than the ones initially provided by my grandmother. She knew so well how to make the recipe that it was hard for her to put herself in my shoes, or in the shoes of anyone who, well, just didn’t know everything that she did.
Most of the recipes I have from my home are like that. They mention “a drop of milk”, “a bit of flour”, or they get started with 100 grs of chocolate but then add unmeasured extra quantities of it as the preparation progresses, according to how we know the dish is supposed to turn out because we made it countless times before. This is perfectly okay when recipes are transmitted within families but it becomes a problem when one has never seen the dish being prepared before. People tend to transmit the initial ingredients and the basic procedures but, more often than not, they simply forget to pass down vital information that one only acquires when making the food with them. Then, of course, fiascos become very common!
Let me just tell you that I had many of those fiascos before achieving this recipe (which gave me a few headaches too!) and I still haven’t found a good one for our traditional colaciones. What’s more, I don’t think my search for the real alfajor cordobés is over yet. These are delicious cookies, the texture of which does resemble that of our traditional sweets…but the taste is not quite “it”, in my opinion, and that is the reason I called them “semi-cordobeses”. That being said, do try them, because they are really, really tasty!
Here is the recipe:
Ingredients (For 25 alfajores of 4 cms diameter/ 50 single cookies)
– 500 grs all purpose flour (0000)
– 10 grs amonium bicarbonate (or 12 grs sodium bicarbonate, which is less smelly)
-10 grs baking powder
– 120 grs soft butter or margarine
– 2 eggs (I used M)
– 200 grs sugar
– 50 grs honey
– 15 grs malt extract (I used barley malt extract, which I found in the organic food section of my local supermarket)
– Fruit jam of your choice or dulce de leche, for sandwiching the cookies. I used quince jam, apricot jam and dulce de leche, for more variety. Traditional jams are quince, apricot, apple and pear.
– 4 cups of icing sugar
– 1 tablespoon of lemon juice
– 3/4 cup of boiling water (or 12 tablespoons)
Preparation:
1) Mix flour, baking powder and bicabonate.
2) Pour flour mix on the kitchen counter and make a hole in the middle
3) Add butter, eggs, honey, malt extract and sugar in the hole. Start mixing the wet ingredients with your hands, and once this is done, start incorporating the flour, little by little, until you get a uniform dough.
4) Cover the dough in plastic wrap and put in the refrigerator for 20 minutes.
5) In the meantime, prepare your baking sheets by lining them with baking paper.
6) A few minutes before removing the dough from the refrigerator, preheat the oven to 250 degrees C (maximum)
7) Roll the dough 1/2 cm wide and cut circles using a cookie cutter. Place the circles on baking sheets and put them in the freezer for 5 minutes. NOTE: The cookies grow in the oven, so place them apart on the baking sheet or they will join one another. Also, do not skip the freezer part or they will lose their shape!
8) Bake in a hot oven for 5 to 7 minutes, until they barely begin to brown. Be careful, they brown easily!
9) Remove from the oven, transfer to a wire rack and let cool completely
10) Add one tablespoon of jam or dulce de leche to one cookie, and sandwich it by placing another one on top. Now you have an alfajor! Continue until all cookies have been sandwiched together.
11) Prepare the glaze by adding the boiling water and lemon juice to the icing sugar and mixing well, until no lumps remain.
12) Place the alfajores on a wire rack and pour the glaze over them. Let the glaze cool and harden, and eat.
You may store them in the freezer for up to 3 months. I hope you will like them!
Buenas noches queridos amigos! Espero que esten pasando un hermoso fin de semana!La semana pasada tuvimos unos días increíblemente calurosos en Nicosia, con temperaturas que iban de los 40 and los 45.5 grados centígrados. El verano se ha instalado aquí definitivamente y eso significa, para nosotros, hacer todos los esfuerzos posibles por minimizar la entrada de calor a la casa. Por este motivo, limpiamos bien temprano a la mañana y luego intentamos mantener todas las persianas bajas, cocinar lo menos posible y, se imaginarán, evitamos prender el horno! Así que optamos por comidas livianas, que requieran mínima cocción, como ensaladas frescas, muchas frutas y helados palito de fruta, bien simples.A veces, sin embargo, nos agarren esos ataques de algo dulce-dulce y, para estos casos, estos alfajores son perfectos: son increiblemente fáciles de hacer y sólo requieren 5 a 7 minutos de horno. Una vez que estan cocidos y ya se han enfriado, se los une con mermelada de frutas o dulce de leche y se los cubre con el baño más sencillo que existe: azucar impalpable a la que se le agrega agua hirviendo y un poquito de limón. No pueden ser más sencillos!Seguramente habrán notado que llamé a estos alfajores
semi cordobeses y esto tiene una razón de ser. Hace ya bastante venía buscando una buena receta de los alfajores tradicionales de mi terruño (
de los que hablé en este post). Cuando vivía en Argentina nunca los hice porque, en caso de antojo, no tenia más que ir al kiosco a comprar uno, pero ahora que vivo en el exterior y que quiero transmitirle a mis hijos mis tradiciones culinarias, comencé a querer poder hacerlos en casa.
La búsqueda, sin embargo, no fue sencilla. Descubrí, entre otras cosas, que la cocina criolla tiene fama de “poco confiable” “traicionera” o “temperamental”. Ahora bien, honestamente me niego rotundamente a asignarle a una comida caracteristicas humanas y creo que lo que en realidad ocurre, que el motivo por el que las recetas “no siempre salen bien”es otro, y está ligado a la forma en que se transmiten las recetas: como parte del acervo familiar de cada uno. Las recetas no se escriben, se aprenden mirando a nuestros mayores, cuando somos chicos, y haciéndolas con ellos, cuando crecemos. En mi casa, por ejemplo, rara vez mediamos ingredientes meticulosamente, ni escribiamos instrucciones detalladas. Simplemente
sabíamos cómo debía quedar el plato y cómo solucionar posibles problemas, porque lo veníamos haciendo toda nuestra vida.
Escribo estas líneas y recuerdo una anecdota, muy ilustrativa, que involucra a mi abuela. Un día, allá por el año 1997, días antes de que yo fuera a partir de Argentina por unos meses, caí en la cuenta de que nunca había anotado algunas de aquellas deliciosas recetas que mi abuela no hacía tan frecuentemente y que, por lo tanto, yo no conocía de memoria. Así que me senté con ella en la cocina de su casa, con un cuadernito que aún conservo, y una pava de mate, a intentar que ella me explicara su recetario personal. Nuestros dialogos terminaron siendo algo más o menos asi:
Yo: Bueno, a ver, rosquitas. ¿Qué ingredientes llevan?
Abuela Antonia: 6 huevos, 3 cucharadas de alcohol, 1/2 kilo de harina
Yo: Y como las hago?
Abuela Antonia: Mezclá todo hasta que te quede una masa suave. Pero si ves que la masa está muy seca, agregá un huevo
Yo: (confundida)…pero cómo sé si la masa está seca como para agregarle un huevo o si sólo tengo que seguir trabajandola
Abuela Antonia: ah, no sé! Yo sólo sé!
Obviamente terminamos haciendo las rosquitas juntas y en ese momento tomé muchisimas más notas para complementar las instrucciones iniciales dadas por mi abuela. Ella conocía tan bien cómo hacer la receta que le resultaba dificil ponerse en mi lugar, o sea, en el lugar de una persona que no supiera aquello que ella sabía tan a la perfección.
La mayoría de las recetas que traigo de casa son así. Hablan de “un chorrito de leche”, “un poquito de harina” o mencionan 100 grs de chocolate, pero no cuentan todos esos “poquitos extra” que se van agregando durante la preparación, conforme cómo el plato “debe quedar”. Esto funciona de maravillas con las recetas familiares, porque uno las conoce de memoria y no necesita una receta detallada, pero se transforma en un problema para alguien que nunca hizo el plato antes. La gente tiende a transmitir sólo los ingredientes iniciales y los procedimientos básicos, olvidando transmitir tambien, la mayor parte de las veces, aquellos datos extra que son vitales para obtener un buen resultado. Y en esos casos, claro, los fiascos son momumentales y uno se queda mirando el horroroso resultado final y preguntándose qué habrá ocurrido.
Dejenme decirles que, en la busqueda de esta receta he tenido muchos de esos fiascos, que, aun esta receta misma me dio varios dolores de cabeza al comienzo, hasta que logré “rellenar los espacios vacíos”, y que aún no logro dar con una buena receta de colaciones. Y más aún, todavía no considero que mi búsqueda del perfecto alfajor cordobés haya culminado. Estos alfajorcitos son deliciosos, y tienen una textura muy similar…pero el gusto no es exactamente el del alfajor cordobés tradicional, en mi opinión, y es por este preciso motivo que los llamé “semi-cordobeses”. Dicho esto tambien les digo que no dejen de probarlos porque son realmente muy, muy ricos!
Aquí está la receta:
Ingredientes
– 500 grs de harina cuatro ceros
– 10 grs de bicarbonato de amonio o 12 grs de bicarbonato sódico ( que es menos oloroso)
– 10 grs de polvo de hornear
– 120 grs de margarina o manteca
– 2 huevos
– 200 grs de azucar
– 50 grs de miel
– 15 grs de extracto de malta
– mermelada de frutas o dulce de leche para unir las tapitas. Yo usé mermelada de membrillo, de damascos y dulce de leche. Las mermeladas tradicionales son membrillo, damascos, pera y manzana.
– 4 tazas de azucar impalplable
– 3/4 taza de agua hirviendo
– 1 cucharada de jugo de limón
Preparación:
1) Mezcle la harina con el polvo de hornear y el bicarbonato
2) Coloque la harina sobre la mesada en forma de corona (haciendo un huevo en el medio)
3) Agregue, en el hueco mencionado, la manteca o margarina, los huevos, el azucar, la miel, y el extracto de malta. Mezcle los ingredientes húmedos con las manos y, una vez incorporados, comience a agregar de a poco el harina, moviendola hacia el centro en pequeñas cantidades, hasta formar una masa uniforme.
4) Cubra el bollo de masa con papel film y lleve a la heladera por 20 minutos.
5) Mientras tanto, prepare las placas para horno recubriendolas con papel de hornear (antiadherente).
6)Unos minutos antes de sacar la masa de la heladera, precaliente el horno a maximo/250C
7) Saque la masa de la heladera y estirela con palote de amasar hasta que tenga un ancho de 1/2 cm. Corte circulos de aproximadamente 4 cms de diametro, coloquelos sobre la placa y lleve la placa al freezer por 5 minutos. NOTA: las tapitas crecen en el horno, asi que coloquelas suficientemente separadas la una de la otra o se unirán al cocerlas. Asimismo, no omita ponerlas en el freezer o perderan la forma!
8) Cocine las tapitas en horno fuerte por 5 a 7 minutos, hasta que esten apenas doradas. Tenga cuidado, se doran muy rápido, vigílelas!
9)Retire del horno, transfiera a una rejilla, y deje enfriar totalmente.
10) Una vez que las tapitas estén frias, unte la mitad con una cucharada de la mermelada/dulce de su elección, y cierrelas con las tapitas restantes, haciendo un sandwich. Una vez haga esto, usted tendrá en sus manos alfajores!
11) Prepare el baño de azucar agregando el agua hirviendo y el limon al azucar impalpable y revolviendo bien hasta que no queden grumos.
12) Coloque los alfajores sobre una rejilla y cubralos con el baño de azucar. Deje que el baño se seque y endurezca y disfrute!
Pueden guardarlos en el freezer por 3 meses. Espero que les gusten!

Have a wonderful weekend and a great start of the new week!


