by Marcela M. | Apr 18, 2013 | Gluten Free, Mousses and ice cream, Recipe Box, Recipes, Sweets, Vegan & Raw
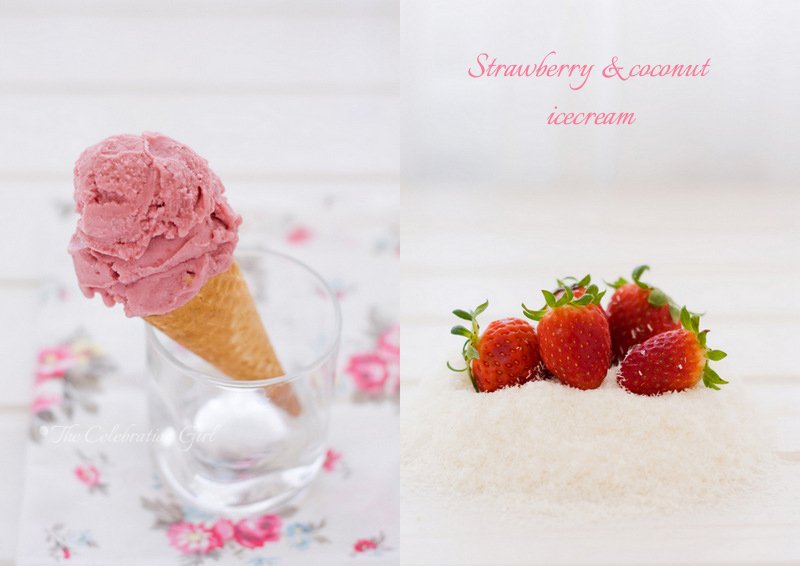
Good morning dear friends!
Today’s recipe was my monthly contribution to the Spanish website Petit-On. As I have mentioned before, each month I contribute a recipe based on an ingredient chosen by one of the blog’s contributors. To my utter delight, the ingredient for April was strawberries!
I love strawberries and, each year, I wait anxiously for April to arrive because I know that it’s strawberry season. I love their fragrant smell, their sweetness that goes so well with slightly tangy flavors, and the deep red of their skins. They are delicious and beautiful, a real feast for all senses. The funny thing is that I hated them when I was a child…but fortunately I have come to my senses since then!
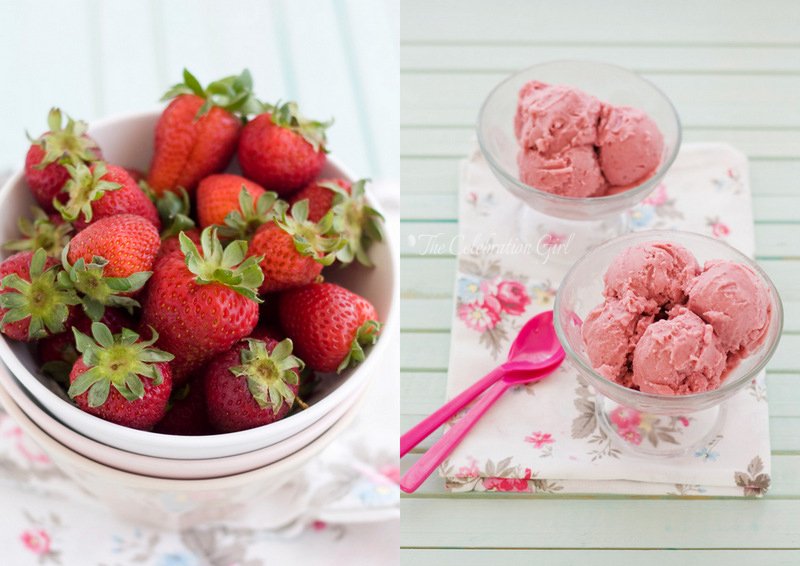
Loving strawberries as I do, it took me a while to chose a recipe, but I finally decided to make this one, because what better way to greet the warmer weather and celebrate Spring than with a delicious ice cream?
As you will soon see, an added beauty of this recipe is that it takes very few ingredients: coconut milk, fresh strawberries, sugar and a splash of good vanilla, to enhance the strawberries natural flavor (I use vanilla bean paste but you may use vanilla extract if you want, or a vanilla pod). Yes, no milk, no cream and no eggs, which also means no need to make a custard, beat ingredients or anything like that. I warm up the milk with the sugar for a little while, so that the sugar cristals dissolve but you can also make it raw and just out all ingredients in a blender or food processor at the same time, process and refrigerate for a couple of hours before churning in an ice cream maker.
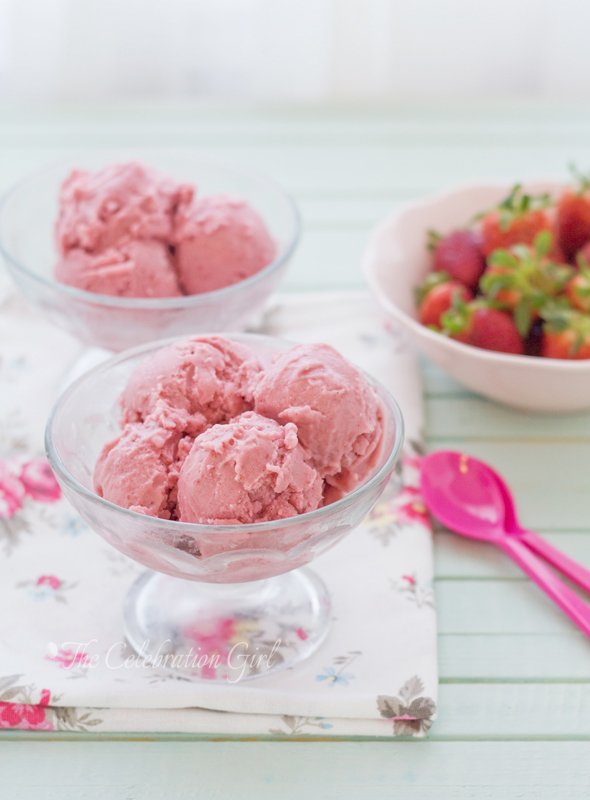
Here is the recipe:
Strawberry and coconut ice cream
Ingredients: 2 1/2 cup of strawberries , 1 can of coconut milk, 1/2 cup of sugar, 1 teaspoon of vanilla bean paste/the seeds of 1 vanilla pod or 2 teaspoons of vanilla extract.
Preparation:
1) Wash the strawberries, remove the leaves, cut them in half and put them in the bowl of a food processor or blender. Process and blend until they transform into a purée. Reserve.
2) Put coconut milk and sugar in a saucepan and bring to moderate heat for about 5 minutes, so that the sugar crystals dissolve. Remove from the heat, let cool down for a while and add vanilla.
3) Pour the sugared milk in the food processor/blender, together with the strawberry purée and pulse a few times to to integrate well.
4) Pour the preparation in a tall glass/bowl, cover with foil and refrigerate for at least 4 hours before churning.
5) Remove the preparation from the refrigerator and churn in your ice cream maker according to the manufacturer’s instructions. I use the KitchenAid ice cream attachment, with which it takes 15-20 minutes for the ice cream to reach soft consistency.
6) Remove the ice cream from the machine, put it in an airtight container and place it in the freezer for a couple of hours so that it reaches scoop consistency.
If you don’t have an ice cream machine, you can still make this recipe. In that case, instead of refrigerating the preparation as is required before churning, put it directly in the freezer, and remove it every 30 minutes during 2 hours, beating it vigorously every time, so as to break the ice crystals. You may also use it to make ice lollies, if you have the molds. They will be delicious either way!
Do you like to make ice cream at home? Do you have any food allergies that prevent you from eating ice cream at a shop? Let me know in the comments below and I promise I’ll do my best to come up with a recipe you can eat!
by Marcela M. | Apr 4, 2013 | Blog, cookies, Recipe Box, Recipes, Sweets
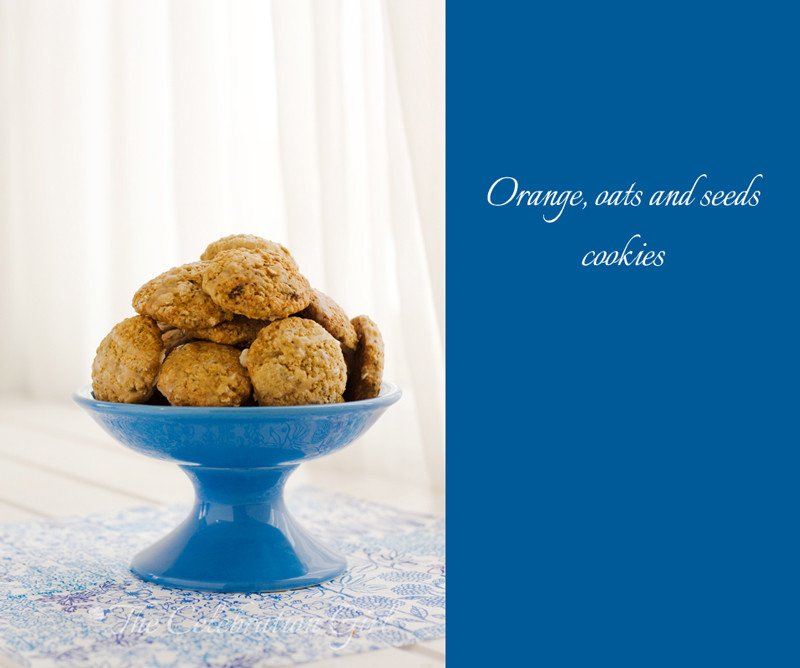
Good morning dear friends!
I’m very happy today, because yesterday I sent out my first newsletter!!! I got great feedback from some subscribers and that had me smiling all day long. Thank you for being there! If you forgot to subscribe but would still like to read the newsletter, I can still send it to you, all you have to do is register in the pink form on the sidebar or in the one at the end of this post!
Now let’s move to today’s recipe, which was my monthly contribution to Petit-On. As you know the recipes contributed have to share one common ingredient, and the one for March was oranges.
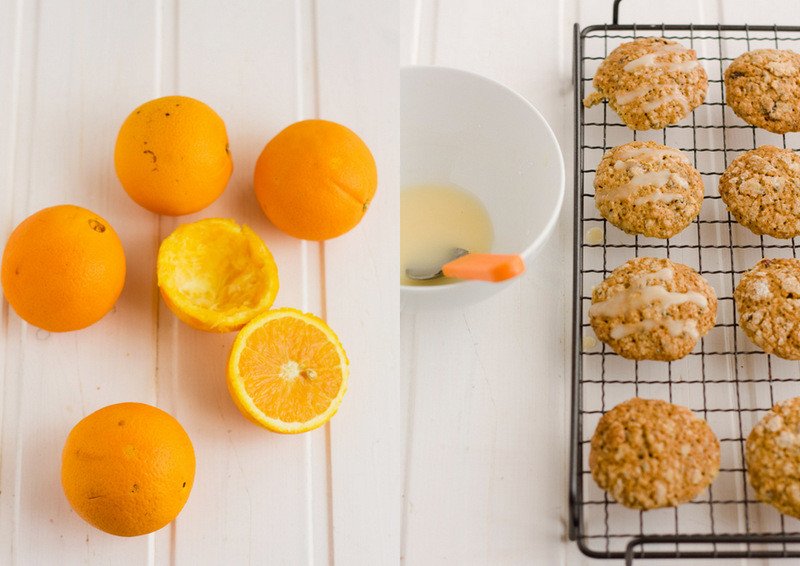
I love oranges. I use them a lot in my baking and also when cooking savory dishes (like tangerine beef, or orange scented quinoa, for example). I adore how just a tiny bit of orange zest can completely transform traditional dishes, such as pastry cream or strawberry sauce.
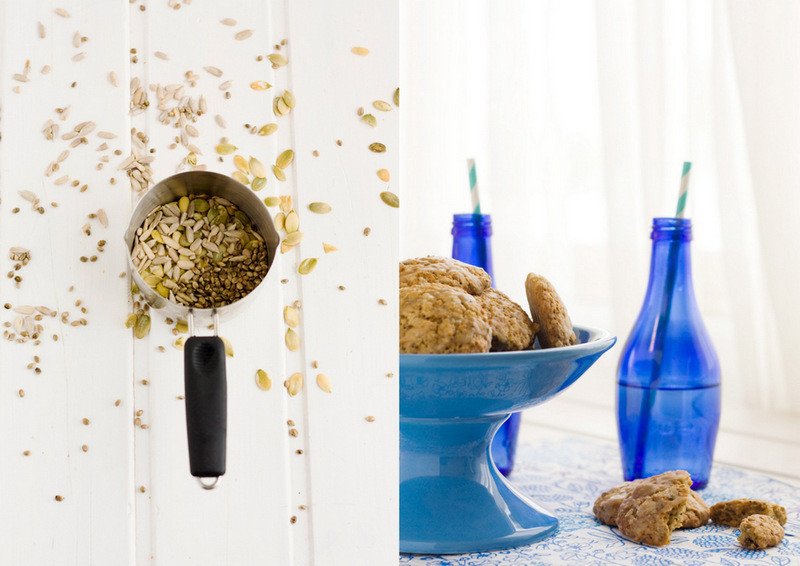
I adapted this recipe from one given to me by my mum, a few years ago. The original one used self-raising flour and did not require any baking powder nor baking soda or cornstarch, but I modified this because I was unable to reproduce it with the flours that I could find in Cyprus. Self raising flours in Argentina do not require any leavening agents as do, from my experience, the ones sold in Europe so, after a couple of culinary disasters, I made a few modifications to preserve the cookie’s yumminess. I also reduced the original amount of sugar and used different seeds because the ones I used to include in my native Córdoba (such as Amaranth) cost a fortune here. This is one of the best things of this recipe: it is very versatile. If you keep the proportions more or less intact, they will definitely turn out tasty and be a success! And they are dairy free!
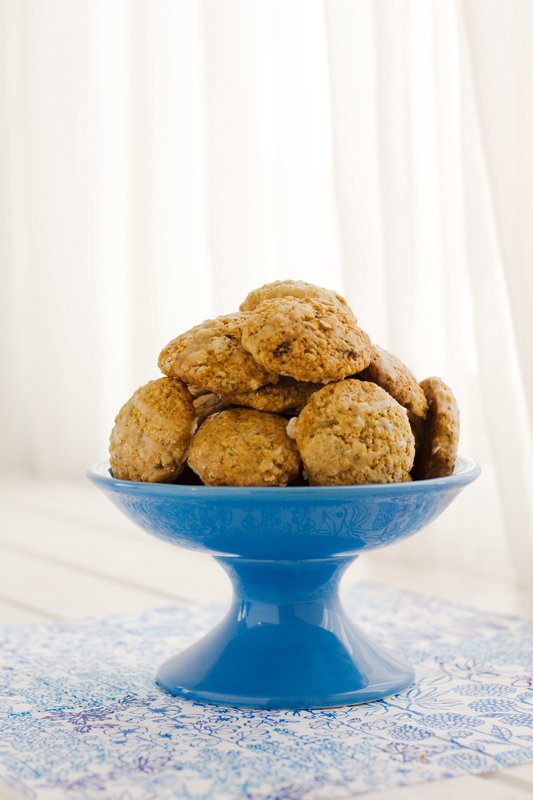
Here is the recipe
Orange, seeds and oat cookies (makes 3 dozen)
Ingredients: 2 cups rolled oats (I use Quaker), 1 cup all purpose flour, 1/2 teaspoon baking of soda, 1 teaspoon baking powder, ½ cup cornstarch, 3/4 cup of sugar (I used golden) 3/4 cup oil (canola or sunflower), zest of 2 oranges (you may also use lemon or clementines, or a combination) , 2 eggs (M), slightly beaten, juice of half an orange, 1 cup of mixed seeds ( I used 2 tablespoons of chia seeds, 2 tablespoons of hemp seeds, 2 tablespoons of pumpkin seeds and 3 tablespoons of sunflower seeds) .
NOTE: You may also use other seeds, such as sesame, linseed amaranth, poppy, etc. You can also use only 1/2 cup of seeds and add 1/2 cup of raisins, dried berries, or nuts, if you wish. If you add fruits or nuts, just remember to toss them in flour before adding them to the batter.
Preparation:
1) In a bowl, mix flour, baking soda, baking powder, sugar, cornstarch and oats.
2) Add oil, eggs, and orange juice and zest and mix to incorporate well.
3) Add seeds and mix briefly. Be very careful not to over mix or the cookies will turn out hard. Beware that the dough will look very soft and you may be tempted to add liquid, but DON’T. All you have to do is wrap it in foil and place it in the refrigerator for at least 2 hours. You can also freeze the dough and bake the cookies later. If you don’t want to wait, you may bake the cookies but keep in mind that they won’t keep their shape.
5) Remove the dough from the refrigerator, extend it with a rolling a cut, using traditional cookie cutters. Place the cookies on a baking sheet lined with baking paper and bake at 175 degrees/350F until golden (approximately 15 minutes, but this depends on each oven). Keep in mind that these cookies do grow in the oven, so leave space between them when you are placing them in the baking sheet.
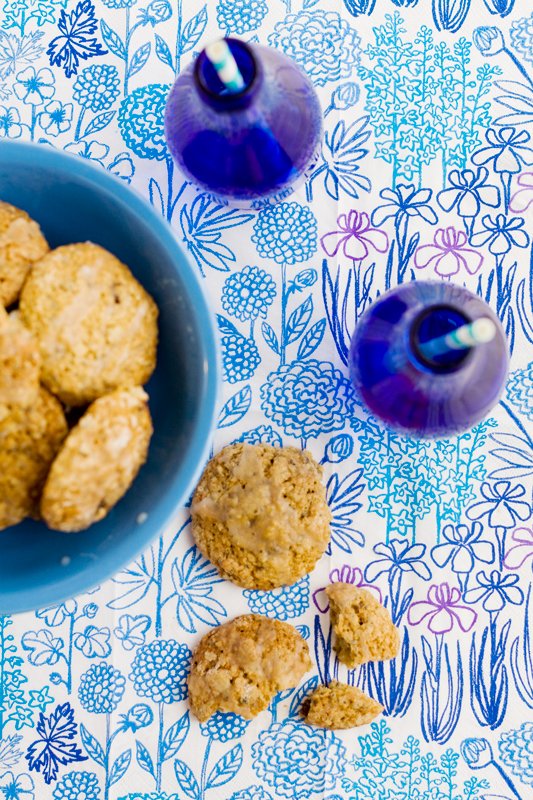
6) When they are ready, remove them from the oven and let them rest on the sheet for about 10 minutes. After this, remove them with a spatula and place them on a wire rack until cold (or eat them warm, I won’t tell anyone 😉
I hope you like this recipe and , if you do, please share it!
Now, please tell me in the comments below: which is your all time favorite cookie?
Para ver la receta en español, HACER CLICK AQUI
by Marcela M. | Feb 14, 2013 | Blog, Cakes, Gluten Free, Holidays, Recipe Box, Recipes, Sweets, Valentine's day, Vegan & Raw
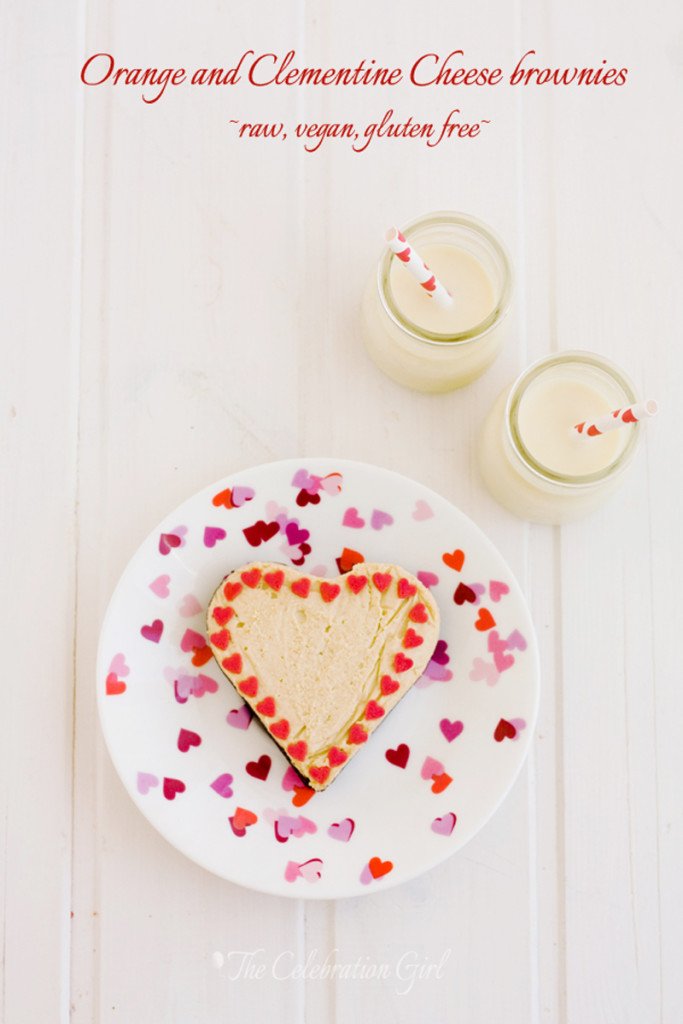
Good morning dear friends! Happy Valentine’s day!
Do you celebrate this holiday or it is not a tradition where you live? As an Argentinian, I didn’t grow up with Valentine’s day and learn’t about it from movies and American TV shows. It was only in the late ’90s that it became more common to celebrate it, but that was only for those who had someone to celebrate it with and, until I met my husband, many years after that and in a different country, I didn’t. Most years, I would get together with my best friend (also single at the time) , cook together and watch movies that had nothing to do with romance, like the Lord of the Rings trilogy-extended edition. It was awesome. Rom-Coms could be watched any other day. We were not against the holiday, we were not a Valentine’s Grinch, we just felt that it was not for us. Like “
The day of the secretary” is not for you unless you are a secretary and you don’t expect your life to be different just because someone else is celebrating, I didn’t expect anything from Valentine’s day. But since everything seemed to be taken over by teddy bears and pink hearts, we made it ours by creating our own traditions.
The first Valentine’s day after I met my husband, which happened 3 weeks after we got married, we spent it apart. We were living in Ivory Coast at the moment, and had left to get married in Italy during our vacation time. But the day after we left there were riots that led to the evacuation of all non-essential staff of the organization where we worked and we got married on the day when our colleagues were being transported to Gambia. Then the call came: My husband had to go back, he was essential staff. I was not, so I had to stay behind. Argentina was too far away so, a mere two weeks after the wedding, we traveled to Belgrade (where my husband’s family lives) and I stayed with them for 3 weeks. My husband’s ethnic group has a tradition (no longer being followed anymore, from what I’m told) of bringing the bride back to her family a few weeks after the wedding, to give her the opportunity to change her mind, so we used to joke that he didn’t want to risk it, so he was leaving me with his family instead 😉
So Valentine’s day went by, uncelebrated, and maybe because of that, we never made a big deal about it. But we always have some treat, even if it’s just a block of dark chocolate, to mark the day, just because we take every opportunity to celebrate all that is good in our life.
Today’s recipe is the one I prepared for my monthly contribution to Petit-On. The ingredient selected for February was cheese, which presented a problem for me, so I checked with Raquel to see if I could use substitutions, and she encouraged me to write this recipe.
If you are reading these words and have been reading this blog for a while, you are probably wondering why is cheese a problem for me. I have, after all, a recipe for the best cheesecake ever, which is also one of the most visited blog posts. The reason is that I can’t eat dairy without feeling pain in my breasts due to a condition called cystic fibrosis. We discovered it two years ago when I ran in panic to the doctor after finding a lump the size of a marble in my right breast. The doctor ordered a breast ultrasound and we found out that I have cysts in my breasts, which are not dangerous but fill with liquid during ovulation, which causes pain. Milk makes the pain bad, but cheese, cream and yogurt make it unbearable and, when I do eat them, I know it’s at my own risk and regret it later. Since then 95% of my diet is vegan (I didn’t eat meat or eggs from before discovering this condition) and I have been working on finding substitutions for my favorite treats (You may have noticed that I normally list ” butter or margarine”in the ingredients, and that is because I used to make it with butter but now use vegan margarine and know it can be done). Now let’s be honest: vegan cheese is not brie or camembert, but when the choice is feeling enormous pain and freaking out when doing my breast exam, vegan cheese does the trick.

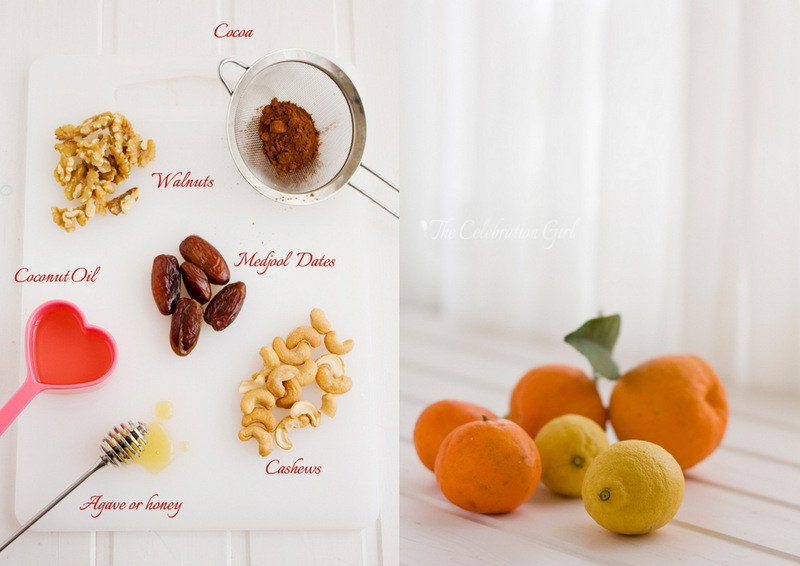
This recipe was created by adapting and modifying two recipes from Sara Britton, of the blog My New Roots. I had been wanting to try them for a while and found this to be the perfect opportunity to do so. And I love the result! It is called cheese brownie, because it has a raw brownie base,made only with walnuts, cocoa, dates and cocoa nibs for added crispiness. As Sara advises, Medjool dates are better because they are sweeter, but if you cannot find them or they are too expensive, simply add more quantity. Also, if you can, use good quality cocoa because it does make a difference.
The cream cheese filling is made with cashews, that were soaked overnight, agave nectar (or honey, if you are not vegan), coconut oil (which hardens at room temperature, so you will need to submerge the closed bottle in warm water for 10 minutes before using it), lemon juice (to give it the slightly bitter, characteristic “cheese”flavor) and orange and clementine juice and zest. I chose these flavors instead of the more traditional vanilla/fruits of the forest because citrus are in season and the trees that line my street are ripe with fruits. They also combine beautifully with the depth of dark chocolate.
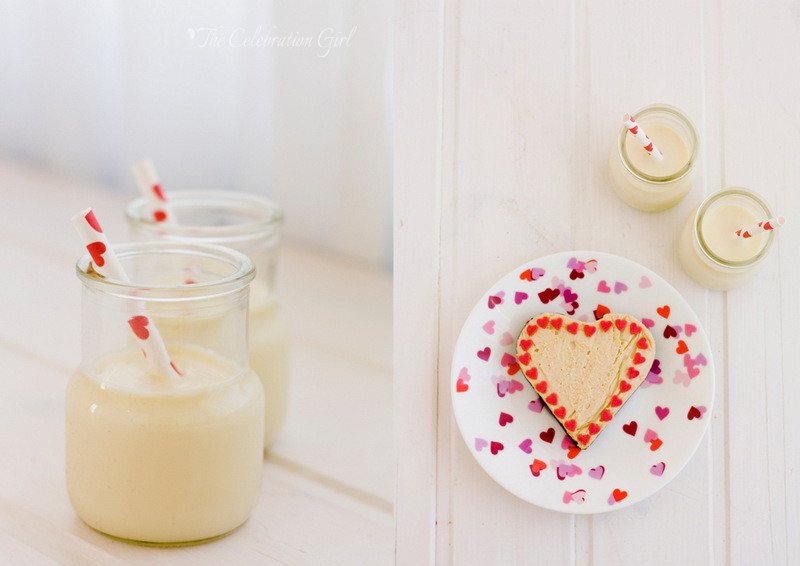
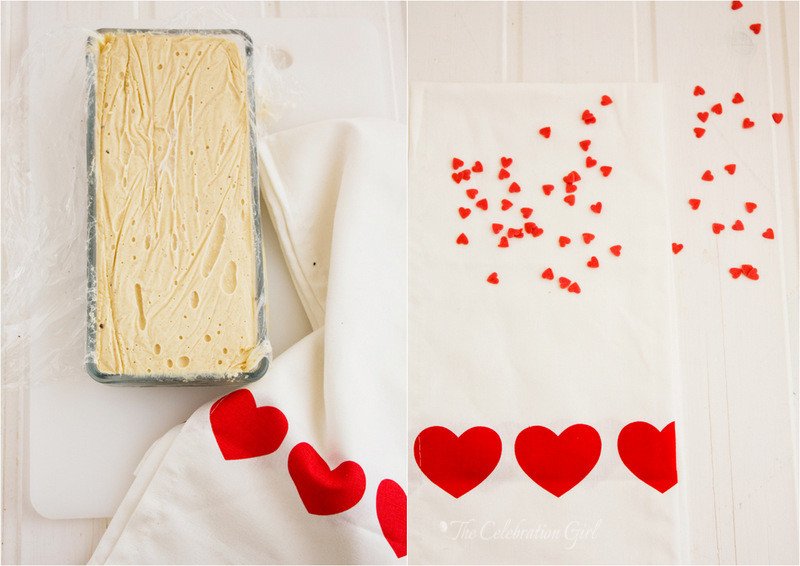
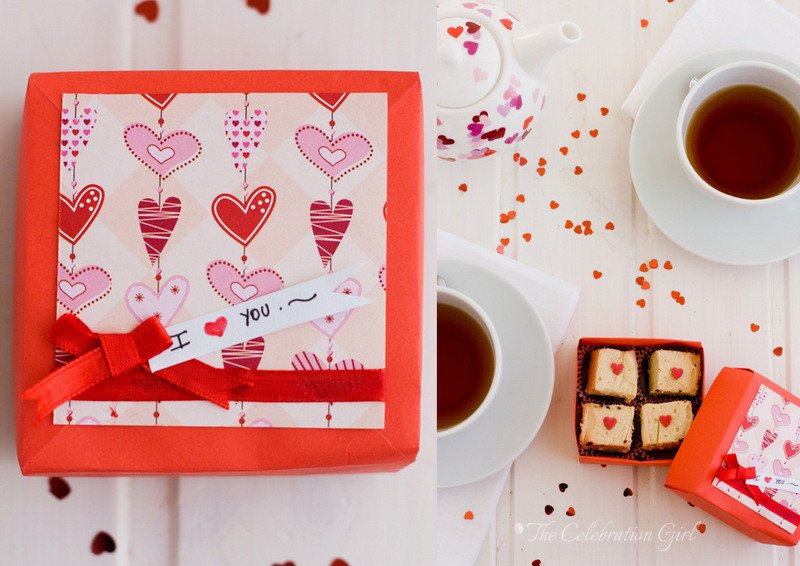
As you will see, the recipe is very, very easy and it only requires a food processor or blender to do all the work. Furthermore, because of its characteristics, it is very versatile, and can be shaped in any form you like and even cut using a cookie cutter. I made little hearts using small heart shaped pans for my children, and a bigger, rectangular one, which I then cut in small squares to eat as “cheese brownie bites”. Since today is Valentine’s day, I placed a few bites in a home made origami box lined with mini cupcake cases, to give as a small present. Do you like them?
Here is the recipe:
Orange and Clementine Cheese brownies (adapted and modified from My New Roots)
Ingredients:
For the crust: 1 cup walnuts, 1 1/2 cup dates (Medjool are best), unpitted and soaked in warm water for 10 minutes, 1/2 cup cocoa powder, 2 teaspoons cocoa nibs
For the filling: 2 1/2 cups raw cashews, soaked overnight, 2/3 cup coconut oil, 2/3 cup agave or honey, 1/2 cup lemon juice, 1/2 cup orange juice, juice of 1 clementine, zest of 1 orange and 1 clementine. NOTE: If you like sweeter desserts, reduce lemon juice to 1/3 cup and replace by orange juice.
Preparation:
1. Cover the pan you will use with foil, making sure to leave plenty at the sides. This will help you unmold the cake without needing to invert it (just pull the excess foil and lift, carefully, and it will come up.
2. Place walnuts in the bowl of the food processor and process until they turn into powder. Add cocoa and process 30 seconds to integrate (or pulse). Turn the processor on and start adding the dates, one at a time, until getting a sand-like dough that compacts when pressed between your fingers.
3. Pour the dough in the pan, extend it evenly and press with your fingers to shape it. Set aside.
4. Wash and dry the Food processor’s bowl and fill it with all the ingredients necessary for the filling. Just dump them all at once. Turn the food processor on, and let it work until the ingredients morph into a smooth cream. How smooth the filling will be depends greatly on how powerful is your food processor, so I joke that if it becomes very smooth, I made a vegan philly cheesecake and, if it’s a bit crumbly, I made a ricotta cake instead 😉
5. Pour the filling over the crust and smooth using a spatula.
6. Wrap the cake in the excess foil and place it in the fridge for at least 6 hours.
7. Take out of the freezer 30 minutes before serving. Cut with a warm sharp knife while still cold.
Amigos hispanoparlantes: La receta en castellano está en Petit-On! Pueden verla haciendo click AQUI.
by Marcela M. | Jan 25, 2013 | Blog, cookies, Recipe Box, Recipes, Sweets

Good afternoon dear friends! I hope you had a wonderful start of the New Year. I missed you these past days!
I hadn’t planned to take a break from blogging but, as you may know if you follow me on facebook , my children and I were hit hard by weather and, for the first time in years, I couldn’t lift a finger. It all started on Christmas day, when I lost my voice (a serious tragedy for a chatter like me, maybe not so much for my family ;). 10 days later, my daughter woke up with high fever, and Luka and I followed her a day after, with 40C. When, after a couple of days, the fever didn’t recede, we took the children to see the doctor, who also checked me. Luka and Zoe had what appeared to be just a flu but later developed into a ear infection requiring a full course of antibiotics and I, myself, had tonsillitis- so antibiotics were prescribed for me as well. Then, this week, just after we had finished her course of antibiotics, Zoe relapsed with 48 hs of non-stop cough and high fever and then, almost miraculously, her cough and her fever stopped, as suddenly as they had started. Now Luka seems to have caught the same virus and started having fever. Ahh, the joys of Winter…oh well.
Over the years since Luka and Zoe were born, there have been many minor health problems and a few scares as well, but this was the first time (since recovering from the cesarian) when I was not feeling well myself either when taking care of their own ailments. I don’t normally get ill, and entire winters go by without me catching a single cold (which I attribute to the ridiculous amounts of garlic I consume. Seriously, I’m sure Dracula has marked my house as a no-go area!). To be honest, I hate being sick and I’m not very good at it because I just.can’t .stay. in. bed. and when I absolutely have to, I am making mental lists of things I have to do the minute I am able to stand up and get going. So this period of common illnesses was a challenge for me, and all the more so because my husband was away from Cyprus this last week.
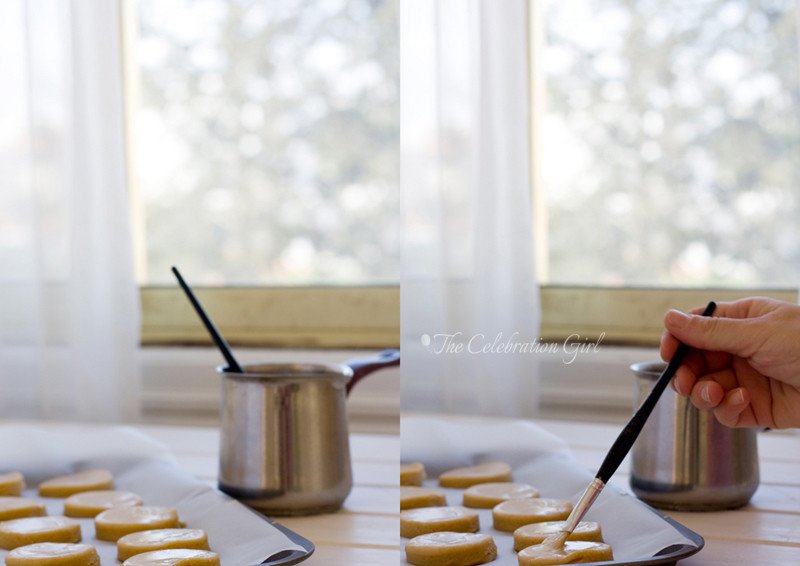
One of the things that was on my mental “to do”list while I was trying hard to lie in bed were these scones, Whole Kitchen Magazine’s January challenge. When I saw the recipe that was suggested for this month I was so happy! I love scones, they were always one of my favorite treats when I was growing up.I like them because they are not too sweet, and they admit so many variations that the possibilities for getting creative with them in the kitchen are almost endless. We can even get the same recipe and make them savory, with spices such as garlic and thyme, or rosemary, to accompany a hearty Winter soup.
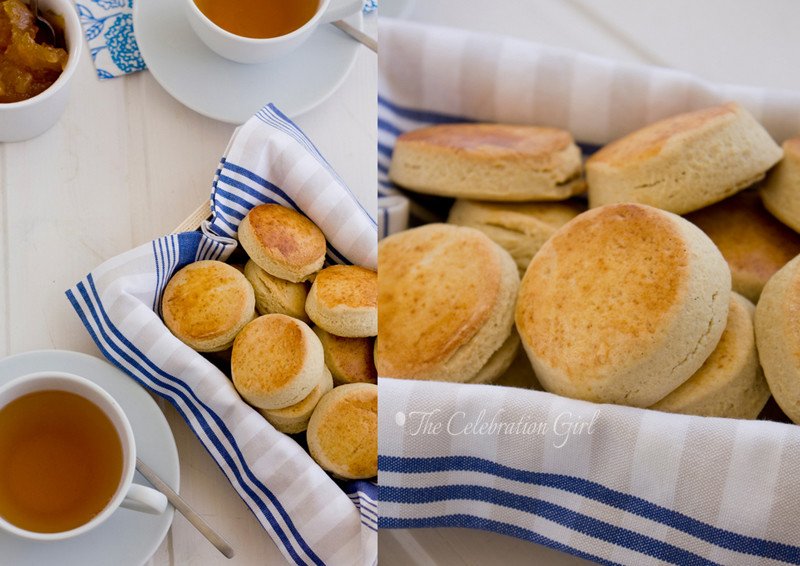
It is for this reason that I opted to make a a traditional, plain vanilla recipe without glaze. I wanted to give you the basic recipe so as to allow for experimentation. I’ll show you some of my favorite variations in the future but, for now, I thought it would be nice to start small.
As you will see from the recipe, the procedure is fairly simple, but there are a couple of important steps to get them right: 1) Don’t over mix the batter, and don’t knead the dough. This is crucial. You should barely integrate the dry ingredients into the wet ingredients and then roll and fold no more than 3 times. If you have remaining dough after the first cut, roll once only and cut again. 2) Make sure to pre-heat the oven properly, so that you can pop them in the oven the minute they are ready, or otherwise they won’t rise properly. You can see the difference between the ones that were placed in the oven immediately and the ones that had to wait on the counter in the next picture. They still taste fine, but the texture is different. So, if you want perfect scones, make sure the oven is hot and ready and don’t waste time!
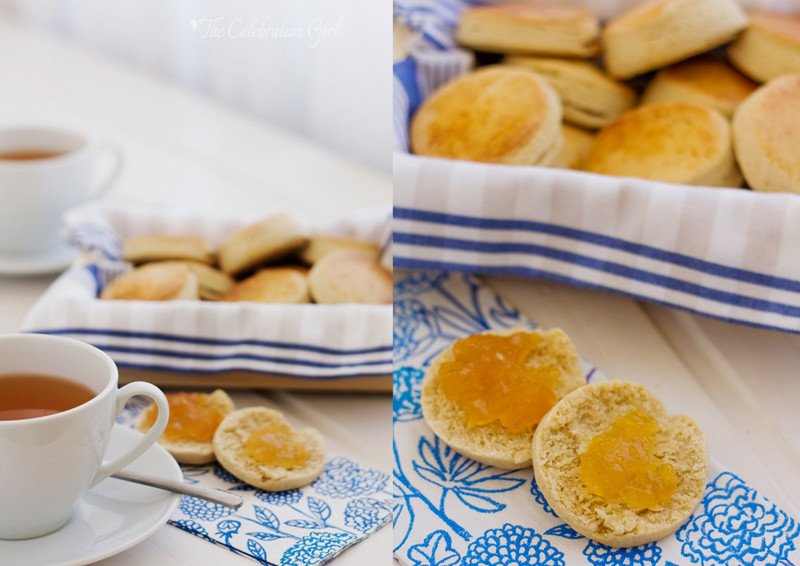
I like to eat them with jam ( some people also use clotted cream) and to accompany them with some nice tea. If shared with friends and loved ones, they taste better, of course 🙂
Now, one last important piece of information before leaving you with the recipe: Luka and Zoe’s baby sitter, who is an adorable Scottish lady, has asked me to request you to pronounce their name the ways Scots do, as if the E was not there (scons). She says English people pronounce them differently but that, since they are a Scottish treat and not an English one, she feels very strongly that they should be pronounced the Scottish way. So now you know 🙂
Here is the recipe:
Scones (makes around 30)
Ingredients: 500 grs all purpose flour, 2 teaspoons baking powder, 150 grs butter, 150 grs icing sugar, 3 egg yolks, 1 tablespoon vanilla extract, 125 cm3 warm milk + 1 egg yolk and 20 cm3 milk for brushing them before putting them in the oven.
Preparation:
1) Pre-heat the oven to 200C. Mix flour and baking powder and sift together over the counter. Make a well in the middle.
2) Add butter (softened at room temperature) and sift the icing sugar on top of it. Mix with your hands until creamy.
3) Add the egg yolks one, by one, and cream with your hands after each addition.
4) Add vanilla extract and milk. Mix until incorporated.
5) Fold the flour into the wet ingredients until fully integrated, without kneading.
6) Dust the countertop with flour and roll the dough to form a rectangle. Fold the dough in the middle and roll again. Fold and roll two more times, without leaving resting periods and then roll one final time, until getting a width of approximately 3cms.
7) Cut circles using a round cookie cutter and place the scones on a baking tray lined with baking paper.
8) Mix one egg yolk with 20 cm3 of milk and brush the scones with the mixture. Place the baking tray in the hot oven for 30/35 minutes (they will get golden on top).
9) Remove from the oven and place on a wire rack to cool completely.
Con sabor latino…
No había pensado tomarme vacaciones del blog pero, como seguramente sabrán si me siguen en facebook, mis hijos y yo caimos víctimas de unos virus fuertísimos y, por primera vez en muchos años, no podía ni moverme, mucho menos sentarme a la computadora, o sacar fotos. Todo comenzó el día de navidad, cuando me desperté sin nada, nada, nada de voz (lo que para alguien como yo es una tragedia aunque, posiblemente, para mi familia haya sido una bendición 😉 10 días más tarde mi hija empezó con fiebre, y 48 horas más tarde le seguimos Luka y yo, con temperaturas que llegaban a los 40 grados. Seguimos así un par de días, así que llevamos a los chicos a la pediatra, que me revisó a mí también de paso. Luka y Zoe tenían lo que parecía ser sólo una gripe pero luego derivó en una infección en el oído, y yo tenía amigdalitis, así que terminamos todos con antibioticos. Luego, esta semana que acaba de terminar, cuando apenas habíamos terminado el ciclo de antibióticos, Zoe cayó en cama nuevamente con 48 hs de fiebre y una tos terrible y constante y que cesaron tan abruptamente como habían comenzado. Eso sí, ahora parece que Luka está empezando con lo mismo…ahhh las bondades del invierno…qué se le va a hacer.Esta no es la primera vez que mis hijos están enfermos, claro está. Pero esta es la primera vez que yo he estado enferma al mismo tiempo. Por suerte, no suelo enfermarme nunca y normalmente el invierno pasa sin que yo me agarre ni un resfrío (lo que atribuyo a las enormes cantidades de ajo que consumo. En serio, yo creo que Drácula debe tener mi casa marcada para que los vampiros no se acerquen ni por casualidad). Quizás a causa de esto, detesto estar enferma y soy mala paciente porque no.puedo.quedarme.en.cama. y cuando no tengo más remedio que hacerlo me la paso haciendo listas mentales de cosas que quiero hacer ni bien pueda levantarme. Así que, como imaginarán, este período de enfermedades conjuntas fue un desafío para mí, más aún porque mi marido estuvo de viaje fuera de Chipre durante toda la semana pasada.Una de las cosas que estaba en mi lista mental de cosas para hacer cuando me sintiera mejor, eran estos scones que Whole Kitchen Magazine nos proponía a los miembros del círculo para el mes de enero. Me encantan los scones y han sido, desde siempre, una de mis galletitas preferidas. Me gustan porque no son demasiado dulces y porque admiten tantas variaciones que es facil ser creativo y experimentar con ellos, pudiendo incluso eliminar el azucar y hacerlos salados, con especias, para acompañar una rica sopa. Es por ello que la receta que les traigo hoy es muy simple: scones de vainilla sin baño alguno, porque quería darles la receta básica para que ustedes mismos puedan jugar con ellos de la manera que mejor les plazca, intercambiando sabores y agregando ingredientes si asi lo desean.Hacer scones es muy sencillo, pero deben observar dos reglas importantes: 1) No mezclen de más los ingredientes, y no amasen la masa. Esto es crucial. Los ingredientes secos tienen que ser apenas integrados a los húmedos y, luego, deben estirarlos con palotes y doblarlos por la mitad no más de 3 veces. Si tienen resto de masa, junten y estiren sólo una vez antes de volver a cortar. 2) Asegurense de precalentar el horno ni bien empiezan a trabajar en ellos, porque los scones tienen que ser introducidos en un horno bien caliente ni bien se terminar de hacer o quedarán chatos. Fijense en las fotos de más arriba, la diferencia en altura entre algunos de los scones: los chatos son los que tuvieron que esperan en la mesada mientras se hacía la primera tanda. Saben bien igual, pero la textura es diferente. Así que ya lo saben, si quieren scones perfectos, asegurense que el horno esté bien caliente a tiempo!Me gusta servirlos acompañados de mermelada y un rico té, y hay gente a la que tambien le gusta la crema/nata. Si se disfrutan en buena compañía, saben mejor, claro 🙂 Finalmente, antes de dejarlos con la receta, una última advertencia: la baby sitter de Luka y Zoe, que es una señora escocesa adorable, me pidió que les informara que la pronunciación correcta es SCONS y no SCOUNS, como lo promuncian los ingleses. “Los ingleses lo pronuncian mal, son dulces escoceses, no ingleses, y por eso su nombre debe ser pronunciado como lo hacemos nosotros”, me dijo. Así que ya saben 🙂
Scones (rinde alrededor de 30)
Ingredientes: 500 grs harina 0000, 2 cucharaditas de té de polvo de hornear (Royal), 150 grs manteca (o margarina), 150 grs azucar impalpable, 3 yemas, 1 cucharada sopera de vainilla, 125 cm3 de leche tibia + 1 yema y 20 cm3 de leche para pincelarlos antes de hornear.
Preparación:
1) Pre caliente el horno a 200C. Mezcle la harina y el polvo de hornear y ciernalos sobre la mesada. Haga un huevo en el medio de la montaña de harina, para quen quede como una corona.
2) Coloque la manteca (que debe estar a punto pomada) en el hueco y cierna el azucar impalpable encima de la misma. Mezcla manteca y azucar con las manos hasta obtener una crema.
3) Agregue las yemas, de a una, e incorporelas a la crema de manteca.
4) Agregue vainilla y leche a la crema, e incorpore.
5)Integre la harina a la crema, de a poco, y forme un bollo de masa, cuidando de no amasar en ningun momento.
6) Espolvoree la mesada con harina y, usando un palote de amasar, estire la masa hasta formar un rectangulo. Doble la masa por la mitad y estire nuevamente con palote. Vuelva a doblar y estirar dos veces más, sin dejar que la masa descanse y luego estire una última vez hasta tener una masa de un grosor de aproximadamente 3 cms.
7) Corte los scones usando un cortante redondo, y colóquelos en una placa para horno cubierta con papel pata hornear.
8) Mezcle una yema con 20 cm3 de leche y pincele los scones con dicha mezcla. Lleve la placa al horno caliente por 30/35 minutos o hasta que estén dorados arriba.
9) Retire del horno y coloque sobre una rejilla hasta que se enfrien completamente.
I hope you like this recipe! See you on Monday!
Espero que les guste la receta! Nos vemos el lunes!
by Marcela M. | Dec 24, 2012 | Blog, Cakes, Christmas and NYE, Holidays, Recipe Box, Sweets
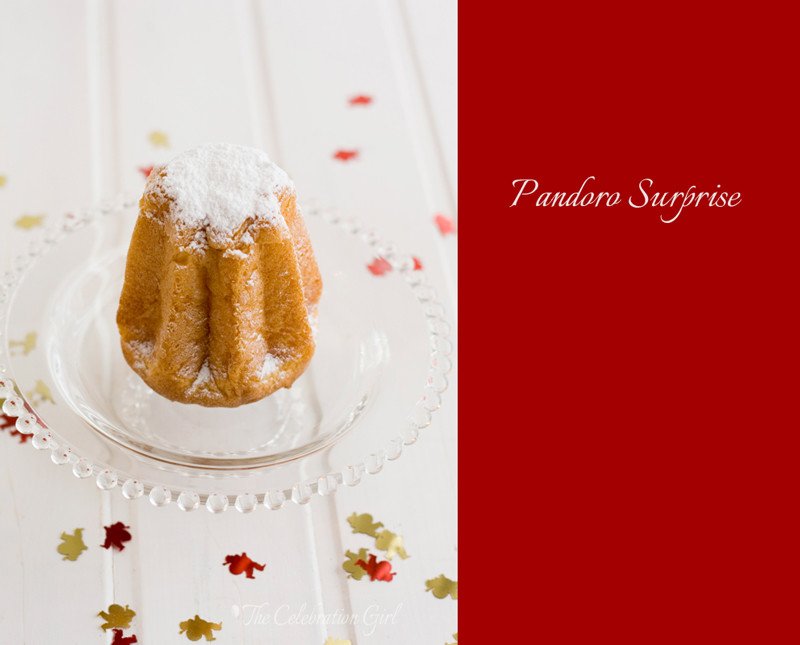
Good morning dear friends! Today is Christmas’ eve and this is the last post of the 2012 advent calendar! I can imagine that, by now, all presents are wrapped, all menus are more or less figured out, and you must already have an idea of how you want to set up your Christmas table, am I right? Or maybe not?
In case you need a last minute idea, here is one of my favorites, a twist on the traditional Pandoro/Panettone/Pan dulce, that we normally eat after the toast, back home in Argentina. And because it is a last minute idea, it requires no baking, no effort at all, and it requires only two store-bought items: pandoro/panettone/pan dulce and ice cream.
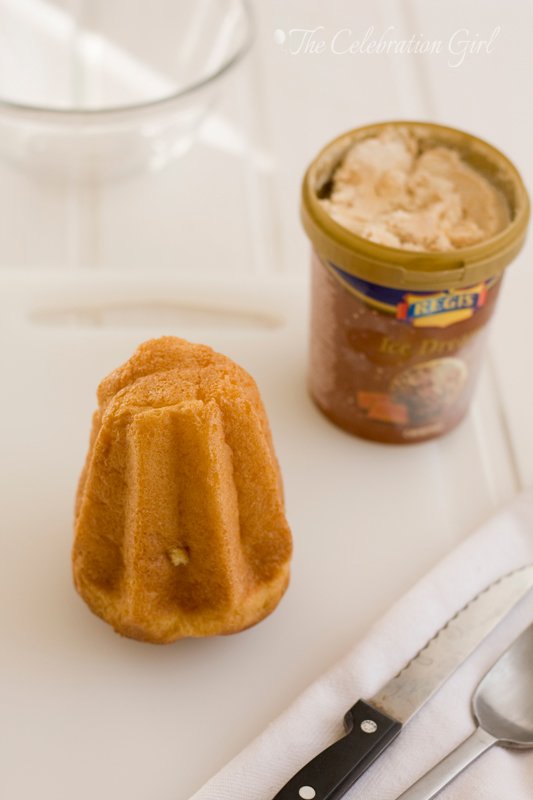
1) Begin by cutting the top of the Pandoro, and carving a hole with a serrated knife, as in the picture below.
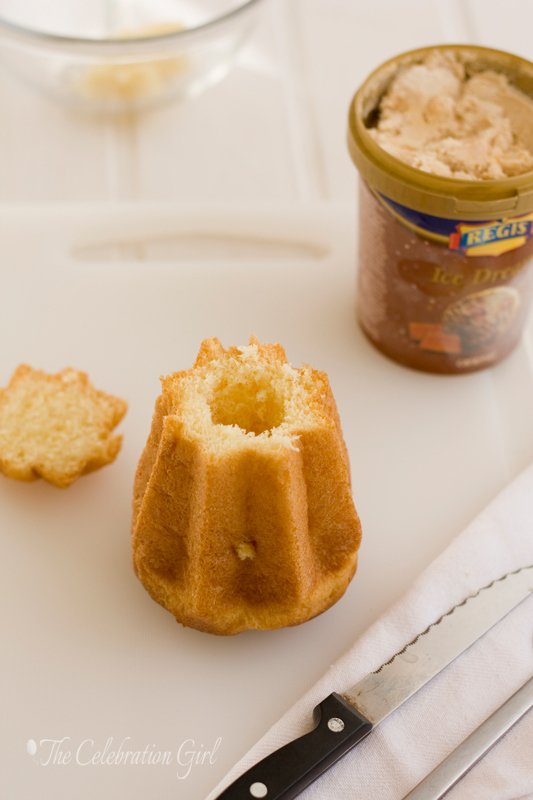
2) Using a spoon, fill the hole with the ice cream of your choice. In this occasion, I used caramel but my favorite is actually stracciatella, or plain vanilla if you are using pan dulce instead of pandoro. It is better to let the ice cream sit at room temperature for 15 minutes before using it, so that it’s softer and easier to work with. But if you are in a rush, simply mix it with a spoon until it reaches the right consistency.

3) Place the” cap” of the pandoro back on top, wrap in foil and put the pandoro in the freezer for 2 to 3 hours.
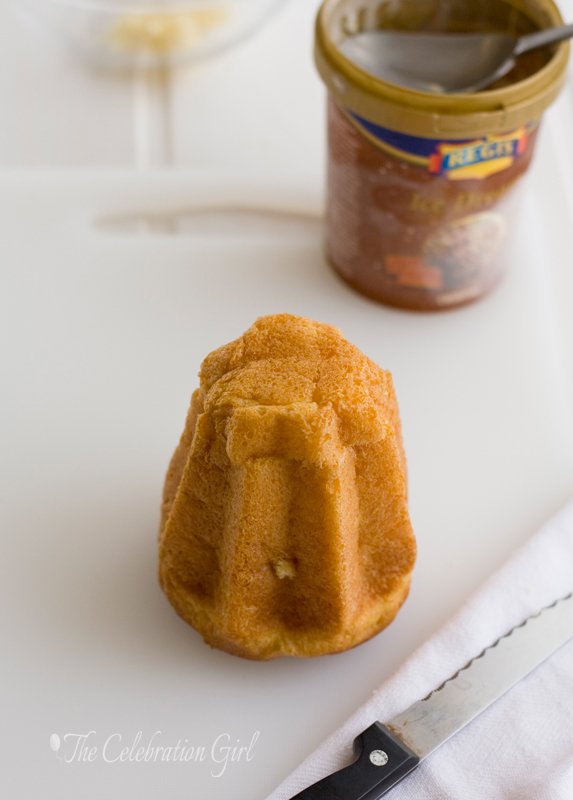
4) For serving, you have two options: serve it as you would serve an ice cream cake, straight out of the freezer, dusting it with icing sugar or pouring chocolate sauce on top, or as a chaud-froid, by placing the pandoro a few seconds in the microwave to heat the exterior without melting the interior, then adding hot chocolate sauce on top. If you don’t have a microwave, you can heat the oven, turn it off and place the pandoro inside for 5 minutes maximum. This will make the exterior slightly warm, without completely melting the ice cream inside.
May your celebrations be merry and bright, and may your heart be full of love, today and always!
Have a lovely Christmas, dear friends!

Con sabor latino…
Buenos días queridos amigos! Hoy es nochebuena, y este es el último post de este calendario de adviento virtual 2012. Imagino que, para este momento, todos los regalos estaran ya envueltos, el menú delineado, y ya tendrán una idea de cómo quieren poner la mesa para la cena de navidad…o quizas no?
Por si acaso lo necesitan, aquí les dejo una idea de último minuto que me encanta, una vuelta de tuerca al tradicional Pandoro/Pan dulce/ Panettone con el que solemos brindar, en Argentina, cuando suenan las 12 campanadas anunciando que ya es Navidad. Como es una idea de último minuto, no requiere horneado, ni decoración, ni esfuerzo, sólo dos ingredientes comprados: el panettone/pandoro/pan dulce y helado.
1) Comiencen por cortar la tapa del pandoro y ahuequenlo con un cuchillo serrucho.
2) Con una cuchara, coloquen helado en el hueco. Yo usé helado de caramelo en esta ocasión, pero mi preferido es el de crema granizada para el pandoro, y uno de buena vainilla para el pan dulce. Tengan en cuenta que es mejor que el helado no esté demasiado duro, asi que saquenlo de la heladera 15 minutos antes de usar, o bien revuelvanlo unos minutos con una cuchara hasta que se ablande.
3) Coloquen la tapa nuevamente en su lugar, cubran en papel film y lleven al freezer por al menos dos a tres horas
4) Para servir, hay dos opciones igualmente ricas: presentarlo como una torta helada, o sea ni bien sacado del freezer, espolvoreado con azucar impalplable o acompañado de salsa de chocolate ; o bien como un chaud froid, colocandolo un par de segundos en el microondas para que el exterior se caliente apenas, sin derretir el helado, y acompañarlo de salsa de chocolate caliente. Si no tienen microondas (como yo), calienten el horno y, cuando tenga temperatura, apaguenlo y coloquen el pandoro dentro por un máximo de 5 minutos. Recuerden que no queremos que el helado se derrita, sólo calentar apenas el exterior, para generar una textura y sensación diferentes al probarlo.
Espero que sus celebración sean maravillosas y muy felices, y que sus corazones estén llenos de amor, hoy y siempre!
Que tengan una muy feliz navidad, queridos amigos!
by Marcela M. | Dec 18, 2012 | Blog, Cakes, Christmas and NYE, Holidays, Recipe Box, Recipes, Sweets

Good morning dear friends! It’s day 18 of the advent and here I bring you another edible gift idea: a cake mix for a delicious mocha chocolate chip cake – with recipe included, of course.
This recipe is not my own. It appeared on Hallmark magazine in January 2008, a beautiful publication that, unfortunately, doesn’t exist anymore. I was living in Ivory Coast at the time, working in peacekeeping and was subscribed to the magazine, that I received by post on a bi-monthly basis and this was the last number I received before moving to Cyprus. It was like a breath of fresh air, full of lovely ideas, crafts and delicious recipes.
It was in its pages that I saw this cake for the first time, as well as the way to layer it for a present, which I have adapted below. The article included other recipes as well, but I haven’t tried them yet. I promise to share them with you as soon as I do!
The great thing about this gift is that it takes out all stress from making a cake from scratch. People who hate baking generally hate the precision it requires, the measuring, sifting, scooping…by doing all that work for them, we take away all difficulty. The person who receives this mix only has to add a few ingredients and follow a few simple steps (the same that are required when making a box cake) and in a less than an hour they will have a delicious, preservatives-free cake with fresh ingredients ready to be eaten.
You could also prepare this cake mix for yourself, without the fancy label and packaging, and keep it ready for those times when you want a home baked cake but you don’t feel like going through all the trouble. It is also a great option when travelling for a short time, to the mountains or to the beach, when we don’t feel like bringing all our baking equipment with us. We can just pre-measure all dry ingredients at home, toss them in a Ziploc bag or any other container, and finish baking at our destination. Another advantage? The mix lasts for 6 months!

Here is the recipe and the instructions for layering it as in the pictures
Mocha chip cake (adapted from Hallmark Magazine of January 2008)
Ingredients: (for making the cake at home): 2 cups sifted cake flour, 1 tablespoon espresso, 2 teaspoons baking powder, 1 teaspoon baking soda, 1/2 teaspoon salt, 1/2 cup unsweetened cocoa, 2/3 cup brown sugar, 2/3 cup granulated sugar, 1/4 cup powdered milk , 1/2 cup mini chocolate chips, 170 grs or 3/4 cup butter or margarine, 3/4 cup water, 3 eggs, 2 tablespoons vanilla extract (the last four are the ingredients to be added by the recipient of the cake mix jar)
Note: If you don’t have cake flour, you can make it at home. For each of all purpose flour, remove 2 tablespoons from it and add 2 tablespoons cornstarch. Sift together several times, to integrate.
Preparation of the cake mix: I am detailing below how to layer the mix, as described by Hallmark magazine. You can also put each ingredient as an individual layer, it doesn’t affect the final outcome, but make sure to sift together flour,baking powder and baking soda before adding them for better results.
Layer 1: 3/4 cup cake flour, espresso, baking powder and baking soda
Layer 2: 1 cup cake flour and cocoa
Layer 3: 1/4 cup cake flour and brown sugar
Layer 4: granulated sugar and powdered milk
Layer 5: chocolate chips
Instructions (to be included with the cake mix):
1) Pour all contents of the jar in a bowl and mix briefly
2) Add 170 grs of soft butter and ½ cup of water and beat on medium speed for 3 minutes
3) In another bowl, beat 3 eggs with ¼ cup of water and 2 teaspoons vanilla extract
4) Add egg mixture to cake batter in 3 times, mixing well after each addition.
5) Divide the batter in two and pour it in two 9 inch/20 cms round cake pans, previously greased and dusted with cocoa or flour (cocoa doesn’t leave a white trace and adds to the chocolatey flavor)
6) Bake at 175C or 350 F for 20 to 30 minutes, or until a stick inserted in the middle comes out clean
7) Let cool and frost with vanilla, mocha or chocolate frosting, if desired.
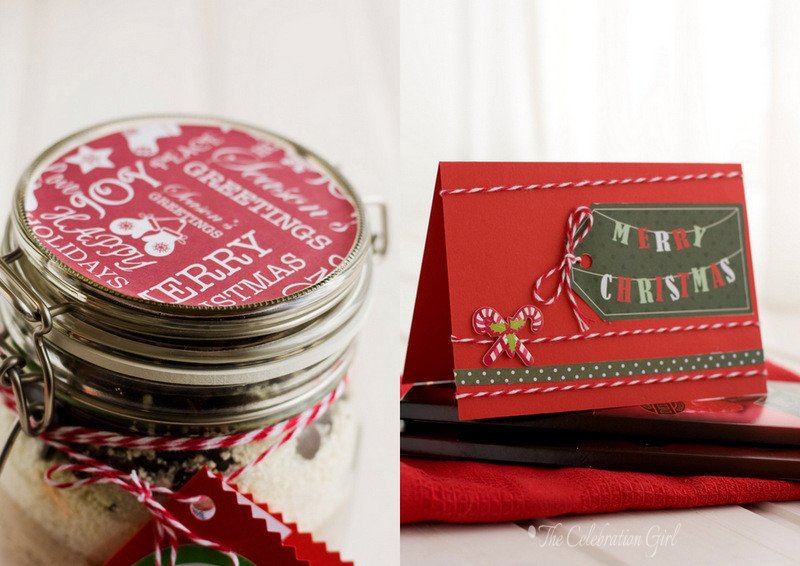
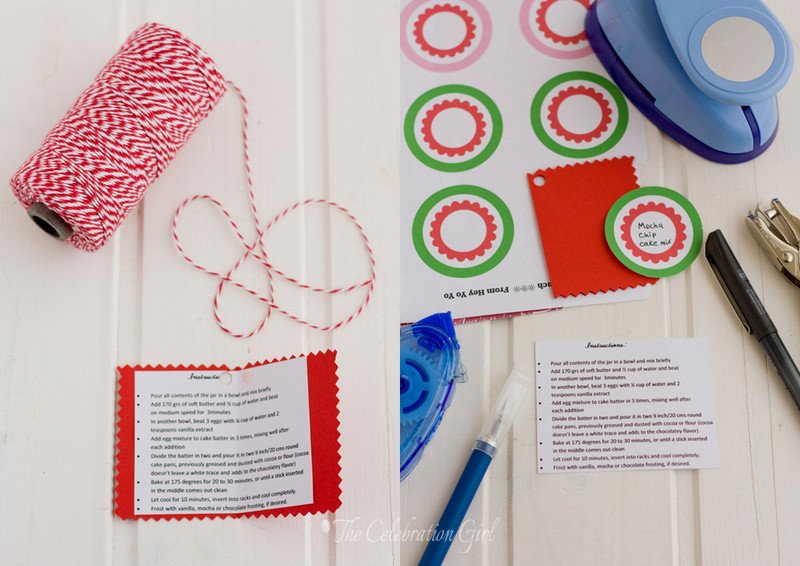
Once I had measured, mixed and layered all ingredients, it was time to beautify the present. I cut a circle of Christmas paper (which came with a crafts magazine) and glued it to the top of the jar. I prepared a small card, containing the instructions, with a small piece of red cardboard paper, zig zag scissors, a hole punch and party circles that I downloaded for free from catch my party (I will show you other uses of those free printables in posts to come). I also copied the instructions in a word document (using calibri font, size 8), printed it, cut it and glued it to the inside of the card. Then, I punched a hole and attached it to the jar with red and white baker’s twine.
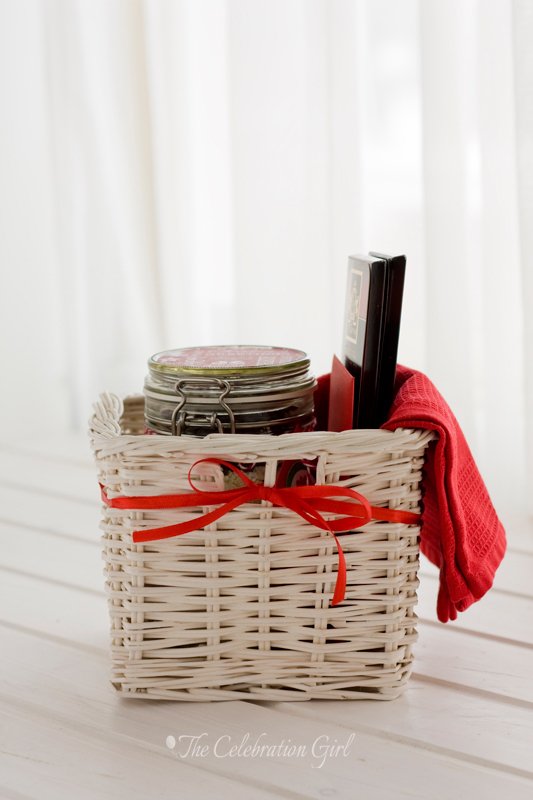
The whole present also included a red kitchen towel, a home made greeting card, two bars of good quality chocolate and recipes for my favorite vanilla, mocha and chocolate frostings, as well as recipes for making hot chocolate. Everything was placed in a white straw container, and tied with red ribbon. I truly hope the persons I am giving it to will like it!
Do you like it?
Con sabor latino…
Buenos días queridos amigos! Hoy es el día 18 del adviento y aquí les traigo otra idea de regalo comestible: una mezcla casera para una torta moca de chocolate (o sea, con café), con receta incluida, por supuesto.
Esta receta no es de mi autoría, la ví en el número de enero de 2008 de una revista que lamentablemente ya no existe, Hallmark Magazine. Este número en particular lo recibí por medio de una suscripción, justo antes de venir a vivir a Chipre. Era una revista preciosa, llena de manualidades, recetas deliciosas e ideas creativas. En sus páginas encontré esta receta que hoy comparto con ustedes, y la idea de regalar mezclas pre hechas. El artículo incluía otras receta que no incluyo porque aún no las he probado, pero tengan seguro que, en cuanto lo haga, las compartiré aquí con ustedes!
Este es un regalo que me encanta hacer porque quita todo el stress que mucha gente siente al preparar una torta casera. La mayor parte de la gente que conozco a la que no le gusta la repostería, suele tenerle miedo y hasta odiarla por la precisión que ésta requiere, por cómo hay que medir, cernir y pesar los ingredientes. Con este regalo, nosotros hacemos todos esos pasos por ellos, y quien lo recibe sólo tiene que actuar como con una torta de caja: agregar ingredientes húmedos y mezclar. Unos pocos pasos despues y en menos de una hora tendrán una torta casera, sin conservantes y con ingredientes frescos, lista para ser disfrutada.
Tambien pueden usar esta idea para preparar mezclas para ustedes mismos, y dejarlas listas para esos días cuando tenemos ganas de comer algo caserito pero no tenemos ganas de tomarnos todo el trabajo que ello implica. Tambien es una buena idea para cuando salimos de vacaciones por un dias, al campo o a la playa, y no queremos trasladar todo nuestro equipo de reposteria (cucharas medidoras, balanzas y demases). Sólo tendremos que medir y pesar todo en casa, ponerlo en una bolsa Ziploc o en otro recipiente y terminar la preparación donde sea que vayamos. Otra ventaja más? La mezcla dura 6 meses!
Aqui les dejo la receta y las instrucciones para que las capas queden como en la foto:
—————————-
Torta moca de chocolate (adaptada de la edicion de enero 2008 de Hallmark Magazine)
Ingredientes (para hacer la torta en casa): 2 tazas de harina de reposteria, 1 cucharada de espresso en polvo, 2 cucharaditas de polvo de hornear, 1 cucharadita de bicarbonato sodico, 1/2 cucharadita de sal, 1/2 taza de cacao amargo, 2/3 taza de azucar moreno, 2/3 taza de azucar comun, 1/4 taza de leche en polvo, 1/2 taza de chispas de chocolate, 170 grs de manteca o margarina, 3 huevos, 3/4 taza de agua, 2 cucharadas de extracto de vanilla (estos últimos cuatro ingredientes deberán ser agregados por la persona que recibe el regalo, si es para regalar).
Nota: si no tienen harina de reposteria, pueden hacerla casera de la siguiente manera: Por cada taza de harina común, retiren 2 cucharadas soperas y reemplacenlas por maizena (fécula de maiz). Tamicen varias todo para que se integre bien, y listo!
Preparación de la mezcla pre hecha: La forma de presentación que les detallo a continuación es la sugerida por Hallmark magazine. Tambien pueden colocar los ingredientes uno a uno, de manera individual, pero asegurense de tamizar harina, polvo de hornear y bicarbonato antes de hacerlo, para que la torta quede perfecta.
1er capa: 3/4 taza de harina, espresso, polvo de hornear y bicabonato sódico
2da capa: 1 taza de harina y cacao amargo
3er capa: 1/4 taza de harina y azucar moreno
4ta capa: azucar comun y leche en polvo
5ta capa: chispas de chocolate
Instrucciones (deben acompañar el frasco con la mezcla):
1) Coloque el contenido del frasco en un bowl amplio y mezcle brevemente
2) Agregue 170 grs de manteca y 1/2 taza de agua y bata con batidor electrico a velocidad media por 3 minutos
3) En otro bowl, bata los huevos con 1/4 taza de agua y 2 cucharadas de vainilla
4) Agregue la mezcla de huevos al resto de la masa en tres tiempos y bata bien luego de cada adición.
5) Divida la mezcla en dos y coloque en dos moldes de torta de 20 cms, enmantecados y espolvoreados con cacao o harina (yo prefiero cacao para tortas de chocolate porque no deja pelicula blanca y hace que el sabor sea aun mas chocolatoso)
6) Cocine en horno a 175 grados por 20 a 30 minutos
7) Retire, deje enfriar, rellene con crema de vainilla, moca o de chocolate (si asi lo desea) y espolvoree con azucar impalpable.
———
Una vez que mezclé los ingredientes y los coloqué en el frasco, llegó la hora de arreglarlo para que quedara bonito para regalo. Corté un círculo de papel navideño (que había venido de regalo con una revista de manualidades) y lo adherí a la tapa del frasco. Preparé una tarjetita con cartulina roja, tijera de puntas, un troquel individual y unos printables gratis que encontré en catch my party. Copié las instrucciones en word (con letra calibri, tamaño 8), las imprimí, recorté y pegué a la tarjeta. Luego usé el troquel para hacer un agujero y adjunté la tarjeta al frasco con hilo rojo y blanco.
El regalo tambien incluía un repasador rojo, dos tabletas de chocolate de buena calidad, una tarjeta hecha a mano, recetas para mis cremas de vainilla, moca y chocolate preferidas, y recetas para preparar chocolate caliente. Coloqué todo en una cajita de paja de color blanco y finalicé la presentación con un moño rojo.
Espero que este regalo le guste a quienes pienso entregarselo! Y a ustedes ¿les gusta?


