by Marcela M. | Feb 26, 2013 | About, Blog
Good morning dear friends! I have been missing in action, I know, I know. My organization instinct kicked in late January and February, and I have been putting my house in order, de-cluttering, organizing, planning new projects (including some secret ones that I hope to be able to unveil later this year!) and, overall, getting ready for what looks like will be a very busy year.
I will tell you all about this in my next post, but today I wanted to talk to you about a ritual I initiated last year and that I have come to love: that of changing lists and resolutions for the choice of one word to guide us all year. And the reason I want to tell you about it is because this practice had a great impact on me in 2012.
2012…Have you had years when you look back, at the end, and say “this year changed me”? 2012 was such a year for me.
2012 changed me deeply, the way only difficult years can, and it is only now, already two months into 2013, that I am able to appreciate the extent of this change.I suppose it is always like that with difficult years: when all the bad and the ugly are taking place, our survival instincts kick in and there’s not much time for reflection. It is only when the storm has already passed that we can assess the damage, see what is left, and what we need to repair or rebuild. It is also only then that we can appreciate the extent of our resilience and truly value the skills that helped us through it all.
When 2012 began, I decided to choose a word for the year, instead of making resolutions. I had read about it and heard other people talk about their one word and what a powerful practice it was, and I was curious. So, in December 2011, I sat down in my hotel room in Buenos Aires while the rest of the family slept, with a little notebook given to me by my friend Laura in my lap, and a pen in my hand, and I reflected on the year that was finishing and on my hopes, wants and dreams for the one that was about to begin. I scribbled several words but there was one that kept coming to my mind: Integrate. I didn’t really know why I kept thinking about it or how it could apply to how my life looked at that point, but I decided to trust the Universe and my intuition and chose it nonetheless.
It turned out that it was the right choice, because early in 2012 almost everything I knew or thought I knew seemed to break into a million tiny little pieces, to disintegrate. And my word helped me cope.
When things got tough and then got worse before beginning to get better, I used to close my eyes, think about my one word, and say it aloud and, doing so, keeping it in mind helped me stay still and (moderately) calm and centered amid all chaos. Having just one word instead of lists made it easy to prioritize and, having a versatile word (that was also a call to action, made it simple to adapt its meaning and its message to almost every situation I found myself into. Simple is important when things fall apart because in those moments we cannot cope with confusion. Simple practices are the ones that we are able to maintain, that help keep us grounded. Not surprisingly, perhaps, the daily practice of a simple home yoga routine (yoga, which means none other than union) became such a big part of my life in 2012.
For one whole year, I sought for every part of both myself and my life to become whole, to integrate the person that I had once been with the one that I had become, to discern what it was that I needed to let go of and what I needed to embrace. The year and my word made me face that which was disconnected, that which needed to be integrated, . And the process changed me. Crisis are, indeed, opportunities for growth, as they say. Even if when they are taking place we wish they were not happening, even if when they are taking place it seems impossible to understand what the lessons are behind it all.
I began feeling the urge to choose a new word in early December 2012, when several others starting coming to my mind. Then January came and, after the first round of family colds and flu, I decided to choose my word differently this year, to delve deeper into the practice, to commit to it more because now I knew it was important. I printed Susannah Conway’s 2013 Unravelling the year ahead workbook , played some nice music, made a cup of chamomile tea and gave myself some time to let go of 2012 and start dreaming about what was to come.
I didn’t finish in one take, but I did finish. And also this time, the word chose me.
I had scribbled down a few words and they all seemed to be variations of the same theme but none seemed to click. Then one day, I was pondering about those words in my head while my husband watched the news, when I saw President Obama’s inauguration and remembered the powerful one word message of his campaigns. And then one word came to me, and I knew it was it .
Forward.
2012 was the time to sit still, to ponder, to let go of what was but is no longer, to become whole.
2013 is the year I want to move forward, to embrace the changes that took place and see where they take me, to step firmly on the new ground and start walking towards the future. In 2013 I hope to explore new hobbies, to let go of fear and take a leap in those areas where, deep inside, I know I’m ready. I hope to challenge myself, to progress, and be a catalyst of change for those who want to come along with me. I want 2013 to be the year where I’ll dream new dreams and work hard to make them come true, and I want to believe, again, that there are no limits to our dreams and that everything is possible if we put our hearts into it.
Do you have a word for 2013? Have you ever chosen one? What are your hopes and dreams for the new year?
Amigos hispanoparlantes: la traducción al español será publicada esta noche!
by Marcela M. | Feb 14, 2013 | Blog, Cakes, Gluten Free, Holidays, Recipe Box, Recipes, Sweets, Valentine's day, Vegan & Raw
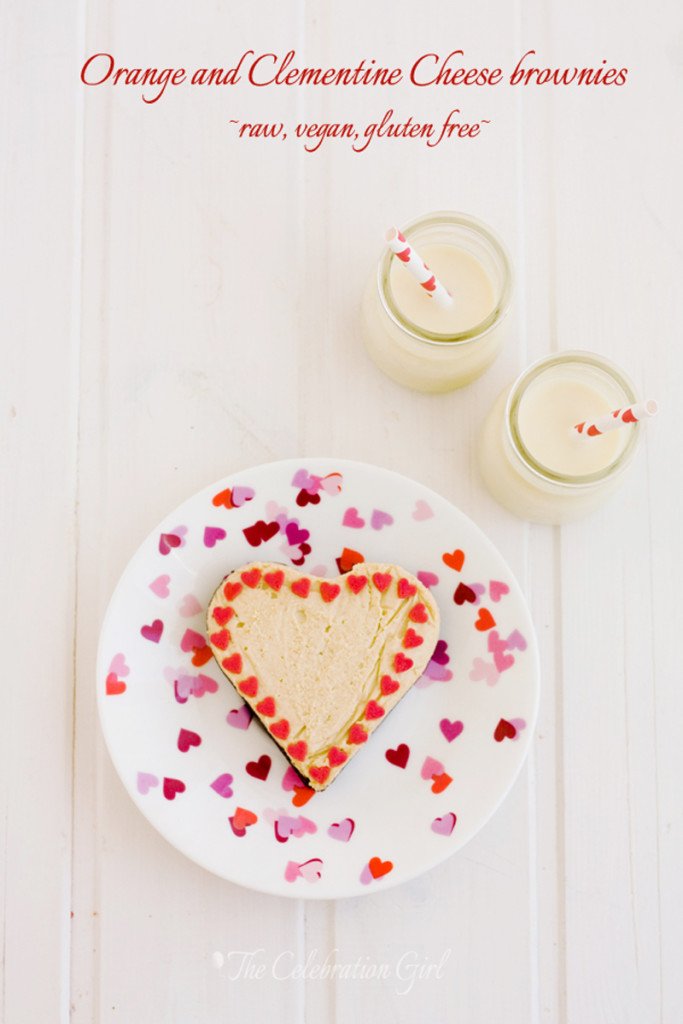
Good morning dear friends! Happy Valentine’s day!
Do you celebrate this holiday or it is not a tradition where you live? As an Argentinian, I didn’t grow up with Valentine’s day and learn’t about it from movies and American TV shows. It was only in the late ’90s that it became more common to celebrate it, but that was only for those who had someone to celebrate it with and, until I met my husband, many years after that and in a different country, I didn’t. Most years, I would get together with my best friend (also single at the time) , cook together and watch movies that had nothing to do with romance, like the Lord of the Rings trilogy-extended edition. It was awesome. Rom-Coms could be watched any other day. We were not against the holiday, we were not a Valentine’s Grinch, we just felt that it was not for us. Like “
The day of the secretary” is not for you unless you are a secretary and you don’t expect your life to be different just because someone else is celebrating, I didn’t expect anything from Valentine’s day. But since everything seemed to be taken over by teddy bears and pink hearts, we made it ours by creating our own traditions.
The first Valentine’s day after I met my husband, which happened 3 weeks after we got married, we spent it apart. We were living in Ivory Coast at the moment, and had left to get married in Italy during our vacation time. But the day after we left there were riots that led to the evacuation of all non-essential staff of the organization where we worked and we got married on the day when our colleagues were being transported to Gambia. Then the call came: My husband had to go back, he was essential staff. I was not, so I had to stay behind. Argentina was too far away so, a mere two weeks after the wedding, we traveled to Belgrade (where my husband’s family lives) and I stayed with them for 3 weeks. My husband’s ethnic group has a tradition (no longer being followed anymore, from what I’m told) of bringing the bride back to her family a few weeks after the wedding, to give her the opportunity to change her mind, so we used to joke that he didn’t want to risk it, so he was leaving me with his family instead 😉
So Valentine’s day went by, uncelebrated, and maybe because of that, we never made a big deal about it. But we always have some treat, even if it’s just a block of dark chocolate, to mark the day, just because we take every opportunity to celebrate all that is good in our life.
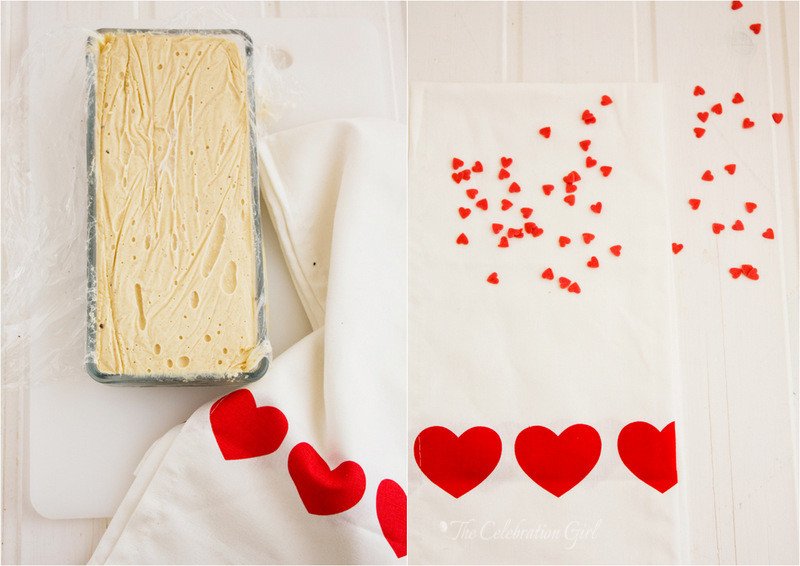
Today’s recipe is the one I prepared for my monthly contribution to Petit-On. The ingredient selected for February was cheese, which presented a problem for me, so I checked with Raquel to see if I could use substitutions, and she encouraged me to write this recipe.
If you are reading these words and have been reading this blog for a while, you are probably wondering why is cheese a problem for me. I have, after all, a recipe for the best cheesecake ever, which is also one of the most visited blog posts. The reason is that I can’t eat dairy without feeling pain in my breasts due to a condition called cystic fibrosis. We discovered it two years ago when I ran in panic to the doctor after finding a lump the size of a marble in my right breast. The doctor ordered a breast ultrasound and we found out that I have cysts in my breasts, which are not dangerous but fill with liquid during ovulation, which causes pain. Milk makes the pain bad, but cheese, cream and yogurt make it unbearable and, when I do eat them, I know it’s at my own risk and regret it later. Since then 95% of my diet is vegan (I didn’t eat meat or eggs from before discovering this condition) and I have been working on finding substitutions for my favorite treats (You may have noticed that I normally list ” butter or margarine”in the ingredients, and that is because I used to make it with butter but now use vegan margarine and know it can be done). Now let’s be honest: vegan cheese is not brie or camembert, but when the choice is feeling enormous pain and freaking out when doing my breast exam, vegan cheese does the trick.

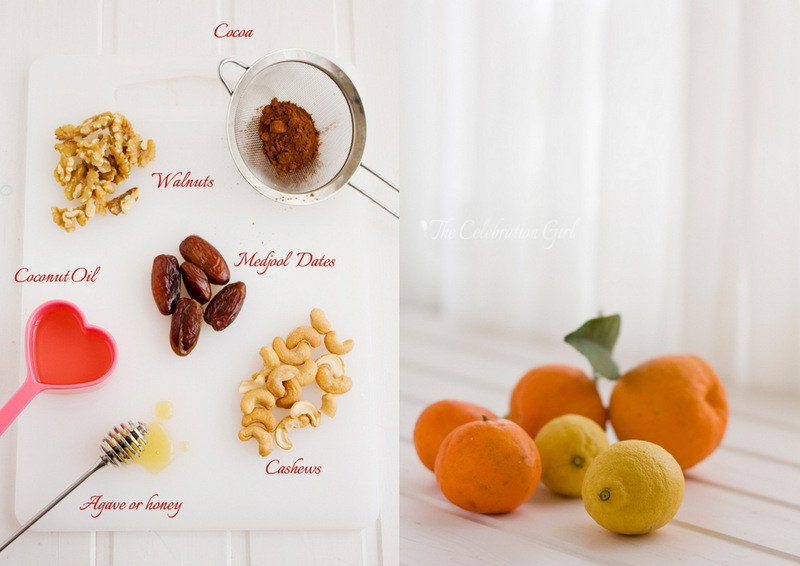
This recipe was created by adapting and modifying two recipes from Sara Britton, of the blog My New Roots. I had been wanting to try them for a while and found this to be the perfect opportunity to do so. And I love the result! It is called cheese brownie, because it has a raw brownie base,made only with walnuts, cocoa, dates and cocoa nibs for added crispiness. As Sara advises, Medjool dates are better because they are sweeter, but if you cannot find them or they are too expensive, simply add more quantity. Also, if you can, use good quality cocoa because it does make a difference.
The cream cheese filling is made with cashews, that were soaked overnight, agave nectar (or honey, if you are not vegan), coconut oil (which hardens at room temperature, so you will need to submerge the closed bottle in warm water for 10 minutes before using it), lemon juice (to give it the slightly bitter, characteristic “cheese”flavor) and orange and clementine juice and zest. I chose these flavors instead of the more traditional vanilla/fruits of the forest because citrus are in season and the trees that line my street are ripe with fruits. They also combine beautifully with the depth of dark chocolate.
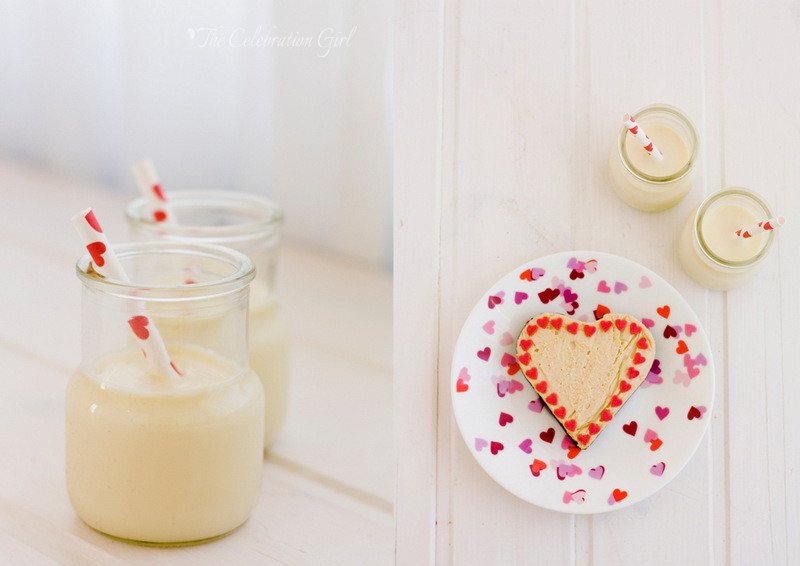
As you will see, the recipe is very, very easy and it only requires a food processor or blender to do all the work. Furthermore, because of its characteristics, it is very versatile, and can be shaped in any form you like and even cut using a cookie cutter. I made little hearts using small heart shaped pans for my children, and a bigger, rectangular one, which I then cut in small squares to eat as “cheese brownie bites”. Since today is Valentine’s day, I placed a few bites in a home made origami box lined with mini cupcake cases, to give as a small present. Do you like them?
Here is the recipe:
Orange and Clementine Cheese brownies (adapted and modified from My New Roots)
Ingredients:
For the crust: 1 cup walnuts, 1 1/2 cup dates (Medjool are best), unpitted and soaked in warm water for 10 minutes, 1/2 cup cocoa powder, 2 teaspoons cocoa nibs
For the filling: 2 1/2 cups raw cashews, soaked overnight, 2/3 cup coconut oil, 2/3 cup agave or honey, 1/2 cup lemon juice, 1/2 cup orange juice, juice of 1 clementine, zest of 1 orange and 1 clementine. NOTE: If you like sweeter desserts, reduce lemon juice to 1/3 cup and replace by orange juice.
Preparation:
1. Cover the pan you will use with foil, making sure to leave plenty at the sides. This will help you unmold the cake without needing to invert it (just pull the excess foil and lift, carefully, and it will come up.
2. Place walnuts in the bowl of the food processor and process until they turn into powder. Add cocoa and process 30 seconds to integrate (or pulse). Turn the processor on and start adding the dates, one at a time, until getting a sand-like dough that compacts when pressed between your fingers.
3. Pour the dough in the pan, extend it evenly and press with your fingers to shape it. Set aside.
4. Wash and dry the Food processor’s bowl and fill it with all the ingredients necessary for the filling. Just dump them all at once. Turn the food processor on, and let it work until the ingredients morph into a smooth cream. How smooth the filling will be depends greatly on how powerful is your food processor, so I joke that if it becomes very smooth, I made a vegan philly cheesecake and, if it’s a bit crumbly, I made a ricotta cake instead 😉
5. Pour the filling over the crust and smooth using a spatula.
6. Wrap the cake in the excess foil and place it in the fridge for at least 6 hours.
7. Take out of the freezer 30 minutes before serving. Cut with a warm sharp knife while still cold.

Amigos hispanoparlantes: La receta en castellano está en Petit-On! Pueden verla haciendo click AQUI.
by Marcela M. | Jan 31, 2013 | Blog, Cooking basics and tutorials, Recipe Box, Recipes

Good morning dear friends! How are you? Can you believe that the first month of the year is already gone? Am I the only one that feels that Christmas was, like, yesterday?
This past week I was hit by a cold, again. It seems that every virus that is going around finds a place in my throat because I have been coughing and coughing and coughing for a week now. It is getting better, fortunately, but a little bit of it still remains, which is why I haven’t posted here as planned- I was barely cooking. I have a pile of recipes I want to tweak and photograph for you, and I am hoping to be able to do it in the upcoming weeks.
The recipe I am bringing you today is the one I contributed to Petit-On in January. The monthly challenge involved recipes containing oats, an ingredient I love. In fact, my most iconic desert, nugatón , has oats as its main ingredient and I considered sharing that recipe instead for quite a while. I finally decided against it because it also takes great quantities of chocolate and butter and most of us are still detoxing from the holidays, am I right?
I started making my own granola and muesli 5 years ago, when I was living in Ivory Coast. They are both so easy to make, and making them at home allows me to become creative and vary nuts, seeds and spices to suit the season (and my own cravings!). This combination that I bring you today is ideal for winter, because it uses honey, ginger, cinnamon and cardamom, spices that pair very well with seasonal fruits like apples and pears. If you live in the Southern hemisphere, I recommend eating it with apricots or peaches, which also pair well with this spice blend.
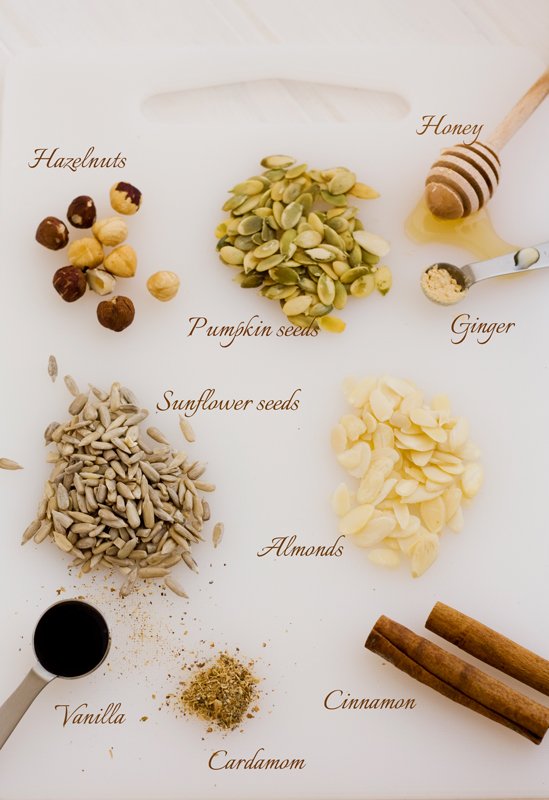
As you will see from the instructions, this recipe is very easy to make and all you need are a couple of bowls and an oven tray in order to do so. All you need to do is mix the dry and wet ingredients separately, then mix them and pour them in a lined (or non-stick) oven tray, then place it in the oven for about half an hour, turning the granola from time to time to make sure it browns evenly, without burning.
The recipe uses very little honey as a sweetener, so as to let the spices shines. I find that, when food is too sweet, the general sweetness tends to overpower the other flavors, so I like to opt for a milder sweet taste. Furthermore, there is also the sweetness of the dates and raisins so, fear not, it is delicious. If you like extra sweet food, you may add a few more spoons of honey, but I encourage you to try it this way first- you may be hooked! Also, if you are vegan, feel free to replace the honey by agave nectar, it works fine as well.
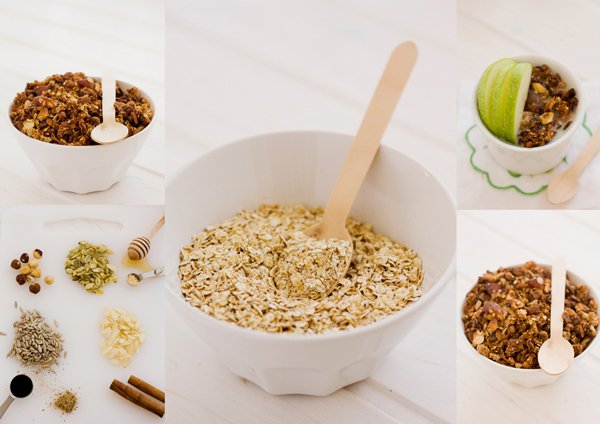
Here’s the recipe:
Spiced Granola
Ingredients: 2 cups rolled oats, 1/2 cup sliced almonds, 1/2 cup crushed hazelnuts, 1/4 cup pumpkin seeds, 1/4 cup sunflower seeds, 2 tablespoons oil, 2 tablespoons honey, 6 tablespoons water, 1 tablespoon vanilla extract, 1 teaspoon cinnamon, 1/2 teaspoon ground ginger, 1/4 teaspoon cardamom, 1/3 cup raisins, 1/3 cup medjool dates.
Preparation:
1- Pre-heat the oven to 200C. Line a baking tray with baking paper and set aside.
2- Put oats, almonds, hazelnuts, pumpkin and sunflower seeds in a bowl and mix.
3- In another bowl, place oil, honey, water, vanilla and spices. Mix well.
4- Add the wet ingredients to the dry ingredients and mix very well, until they are evenly soaked.
5- Pour the mixture on the lined oven tray and extend it evenly. Place the tray in the oven and bake for 20/30 minutes, or until evenly browned. It is very important to remove the tray after the first 10 minutes, and every 5 minutes after that, in order to turn the granola so that it browns evenly. If you just let it sit in the oven for the whole duration, the upper parts will burn! Hazelnuts are particularly sensitive to heat, so keep a close eye on them.
6- Once all granola is golden brown (but not burnt!), remove it from the oven and let it cool down on the counter.
7- Remove the date pits and cut the dates in fours.
8- Add raisins and dates to the granola and store in an airtight container.
9- Serve with milk or yogurt (I like almond milk) and fruit, if so desired.
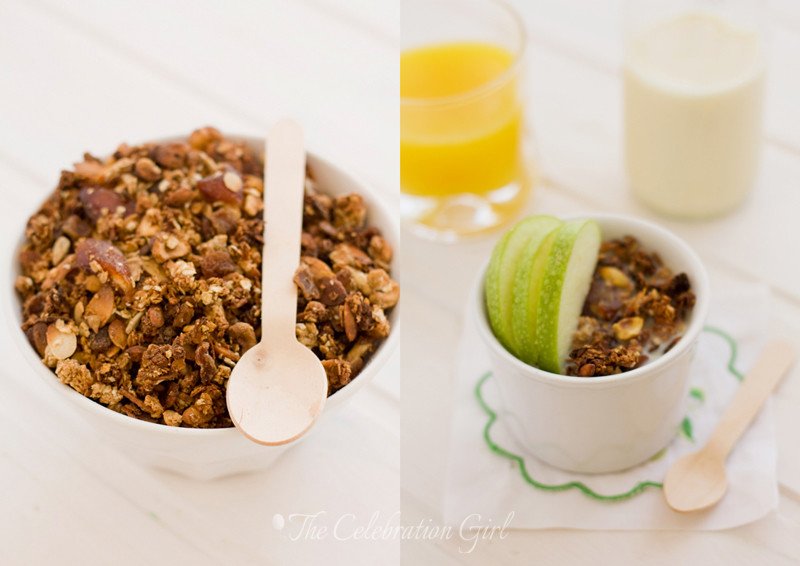
I hope you like this recipe. Have a wonderful weekend!
Amigos hispanoparlantes: Esta receta es la traducción de la que publiqué, en español, para Petit-On, y que pueden ver haciendo click AQUI.
by Marcela M. | Jan 25, 2013 | Blog, cookies, Recipe Box, Recipes, Sweets
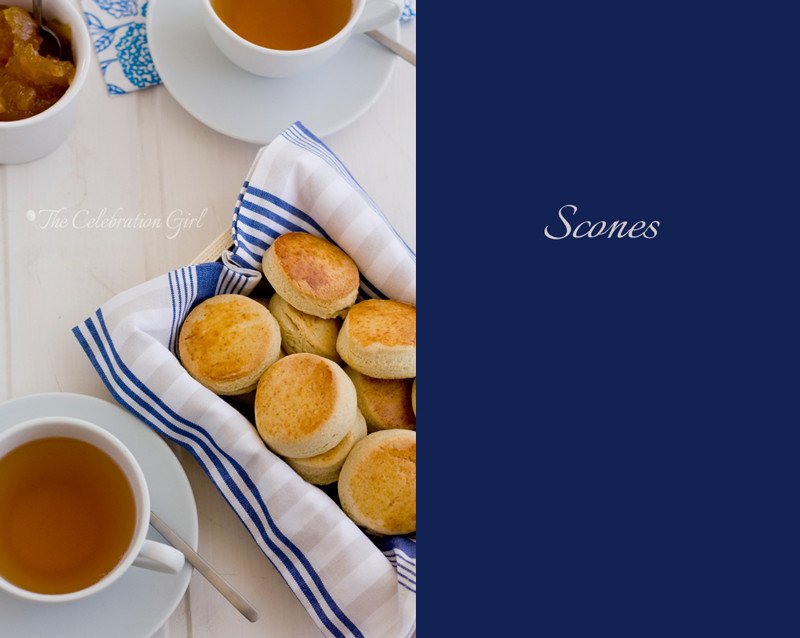
Good afternoon dear friends! I hope you had a wonderful start of the New Year. I missed you these past days!
I hadn’t planned to take a break from blogging but, as you may know if you follow me on facebook , my children and I were hit hard by weather and, for the first time in years, I couldn’t lift a finger. It all started on Christmas day, when I lost my voice (a serious tragedy for a chatter like me, maybe not so much for my family ;). 10 days later, my daughter woke up with high fever, and Luka and I followed her a day after, with 40C. When, after a couple of days, the fever didn’t recede, we took the children to see the doctor, who also checked me. Luka and Zoe had what appeared to be just a flu but later developed into a ear infection requiring a full course of antibiotics and I, myself, had tonsillitis- so antibiotics were prescribed for me as well. Then, this week, just after we had finished her course of antibiotics, Zoe relapsed with 48 hs of non-stop cough and high fever and then, almost miraculously, her cough and her fever stopped, as suddenly as they had started. Now Luka seems to have caught the same virus and started having fever. Ahh, the joys of Winter…oh well.
Over the years since Luka and Zoe were born, there have been many minor health problems and a few scares as well, but this was the first time (since recovering from the cesarian) when I was not feeling well myself either when taking care of their own ailments. I don’t normally get ill, and entire winters go by without me catching a single cold (which I attribute to the ridiculous amounts of garlic I consume. Seriously, I’m sure Dracula has marked my house as a no-go area!). To be honest, I hate being sick and I’m not very good at it because I just.can’t .stay. in. bed. and when I absolutely have to, I am making mental lists of things I have to do the minute I am able to stand up and get going. So this period of common illnesses was a challenge for me, and all the more so because my husband was away from Cyprus this last week.
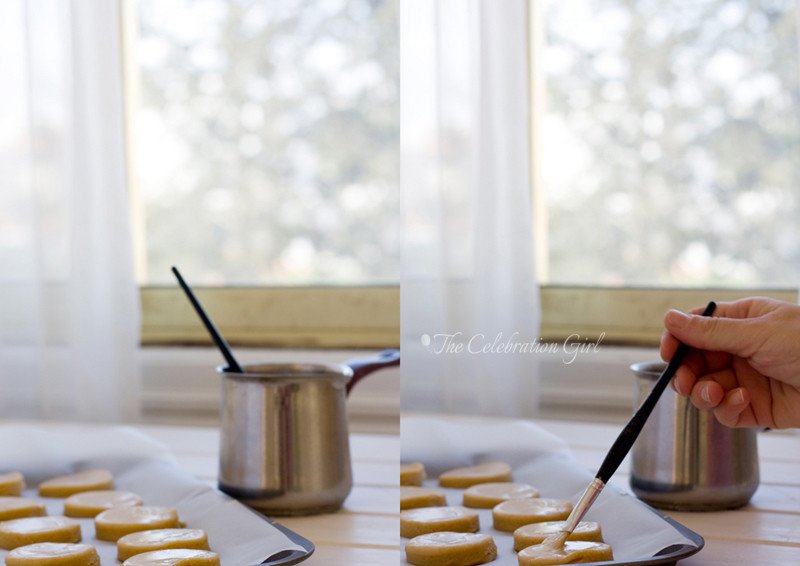
One of the things that was on my mental “to do”list while I was trying hard to lie in bed were these scones, Whole Kitchen Magazine’s January challenge. When I saw the recipe that was suggested for this month I was so happy! I love scones, they were always one of my favorite treats when I was growing up.I like them because they are not too sweet, and they admit so many variations that the possibilities for getting creative with them in the kitchen are almost endless. We can even get the same recipe and make them savory, with spices such as garlic and thyme, or rosemary, to accompany a hearty Winter soup.
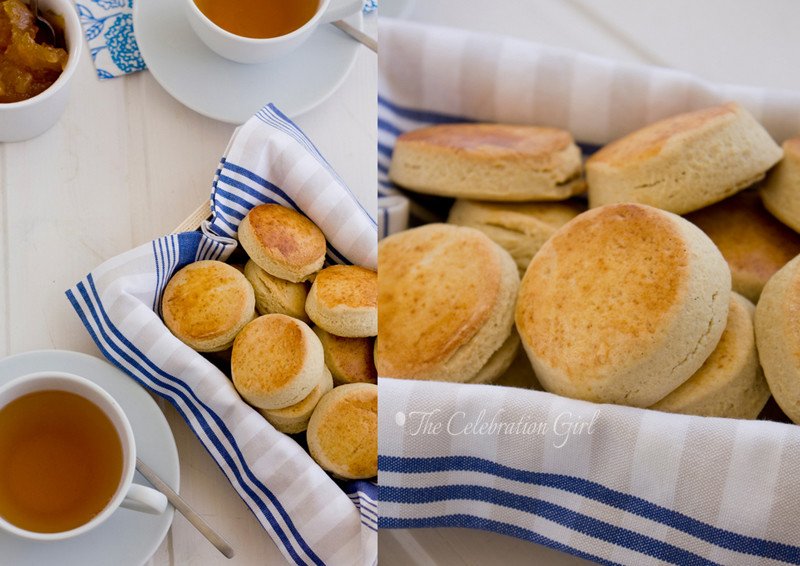
It is for this reason that I opted to make a a traditional, plain vanilla recipe without glaze. I wanted to give you the basic recipe so as to allow for experimentation. I’ll show you some of my favorite variations in the future but, for now, I thought it would be nice to start small.
As you will see from the recipe, the procedure is fairly simple, but there are a couple of important steps to get them right: 1) Don’t over mix the batter, and don’t knead the dough. This is crucial. You should barely integrate the dry ingredients into the wet ingredients and then roll and fold no more than 3 times. If you have remaining dough after the first cut, roll once only and cut again. 2) Make sure to pre-heat the oven properly, so that you can pop them in the oven the minute they are ready, or otherwise they won’t rise properly. You can see the difference between the ones that were placed in the oven immediately and the ones that had to wait on the counter in the next picture. They still taste fine, but the texture is different. So, if you want perfect scones, make sure the oven is hot and ready and don’t waste time!
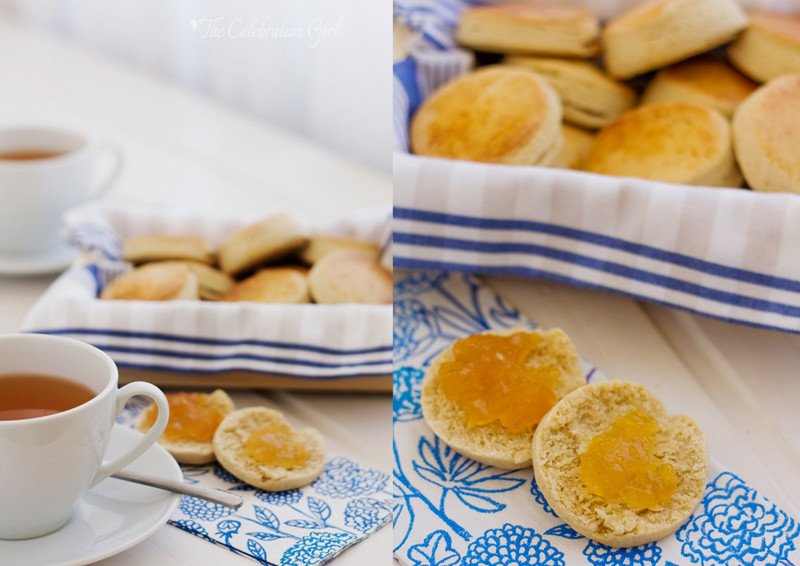
I like to eat them with jam ( some people also use clotted cream) and to accompany them with some nice tea. If shared with friends and loved ones, they taste better, of course 🙂
Now, one last important piece of information before leaving you with the recipe: Luka and Zoe’s baby sitter, who is an adorable Scottish lady, has asked me to request you to pronounce their name the ways Scots do, as if the E was not there (scons). She says English people pronounce them differently but that, since they are a Scottish treat and not an English one, she feels very strongly that they should be pronounced the Scottish way. So now you know 🙂
Here is the recipe:
Scones (makes around 30)
Ingredients: 500 grs all purpose flour, 2 teaspoons baking powder, 150 grs butter, 150 grs icing sugar, 3 egg yolks, 1 tablespoon vanilla extract, 125 cm3 warm milk + 1 egg yolk and 20 cm3 milk for brushing them before putting them in the oven.
Preparation:
1) Pre-heat the oven to 200C. Mix flour and baking powder and sift together over the counter. Make a well in the middle.
2) Add butter (softened at room temperature) and sift the icing sugar on top of it. Mix with your hands until creamy.
3) Add the egg yolks one, by one, and cream with your hands after each addition.
4) Add vanilla extract and milk. Mix until incorporated.
5) Fold the flour into the wet ingredients until fully integrated, without kneading.
6) Dust the countertop with flour and roll the dough to form a rectangle. Fold the dough in the middle and roll again. Fold and roll two more times, without leaving resting periods and then roll one final time, until getting a width of approximately 3cms.
7) Cut circles using a round cookie cutter and place the scones on a baking tray lined with baking paper.
8) Mix one egg yolk with 20 cm3 of milk and brush the scones with the mixture. Place the baking tray in the hot oven for 30/35 minutes (they will get golden on top).
9) Remove from the oven and place on a wire rack to cool completely.
Con sabor latino…
No había pensado tomarme vacaciones del blog pero, como seguramente sabrán si me siguen en facebook, mis hijos y yo caimos víctimas de unos virus fuertísimos y, por primera vez en muchos años, no podía ni moverme, mucho menos sentarme a la computadora, o sacar fotos. Todo comenzó el día de navidad, cuando me desperté sin nada, nada, nada de voz (lo que para alguien como yo es una tragedia aunque, posiblemente, para mi familia haya sido una bendición 😉 10 días más tarde mi hija empezó con fiebre, y 48 horas más tarde le seguimos Luka y yo, con temperaturas que llegaban a los 40 grados. Seguimos así un par de días, así que llevamos a los chicos a la pediatra, que me revisó a mí también de paso. Luka y Zoe tenían lo que parecía ser sólo una gripe pero luego derivó en una infección en el oído, y yo tenía amigdalitis, así que terminamos todos con antibioticos. Luego, esta semana que acaba de terminar, cuando apenas habíamos terminado el ciclo de antibióticos, Zoe cayó en cama nuevamente con 48 hs de fiebre y una tos terrible y constante y que cesaron tan abruptamente como habían comenzado. Eso sí, ahora parece que Luka está empezando con lo mismo…ahhh las bondades del invierno…qué se le va a hacer.Esta no es la primera vez que mis hijos están enfermos, claro está. Pero esta es la primera vez que yo he estado enferma al mismo tiempo. Por suerte, no suelo enfermarme nunca y normalmente el invierno pasa sin que yo me agarre ni un resfrío (lo que atribuyo a las enormes cantidades de ajo que consumo. En serio, yo creo que Drácula debe tener mi casa marcada para que los vampiros no se acerquen ni por casualidad). Quizás a causa de esto, detesto estar enferma y soy mala paciente porque no.puedo.quedarme.en.cama. y cuando no tengo más remedio que hacerlo me la paso haciendo listas mentales de cosas que quiero hacer ni bien pueda levantarme. Así que, como imaginarán, este período de enfermedades conjuntas fue un desafío para mí, más aún porque mi marido estuvo de viaje fuera de Chipre durante toda la semana pasada.Una de las cosas que estaba en mi lista mental de cosas para hacer cuando me sintiera mejor, eran estos scones que Whole Kitchen Magazine nos proponía a los miembros del círculo para el mes de enero. Me encantan los scones y han sido, desde siempre, una de mis galletitas preferidas. Me gustan porque no son demasiado dulces y porque admiten tantas variaciones que es facil ser creativo y experimentar con ellos, pudiendo incluso eliminar el azucar y hacerlos salados, con especias, para acompañar una rica sopa. Es por ello que la receta que les traigo hoy es muy simple: scones de vainilla sin baño alguno, porque quería darles la receta básica para que ustedes mismos puedan jugar con ellos de la manera que mejor les plazca, intercambiando sabores y agregando ingredientes si asi lo desean.Hacer scones es muy sencillo, pero deben observar dos reglas importantes: 1) No mezclen de más los ingredientes, y no amasen la masa. Esto es crucial. Los ingredientes secos tienen que ser apenas integrados a los húmedos y, luego, deben estirarlos con palotes y doblarlos por la mitad no más de 3 veces. Si tienen resto de masa, junten y estiren sólo una vez antes de volver a cortar. 2) Asegurense de precalentar el horno ni bien empiezan a trabajar en ellos, porque los scones tienen que ser introducidos en un horno bien caliente ni bien se terminar de hacer o quedarán chatos. Fijense en las fotos de más arriba, la diferencia en altura entre algunos de los scones: los chatos son los que tuvieron que esperan en la mesada mientras se hacía la primera tanda. Saben bien igual, pero la textura es diferente. Así que ya lo saben, si quieren scones perfectos, asegurense que el horno esté bien caliente a tiempo!Me gusta servirlos acompañados de mermelada y un rico té, y hay gente a la que tambien le gusta la crema/nata. Si se disfrutan en buena compañía, saben mejor, claro 🙂 Finalmente, antes de dejarlos con la receta, una última advertencia: la baby sitter de Luka y Zoe, que es una señora escocesa adorable, me pidió que les informara que la pronunciación correcta es SCONS y no SCOUNS, como lo promuncian los ingleses. “Los ingleses lo pronuncian mal, son dulces escoceses, no ingleses, y por eso su nombre debe ser pronunciado como lo hacemos nosotros”, me dijo. Así que ya saben 🙂
Scones (rinde alrededor de 30)
Ingredientes: 500 grs harina 0000, 2 cucharaditas de té de polvo de hornear (Royal), 150 grs manteca (o margarina), 150 grs azucar impalpable, 3 yemas, 1 cucharada sopera de vainilla, 125 cm3 de leche tibia + 1 yema y 20 cm3 de leche para pincelarlos antes de hornear.
Preparación:
1) Pre caliente el horno a 200C. Mezcle la harina y el polvo de hornear y ciernalos sobre la mesada. Haga un huevo en el medio de la montaña de harina, para quen quede como una corona.
2) Coloque la manteca (que debe estar a punto pomada) en el hueco y cierna el azucar impalpable encima de la misma. Mezcla manteca y azucar con las manos hasta obtener una crema.
3) Agregue las yemas, de a una, e incorporelas a la crema de manteca.
4) Agregue vainilla y leche a la crema, e incorpore.
5)Integre la harina a la crema, de a poco, y forme un bollo de masa, cuidando de no amasar en ningun momento.
6) Espolvoree la mesada con harina y, usando un palote de amasar, estire la masa hasta formar un rectangulo. Doble la masa por la mitad y estire nuevamente con palote. Vuelva a doblar y estirar dos veces más, sin dejar que la masa descanse y luego estire una última vez hasta tener una masa de un grosor de aproximadamente 3 cms.
7) Corte los scones usando un cortante redondo, y colóquelos en una placa para horno cubierta con papel pata hornear.
8) Mezcle una yema con 20 cm3 de leche y pincele los scones con dicha mezcla. Lleve la placa al horno caliente por 30/35 minutos o hasta que estén dorados arriba.
9) Retire del horno y coloque sobre una rejilla hasta que se enfrien completamente.
I hope you like this recipe! See you on Monday!
Espero que les guste la receta! Nos vemos el lunes!
by Marcela M. | Dec 31, 2012 | Blog
Good morning dear friends! How are you? How were your Christmas celebrations? I hope everything went smoothly and that you had a great time with your families!
We had a lovely, quiet Christmas eve, opened presents on Christmas morning, and then had lunch on Christmas day with some dear friends, which was great. But on the evening of the 25th, I got hit by a HUGE cold that knocked me down and left me without voice for 4 days! It had been years since the last time I had had to stay in bed, so this was totally unexpected! Fortunately, Luka and Zoe didn’t catch it, and only have a mild cough. This is the reason that kept me away from blogging this past week…I had no strength to sit in front of the computer!
I am now (almost) completely recovered and I wanted to take a second from all the NYE preparations to thank you for being there, for reading my posts, for commenting, for interacting with me on facebook and twitter, for making this a happier place than I ever thought it would be.
2012 has been a year of growth in many areas of my life and The Celebration Girl has been no different: The blog underwent a face lift thanks to wonderful designer Jessica Sims and, since then, the overall readership, facebook friends and daily visits more than tripled, persons (other than my mother) subscribed to the blog and now receive all posts by email, I started collaborating regularly with Spanish website Petit-On and participated in Whole Kitchen’s advent calendar, I managed to go back to publishing twice weekly ( atrend I am planning to continue all through 2013) and even to do it daily during the advent. I have taken so many pictures that my hard drive is begging for a clean-up and, what is best: I am overflowed with ideas for new content, pictures and tutorials. I feel energized and happy and I owe it to you. So, Thank you!
As a final 2012 treat, I though I would share with you some blog statistics that wordpress just delivered to my inbox. Here they go:
- – The Celebration Girl is truly an international blog, read in 151 countries!
- – The countries with bigger readership are, in this order: USA, Spain and Argentina.
- – The most viewed posts were the following: Christmas cookie recipes, The Best cheesecake ever, Tips on how to make meringue cookies , and the fondant tutorials for making flowers and owl cupcake toppers.
- – Pictures seem to be what drove people to this blog, because most visitors arrived through foodgawker, tastespotting, pinterest and google image search. I find that flattering 🙂
- – Most search engine terms were related to fondant, tutorials and to Argentinian recipes. “Easy fondant flowers” was typed 401 times, “fondant flowers” 259 and “how to make fondant flowers “146”. I have taken note and will be adding more related content in 2013
- – Amanda was the most regular commenter: THANK YOU!
Thank you, all of you, for being a part of my life. May you be able to close 2012 with a smile in your faces and to greet 2013 with love, hope and faith in whatever it may bring.
HAPPY NEW YEAR!!!!


