by Marcela M. | May 3, 2012 | Blog, cookies, Recipe Box, Recipes, South America, Sweets, Travel, Uncategorized
Good morning friends! Let’s finish the week on a sweet note, shall we?
Last year, during our stay in Córdoba, I started preparing a few posts about Argentina’s sweet food culture. I could not finish writing these posts at the time, but I did take the pictures with the aim of showing you what we, Argentinians, think about when we think about sweets, what we love, what we miss when we are abroad. So here is the first of these posts, three in total, showcasing a small selection of my favourite treats. I need to give you one warning, though: there are many more sweets that I could not find in Córdoba (because they are typical of other provinces) or didn’t have the time to photograph. I also owe you a post on the candies and cookies from my childhood, which I meant to prepare, but my children kept eating the items to be photographed 😉
So, let’s begin! Today’s post is about the most popular of Argentina’s sweet treats: alfajores. But what are alfajores? And why are they called this way?
Alfajores are basically two cookies sandwiched together by some kind of sweet filling, be it fruit jam, dulce de leche, mousse or even ice cream. Their name comes from the arabic word “alajú”, and it is, in fact, an arabic confection that entered Spain during the Moorish era (during the period of Al-Andalus) and was then adopted -and modified- by the Spanish colonies. The shape and the recipes for the cookie itself and its fillings vary greatly from one country to the other, and even from one region to the other. According to wikipedia, the original confection (which can still be found in Spain) contained flour honey, spices and nuts and had a cilinder form (like a crêpe), while in Latinamerica alfajores are round and are normally filled with jams and mousses.Also, while in Spain they constitute a treat to be enjoyed mainly on special occasions (such as Christmas), except in the Medina Sidonia (where one can buy them all year long), in countries such as Argentina they are an everyday snack and can be bought in any kiosk.
Alfajores are different from a regular sandwich cookie, such as an oreo. The texture of the cookie itself is different: alfajores are moist and soft, and lack the crispiness of a traditional sandwich cookie. The filling is different as well, and more abundant. Whoopie pies, on the other side, look like an alfajor, and that is probably what we would call them back home in Argentina.

Argentina has different kinds of traditional alfajores, which differ from province to province. There are, of course, those that are available in kiosks nation-wide, produced by big candy companies, such as Arcor, Bagley or Terrabusi (owned by Kraft foods), but what is really interesting, and what I recommend you to do if you travel to Argentina one day, is to taste the regional versions, and compare them. In the following pictures I will show you some of these alfajores for you to get a glimpse at the variety you can find, and once I have tested and tweaked the recipes I brought from home, I will share them with you here as well.
The first type of alfajores I am showing you is perhaps the most famous one: Alfajor “Marplatense”, the alfajor from Mar del Plata, a seaside city in Buenos Aires province, which is also a traditional vacation spot.

Mar del Plata has many alfajor factories and, one of them, Havanna, has opened cafés and stores in several other countries, such as Israel, Spain, Mexico and the US. Havanna alfajores can also normally be found in shops that sell Latin-american products, as well as in Argentinian restaurants.
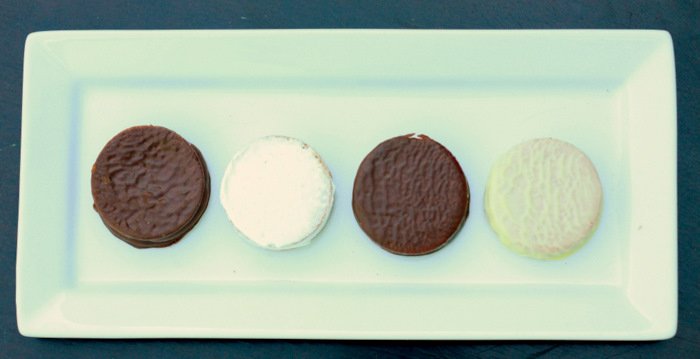
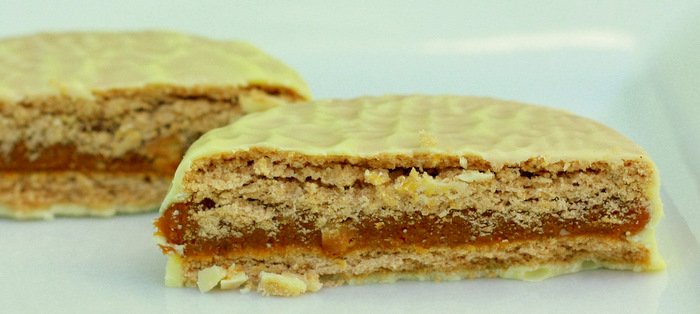
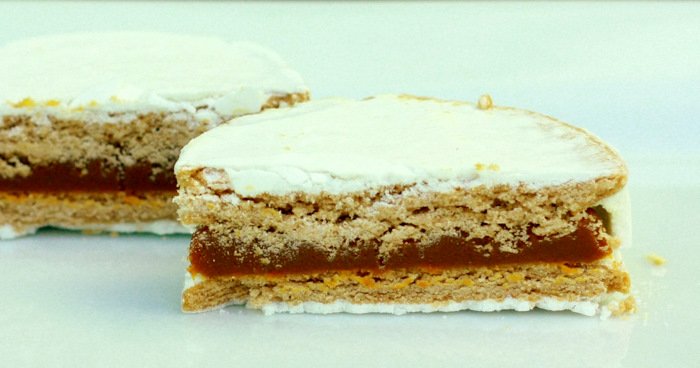
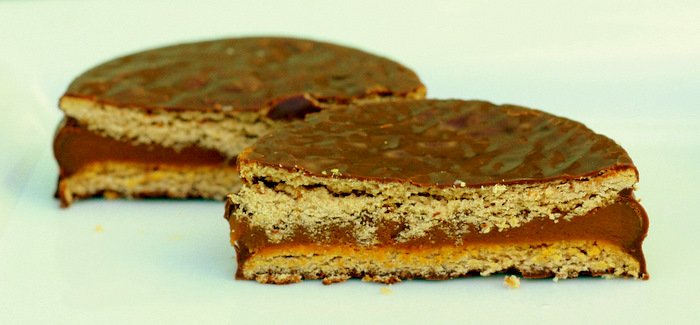
There are several types of alfajores from Mar del Plata: vanilla cookie with dulce de leche filling, covered in chocolate, vanilla cookie with dulce de leche filling covered in sugar glaze, vanilla and coffee cookie with dulce de leche filling and dark chocolate glaze, and vanilla and walnut cookie, with dulce de leche filling and covered in white chocolate glaze. They are all delicious, and their dulce de leche filling has the characteristic subtly smoky flavour that just burst in your mouth with the first bite and leaves you wanting more.
Alfajores from Córdoba are quite different, in two main aspects: the cookie is quite simple and light, the traditional filling is fruit jam instead of dulce de leche (normally, apple, pear or quince jam) and they are covered with a very simple sugar glaze made with only icing sugar and water that does not cover the cookie completely. Due to the popular love for dulce de leche, however, alfajores cordobeses with dulce de leche also exist, but they are not the traditional ones.

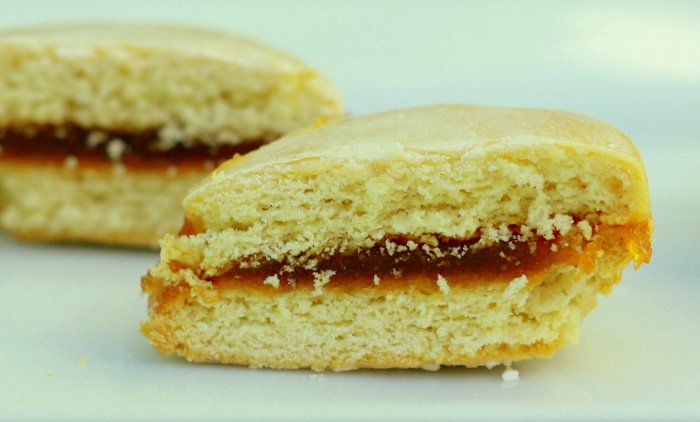
The cordobese confection that traditionally carries dulce de leche are colaciones, which are characterized by the crispy, curved nature of the cookie (that contains many egg yolks and a little bit of alcohol in the dough).
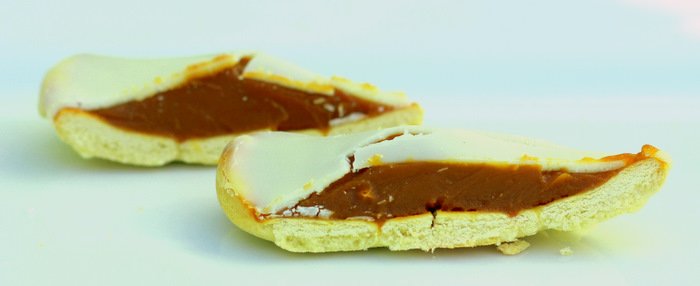
Alfajores from Santa Fé are also very popular. They are made of three layers of crispy, rather dry cookie (characterized because the dough has to be rolled and turned on itself 20 times, such as in the procedure for making puff pastry) , filled with dulce de leche (lots of dulce de leche, since the cookie itself is not overly sweet!) and covered with a sugar glaze made with icing sugar, water, lemon and egg whites.
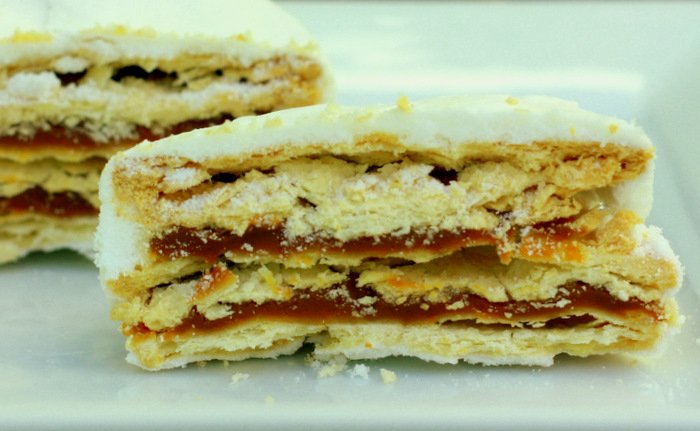
Another very famous alfajor, which I couldn’t find in Córdoba to photograph, is the Alfajor Norteño (from Argentina’s North-West region), which is filled either with layers of dulce de leche and turrón, or only with turrón paste made with honey, egg-whites, sugar and walnuts.
I hope you liked this small introduction to our sweets and, worry not!, recipes will come soon!
And in case you are wondering who ate all those sweets that were photographed, it was a little blonde elf that helps me style food whenever he can…
Have a wonderful weekend!
by Marcela M. | Mar 13, 2012 | Blog, cookies, Recipe Box, Sweets, Uncategorized
Good morning dear friends!
How are you today? I hope you had a wonderful start of the week. Is the weather getting nice, warmer where you live or is winter still looming? Or are you in the southern hemisphere, anxiously awaiting the first yellow leaves of automn, and the relief of rain after a hot summer?
Here in Cyprus the weather has started to get warmer, but one last cold wave (with snow in the Troodos Mountains) has been announced before we can definitely say hello to Spring, so we are not putting our sweaters away yet. The streets, however, are already lined with yellow flowers, the orange and lemon trees are full of fruits, and the grass has turned a beautiful shade of green. The sun is starting to shine brighter, but the wind still blows colder than it will next month, once Spring will be in full bloom. This is such a nice time of the year to be here, and it is definitely the best time to come visit, in my opinion.
Even though we are not yet in Spring, I have already started getting into a Springy mood…hence these cookies! My husband had to travel to London for a few days, where he was planning to visit a dear friend who has two adorable girls aged 8 and 2 1/2, so I thought that I could add to the presents he was taking them a small box of decorated cookies. I looked into my cookie-cutter box and found a couple of sets I hadn’t used before and set myself to work. I made tulips, daisies and butterflies in different sizes and color combinations, and I played with sanding sugar and sugar pearls in some of them. Decorating is a form of meditation to me, because it allows me to focus completely in what I’m doing, and I love that.
I also made a few other cookies, from a princess set: a crown (which my daughter tried to put on her head on several occasions) a high-heeled shoe, and a pink and white castle:
And to top it all off, I added a few cupcake cookies, with red M&Ms as cherries.
My husband took some of these cookies to his friend’s daughters and the rest were enjoyed by our own children, who were very happy with them! If you have never decorated sugar cookies before, I highly encourage you to do so, it is such a fun activity!
Now about the news I announced: This blog is going to undergo a makeover! 😀
When I started blogging, almost a year ago, I didn’t have the money nor the necessary skills to make it look as pretty as I wanted to, so I simply designed a basic header using a tutorial from Makin’ cute Blogs and a background using a free background generator that I found online. It was ok for a start but it was not what I wanted and, ever since then, I have been looking for ways to beautify my little corner on the internet.
A few weeks ago, I read about a design makeover giveaway being offered by Jessica Sims Design, so I entered it…and I won! I had never won anything in my life before this, so you can imagine how happy I was! I have now sent Jessica my ideas and she will soon get to work on them. I am also working on a few pages I want to add, in order to make this place a little bit more practical and user friendly, and once it is all ready, it will come live. I am very excited about this and I hope you will like the end-result!
I will be back later this week with a few travel related posts about our family trip to Argentina.
See you soon and have a great day!
by Marcela M. | Jan 24, 2012 | Blog, cookies, Holidays, Parties, Recipe Box, Recipes, Sweets, Uncategorized
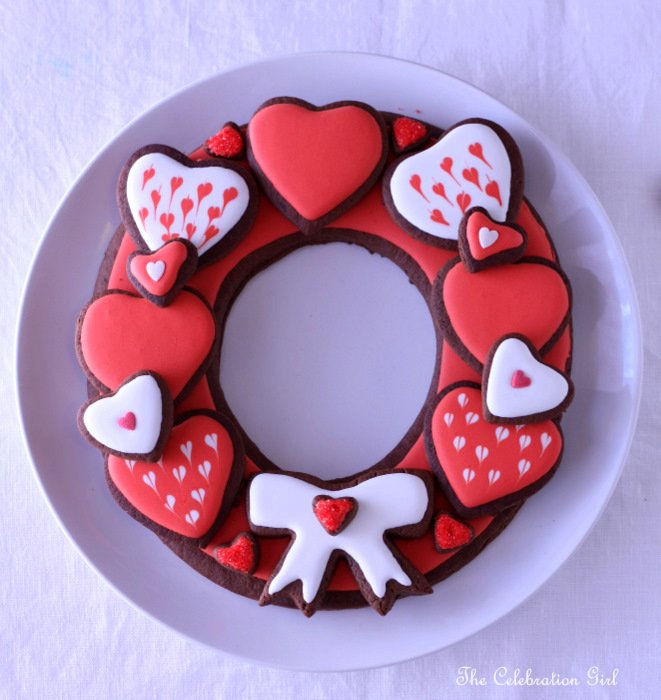
Good afternoon dear friends! How are you today?
These past weeks I have been absent from the blog, and I apologize for that. As I mentioned in my previous post, I had been preparing two surprises for you. The first one, was the dessert table for Chinese New Year, and here is the second one: A tutorial for making the chocolate cookie heart wreath pictured above, which I designed for Catch my Party!
When my Christmas breakfast table was featured as Catch my Party’s Party of the Day, Jillian mentioned that she was going to pin the holly wreath to make it next year and I offered to prepare a tutorial for her. She loved the idea and suggested, instead, a cookie wreath for Valentine’s day! So I set myself to work!
If you would like to know how to do this, including how to decorate each type of cookie, hop over to Catch my Party!
I will show you how to decorate tons of cookies…
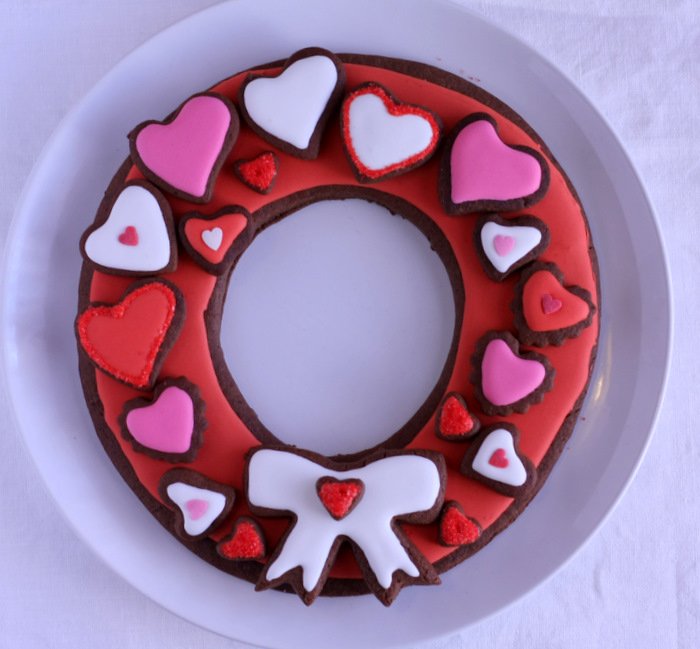
..how to put together a wreath like this one:

or like this other one…
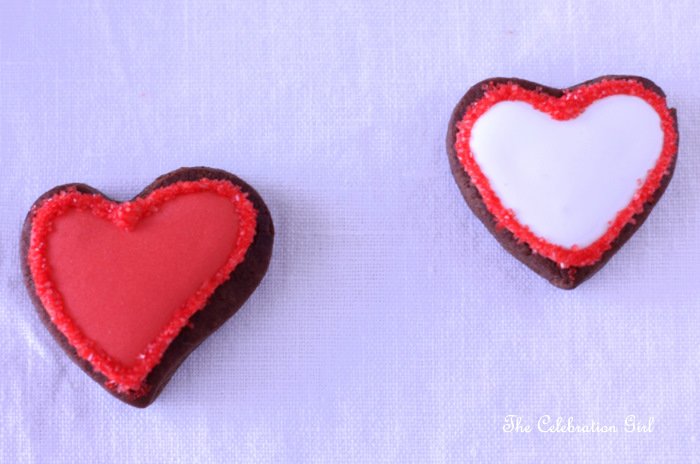
…how to draw hearts with royal icing…

…how to outline with sprinkles…

…and how to outline with sanding sugar.
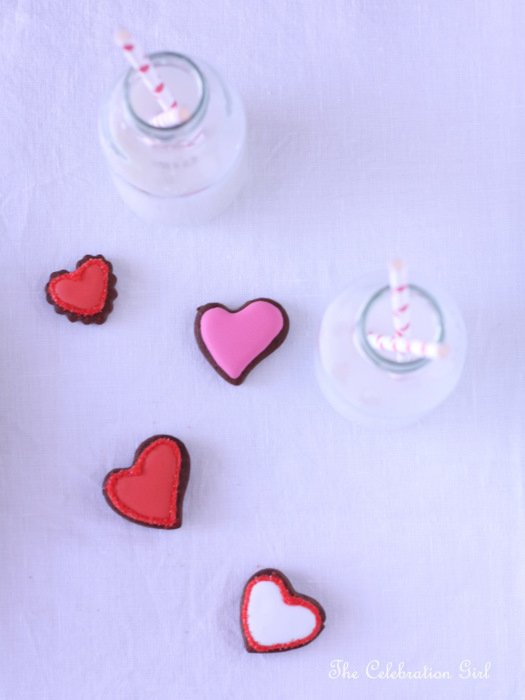
And if you have remaining cookies after assembling the wreath, you can enjoy them with milk…

Or even prepare cute Valentine’s day presents for your loved ones!
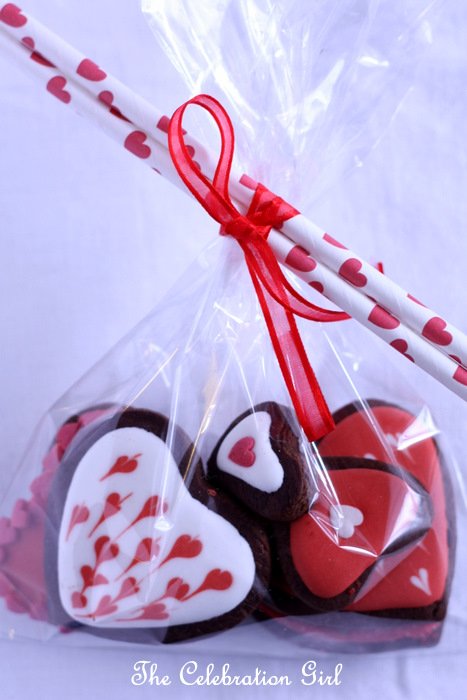
I have also included templates of the cookies I used, so go to Catch my Party now and happy baking!
by Marcela M. | Jan 2, 2012 | Blog, Holidays, Parties, Recipe Box, Uncategorized
Good morning dear friends, and Happy New Year!!!
How are today? How were your celebrations? I hope you all had a really great time and that you started 2012 in the happiest of ways.
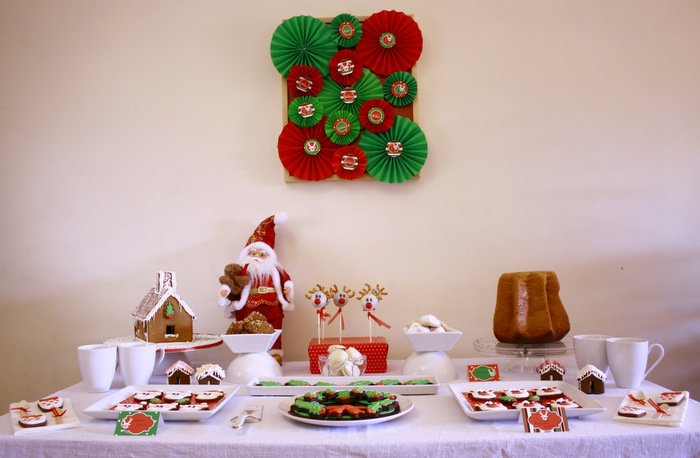
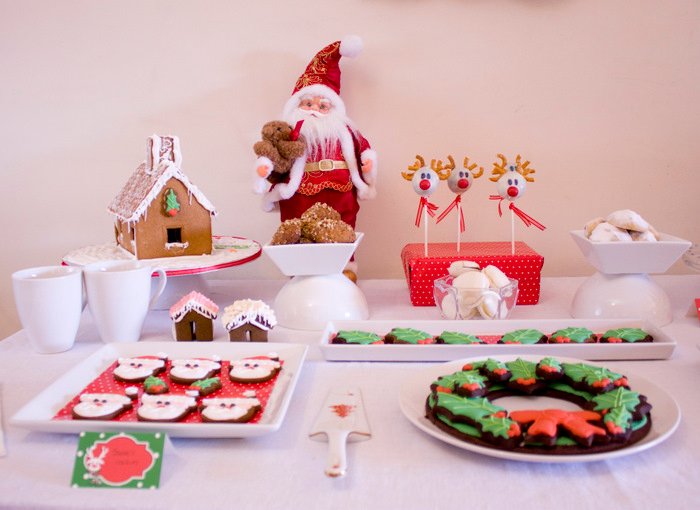
Today, as first post of the new year, I wanted to show you the Christmas table I prepared for our children. Since they are still very young, we do not do big celebrations on Christmas’ eve, but rather, we celebrate on the 25th, together with the opening of presents.
This year, I had an “Amy Atlas moment” and decided to prepare a few special treats to surprise Luka and Zoe for breakfast, together with a decorated table, with backdrop and all. It was really fun to do it! I baked and decorated everything at night for a week, and hid all treats in our study room for the kids not to suspect anything. On the 24th, we set up all decorations and we left the table ready for Luka and Zoe to find it when they woke up. They were so happy!
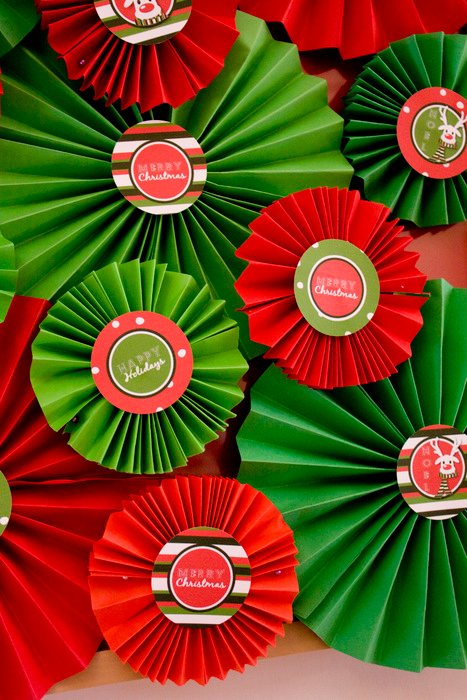
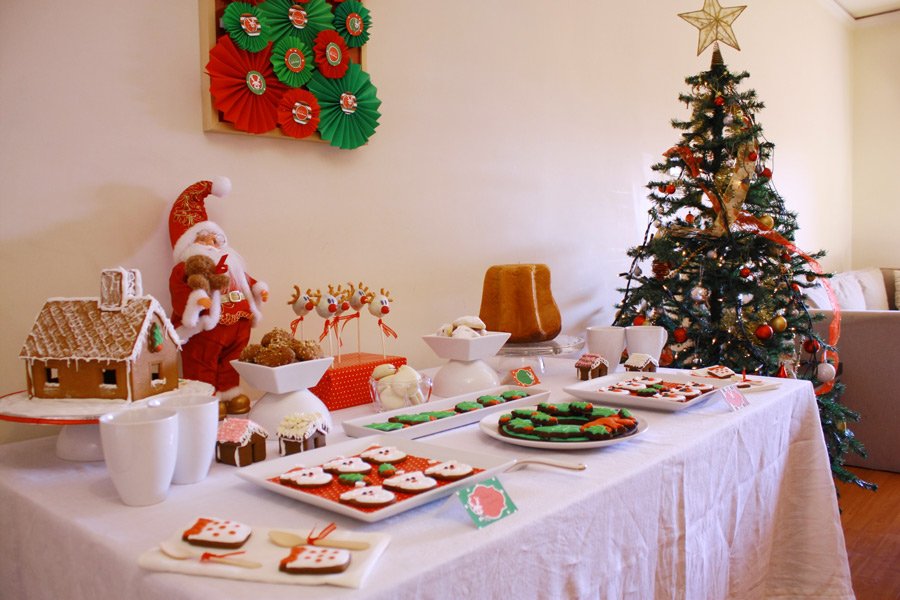
The inspiration for the table came from a set of window stickers that we brought from Argentina, which featured Santa Claus and its reindeers, and with which the kids had been playing since we had arrived back to Cyprus ( they didn’t survive, so I have no photos of them!). Around the time when I was preparing the treats, I also saw a BEAUTIFUL set of Free party printables from Bird’s Party, offered at Catch My Party, featuring a super cute Rudolph reindeer, so I decided to use them, and to adjust the colours of the reindeers to match them. I also used the printables for the backdrop: I made several red and green paper fans in different sizes, glued the party circles to them, and attached them to a frame that I already had.
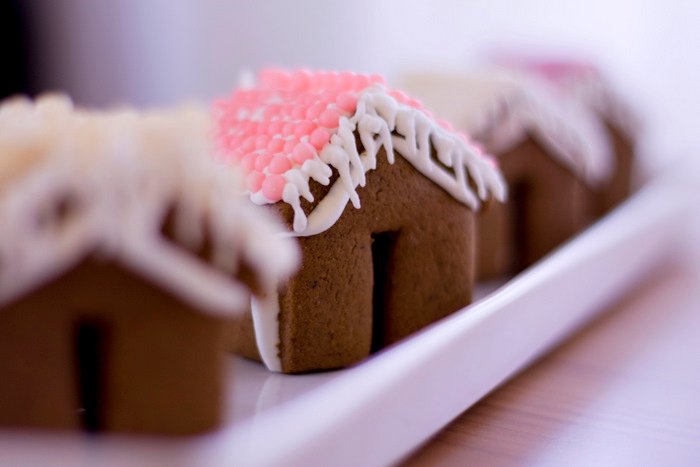
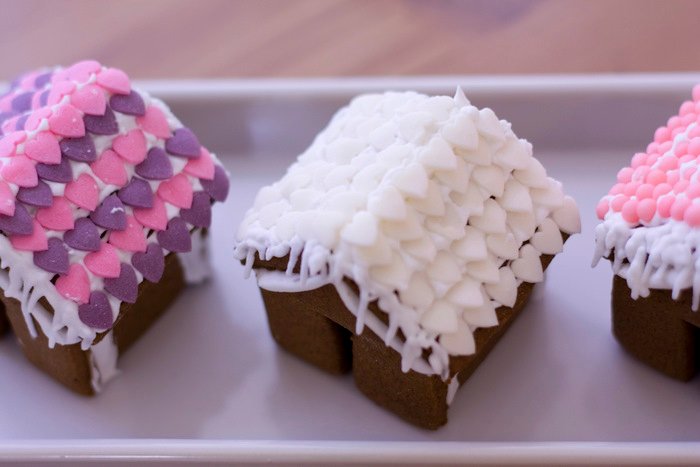
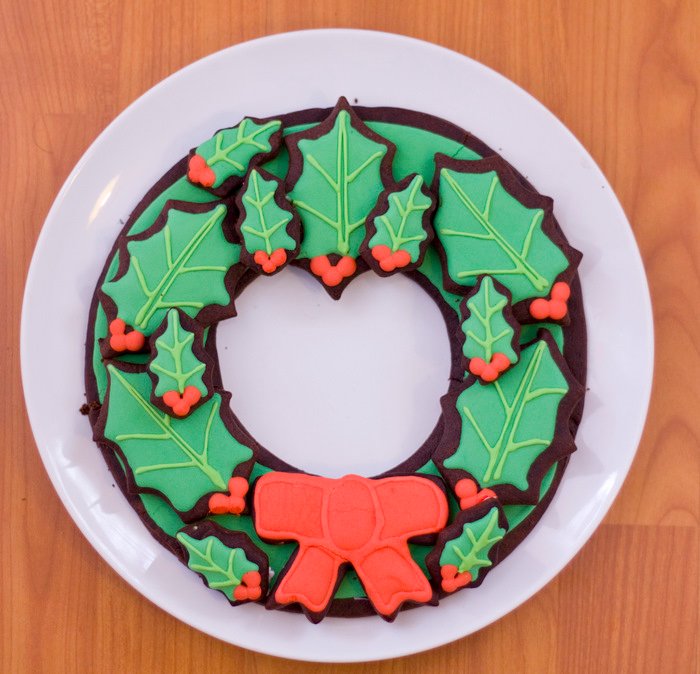
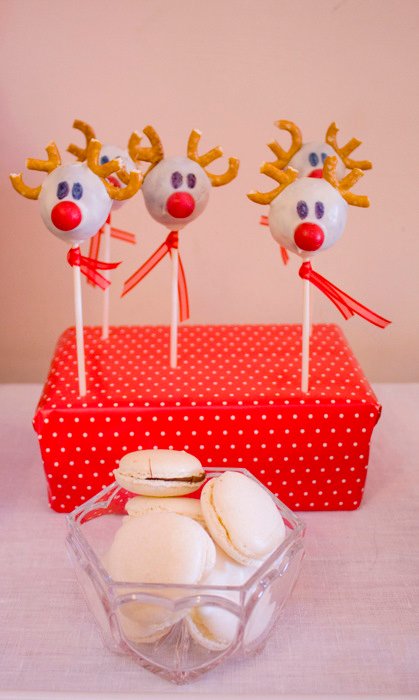
The desserts themselves aimed at reflecting us, as a multicultural family, and at incorporating flavours from our different traditions. There was Pandoro, which is common in Argentina and Italy (store-bought), gingerbread cookies (in the shape of Santa Claus and Rudolph’s faces), gingerbread houses (the flavour of which reminds my husband of his own childhood in Kosovo), kourambiedes and melomakarona (from Greek Cyprus, where we live), as well as chocolate cookies in the shape of holly and of a Christmas wreath, “Rudolph” cake pops and vanilla bean macarons with chocolate hazelnut cream. For drinks, we served hot chocolate, and coffee for the adults.
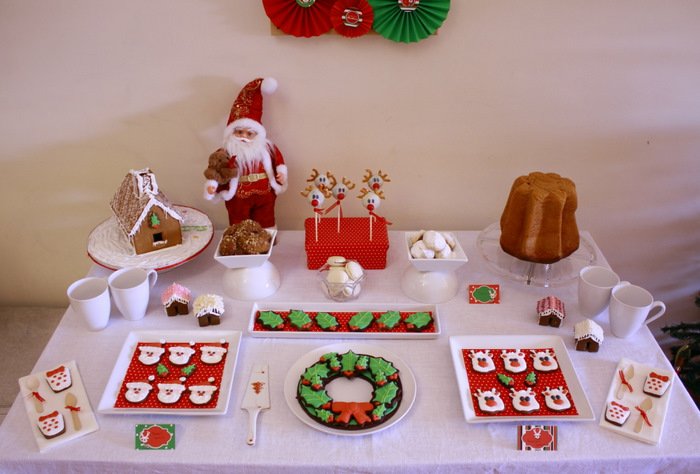
I made all cookies (including the cookie wreath) using the gingerbread cookies and chocolate rolled cookies recipes from Glory, of Glorious Treats, and 2 sets of Wilton cookie cutters. For the macarons, I used the recipe and the method I shared inhere, and I made the mini-gingerbread houses according to the templates and instructions shared on the blog Not Martha. For glueing the gingerbread houses , I used Sweetopia’s recipe for Royal Icing, which I then thinned to decorate the cookies. I LOVE that recipe, it worked really beautifully.
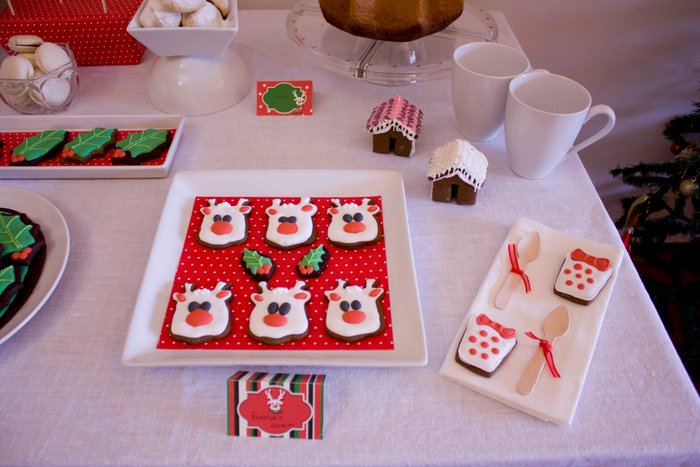
Here are a few more pictures of the details:
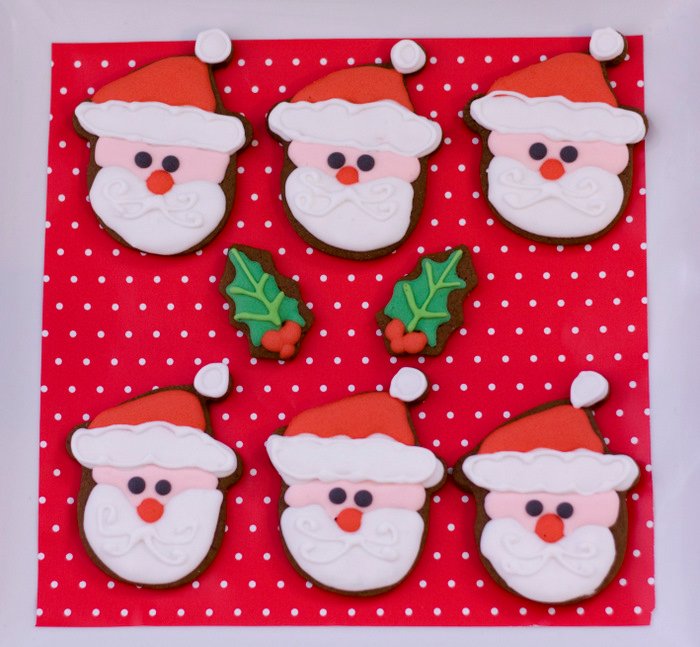
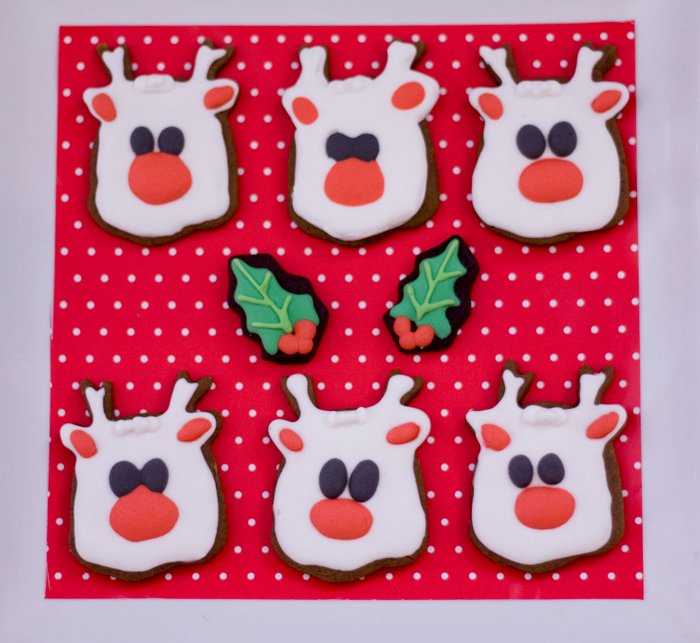

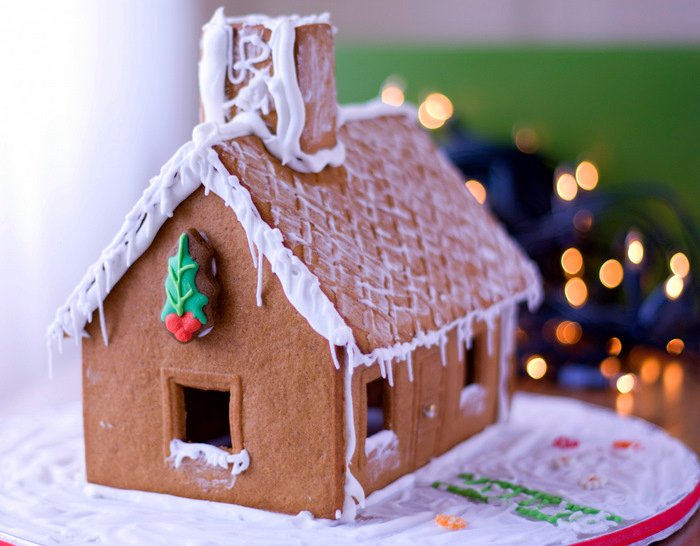


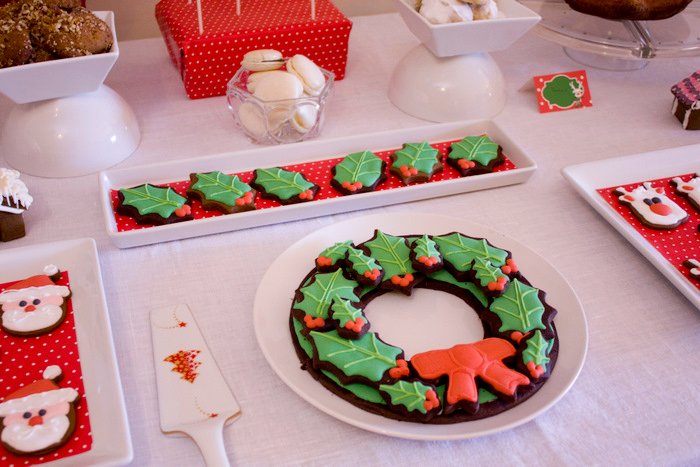

And here is how the dessert table looked next to our Christmas Tree, in our living room:
I hope you like it!
Have a wonderful week!
by Marcela M. | Dec 30, 2011 | Blog, Pies, Recipe Box, Recipes, Sweets, Uncategorized
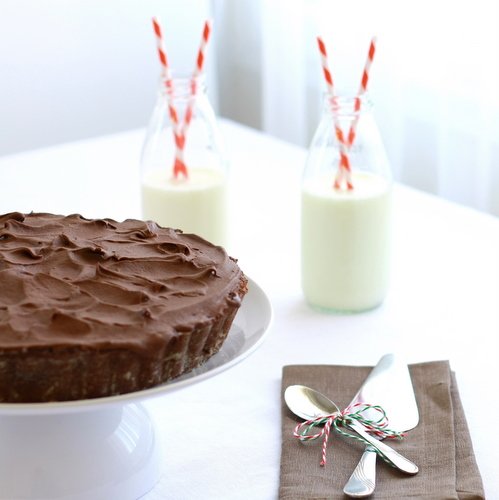
Good morning friends! How are you? Are you ready to say goodbye to 2011? I know I am.
It is funny how the simple act of changing one tiny little number can make us feel like the days ahead are full of possibilities, that new beginnings are possible and that wonderful things await us. I embrace that feeling every year, even if it may be just an illusion for some. I like making time for pausing and reflecting and planning and hoping.
We also have a small tradition for New Year’s eve: we try a new recipe each year. We search old cookbooks, trusted blogs and the internet in look for yumminess and we prepare that. Alas, we still haven’t decided what to prepare this year! Mole Poblano is a strong contender…I’ll let you know next year whether we made it or not! And iIf you would like to give it a try, check Amanda’s blog.
When we started looking for recipes for New Year’s eve, I also started thinking about new recipes to share with you. And I remembered that this recipe, which appeared in Whole Kitchen Magazine back in September, could not be read by those of you who do not speak Spanish and that I had received several requests to share it in English. The problem was that the recipes were exclusively for Whole Kitchen, so I couldn’t publish them here without authorization (and, being a lawyer, everything related to authorizations, copyright, etc, etc is pretty much sacred to me!).
I contacted Silvia, one of the lovely editors of Whole Kitchen, and asked her whether I could publish it or if they would be interested in publishing the recipe in English in their blog. And she, very kindly, made an exception to the general rule due to the fact that my blog is not in Spanish, and authorized its publication here. So, my friends, here is the recipe for Chocolate and pear mousse pie that I submitted to Whole Kitchen Magazine (and remember that if you want it in Spanish, you can read it here)
Ingredients
For the crust:
100 grs de butter
100 grs icing sugar
180 grs self-raising flour
60 grs cocoa
1 egg yolk
1 egg
For the filling:
4 medium-sized pears
100 grs sugar
50 grs melted butter
1 tablespoon vanilla extract
1 tablespoon natural lemon juice
1 envelope of unflavoured gelatin, diluted in 1/2 cup warm water and 1/4 cup cold water
2 egg whites, beaten until stiff
200 cm3 whipped cream
For the chocolate ganache:
200 grs dark chocolate (if you don’t like the bitterness of dark chocolate, you can use half dark chocolate, half semi-sweet chocolate)
200 cm3 cream
1 tablespoon vanilla extract

Preparation:
1) Prepare the crust: In a bowl, mix flour, cocoa and sugar. Make a whole in the middle and add butter, incorporating everything with your fingers until it reaches an sand-like consistency. Add the egg and the egg yolk and integrate until you have a dough that you can form into a ball. Cover the dough with cling film and let it rest in the fridge for 15 minutes.
Grease and flour a 30 cms pie pan and preheat the oven to 150C/300F. Remove the dough from the fridge, roll it and cover the pan with it. Bake it in the oven for about 10 minutes or until the dough separates from the borders of the pan. Remove from the oven and let it cool down while you prepare the filling.
2) Prepare the filling: Peal the pears and cut them into medium-sized squares. Place them in a saucepan together with butter, sugar and lemon juice. Cook on low heat for about 15 minutes or until the pears become soft.
Once the pears are soft, remove from the heat an let them cool down for about 10 minutes. Place the preparation in a food processor or blender and pulse until having a purée. Add the vanilla and let it cool completely (you may place the purée in the fridge to accelerate the process if you so desire).
Dissolve the unflavored gelatin and add it to the pear purée. Let it rest for 5 minutes so that the gelatin starts to add consistency to the purée.
Whip the cream until firm, being careful not to over do it (we don’t want to make butter!), and add it to the purée once it is ready.
Whip the egg whites until stiff and add them to the purée. Your pear mousse is now ready!
3) Add the pear mousse to the chocolate crust and place the pie in the fridge until the filling is solid (about 4 hours)
4) Prepare the ganache. Chop the chocolate into small pieces and place it in a heat-resistant bowl. Put the cream in a saucepan and put it on the stove, on low heat. Once the cream starts to boil, remove it from the heat and pour it on top of the chocolate. Once the chocolate starts to melt, start beating until it reaches a creamy consistency and until firm enough to cover the pie with it.
5) Pour the ganache over the pie, making swirls with the back of a spoon. You may also put the ganache on a piping bag and decorate the pie with it.
6) Let the pie rest until the ganache is firm and serve.
—————————————————————-
If you don’t want your pie to be too chocolatey, you can omit the ganache and serve it uncovered (just crust and filling). It is delicious either way.
Also, if you want to start the New Year with a traditional Cypriot flavour, you can make Vassilopita, a traditional cake with a coin inside, to be eaten on the 1st of January, the day of Saint Basil.
I hope you like the pie and, most of all, I hope you have a wonderful New Year’s Eve celebration and a fantastic start of 2012. May all your dreams come true next year, and may you always have illusions to create new dreams!
See you in 2012!
by Marcela M. | Dec 25, 2011 | Blog, cookies, Europe, Holidays, Recipe Box, Recipes, Sweets, Travel, Uncategorized

Hello my dear friends!
It is almost evening time here in Nicosia and we are getting ready to start cooking our Christmas dinner. Since we are expats, with no nearby family, this is generally a very quiet moment for us, far from the running, shopping and cooking craze that December generally brings. Family is always missed, but there is comfort and joy in knowing that we are together is our hearts.
One of the advantages that I see in this way of living, is that we get to choose the traditions we love and we want to incorporate into our own celebrations as a little family, and to change them and adopt new ones as it pleases us. So, when it came to choosing how to spend our Christmases, we opted for a quiet dinner at home on the eve, and a bigger, yet intimate, celebration on the actual day of the holiday. Our kids are still rather small, and they haven’t started school yet, so they don’t have many expectations about these dates…so they are doubly surprised and overjoyed when they discovered their presents and special treats on the 25th!
One of the treats that I make since we live in Cyprus are some special Greek cookies called Kourambiedes. They were the first sweet I had when I arrived in Nicosia and I loved them immediately. They are eaten on Christmas day, and at other celebrations, such as weddings. They have cinnamon, almonds and rose water, and they melt in your mouth!
So, if you feel like baking something different these days, do try them! They are very easy, and fun for baking with kids!
Here is the recipe:
Ingredients:
{for the filling}
30grs almonds
1 teaspoon cinnamon
1 teaspoon sugar
{for the dough}
1 egg
1 teaspoon brandy/cognac
1 teaspoon vanilla extract
100grs butter, at room temperature
1/4 cup sugar
1 cups all purpose flour
{for dusting}
rose water (1/4 cup, approximately)
icing sugar (approximately 3 tablespoons)

1)Preheat the oven at 150C/300F
2) Process the almonds, sugar and cinnamon until the almonds are coarsely ground (do not over do it, you don’t want them to turn into powder)
3) Beat slightly the egg, vanilla and brandy. Cream butter and sugar with a wooden spoon and add it to the egg mixture. Once they are integrated, start adding flour 1 tablespoon at a time, until you have a workable dough (see picture 2)
4) Shape a piece of dough into an oval. Make a hole in the middle, put 1/4 teaspoon of the almond and cinnamon mixture in it and close it, as shown in picture 3
4)Place the cookies on a baking sheet and bake for about 45 minutes or until barely golden (Keyword: barely! Do not let them brown!)
5) Put the rose water on a glass and get a brush ready. As soon as you remove the cookies from the oven, paint them with rose water. (The difference in temperature will allow the rose water to be absorbed by the cookies, so do not let them cool down).
6)Let the cookies rest for about 3 to 4 hours. After they are dry, dust icing sugar over them and they are ready!
They taste delicious with a cup of tea and they last for a couple of weeks if you keep them in an airtight container.

May you have a wonderful Christmas, full of love, peace and joy.
————————
Este post está dedicado a mi amiga invisible, y compañera de andanzas fotográficas, María. Feliz navidad!!!!!!


