by Marcela M. | Apr 8, 2013 | Blog, Gluten Free, Main courses, Recipe Box, Recipes, Savories
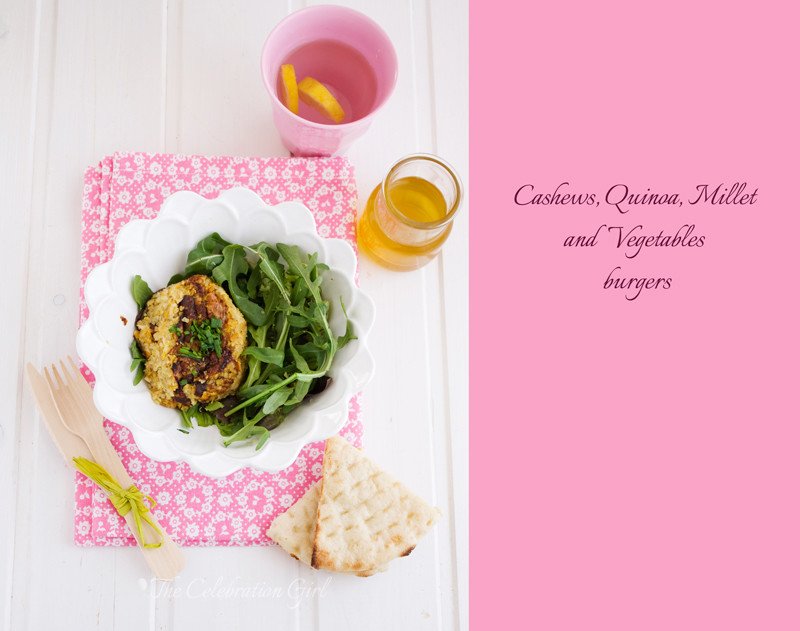
Ever since I stopped eating meat*, about 12 years ago, I had been looking for a delicious veggie burger recipe, one that I would actually crave and not just eat because I had made a whole batch. Early on, I adapted my mum’s recipe for soy burgers and that became my go-to recipe, but I wanted one that would use more vegetables and different grains, to add variety.
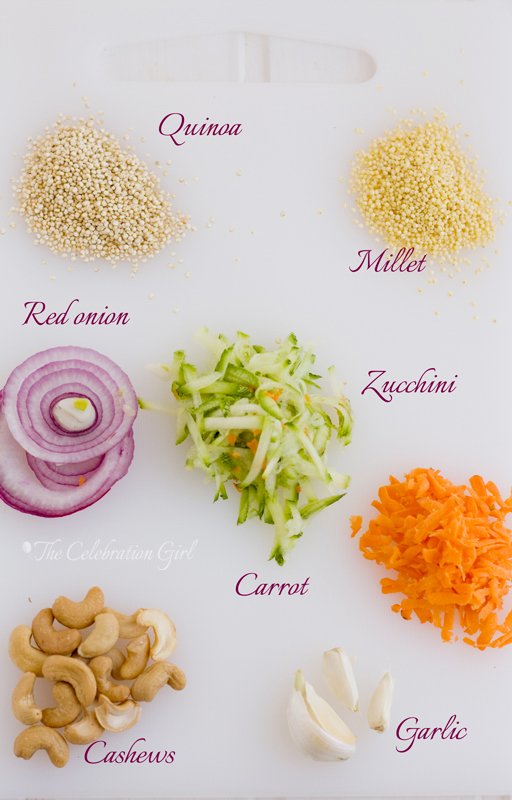
A few months ago, when browsing recipe books, I came across a couple of recipes that seemed interesting but they each had ingredients that either I don’t like or can’t eat (such as cheese). So I decided to do some mix and match and came up with this recipe after a couple of tries.
As you can see from the ingredient list below, these burgers don’t take any eggs, cheese, or dairy. To bind the ingredients, I used chia seeds hydrated 2 tablespoons of water for a few minutes, before adding them to the preparation. You will probably also notice that I didn’t use any breadcrumbs or flour to shape them which is why they are not the traditionally perfectly round burgers that you may be used to seeing. If you prefer perfectly shaped burgers, add a little of the flour of your choice.
One word of caution regarding this recipe: even though it doesn’t use flours, this is not a recipe that is 100% safe for people with celiac disease, because it uses onions and garlic, to which many celiac people have intolerance to. So, if you are making this for a friend with celiac disease, make sure that you omit those ingredients!
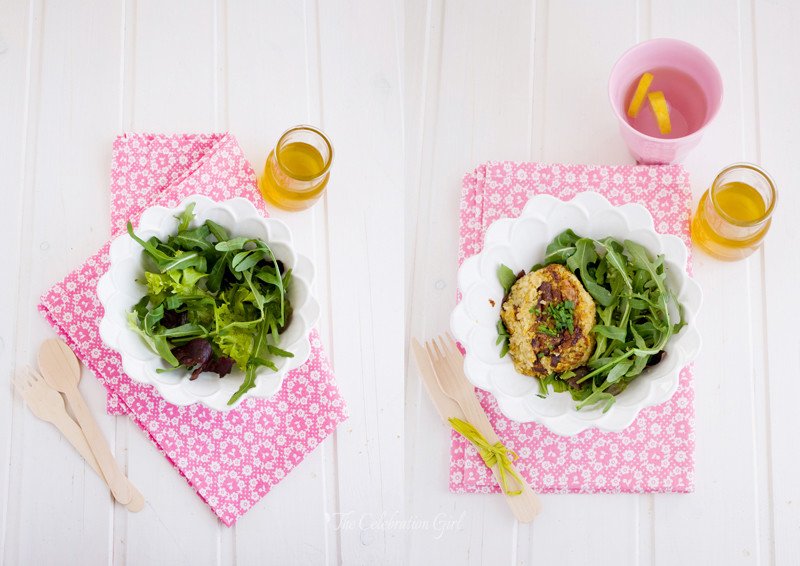
Here is the recipe:
Cashew, quinoa, millet and vegetables burgers
Ingredients: 1 big zucchini, 1 big carrot, 1 big red onion, 1 garlic clove, 50 grs quinoa, 50 grs millet, 2 tablespoons chia seeds, 2 tablespoons water, 50 grs toasted cashews.
Preparation:
1) Fill a saucepan with water and bring it to the boil. Add the quinoa and millet and cook until ready (you can see a video from Sarah Britton, on how to cook quinoa HERE). Strain and reserve.
2) Slice the onion, chop the garlic, shred the carrot and zucchini. Put a tablespoon of oil in a skillet or frying pan and stir-fry the onion and garlic until transparent, then add the rest of the vegetables and let them cook for a few minutes, until tender.
3) Process the cashew nuts until finely chopped (but don’t turn them into flour!).
4) Add the cashews to the vegetables and stir-fry them together for a couple of minutes. Remove from the heat.
5) Add the strained quinoa and millet, as well as the chia seeds, salt and pepper, and mix well.
6) Take the mixture using a spoon and press them to shape them. Refrigerate the burgers until time cook them.
7) Heat a tablespoon of oil in a frying pan and cook them for about 15 minutes, watching them carefully and turning them halfway through the cooking time.
I hope you like this recipe!
Do you like veggie burgers? If you do, do you have a favorite recipe that you would like to share with us in the comments?
Con sabor latino….
Desde que dejé de comer carne, hace ya 12 años, había estado buscando una receta de hamburguesas vegetales que me encantara, una receta tan deliciosa que me diera antojo comerla. Tenía en mi repertorio una receta de hamburguesas de soja, adaptada de la de mi mamá, pero quería incorporar a mi repertorio una versión que utilizara más vegetales y granos diferentes, para así poder aportar variedad a mi dieta.
Hace unos meses, mirando libros de recetas que tengo en casa, encontré un par que me parecieron interesantes, pero todas tenían ya sea algo que no me gustaba o algo que no puedo comer (como el queso). Así que decidí experimentar por mi cuenta y terminé con esta receta que hoy les traigo, y que me encanta.
Como pueden ver en la lista de ingredientes de más abajo, esta versión de hamburguesitas vegetales no usa huevos, ni leche, ni queso. Para ligarlas, utilicé semillas de chia hidratadas en dos cucharadas soperas de agua durante un par de minutos. Si se fijan en los ingredientes, tambien notarán que tampoco utilicé harina ni pan rallado, motivo por el cual no tienen la forma redondita de las hamburguesas comerciales. Si ustedes prefieren que las suyas tengan una forma perfecta, agreguen un poquito de su harina preferida.
Antes de dejarlos con la receta, les hago una pequeña advertencia: a pesar que estas hamburguesas no utilizan harina, no son aptas para celíacos porque utilizan cebolla y ajo, dos ingredientes a los que muchos celíacos presentan intolerancia. Por ello, si van a realizarlas para un amigo que tengan esta condición, omitan estos ingredientes de la preparación!
Aquí está la receta:
Hamburguesas vegetales con castañas de cajú, quinoa y mijo
Ingredientes: 50 grs de quinoa, 50 grs de mijo, 1 zucchini grande, 1 zanahoria grande, 1 cebolla colorada grande, 1 diente de ajo, 50 grs de castañas de cajú tostadas, 2 cucharadas de semillas de chia, 2 cucharadas de agua.
Preparación:
1) Colocar agua en una olla, y llevar a ebullición. Agregar la quinoa y el mijo y cocinar a fuego lento. (AQUI tienen un video que enseña a cocinar quinoa). Colar y reservar.
2) Cortar la cebolla, picar el ajo, rallar la zanahoria y el zucchini. Colocar una cucharada de aceite en una sartén y, cuando esté caliente, saltar la cebolla y el ajo en el mismo hasta que queden transparentes. Agregar el resto de las verduras y cocinar hasta que estén tiernas (tardará solo unos minutos porque están ralladas)
3) Procesar las castañas de cajú en trocitos pequeños, pero con cuidado de no transformarlas en harina.
4) Agregar las castañas a los vegetales y saltarlas en las sarten junto con los mismos, un par de minutos. Retirar la sarten del fuego.
5) Agregar la quinoa, el mijo, las semillas de chía, sal y pimienta a gusto y mezclar bien.
6) Con la ayuda de una cuchara, formar bolitas y aplastarlas para que tomen forma de hamburguesas. Reservar en la heladera hasta que vayan a ser cocinadas.
7) Calentar una cucharadas de aceite en una sarten, y dorar las hamburguesas en la misma, por alrededor de quince minutos cuidando que no se quemen, y dándolas vuelta a la mitad de la cocción.
Espero que les guste esta receta!
Cuentenme: ¿Les gustan las hamburguesas vegetales? ¿Tienen una receta favorita que les gustaría compartir con nosotros en los comentarios?
* I normally eat meat about three times a year, to accompany my husband.
by Marcela M. | Apr 4, 2013 | Blog, cookies, Recipe Box, Recipes, Sweets

Good morning dear friends!
I’m very happy today, because yesterday I sent out my first newsletter!!! I got great feedback from some subscribers and that had me smiling all day long. Thank you for being there! If you forgot to subscribe but would still like to read the newsletter, I can still send it to you, all you have to do is register in the pink form on the sidebar or in the one at the end of this post!
Now let’s move to today’s recipe, which was my monthly contribution to Petit-On. As you know the recipes contributed have to share one common ingredient, and the one for March was oranges.
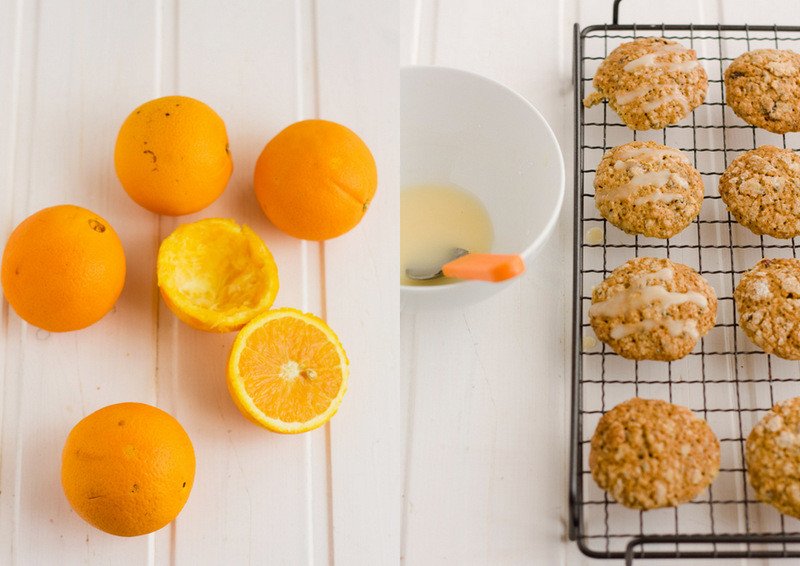
I love oranges. I use them a lot in my baking and also when cooking savory dishes (like tangerine beef, or orange scented quinoa, for example). I adore how just a tiny bit of orange zest can completely transform traditional dishes, such as pastry cream or strawberry sauce.
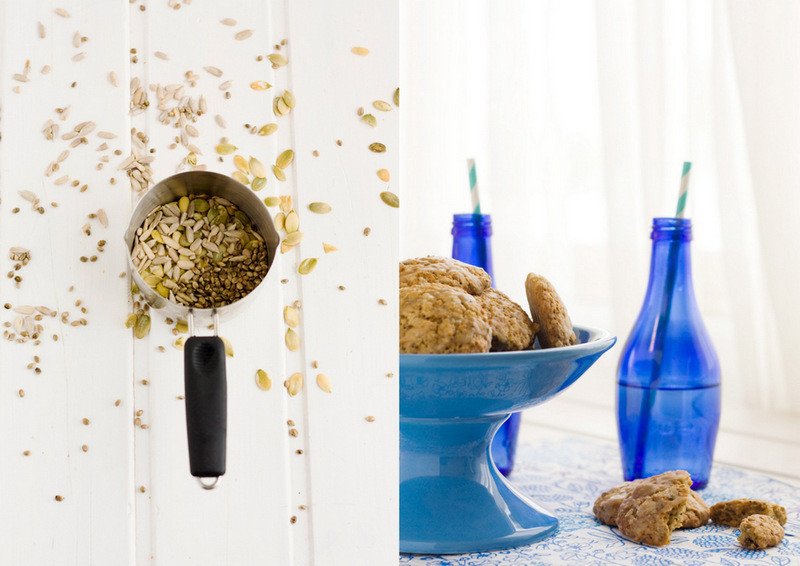
I adapted this recipe from one given to me by my mum, a few years ago. The original one used self-raising flour and did not require any baking powder nor baking soda or cornstarch, but I modified this because I was unable to reproduce it with the flours that I could find in Cyprus. Self raising flours in Argentina do not require any leavening agents as do, from my experience, the ones sold in Europe so, after a couple of culinary disasters, I made a few modifications to preserve the cookie’s yumminess. I also reduced the original amount of sugar and used different seeds because the ones I used to include in my native Córdoba (such as Amaranth) cost a fortune here. This is one of the best things of this recipe: it is very versatile. If you keep the proportions more or less intact, they will definitely turn out tasty and be a success! And they are dairy free!
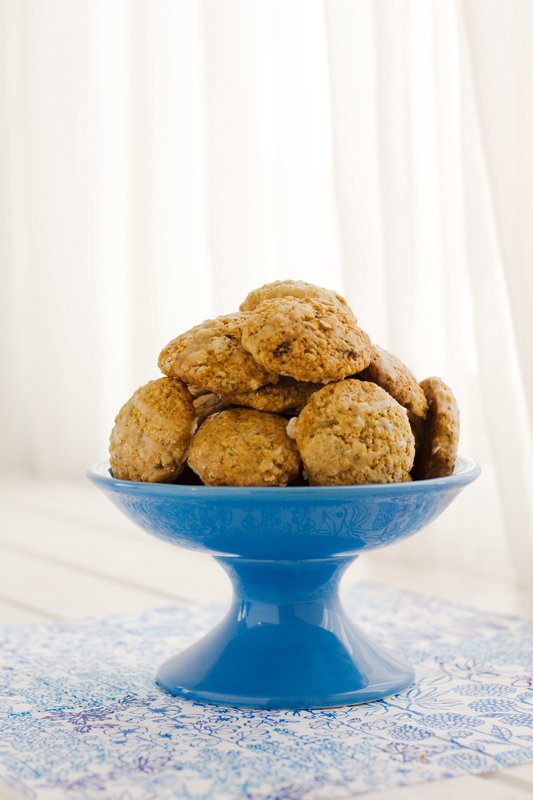
Here is the recipe
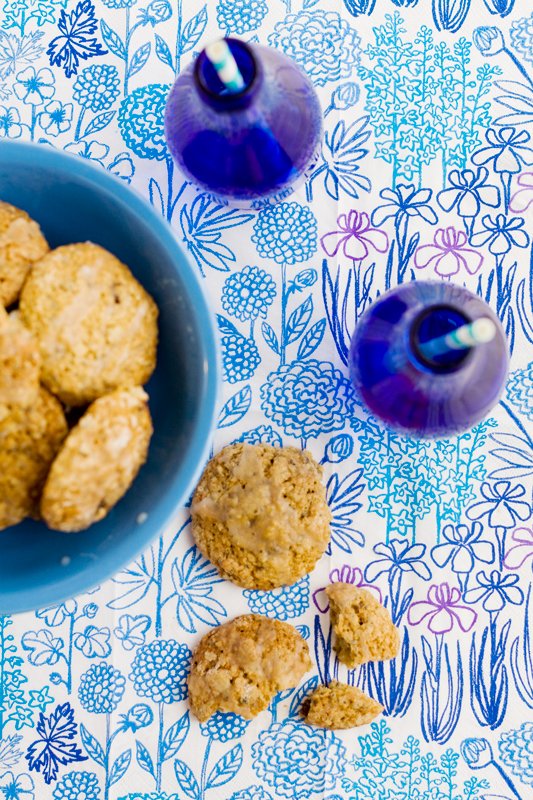
Orange, seeds and oat cookies (makes 3 dozen)
Ingredients: 2 cups rolled oats (I use Quaker), 1 cup all purpose flour, 1/2 teaspoon baking of soda, 1 teaspoon baking powder, ½ cup cornstarch, 3/4 cup of sugar (I used golden) 3/4 cup oil (canola or sunflower), zest of 2 oranges (you may also use lemon or clementines, or a combination) , 2 eggs (M), slightly beaten, juice of half an orange, 1 cup of mixed seeds ( I used 2 tablespoons of chia seeds, 2 tablespoons of hemp seeds, 2 tablespoons of pumpkin seeds and 3 tablespoons of sunflower seeds) .
NOTE: You may also use other seeds, such as sesame, linseed amaranth, poppy, etc. You can also use only 1/2 cup of seeds and add 1/2 cup of raisins, dried berries, or nuts, if you wish. If you add fruits or nuts, just remember to toss them in flour before adding them to the batter.
Preparation:
1) In a bowl, mix flour, baking soda, baking powder, sugar, cornstarch and oats.
2) Add oil, eggs, and orange juice and zest and mix to incorporate well.
3) Add seeds and mix briefly. Be very careful not to over mix or the cookies will turn out hard. Beware that the dough will look very soft and you may be tempted to add liquid, but DON’T. All you have to do is wrap it in foil and place it in the refrigerator for at least 2 hours. You can also freeze the dough and bake the cookies later. If you don’t want to wait, you may bake the cookies but keep in mind that they won’t keep their shape.
5) Remove the dough from the refrigerator, extend it with a rolling a cut, using traditional cookie cutters. Place the cookies on a baking sheet lined with baking paper and bake at 175 degrees/350F until golden (approximately 15 minutes, but this depends on each oven). Keep in mind that these cookies do grow in the oven, so leave space between them when you are placing them in the baking sheet.
6) When they are ready, remove them from the oven and let them rest on the sheet for about 10 minutes. After this, remove them with a spatula and place them on a wire rack until cold (or eat them warm, I won’t tell anyone 😉
I hope you like this recipe and , if you do, please share it!
Now, please tell me in the comments below: which is your all time favorite cookie?
Para ver la receta en español, HACER CLICK AQUI
by Marcela M. | Apr 1, 2013 | Blog, Recipe Box, Recipes, Salads and dips, Savories
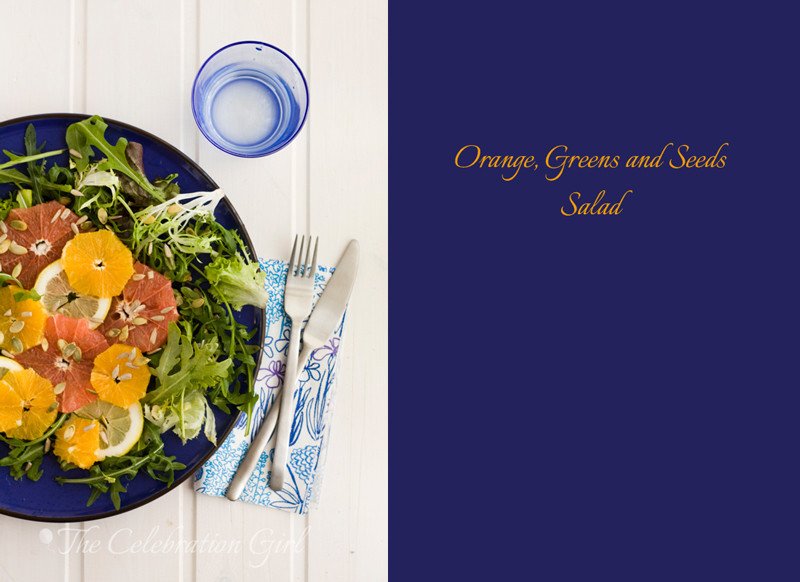
Good morning dear friends! I hope you had a lovely Easter, if it was celebrated yesterday in your part of the World. Easter in Cyprus (and Greece, Serbia, Russia, and other Orthodox countries) will be on May 5th only, but we celebrated it yesterday because our dearest friends (who are catholic), invited us for a lovely Easter party at their home. It is always nice to spend time with friends, but the warmer weather seems to invite leisurely afternoons even more, don’t you think?
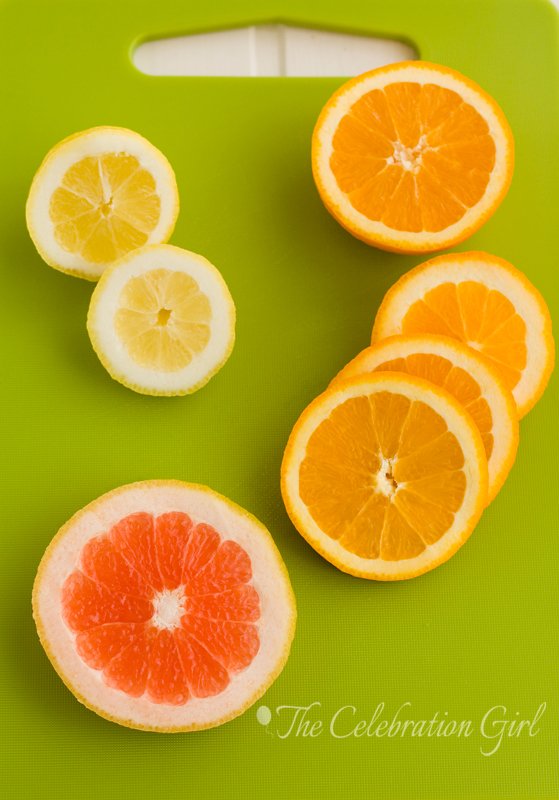
I love Spring, I always have, but I like it even more since I came to live in Cyprus, because the weather is just so nice during this time of the year. And it’s not just the weather: right now, for example, the trees that line the streets of downtown Nicosia are full of pretty pink blooms, and some white and pink bougainvilleas are starting to appear here and there. It’s such a lovely sight!
This is why, as soon as April comes I am ready to pack away sweaters and scarves and to tread heavy “comfort” food, for salads, smoothies, and plenty of fresh fruits and vegetables. This year, I even decided to take it a step further and start the new season with a 5 day detox…sort of like a Spring Clean for the body. So, what is a detox? basically a few days of eating super healthy and avoiding certain food groups that are normally not easy to digest (such as wheat, dairy, sugar and, obviously, processed foods).
I have done detox diets before, for longer periods of time, and I credit this eating regime with helping me recover after I had malaria. They are great for going back to our healthy habits, trying new foods and exploring new ingredients. A salad is only boring if you use the same ingredients every time, but it takes just a few new veggies, a bunch of fresh herbs, a handful of seeds or toasted nuts- or some fruits even, and we have something completely different and incredibly yummy.
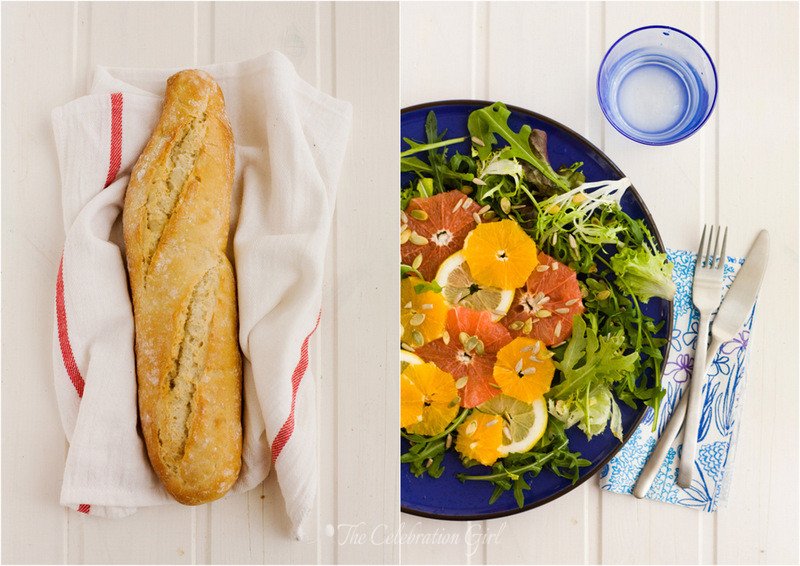
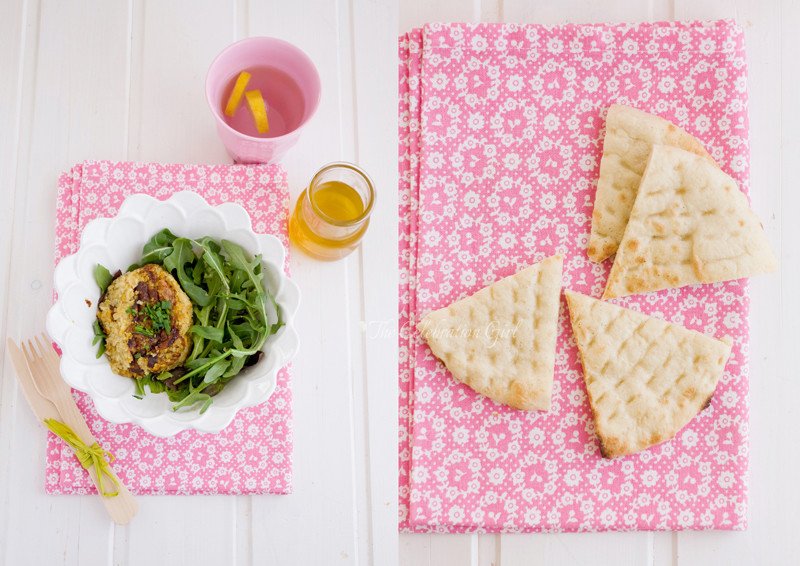
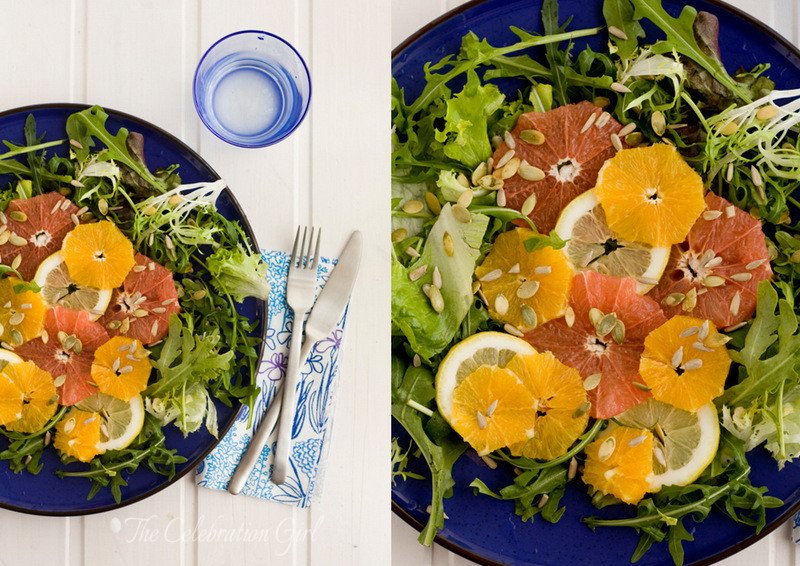
This salad was one of the discoveries I made while playing in the kitchen during my last detox, and it is one of my favorites. It is easy, tasty and full of vitamin C (which help me fight those nasty colds that some of us get at the end of the winter). If you are doing a detox, avoid the baguette, of course 😉
Here is the recipe:
Citrus, greens and seeds salad (serves 2)
Ingredients: A big bunch of green leaves (Rocket/Arugula, Lettuce, Spinach), 1 orange, 1 grapefruit, 1 lemon, 1 tablespoon of sunflower seeds, 1 tablespoon of pumpkin seeds.
Preparation:
1- Wash the salad leaves and cut, if desired. Put them all in a big bowl.
2- Peel and slice the citrus fruits and the lemon. Add to the bowl.
3- Sprinkle the seeds on top and season with olive oil, salt and pepper to taste.
How about you: Have you ever done a detox? Do you also change your eating habits according to the seasons?
—————————————
NOTE: Did you notice the pink box at the end of this post and on the sidebar? I’m launching a newsletter! So, hop into the list if you want to receive news, tips and other cool stuff on a monthly basis! The first issue will be emailed next Wednesday, don’t miss it!
NOTE 2: The links above ARE NOT affiliate links. I just wanted to share the detox I’m doing in case you wanted to join me.
Con sabor Latino…
Buenos días queridos amigos! Espero que hayan pasado una hermosa Pascua, si es que en su país se celebró ayer. Aquí en Chipre (y en otros paises Ortodoxos, como Rusia, Serbia y Grecia), la Pascua se celebrará recien el 5 de mayo, pero nosotros celebramos ayer porque nuestros amigos más queridos nos invitaron a hacerlo con un hermoso almuerzo en su casa. Siempre es hermoso pasar tiempo con amigos, pero los días cálidos de primavera son especialmente aptos para pasar largas tardes conversando tranquilamente, no les parece?
A mí me encanta la primavera. Siempre me gustó, a decir verdad, pero me gusta aún más desde que vivo en Chipre, porque el clima en esta época es absolutamente delicioso. Y no sólo es bonito el clima: los arboles del centro, por ejemplo, se llenan de pimpollos rosados y las bouganvillas comienzan a mostrar sus flores blancas y fucsias aquí y allá. Es verdaderamente precioso!
Por este motivo, ni bien llega el mes de abril, yo siempre estoy lista para guardar sweaters y bufandas y cambiar la comida pesada por ensaladas, licuados y muchas frutas y verduras frescas. Este año, hasta decidí ir un poco más allá, y comenzar este mes con un detox de 5 días…algo así como una limpieza de primavera para el cuerpo! ¿Qué es un detox? Es un programa alimentario en el cual, por un período de tiempo, eliminamos aquellos grupos alimentarios que suelen ser dificiles de digerir (azucar, trigo, lacteos, alimentos procesados, entre otros). Yo he hecho dietas detox en otras ocasiones y a ellas les debo el haber recuperado la salud de mi hígado despues de haber tenido malaria. Son fantásticas para retomar buenos hábitos de comida ( o adoptarlos, si nunca los hemos tenido), probar recetas nuevas y explorar nuevos ingredientes. Una ensalada sólo es aburrida si usamos los mismos vegetales todas las veces, pero con algo tan sencillo como cambiar algunos ingredientes, agregar un manojo de hierbas frescas, unas nueces o semillas tostadas, y hasta -¿por qué no? – alguna fruta, un plato de todos los días se transforma en algo delicioso.
Esta ensalada que les traigo hoy fue uno de los descubrimientos que hice jugando en la cocina durante mi último detox y es una de mis favoritas. Es facil, deliciosa y está llena de vitamina C (lo que nos ayuda a combatir esos ultimos resfríos que algunos de nosotros solemos padecer a finales del invierno). Si están haciendo un detox, omitan baguettes como la de la foto, claro 😉
Aquí tienen la receta:
Ensalada de crítricos, semillas y hojas verdes (para 2 personas)
Ingredientes: Un manojo grande de hojas verdes (rucula, lechugas varias, espinaca), 1 naranja, 1 pomelo, 1 limón, 1 cucharada de semillas de zapallo, 1 cucharada de semillas de girasol, aceite de oliva, sal y pimienta para condimentar.
Preparación:
1- Lave bien y corte las hojas verdes, de ser necesario. Coloquelos en una ensaladera o bowl grande
2- Pele las frutas y el limón y córtelos en rodajas. Agreguelas a la ensaladera.
3- Espolvoree las semillas y sazone con aceite de oliva, sal y pimienta a gusto.
Ahora cuentenme ¿ Alguna vez hicieron un detox? ¿Cambian sus hábitos alimentarios de acuerdo a las estaciones?
—————————————-
NOTA: Notaron el rectangulo rosado con mi foto en la barra de la derecha y debajo de este post? Es para que puedan subscribirse a mi newsletter! Así que, si quieren recibir comunicaciones más personalidas, tips y otras cositas lindas, súmen su email a la lista! El primer número será enviado el próximo día miercoles, no se lo pierdan!
NOTA2: Los links de este post NO FORMAN PARTE DE PROGRAMAS DE AFILIADOS. Simplemente quise compartir con ustedes el detox que estoy haciendo, por si quieren sumarse!
by Marcela M. | Mar 17, 2013 | Blog, Gluten Free, Main courses, Recipe Box, Recipes, Savories
This week was a hectic and intense one, difficult at times, tiring at moments, empowering and happy at others. You know the ones: weeks of mixed emotions, lots to do and little sleep. We all have them, right? I know we do.
Last Tuesday night, after a couple of particularly intense days, I posted on the blog’s facebook page about it, mentioned that I needed chamomille tea to unwind and asked friends to share the strategies that they used to relax during or after difficult times. Most mentioned cooking and baking, some mentioned reading or painting mandalas, having a cup of tea, and sharing times with family or others that they love. I had only mentioned tea in my post, because it is what I was planning to do right away, but the reader’s beautiful responses left me reflecting about my own resources, my own set of grab and go strategies that have helped me during difficult times and the ones that, until today, I had only shared with those who know me well in my personal life, or who have specifically requested my help. Some of those practices (such as baking, watching a selection of my favorite feel good movies like Amélie or silly ones like Zoolander (it always makes me laugh so hard!), having a nice cup of tea) were put in place during happy times and took a whole different meaning during the bad ones; some others I discovered when things were already tough and I was desperately looking for means to stop me from drowning, and have stayed with me, as a core part of my life, ever since. This is the case of meditation and yoga.
The first time I remember hearing about yoga I was 17 years old. Our high school literature professor used to mention that he practiced yoga and meditation and I became curious about them but, back home, back then, yoga was considered an “exotic” discipline and it was not easy to find where to practice. Life continued, time went by, I tried a class at a local gym when I was 21 but run out of money at the end of the first month, and didn’t continue. Then, one day, when I was in the middle of one of the most difficult times in my life, I met the husband of one of my best friend’s on the street and he mentioned that he was going to an amazing yoga class, merely 3 blocks away from my house. I hadn’t thought about yoga in years and I was not looking for a class at the time but I somehow knew it was what I needed. I signed up for the class and fell completely in love with yoga. It was not the asanas, or the pranayams or the meditation…it was all of it together, it was how I felt during the practice but mostly how I felt (as a whole person) after them, the calmness, the peace, the grounding it brought into my life and that I had never experienced before.
I left Argentina the following year, first for Spain and shortly after for Ivory Coast. I bought yoga books and CDs and tried for a while to keep up with a regular home practice, but couldn’t. I didn’t know how, and it always seemed that there was something more important that I just had to do before or that I didn’t feel in quite the right mood…and then, as time went by, I ended up never finding the right time and never getting into the right mood. I knew I needed it, I missed it so much and yet, and yet…there was always an excuse. Excuses are ok under normal circumstances but one thing I discovered during those days is that, when everything around us seems to be falling apart, when are exposed to extreme suffering, poverty, chaos and fear, excuses have the potential to be truly damaging. Excuses, in those circumstances, prevent us from seeking that which we truly need, prevent us from connecting to our bodies, our minds and our souls, from finding the necessary calm and ease that is needed in order to do our work and live our life in a way that is healthy, sustainable and useful for those we are meant to serve. Despite my excuses, I knew I had to change and, by the time I arrived in Cyprus, on 24 December 2007, I was craving yoga. But before I could find a yoga class near my home, I got pregnant with Luka and Zoe and went into bed rest. And then they were born and I couldn’t find the time to attend a class anymore-or anyone to take care of them while I did, for that matter.
Then one day, when browsing the web in search for an article about Indian UN peacekeepers who were teaching yoga to kids in the Iraeli/Lebanese border, I came across Marianne Elliott’s blog, then called Zen Peacekeeping, and I was hooked. I read one blog post after another, feeling a connection that I had rarely felt before with anyone I had read online. There was a person I could identify with, someone who had been through similar experiences and who had come out of them with similar conclusions as myself. Her articles on yoga and body shame, yoga and real life, her whole series on self care , especially her article on why kindness (and not will power) is key to starting a healthy habit, her articles on courage, and even the ones on using twitter for good -and avoiding twitter overwhelm- all rang a bell and said things I wanted to express, better than I ever could.
And Marianne taught online yoga courses for those who, like me, wanted to establish a home yoga practice, but didn’t know how to get started.
I didn’t sign for her courses right away, because I was getting better at finding excuses (I had years of practice by now). Instead, I waited, and waited, and waited until I almost collapsed from anxiety and exhaustion.
I finally signed up after I saw a video when Marianne announced her course on 30 days of yoga for people who are too busy to do yoga. Do you identify with the title? Yes, so did I. I felt that I couldn’t commit to a full 90 minute class, not even to a 45 minute class…but I could commit, I needed to commit to as little as 5 minutes of yoga every day, 5 minutes of self care, 5 minutes just for myself, 5 minutes doing something I loved but had forgotten how to do.
If you are wondering how an online yoga course works, here is how it does now:

Back then, when I first did it, the interface was different, but basically there are videos with the practices (which you can download and keep forever), daily emails, a Facebook group, conference calls, Marianne’s assistance whenever this is needed and, in some cases, a beautiful ebook at the end of the 30 days. Not very different from any other online course you may have done in any other discipline. (What makes the courses different is Marianne’s kindness, but I’ll talk to you about that later).
So I made my commitment to myself, and I started the practices, as sent by Marianne and as recommended by her. The first week, nothing happened. “Where’s the calmness I am supposed to be feeling?????” , I kept thinking, because I was, if anything, more anxious than before. The second week, came the tears. The minute I would step on the rug where I used to practice yoga, I would start crying and I wouldn’t stop until after savasana. The practices were short, 10 minutes only, but something inside of me was being released. I cried all second and third week and then, on the fourth and last week, I started to feel at peace.
I still felt too busy for anything longer, but Marianne’s courses had shown me that I was never too busy to so some yoga and that any yoga was better than none. I had the videos, I had the emails, I had the proof, so I renewed my commitment and maintained my routine, of doing at least 10 minutes of yoga everyday and not beating myself up if that was all the yoga I could do. And it continued to work, to be what I needed. When I felt that I needed some more, I would combine the videos or double the number of sets of each practice. I felt at ease with my routine and I was happy.
Then, at the beginning of 2012, when our world fell apart, and I started feeling again like I had no time to sit on the mat, this time I knew (having practiced long enough the year before) that what I needed was, in fact, the exact opposite: I needed more yoga. So I registered for Marianne’s standard 30 days of yoga course (She also has courses for Beginners and classes of Curvy Yoga) and I committed to 45 minutes practices, 4 times a week.
Why am I talking to you about yoga and my experience today? Why am I talking to you about Marianne? Because this year I want to share with you everything that is good in my life, all the resources that have worked for me in the past, and that continue to support me in many ways. I wanted to share this with you so that you could get to know Marianne and her work, which I greatly admire . More importantly, I want to share Marianne’s courses with you because they have supported not only me, but also my children, who love the short routines of Busy Yoga and practice them on their own (please turn off the volume if you don’t to hear Luka and me singing Elmo’s songs while Zoe practices yoga in the video). I want to share her courses with you because they are the only ones to which I have been able to commit consistently and for a long period of time, and I want to do it because I know how important this can be and what a difference it can make to one’s life.
I want to share this with you because I know how easy it is to fall off the self care wagon and how damaging this can be. I want to share Marianne’s courses with you because, after I fell off, I needed a course rooted on kindness towards myself and others to get back on track, and because this may be your case too.
I wanted to share this with you today because Marianne’s latest edition of her yoga courses start tomorrow and I will be in them, again, and because it occurred to me that, perhaps, you may need something like what she offers, and you would like to join me there as well. And finally, I wanted to share this with you today to let you know that I know how it feels to let go of our good habits, to struggle to keep up with what is good for us, but that is never too late to get back on track.
Please, share with me in the comments below: which practices are essential to your well being? Do you also struggle to find time for them?
Now, while we talk, let’s cook something yummy, shall we?
I made this tart a couple of weeks ago, on one of those lovely early Spring days that are so beautiful in Cyprus. Last December, my husband bought me Aran Goyoaga’s new book, Small Plates and Sweet Treats: My Family’s Journey to Gluten-Free Cooking, (which is one of the most beautiful cook books that I have ever seen) and I started looking forward to experimenting with gluten free cooking. I was so eager to start trying her recipes that, on the day of our wedding anniversary (January 26th), we traded our traditional fondant au chocolat, for Aran’s Almond butter, chocolate and beet molten cakes -and I believe these will be our new anniversary staple dessert.
I was a little bit scared of gluten free savory food, so it took me a while longer to begin experimenting with the small plates part of the book. I can find my way pretty easily around desserts and I have a natural instinct for knowing how to adapt sweet recipes, but I can’t really say the same about tart crusts, crackers, breads and other savory food. But I felt encouraged by the molten cakes’ success and I decided to try to make this tart (which is a classic at my home) with a gluten free & vegan crust (adapted from the one in Aran’s Zucchini,quinoa and goat cheese tart, if you have the book)
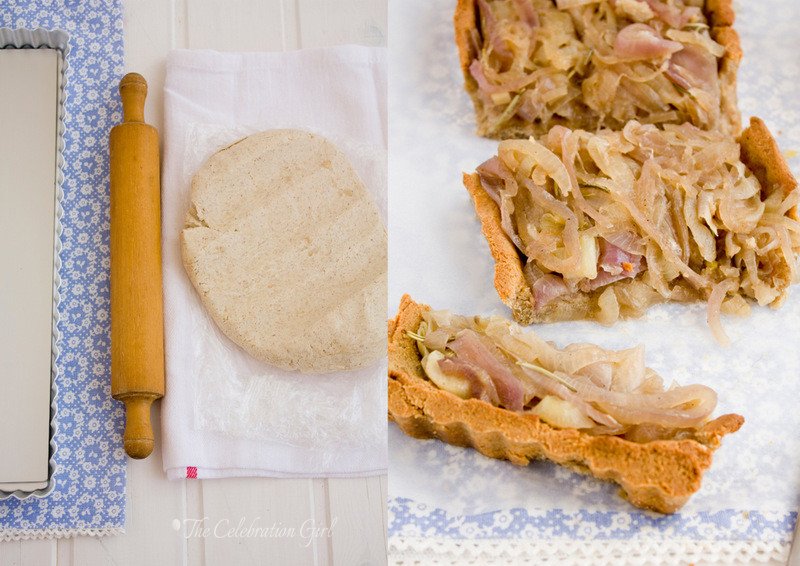
The preparation of the crust is fairly simple, but it takes a bit of time, because it has to be chilled twice and cooked for quite some time. I must also confess that, when I saw its texture, I freaked out: It felt like clay! I went ahead and put it in the oven because of how much I admire Aran’s work, but it was honestly a leap of faith- I was convinced I had made a mistake along the way and that it was going to turn out absolutely inedible. Fortunately for me, my fears were unfounded, based only on my lack of knowledge of gluten free cooking, and the crust turned out to be delicious. More importantly, this crust and the molten cakes got me hooked on experimenting with different flours (it’s so creative!), so you can expect more gluten free recipes in the future.
One word of caution regarding this crust, before leaving you with the recipe: You will want to respect the refrigerating times and make sure that it cooks well before adding the onion. The crust is delicious if it’s crispy but not so much if it isn’t, so bake it long enough before adding the filling to make sure that the bottom is crispy as well. Remember that, once you add the onion filling, the baking times are very reduced, so the crust will need to be ready before this happens or it will turn soggy. And we don’t want that to happen!
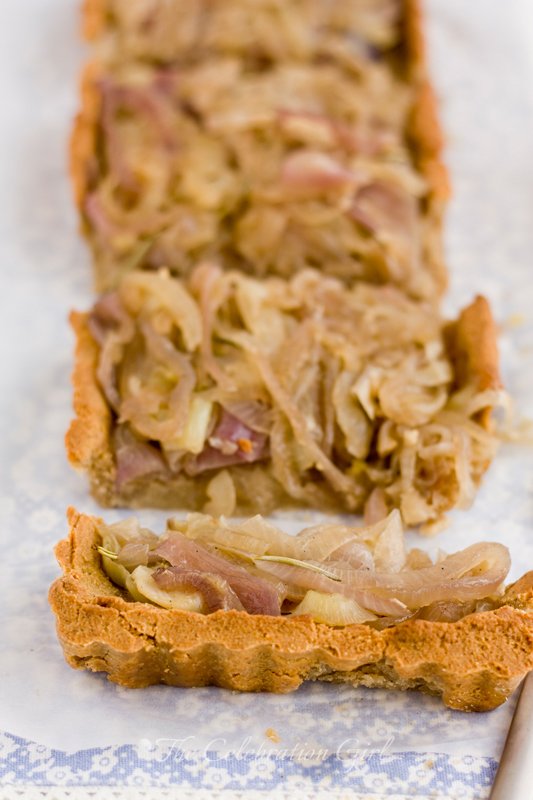
Now without further ado, here is the recipe:
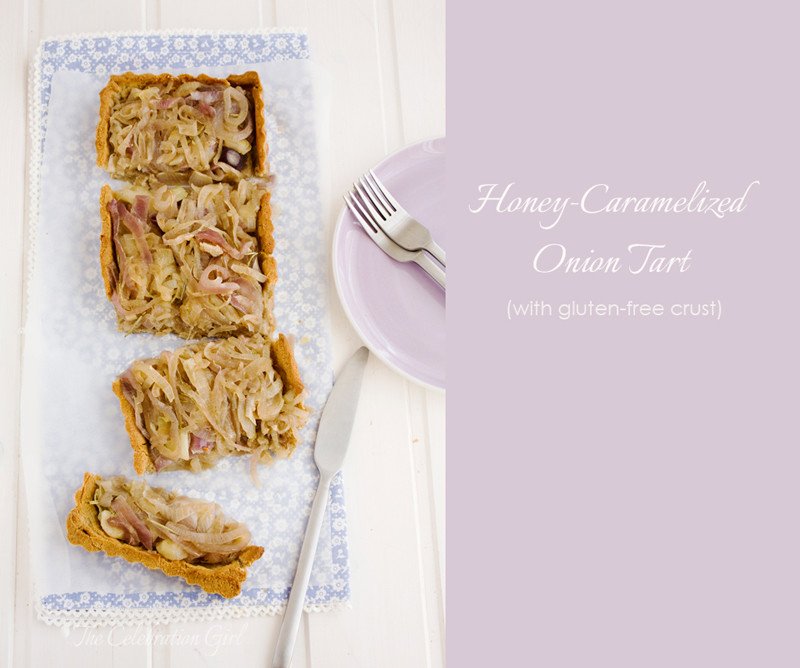
Honey-caramelized onion tart, with gluten free crust
Ingredients:
For the crust: 60 grs buckwheat flour, 70 grs hazelnut flour, 140 grs quinoa flour, 140 grs brown rice flour, 1 teaspoon nutmeg, salt to taste, 120 ml olive oil, 250 ml cold water.
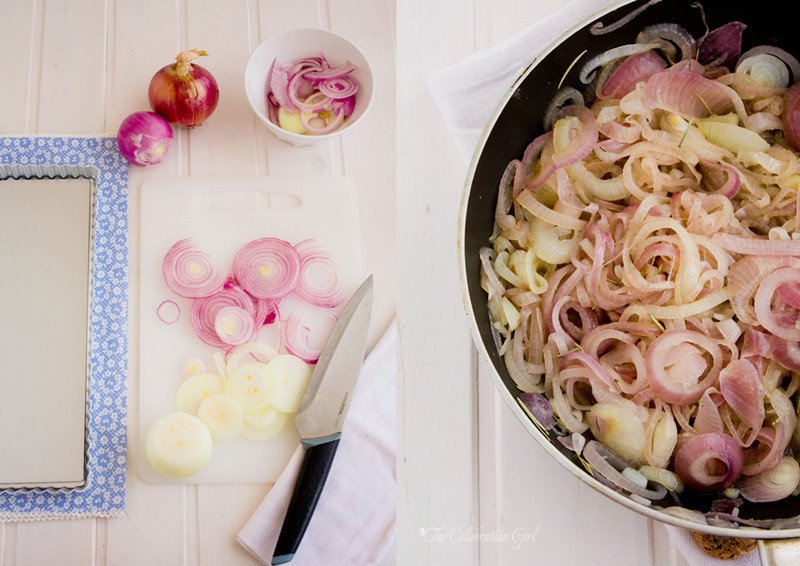
For the filling: 3 red onions, 3 yellow onions, 2 tablespoons honey, 2 tablespoons warm water, 1 tablespoon rosemary or thyme, vegetable oil of your choice.
Preparation:
1- Prepare the crust: Put all flours in the food processor and pulse a few times to air them. Add nutmeg, salt, olive oil and cold water and pulse until the dough comes together. Remove from the food processor, wrap it in foil and place in the refrigerator to chill for 1/2 hour.
2- Remove the dough from the refrigerator, and roll it on the counter (previously dusted with your favorite gluten free flour). Cover your desired tart mold with it, pinch it with a fork and place it in the refrigerator for another 30 minutes.
3- Pre heat the oven at 200C. Remove the tart mold from the refrigerator, cover with baking paper and add pie weights or dry beans (I used alubia beans) so that the dough doesn’t rise much in the oven. Bake the crust for 20 minutes.
4- Remove the beans or weights and continue baking for another 20 minutes, until golden. When ready, remove the crust from the oven and let it chill, but leave the oven on.
5- Prepare the filling: Peel and slice the onions. Put 3 tablespoons of oil in a frying pan and sautée the onions in it. Add rosemary, salt and pepper and let cook for about 5 minutes. Once the onions are tender and start to turn golden, add the honey (which must be liquid), mixed with two tablespoons of warm water. Stir and let it simmer for another 5 minutes.
6- Add the onion filling to the crust and place the tart again in the hot oven, for a final 5 minutes. Serve hot.
Have a beautiful week!
by Marcela M. | Mar 7, 2013 | Blog

Good morning dear friends!
It’s a beautiful “Almost Spring” morning in Nicosia, how about in your part of the World? We had a very mild Winter this year, and Spring has had an early arrival as well. We knew it was going to be that way when the yellow flowers that fill the parks and unoccupied land plots all around the city started appearing in late January (instead of late February), and we spotted the first caterpillars a little bit after Christmas.
I was looking forward to the warmer weather this year, even if this probably means a longer, warmer Summer as well. A “warmer Summer” in Cyprus normally means an exceedingly hot one, but after a bad round of colds and flu, we are rejoicing in the longer, sunny days, the just cool enough breeze and the discovery of new blooms and flowers everywhere.
Spring, for some of us, is not only a time for flowers and picnic dreams, but also a time for a big Spring Clean. To be completely honest, I normally do a big clean twice a year, in February (right before Lunar New Year) and in September (after Luka and Zoe start school). This helps me sort through old clothes and paperwork and get the apartment ready for the following season. Living in an apartment, instead of a house, means that we cannot afford to have too many things and we need to keep everything in place and pretty much organized or our place ends up looking chaotic very fast. But, despite this, our little system was not working perfectly and I had reached the point when it was really beginning to bother me. So, right at the beginning of the year, I decided that 2013 was going to be the one when I was finally going to organize and simplify our house in a way that was easy to maintain, and when I was going to come up with a cleaning routine that worked for me and that wasn’t going to have me running like an exhausted headless chicken every six months to try to compensate for the little things that I hadn’t managed to do before and that had been piling up since the last big clean. I wanted to develop a cleaning and organizing system that was efficient and worked for us and our lifestyle.
So, after our first big flu, I started my search for inspiration where I always do: Pinterest! I created an Organization and Home Ideas board (you can click on the link to go to my board) and started pinning there everything that I liked and that seemed doable on a tight budget or that I could adapt to be within my means. I knew I had to start where I always do: reducing and de-cluttering, and I knew that, this time, I wanted to be really thorough with this initial stage of the process. Up until this year, I had only managed to sort through bits and pieces every now and then, and whatever we didn’t use anymore had ended up in our storage room, downstairs, which was by now overflown with baby stuff. It was time to let go of all of that, donate what was in good conditions and throw away what wasn’t. I also knew that I needed to develop a simple and consistent cleaning routine that include, not only the basics (which I am fairly good at) but also deep cleaning areas, timed throughout the year so as to be able to have the house spotless doing just a little bit every day. And, most importantly, I knew it was time to stop trying to reinvent the wheel and look for help to be able to do all this because, while I probably would be able to develop all those plans and routines from scratch, that was also not probably the most efficient way to do it. So I pinned and clicked and searched and came up with a system that uses a combination of free resources and paid ones and that is working for me, and this is what I want to share with you today, because I thought that you may be in the same boat that I am and that we are all stronger together.
I still have things to figure out, tasks to complete and parts of this new system to test, of course. Houses grow and change as we, the persons that inhabit them do and, as this happens, systems need to be modified and adapted as well. Organizing and simplifying is an ongoing process. But I am happy to have taken this time (two months!), at the very beginning of the year, to begin doing it, to begin planning because I feel that a huge load has been taken off my shoulders and that I can now focus on new projects without the dark cloud of messiness blurring my thoughts and ideas.
So here is what we did so far:
1) We cleared out the apartment’s storage room. As I mentioned before, it was full of stuff our children had outgrown and, since we are not planning to have any more kids, it was time to give it all to someone who could make good use of it. We considered the idea of a garage sale, but then realized that we actually wanted to donate everything, so we asked our pediatrician whether there was a charity in Nicosia that worked with children and that may be interested in everything we had, and she recommended Alkionides Charity. We checked them out and saw that they do a wonderful work, so we gave them a call and donated everything, knowing that all those furniture and toys that we bought with so much love will go to people who need them the most. The reason I am mentioning this is simply to encourage you to donate, and to let you know, if you are in Cyprus, about the work of this charity so that you can lend them a hand too, if you can.
2) I started putting in practice the wonderful ideas that adorable Mayi Carles shares in the Life is Messy Bootcamp. This program has been a real life changer, in general, and I couldn’t recommend it more. The program comes with beautifully designed pdf planners (which you can buy independently of the program) that are great for getting organized, such as: a decluttering checklist, daily and weekly to do planners, monthly planners, monthly blog planners, fitness planners, weekly menu planners and more (you can see the full list HERE) . So I organized all important information in different binders and started creating a home-keeping one and using LIMB planners to put in practice Mayi’s teachings. If you don’t want to buy the program or the planners, you can still profit from Mayi’s videos and organizing wizardry for free. Just visit her blog, where she has tons of free resources that you can use to make your life less messy and more epic, as she likes to say.
3) I started reading Project Organize your entire Life, joined the Project’s Facebook group and started following some members on Pinterest for further inspiration. This is a community of people just like you and me, who are not afraid of saying that they don’t have everything figured out, and who are all permanently offering help and inspiration to reach the common goal of a simplified life where there is more time to enjoy with those we love. What could be better?
4) I started following the Clean Mama blog and learning about efficient cleaning routines by watching the amazing Clean My Space videos on youtube. I am not ashamed to say that I never had these in place and that, when it comes to cleaning I only knew the very basic. So it was time to educate myself! I printed Clean Mama’s Free monthly cleaning calendar and her free deep cleaning printables and started testing whether they worked for me. They did. So I went ahead and bought her Cleaning kit to complement the free resources. Why did I buy these? Because, as I said, I was tired of trying to reinvent the wheel and I believe that it is worth investing a small amount of money in a system that can help us achieve what we want in less time. Time is money too, and I have learned this the hard way, after years of trying to figure out everything by myself and wasting precious time in the process.
When it comes to cleaning itself, especially how to do it in a greener and more efficient way, I am loving the youtube videos by Clean My Space , a Toronto based cleaning company whose founder, Melissa is the cleaning genie behind the videos. They cover everything, from 10 points of contact to clean after the cold and flu season, to how to clean pillows, how to remove mold from a shower curtain, how to make your own cleaning products with natural ingredients and many, many topics more. I have tested their tips and they are amazing!I also printed Martha Stewart’s Free Stain Removal Basics and added to the cleaning part of my home keeping binder, which is divided by seasons.
So now every morning, I open my binder as soon as the children leave for school, do what is planned for the day, check what I accomplished and 45 minutes later I am done, knowing that I don’t need to stress about cleaning anymore! (insert happy smile!). My most dreaded task, ironing, is done twice a week, in the early afternoon, while my children play next to me. I feel so mature for having- finally!- accomplished this 😉 (You may laugh at me if you want!)
3) I Made a list of all the areas that were driving me crazy, specifying what was bothering me about them and then tackled them one by one: the towels in the bathroom that kept falling down, the under sink area in the kitchen where I could never find the product I was looking for, the overflowing plastic bags in the corner cabinet next to the stove, that kept falling on top of the bottles of oil, our children’s art supplies that were all mixed up, the bits and pieces of broken toys everywhere, the mixed up props for the blog’s pictures, the binders from my Master studies which had remained untouched since the last exam and were full of papers I was sure I was not going to need anymore….you get the idea. With the list in hand, and my pinterest board as inspiration, I started visualizing how each problem could be solved, what products that I already had could be used to accomplish this, and what I needed to buy. One very important point is that I was not aiming at pretty, but only at efficient. When we are on a tight budget, pretty is a luxury and, for me now, it was not a priority. “As pretty as possible, but make sure that, above all, it gets done!” was my motto.
Here is what I have done so far, room by room:
a) Bathroom:
1) I went through all products and got rid of all empty bottles, expired products and everything that hadn’t been used in one year.
2)I corralled all towels in plastic containers: adult towels, children towels, hand towels and old burp cloths that we still use for small clean ups (Yes, I know baskets would have been prettier but they costed three times more, so they were out of the question). The sense of relief I felt at just not seeing those towels fall over each other all the time anymore cannot be properly explained with words. Suffice it to say that it was HUGE!
3) I put all hair styling products (blow drier, iron, combs) in a basket, all bath products in another one, and used another plastic container for the kids’ bath toys. The advantage that I find in having all products classified in containers is not only that things are easier to find and put away but that cleaning the shelves is also much faster.
4) I also placed all bathroom cleaning products in a plastic container under the sink, so that I can just take everything easily with me when cleaning the other toilet.
b) Kitchen:
1) Same as above, the first step was clearing out everything that was expired, not used for a long while, and throwing the cleaning bottles that we store under the sink and which were empty and had remained there for some strange reason. This also included getting rid of most of the plastic bags that were overflowing the cabinet next to the stove and keeping only those ones that we may actually use, in a pretty fabric bag container which is now hanging next to the kitchen towels. Then I cleaned deeply and disinfected all cabinets, counters, as well as the oven (which broke two weeks after that!), the refrigerator and the freezer. This took two whole days.
2) Next, I organized the spice cabinet. I labelled every container and classified the shelves according to use: baking, asian cuisine and hot spices and spices for everyday use (in the lower shelf). I also added a set of small spice containers for the most commonly used spices in our household and placed it next to the stove. This makes it easier to use them while cooking. The labels I used were free printables from The Twinery, but Martha Stewart has free ones as well.
3) I put all cooking products in Ikea plastic containers and labelled them. I then stored them in the shelves according to how they are used: sugars, gluten flours, gluten free flours (in a separate cabinet), nuts and seeds, breakfast products (coffee, tea, cocoa, etc), pasta, rice, beans, etc. I used plastic baskets to put the food that comes in small envelopes, like dry soups, and labelled the basket to know what is inside. I did this because those products always ended up in the top shelf and, since I am very short ( 5″2, or 1.58 mts) I ended up never using those products because they were difficult to reach. So, now I just need to look at the label and pull the desired basket out without fearing messiness. I also used these plastic baskets to organize and classify all oils, vinegars and sauces that go in the cabinet next to the stove, as well as the cleaning products that go under the sink (also classified by usage).
3) I put all foil, baking paper and freezer bags in magazine racks, for easier storage.
4) I placed all food in the refrigerator in plastic baskets (except for bottles, of course). When I was making the list of things that was driving me crazy, I realized that one of them was the fact that cleaning the fridge took ages because I had to remove each and every one of the products and then put them back. Then I saw THIS picture and knew that this was the perfect, affordable solution for us! So I went to Ikea, bought these baskets and classified everything in them: milk, yogurt, cheese, jams and marmalades, and fruits (vegetables are placed in plastic bags in the refrigerator’s bottom drawer). Easy cleanup, and easy to see what we have and what we need!
5) Finally, I cleared the counters, by placing all appliances that are not used daily (except the KitchenAid) and all attachments, in their boxes, on top of the kitchen cabinets. Clear space, easy cleanup, peace of mind!
c) Study/guest Room:
This is the room of the house where I spend most time when our children are at school, where my desk is and where my craft material, my camera equipment and the props I use for food photography are stored. It is also our guest room, so it is important that it is always organized in case someone comes visit. And it normally is, but I needed it to be more functional so that my work there could also be more efficient.
So I took everything out, cleaned the space and starting re organizing. I would like to note that, in doing so, I re cycled and reused furniture and boxes I already had, such as the Antonius wire basket system that used to be where we stored diapers and wipes and that is now the home of my linens, photography equipment and most of my craft materials. Then I classified all props according to usage and color, which makes it easier to plan photoshoots, and placed all ribbon and twine in a makeup organizer that I had gotten as a gift over ten years ago and which was lying dormant since the old days in Ivory Coast.
The rest of the craft material which is dangerous in little hands (craft knives, inks, stamps, embossing powders, washi tape and punches) were stored in two different plastic boxes in the upper cabinet of the room’s closet, as are the camera, lenses, the sewing machine and the medicines.
I also went through all the documents and materials stored in the chest of drawers that is located next to my desk. I tested all pens and pencils that I had in the pencil holders, discarded those which didn’t work and classified by color those which remained.
Finally, I cleared my desk and left on it only that which was indispensable: the computer, the lamp, a desk organizer, post it notes, and a pencil case which actually holds a few cables and the screen cleaning spray. And I make sure to leave it like this every night, before I go to sleep.
d)Children’s room and Toys:
The organization of our children’s room and toys started last July, when I painted their room ( I as in myself, yes, because I am the official house painter!) and we changed their furniture to fit their needs as children (not babies anymore). Up until then, the toy situation, as I call it, was complete and utter chaos and it was maddening not only for us, the adults, but it was also very frustrating for them. I truly believe that children thrive in order and routines and the way things were organized was not helping them and it was making it a mess for me to keep the house in order.
Back in those days, the toys were stored in 4 big boxes. Basically, everything was being dumped there with no order or organization criteria whatsoever, which also meant that, whenever they wanted to find a toy to play, Luka and Zoe had to dump the full contents of the baskets on the floor, which of course remained there when the said toy was found. Sometimes, in the middle of that disorder they would get frustrated at not finding what they wanted and become grumpy. Then I would get grumpy because of the huge mess!
So we started looking for ways to change this. We needed to change their cribs into toddler beds as well and, since their room is quite small but does not allow (because of the disposition of closet, radiator, window and door) to have bunk beds, we knew our space for toys and books was going to be limited. Fortunately, there is Ikea! We found the shelves that you can see in the picture below, which allow for either plastic baskets (of different sizes and colors) or shelves. We cleared old and broken toys, examined which ones were left and decided to get the TROFAST storage system, with a combination of shelves and baskets: pink and white baskets for Zoe’s toys, green and blue baskets for Luka’s and shelves for toys of common usage. We also got THESE under the bed storage boxes, two for each child, where we store soft toys (for Zoe ) and big cars (for Luka).
Finally, we repurposed the old HENSVIK changing table by removing the upper part and transformed it into a book shelf to store their books and puzzles. As a final touch, I decorated it with some fun washi tape to give it a little more character.
Finally, we classified and organized all art supplies. We stored papers and coloring books in magazine racks, small crayons in origami boxes made by yours truly, and bought several pencil cases to store pencils, markers, glue and scissors. We also put all music instruments in a different container for when we are doing the kindermusik exercises. These art supplies and music instruments are stored in the living/dining room, because they normally use them there. We have a 4 row Expedit shelving unit that houses them as well as my cooking and photography books and my magazines and recipe clippings (which are stored in magazine racks).
So there you have it: this is what I have been doing these past two months and the reason why I haven’t been posting as regularly as before. There is still work to do: I need to organize weekly or even monthly nutritious menus and come up with ideas to curve my children’s picky eating, I am planning to finalize the organization of our Emergency Binder (please, check this website for very important information regarding documents that we all must have in place and stored securely in case of emergencies), I need to de-clutter my electronic world and face the dreaded organization of all my pictures and I need to do an inventory of pantry, freezer and medicine cabinets (so that I can rest assured that I won’t have to run to the pharmacy in the middle of the night with a feverish child!). There will also be some modifications here in the blog, to make it more user friendly, and I am happy to report that I have started working on some secret projects, which have me super excited and which I will hopefully be able to share with you in the second half of the year
I am planning to tackle all of this and more in the next few months, but slowly, because I can’t wait to be back here more regularly! So, from next week, I’ll go back to posting twice weekly, on Mondays and Thursdays, and I promise those days will be full of yummy recipes, easy crafts and diys, tips and tricks for stress free parties and bits and pieces of my life, as always.
Now please, tell me: Do you usually do a Spring Clean or any other seasonal cleaning? How do you organize your house, your activities? Which resources do you find more useful? And please, save my life: do you have any ideas to cure picky eating?!Please, share your tips and tricks with me and the rest of this community in the comments below, I can’t wait to read them!
Have a beautiful day!
NOTE: WITH THE EXCEPTION OF THE LIFE IS MESSY BOOTCAMP LINKS, THE REST OF THE LINKS IN THIS POST ARE NOT AFFILIATE LINKS. I am just sharing what truly works for me, with no expectation of gain whatsoever.


