Good morning dear friends! How are you today? I hope you had a fantastic weekend.
I had planned to write this post before but, as you may know, there was an explosion in a munition deposit in Cyprus, that resulted in the destruction of the island’s main power plant. As a consequence of this, and considering that we are in the middle of a torrid summer, power rationing measures have been put in place (no AC, among others), and we are experiencing daily (sometimes twice daily) power cuts. So I guess the macarons that are the object of this post will be the last baking I will be doing for a while – at least until the situation regularizes a little bit- and I will have to reduce my blog posting to one post per week (on Mondays).
I had wanted to make macarons for a long time but, I must confess, I was terrified by the little cookie. I am not a professional baker and macarons are, as a friend put it, the royalty of baking, so I wondered whether I was going to be up to the task. I read countless recipes and instructions on the internet, and there always seemed to be so many steps that one needed to attend to with extreme care and attention, so many things that could go wrong, so many chances that for some unexplainable equation things would in fact go wrong, that I wondered whether making macarons was reserved for some elite of extremely apt bakers while me, a mere muggle of the craft, could never aspire to having these cute and delicious cookies coming out of my oven.
My favorite recipe was the one Linda (from fabulous blog Call me cupcake) shared on Cake Journal. After I read it, I started thinking that maybe I should try. The instructions were detailed, there were plenty of pictures and the commenters kept mentioning how they had been able to make macarons with it. I was encouraged! I bookmarked the recipe and, for several months, I would go back to it every now and then, not daring to actually try it.
It wasn’t until I read the article “Macaron Mythbusters” in Brave Tart that I actually started thinking “I can do this!” If you haven’t read it, please go now, you can continue reading my post later. I just love the humour with which it is written and, being the nerd that I am, its scientific approach to macaron making fascinates me. When I read that “We’re talking about a cookie here, not the Heisenberg uncertainty principle.” I started laughing hard at myself for having been scared of, yes, a cookie and I decided it was time to give macarons a try. The worst thing that could happen, after all, was wasting a few egg whites, almond powder and sugar…and I could always turn a failure into a different kind of success (as I did here). And if I was going to give them a try, what day could possibly be better than July 14th, Bastille day? I am a Francophile, after all 😉
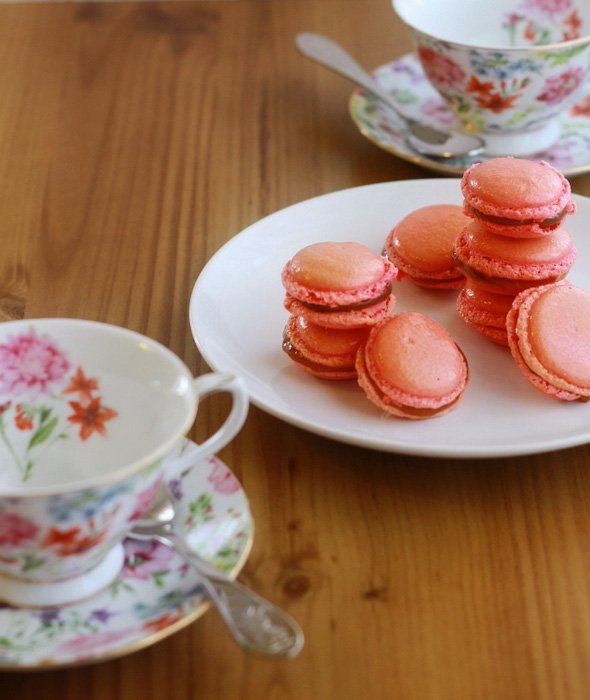
Stella‘s recipe, though, calls for a very stiff and dry meringue, which I was not sure I could achieve with my Moulinex food processor’s whisk attachment (see photos in this post) . Since one of Stella’s Ten Commandments of Macaron making recommends making meringue as instructed by each recipe, I decided to try Linda‘s recipe first (which calls for a stiff meringue, but not necessarily that stiff), while following Stella’s commandments at the same time. I also tested each step according to both their tips, and contrasted textures with Linda’s pictures and with these ones as well. And I am happy to report that it worked! I still have to work on my piping technique, I have to get to know my oven better (I have now bought an oven thermometer for that purpose, yay!) and I have to work on colouring too, but at least I can happily say that my macarons looked like macarons and-most importantly-tasted like macarons!
In case you are interested in giving them a try- and I encourage you to do so, because they delicious!- here is what I did, with pictures to show you every step :
1- I bought ground almonds but, as both Linda and Stella recommend grinding them even more, this is the first thing I did. I put 200 grams of ground almonds (the whole pack) in my food processor and pulsed 5 times.
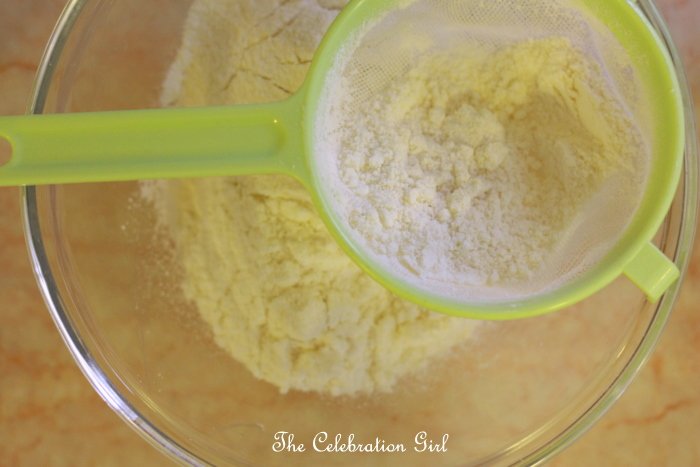
2- I sifted the processed almonds (with a colander, as I don’t own a baking sifter) and this is what I ended up with:
3- Using a kitchen scale, I measured 100 grs of ground almonds (what the recipe requires) and saved the rest for some other time in an airtight container. I put the measured almonds in the food processor again, and measured (also with the scale) the required amount of powdered sugar. I added it to the almonds and processed everything for 1 minute. This allows for them to be properly mixed together, and also to break any big lumps there may be (which is necessary for good macarons).
4- I then sifted the dry ingredients twice, and set them aside.
Now it was time to make the meringue! Stella explains that a good macaron requires a stiff meringue so that, once the dry ingredients are added to it, they will have time to be incorporated without the meringue deflating too fast and therefore losing the necessary consistency for macarons to keep their shape. If the meringue is not stiff enough, there is a risk of overmixing the macarons. It is for this same reason that she recommends adding food colouring while making the meringue and not when adding the dry ingredients: this guarantees that the colour will be fully incorporated without compromising the batter’s consistency. So this is what I did.
According to Stella’s mythbusters article, there is no need to age the egg whites for making a good macaron. Linda, however, recommends aging them for 24 hs and, since I was following the latter’s recipe, I did (in case you don’t know what aging an egg white means, I should clarify that what is required is for you to separate the egg whites, to keep them covered with a paper towel in the fridge for 24 hours, and to take them out of the fridge a few hours before using them. You can also keep them at room temperature, if your weather conditions so permit without them getting spoiled).
5- I washed my food processor and made sure that there was no grease in it by cleaning it with a little bit of lemon juice and a paper towel. I then added my aged egg whites and started beating at medium speed.
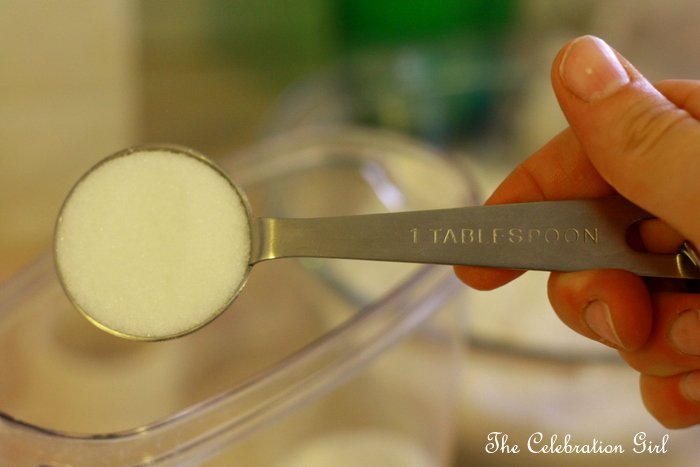
6- When the egg whites started foaming, I added the ground sugar, one tablespoon at a time.
7- Linda’s recipe asks for a glossy and stiff meringue that won’t slide from the bowl if we put it upside down. I tested the consistency with a spatula (as you can see from the picture below, it doesn’t move)
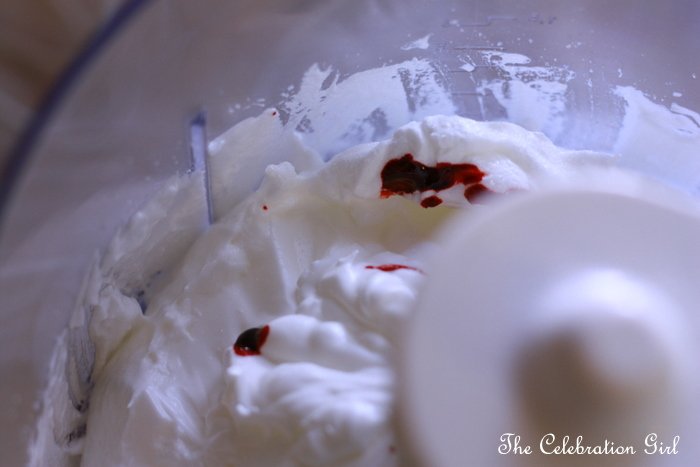
8- I added gel food colouring with a toothpick, and I continued beating for 2 more minutes, until all colour was evenly incorporated. I was looking for a soft shade of pink – I will have to add less the next time!
9- To my surprise, I ended with a stiffer meringue than I expected (yay! Go, Moulinex, go!). This is what it looked like when I put it into the mixing bowl:
10- I added the dry ingredients all at once, and started folding using a spatula. This is called macaronage, and most recipes I have read mention that it takes around 40 strokes to achieve appropriate macaron consistency. They all agree too in that a slightly under-mixed batter is better that an over-mixed one, so I made sure that I tested the consistency every 3 strokes to make sure I did not over do it. Stella recommends making sure that one scrapes the bowl from all sides several times , so I did this too (see the reasons for this here). I counted the strokes and it took me 44 (ah OCD ;))
11-I tested whether the batter had reached appropriate consistency by checking whether the mixture flowed like a ribbon when holding the spatula over the bowl (as Linda recommends, and as seen below). I also used Stella’s method of spooning some batter out and putting it back into the mix and checking whether it incorporates into it within a few seconds.
12- I filled my pastry bag with the help of a tall glass and started piping the macarons on a baking sheet covered with baking paper.
Now, this is where I made the mistake of piping them too close to each other because I had no idea how much they were going to spread. So, bear in mind that they do spread a bit and that , even if they look nothing like beautiful circles at first, they will look better once they finish spreading (just a few minutes). So give them some room to get a nice round shape, so that once they are in the oven they can grow nicely and so that you don’t have to separate them with a knife once cooked (ouch!). Also, try making them about the same size because you will have to pair them afterwards!
The second sheet I piped turned out better than this one, but I am adding the picture of the first one so that you can learn from my mistakes and see what NOT to do:
13- I tapped the baking sheet against the counter (as Stella recommends) and then let them sit for 2 hours (as Linda’s recipe requires). This was easy to do because we had a power cut just then and I couldn’t put them in the oven immediately even if I wanted to 😉
When the power came back, I turned my oven to 150 degrees celsius (or so I thought) and put the first sheet inside. I said “so I thought” because it took me much longer to cook the macarons than the recipe called for. This could also have been because of the addition of food colouring but, in order to be sure the next time, I have now bought an oven thermometer and I am planning to calibrate my oven before making them again.
In order to know whether they are ready or not, try separating them from the baking sheet. If when you try to take one, the top comes off and the bottom remains attached to the sheet…well, they are not ready. Also, their interior should not be gooey.
This is what they looked like when I took them out of the oven, while they were cooling down.
14- After they cooled down completely, I assembled them. I must confess I used what I had in the fridge as a filling: home made dulce de leche and chocolate ganache. I let them rippen for 24 hours in an airtight container in the fridge before eating them (except for one, for testing purposes and for the sake of science only ;)). They do taste much better after 24 hours, so don’t eat them right away (not all of them at least!)
Now that I have made them once, I can’t wait to make them again and to experiment with new flavours and colours!
Would you like to make them?
Have a nice week and see you again next Monday!








Hola Marcela, eres genial. Llevo tiempo pensando en hacer macarons, hasta me compre un pequeño recetario SOLO de macarons en Francia el año pasado, pero la verdad es que me asusta. Cuando empece a leer y empiezan a hablar de termometros, y de que hay que hacer jarabe italiano (otro tipo de receta para el merengue) casi empece a temblar. Tal vez algun dia… dos preguntas:
1. la bascula es absolutamente necesaria, porque la precision es importante cierto ? y
2. y lo mismo para la batidora? Yo no tengo ni batidora de mano todavia, solo un (fouet) ahi vamos otra vez, no se el nombre en español, pero un batidor de huevos manual. Claro que sueño con la kitchenaid, a ver cuando bajan de precio (jaja).
Muchos saludos y felicidades , quedaron super bonitos, y seguro que estaban deliciosos!
Hola Amanda! Muchas gracias! Me alegro que coincidamos tambien en las ganas de hacer macarons,animate!
Sobre tus preguntas: 1- Según Stella, sí, es absolutamente necesaria (está en sus macarons commandments), porque la precisión es necesaria. Aquí salen entre 15 y 20 euros, y la mía vino de regalo cuando compramos la multi-procesadora. Yo pesé hasta las claras, para asegurarme que todas las medidas eran las indicadas por la receta. 2- El batidor al que te refieres en Argentina le llamamos batidor de alambre. Si puedes usarlo o no, dependerá de si tu puedes hacer a mano un merengue duro. Mi abuela batía las claras a nieve con dos tenedores y en 5 minutos tenia unas claras a nieve firme que eran un espectáculo pero la verdad yo, al menos, sin batidora electrica (manual o de la procesadora) nunca he sido capaz de lograrlo. Podrías probar a ver si logras hacer un merengue de estas caracteristicas con 1 clara y, si te sale, intentar los macarons. Caso contrario ¿tienes alguien que pueda prestarte una batidora? Quizas con la promesa de unos macarons bien ricos más de un vecino sea solidario 😉 Sobre la KitchenAid…ahh…algún dia! 🙂
Hi Celebration Girl,
I think your pink color is perfect for a party and goes well with the tea cup too. Looks Great!
Thank you! 🙂
Yaaay! Congrats, they look great! I’m so happy you liked the recipe. They’re actually not that scary, are they? You’ll be a pro sooner than you know 🙂
Your recipe was AWESOME! They are delicious! And no, once you make them, they are not that scary 🙂 Thanks for stopping by!
¡Me encantan tus fotografíasssss! Me pasaría todo el día mirándolas 🙂 ¡hermoso tu blog Marcela!
Muchas gracias! 🙂