Good morning everyone! I hope you are having a lovely day.
Today’s post was inspired by the blogosphere. For the past several months, I have noticed a profusion of super cute owl parties (such as this one, this one and this one) and owl related products (such as these and these printables, these cake-pops and these t-shirts). All these were such a joy to look at that I felt compelled to create something owly too. Who wouldn’t want owls after looking at all those beauties, right?
So yesterday, I did. I had three cupcakes in the freezer, unfrosted, and a few bits and pieces of fondant left from other projects, so I decided to create a few Owl fondant cupcake toppers. I looked at some owl drawings and tried to de-construct their different shapes. Then I took the fondant I had and this is what I came up with.
I- The Yellow and Orange owl, inspired by this adorable birthday t-shirt by Modern Frills.
In order to make it, you will need the following materials:
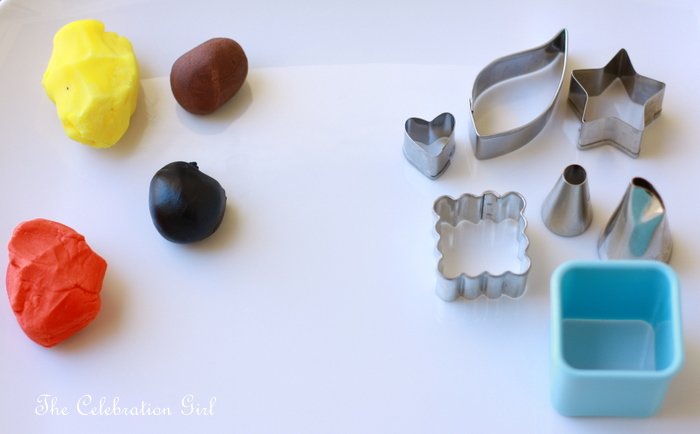
1- Fondant in three different colors. I tried to stick to the original color palette as much as possible, so I used yellow, brown and red. I also used white fondant for covering the cupcake, and attached to it the topper itself.
2- 1 round cookie/fondant cutter (I used one from a set I got from Ikea, but any would do. In the past I have even used caps from coca-cola bottles!)
3- 1 small star-shaped cookie/fondant cutter
4- Round Piping tips number 10 and 12
5- Royal icing (I used one in a tube because there was no point in making a whole batch from scratch for just 1 cupcake topper)
Procedure:
1- For making the owl’s body, roll yellow fondant and cut one circle. Separate the circle from the rest of the fondant and then, very softly, roll the rolling pin on top of it just a couple of times, so that the circle becomes slightly wider at the sides.
2- For making the Owl’s wings, roll red fondant and cut two circles, using the back of the number 10 tip. Roll the rolling pin on top of them so that the circles become ovals. You could also use a leaf-shaped cutter for doing this.
3- For making the eyes, roll red fondant and cut two circles using the back of the number 10 tip (as for making the wings). Roll the brown fondant, and cut two circles using piping tip number 12 (the tip itself, not the back). Place a brown circle on top of each red circle.
4- For making the ears, roll yellow fondant and cut two triangles using the points of the star-shaped cutter. Trim of necessary.
5- For making the nose, roll brown fondant and cut 1 triangle with the star-shaped cutter (as for making the ears). Roll the rolling pin on top to make the triangle longer and trim the sides to achieve the desired shape.
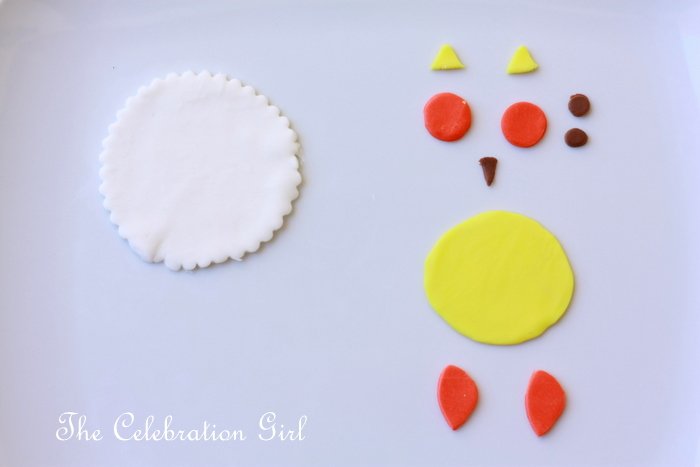
All the parts should look like this before assembly:

In order to assemble the owl, simply place the yellow circle that forms the body on top of the white fondant circle . Glue it with water or sugar syrup (Argentinians friends: almibar). Attach the eyes, nose, ears and wings. Finally, place little dots of royal icing on the wings.
Here’s how it looked right after I finished it, before placing it on top of the cupcake:
II- The second owl was loosely based on this cute gift package designed by Delicious Tea. I started with every intention of doing that design, but then thought it would be funny to make a slightly angry owl, so I re-shaped its eyebrows and eyes 😉
In order to make this owl you will need the following materials:
1- Fondant in 4 different colours. I used red, yellow, brown and black.
2- 1 small square fondant/cookie cutter (mine comes from the same Ikea set I mentioned before)
3- 1 big piping tip. (It could be a D2 or M1. I used a petal shaped one because I had it handy, but since what you need is its back, any big one would do)
4- 1 medium size leaf-shaped cutter
5- 1 small heart-shaped cutter
6- 1 small star-shaped cutter
7- 1 pipint tip number 12
8- 1 scalloped square cutter (mine came with a Wilton set)
Procedure:
1- For making the body, roll red fondant and cut a square. Using the small scalloped square cutter, press softly with one side only to shape feathers. You can also draw the feathers with a food decorating coloring pen.
2- For making the eyes, a- roll yellow fondant and cut 2 circles using the back of the big piping tip, b- roll white fondant and cut 2 circles using the back of the number 12 tip, c- roll black fondant and cut 2 circles using the number 12 tip itself. Place one black circle on top of each white circle and then attach the latter to each yellow circle.
3- For making the eyebrows, roll brown fondant and cut a circle with the back of the number 12 tip. Cut the circle in half and, using the the same cutter trim the centre of each half to shape the eyebrows.
4- For making the wings, a- roll brown fondant and cut 2 leaves. Take 1 of them and proceed as with the eyebrows. This is the wing that will be attached to the left side. Take the remaining wing and trim the edges until it looks as in the picture. b- Roll the red fondant and cut a heart. Separate the heart from the remaining red fondant and, using the same cutter, cut again, removing the lower part. c- Roll yellow fondant and cut a heart out of it. Place the piece of red heart on top of the brown wing, then attach to its lower part the yellow heart (it will look as if there was a red heart below the yellow one)
5- For making the nose, cut a triangle using a point of the star-shaped cutter.
This is how all parts should look like before assembly:
To assemble this owl, simply place the eyes on the upper part of the body (about half the eyes should be inside the body, and half should be out). Attach the eyebrows and shape to give the owl’s look the desired expression. Attach wings and nose. It’s like working on a collage, very simple!
This is how it will look like, once finished:
III- The third owl, was inspired by this cute invitation by the Sugar Bee Bungalow.
In order to make this owl you will need:
1- Fondant in 5 different colours. I used blue, orange, brown, black and white.
2- 1 round-shaped cutter
3- 1 scalloped square cutter
4- 1 Number 12 piping tip
5- 1 star-shaped cutter
Procedure:
1- For making the body, roll brown fondant and cut a circle (with the medium size cutter). Detach the circle from the remaining fondant and roll the rolling pin on top of it, so that it achieves an oval shape (If you have an oval -shaped cutter, just use that one).
2- For making the belly and the wings, roll blue fondant and cut three circles using the back of the number 12 tip. As with the body, roll the rolling pin on top of them, so that they become ovals.
3- For making the eyes: a- roll white fondant and cut 2 circles using the back of the number 12 tip, b- roll black fondant and cut 2 circles using the number 12 tip itself, and c- Place a black circle on top of each white circle.
4- For making the ears, roll the brown fondant and cut 2 triangles using the points of the star-shaped cutter.
5- For making the nose, roll orange fondant and cut 1 triangle. Detach the triangle from the remaining fondant and roll the rolling pin on top of it,so as to make it longer. Trim if necessary.
6- For making the feet, roll orange fondant and cut 1 square using the scalloped square-shaped cutter. Cut the square in two using the same cutter, then divide one of those parts in half. Each half is 1 foot.
This is how all parts should look before assembly:
For assembling this owl: a attach the body to the white circle that will cover the cupcake, b- attach the belly to the body, c- attach the eyes to the body (they should be half on top of the blue belly, half over it, more or less), d- attach the wings, e- attach the ears, f- attach the feet. And that’s all!
Here is how this owl looked just after I finished making it. As you can see it is still shiny from the water I used for attaching the different parts. After a few hours the water dries out, don’t worry.
And here is another look at all three owls before putting them on top of the cupcakes.
For placing them on the cupcakes, I put apricot jam on the said cupcakes, lifted the toppers with a spatula, placed them each on top of a cupcake, and pressed very, very lightly on the sides so that they would attach properly to them.
As you can see, they are very easy to make!
I hope that you liked this tutorial! If you have any doubts about any of the explanations, let me know and I’ll try to guide you through the process the best I can. And if you make them, please share your pictures, I would love to see them!
Have a wonderful weekend, full of love and laughter!


This is a lovely idea and so easy to make with the step-by-step directions. I am going to forward this to my friend who loves baking with fondante.
Me encantan ! Son preciosos !
Thank you Suzanne!
Gracias Amanda, me alegro que te gusten! 🙂
Hi Suzanne! Just found your blog via Dreamers into Doers, and I LOVE it! These are super cute! Thank you for sharing, I can’t wait to try these out. I have never worked with fondant before, I really just haven’t known where to start, or how to work with it. This looks like a manageable first fondant project, we’ll see how it goes…
Hi Shannon! Thank you for your comment, I am happy that you liked my tutorial! Good luck with fondant, it is a great decorating medium. Please share your owl cupcakes pictures, once you make them.
PS: My name is Marcela 😉
I LOVE these so cute owls! The tutorial is great- look forward to trying it
*Sent via Doer into Dreamers
~Ashaunte
Dreamers into Doers- LOL
OMG! These are the cutest! Thank you for sharing with us! You make me feel like I could create them 🙂
Thank you, Amy! Do try to make, they are very easy, you’ll love fondant once you make them!
I love them! They are so adorable and I am thrilled that you used my owl design as inspiration!
Thank you! I am happy that you like them 🙂
I found your blog while I was looking for ideas for cupcakes for my best friend’s baby shower, and everyone loved them! I made a few changes depending on what I had available to me, I have a few pictures if you would like to see my interpretation 😉
I’m so happy you made them and everybody loved them! I would LOVE to see your interpretation! Would you please share? 🙂