Good evening dear friends! I’m still catching up with posts and getting up to speed with the last days of the advent calendar, so here comes today’s original post ( a little late but here we are!)
For the last days of the calendar, I am bringing you a series of gift wrapping ideas. This first post is about greeting cards, because I usually find that gift tags don’t have enough space for writing all that I would want to express so, whenever I give something to a loved one, I prefer to add a greeting card as well. Tomorrow I’ll give you some gift wrapping ideas, on Sunday we’ll make some gift tags and on Monday there will be one final super easy dessert. I hope you will join me in every post!
I started experimenting with card making back in November and I must confess that I am quite addicted to it! I will be making a few tutorials on card making basics, as I learn, but for now, let’s start with something very, very simple, which you can also make with your children. If they don’t use scissors yet, simply pre-cut a few designs and give them to them to play around.
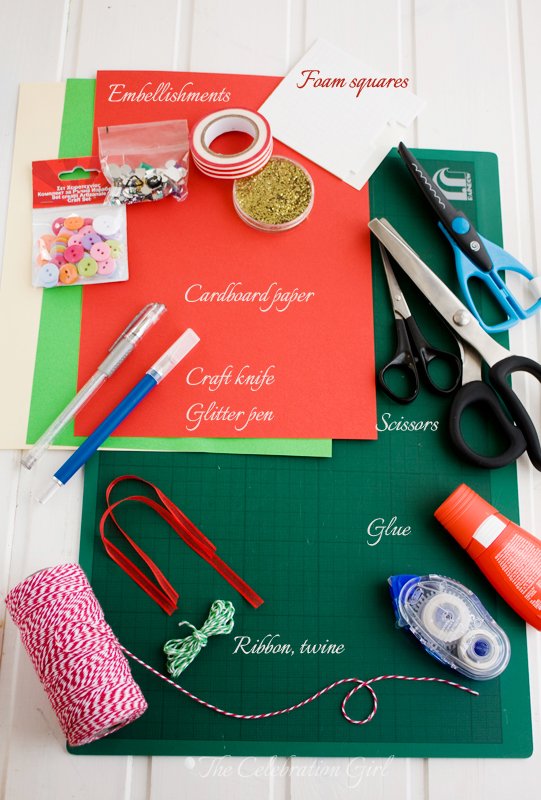
Now, before you start thinking that you may have to buy some pricey supplies, let me tell you right away that nothing special is needed here. Yes, card making can become an expensive hobby because there are so many tools that can enhance our work (stamps, inks of different colors, embossing material, papers of every possible kind, craft punches or die cut machines, letterpress machines, ribbon, twine, washi tape…you name it!). But for these cards all you need are paper, scissors, glue, ribbon, twine (or thread or wool) and some extra embellishments, as glitter or gemstones, if you want. They can be omitted as well. I promise, you won’t even need to go buy patterned papers, because I have looked for free online resources that you can print at home on cardboard paper (which are the ones seen on the picture above) . You can find them HERE, HERE, AND HERE. You can also use free party printables, which normally have really pretty designs, such as the ones offered by Catch my Party HERE.
Let’s begin! I will show you how I made the first card, step by step and then I’ll describe the process I followed with two other cards, so that you are ready to start experimenting yourself!
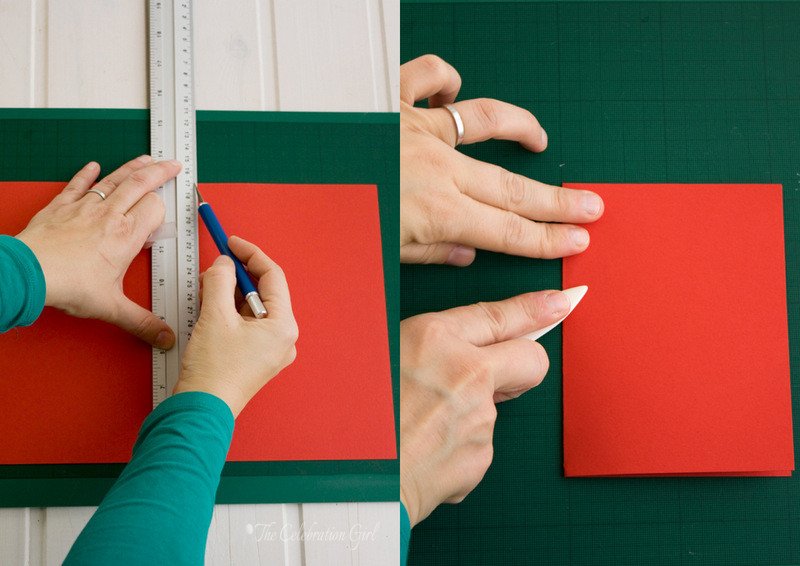
The first thing you need to do is to create the actual card. You may buy pre-cut cards or you can make your own with cardboard paper, which is what I do. I take an A4 page of the colour I want to use, score it in the middle and cut all along with a craft knife (I don’t have a guillotine). Then I fold each part in half, pressing with a bone folder to mark the fold.
Once you have your card, it’s time to start thinking about the design. There are so many possibilities! I normally go through the papers I have (the one above is a free download from crafts beautiful magazine) , I chose one item that I like and then build the rest from there.
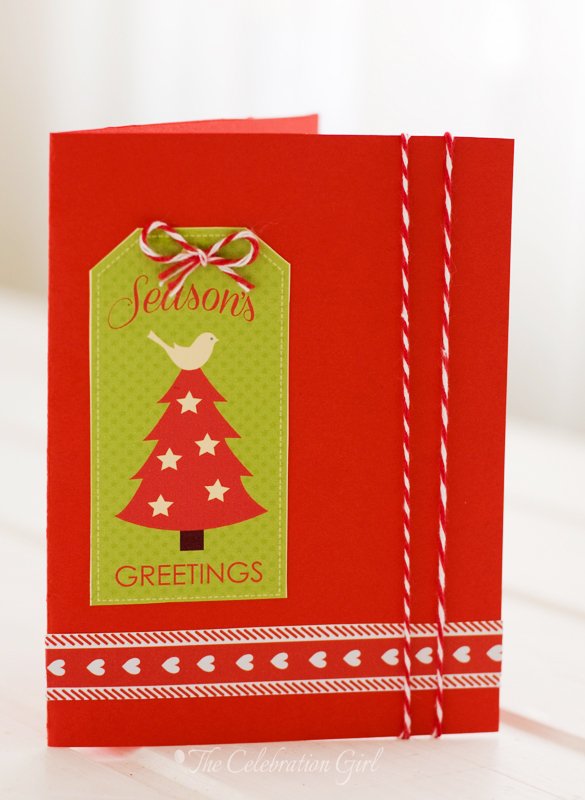
For this card, I wanted to keep the color palette simple, almost monochromatic, so I chose a green, red and white tag. I cut it with scissors, opted for a vertical layout and then started looking for other additions. I cut a stripe of paper with red and white hearts, and red twine. I glued them all with double sided tape, except the twine bow, which I attached on top of the tag with a drop of invisible liquid glue. Finally, I added a double string of twine, which I attached to the back with a small knot (you can see the detail in the picture below).
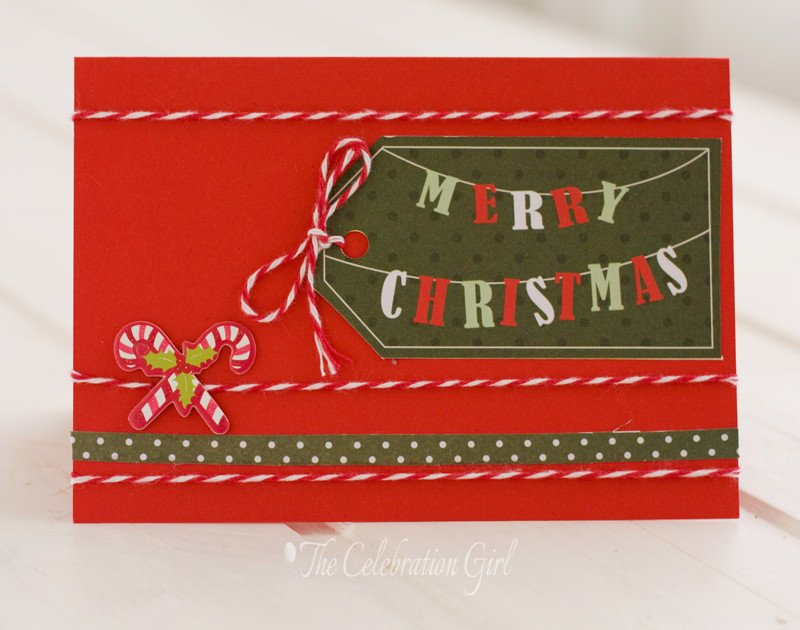
The second card (pictured below) follows the same procedure: a gift tag, a twine bow, a stripe of paper and stripes of twine. The only two changes from the card above were the horizontal layout, and that I also added a sticker with two candy canes.
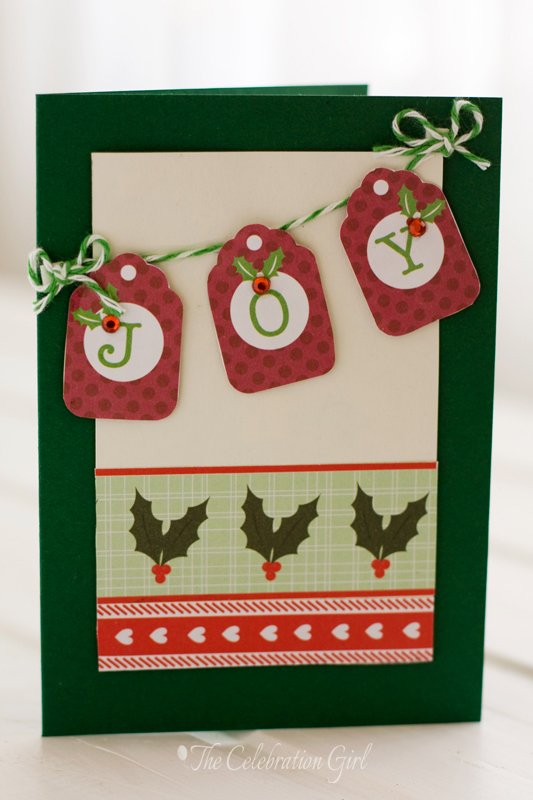
For the third card, I changed the color and I decided to use a 3d effect for which I used self adhesive foam squares for layering some of its parts. I started by cutting a rectangle of white cardboard that was 1 cm smaller than the card in all its parts. I glued two different stripes of paper to its bottom (the one with red hearts and the one with holly) and I cut the letters that spell “joy” using scissors. I decided to place them as a banner, so I also cut three stripes of twine. I placed one all along the upper part of the white card, and made bows with the other two,which I added to the sides of the first one. After that, I attached the letters with a foam square, for a 3D effect and embellished them with a gemstone each. Once the white card was ready, I attached it to the main card in green, also with foam squares.
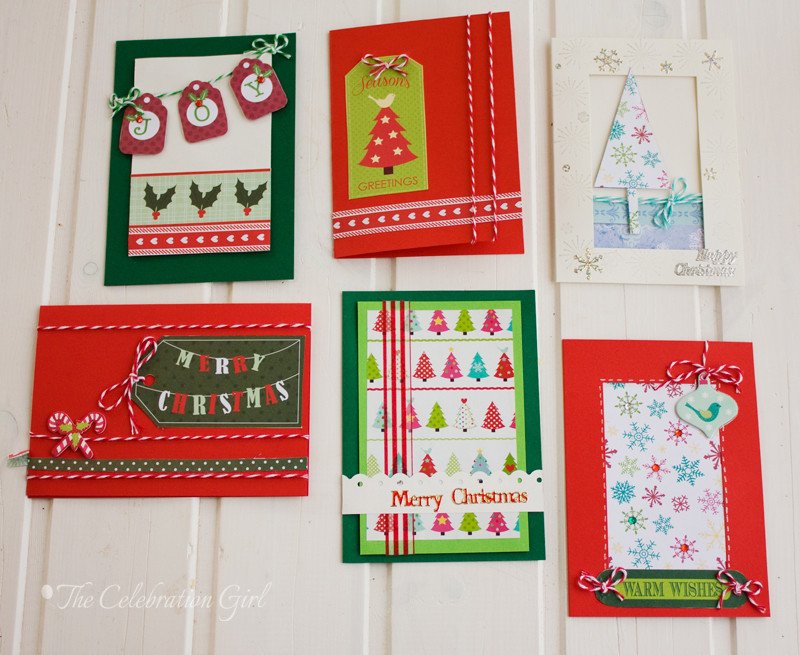
I also made some other cards this season. It is a nice, relaxing craft that I am planning to explore deeper after the holidays.
Have you ever made greetings cards before? If so, what are your favorite tools and materials? If not, would you like to?
Con sabor latino…
Buenas noches queridos amigos! Aun estoy poniendome al día con los posts atrasados, para llegar a publicar los últimos días del calendario de adviento a tiempo, así que aquí, aunque tarde, está el post correspondiente al día de hoy.
Para estos últimos días del calendario les traigo una serie de ideas para acompañar y embellecer los regalos. En este primer post les mostraré cómo hacer unas tarjetas fáciles, porque no sé si a ustedes les pasa como a mí, pero siempre me quedo sin espacio suficiente para escribir en las etiquetas, y es por eso que para mis seres queridos más cercanos, suelo optar por tarjetitas que hago a mano. Mañana les voy a mostrar unas ideas para envoltorios, el domingo veremos etiquetas (que tambien son necesarias y quedan tan bonitas cuando las adjuntamos a un paquetito) y el lunes, para el último post, veremos un postre para un brindis diferente sencillíiiiiiisimo. Espero que me acompañen hasta el final de este calendario!
Les cuento que comencé a experimentar en esto de hacer tarjetas hace muy poco, apenas en noviembre, pero debo confesarles que me resulta adictivo. Despues de las fiestas pienso hacer algunos tutoriales mostrando otras técnicas, a medida que las voy aprendiendo, pero por hoy comenzaremos con algo extremadamente simple, que pueden hacer hasta con los niños. Si sus pequeños no usan tijeras aún, corten por adelantado un par de figuritas y dejenlos experimentar con ellas sobre el papel.
Ahora bien, una aclaración antes de que haya quejas relacionadas con gastos o material que no se encuentra donde viven: para hacer estas tarjetas no necesitan nada especial. Sí, es cierto que este es un hobby que puede tornarse oneroso muy rápidamente, porque hay millones de herramientas y elementos a utilizar (sellos, tintas de distinto tipo y color, relieves, troqueles, papeles especiales…de todo!), pero para hacer estas tarjetas sólo necesitarán cartulina, tijeras, cola de pegar, moños o hilo encerado y algunas cositas adicionales como gemas o glitter (pueden omitir estos ultimos tambien). Ni siquiera necesitan comprar papeles con diseños especiales, porque he buscado algunos gratis que pueden bajar e imprimir AQUI AQUI Y AQUI. Y tambien pueden usar los printables de fiesta gratuitos que se encuentran en lugares como Catch my Party, AQUI.
Comencemos! A continuación, voy a mostrarles cómo hice la primer tarjeta, paso a paso, y luego les mostraré dos tarjetas más y describiré los procedimientos usados para cada una. Recien empiezo a experimentar con esto de hacer tarjetas, asi que me falta muchisimo por mejorar, pero vamos paso a paso, disfrutando del aprendizaje.
Lo primero que necesitan hacer es crear la tarjeta misma. Tambien pueden comprarlas ya hechas, pero yo suelo hacerlas yo misma con una hoja de cartulina tamaño A4. Mido dónde queda el medio, y luego corto todo a lo ancho con un bisturí de manualidades, porque no tengo gillotina. Despues doblo cada parte por la mitad y, usando un cuchillo de hueso, aliso el doblez, para que la tarjeta no “se levante”.
Una vez que tienen lista la tarjeta, es hora de pensar en el diseño. Aquí tambien hay muchísimas posibilidades! Yo normalmente reviso una y otra vez los papeles que tengo y elijo un motivo de base, y en base al mismo armo todo el diseño. Para esta tarjeta quise mantener la paleta de colores muy tranquila, casi monocromática, así que elegí un pinito de navidad en verde, rojo y blanco. Lo recorté con tijeras, elegí ponerlo en formato vertical, y seguí buscando entre mis papeles por otras adiciones. Me decidí por una tira de papel con corazones rojos y blancos, que recorté y pequé con cinta doble faz. Luego agregué un moño hecho con hilo encerado bicolor, y até dos tiras del mismo hilo por detrás de la tapa de la tarjeta, con un nudo pequeño (Pueden ver el detalle en las fotos).
Para la segunda tarjeta, el procedimiento y los materiales fueron practicamente los mismos: tiras y moño de hilo encerado, tira de papel y tarjeta con forma de etiqueta, pero esta vez elegí un formato horizontal y agregué un sticker en forma de bastoncitos de caramelo. En la tercer tarjeta, por su parte, cambié el color rojo por el verde y decidí usar un efecto tridimensional, para lo cual usé cuadrados de goma. Comencé por cortar un rectangulo de cartulina blanca 1 cm más pequeño que la tarjeta principal en todos sus lados. Elegí dos tiras de papel de colores y diseños diferentes (corazones rojos y acebos verdes) y las pequé en la parte inferior de la cartulina blanca. Luego, recorté las letras que forman la palabra joy (alegría) y decidí colocarlas como si fueran un banderín. Para ello, recorté tres tiras de hilo encerado, coloqué la primera a lo largo de la parte superior de la tarjeta y, con las otras dos, hice moños que coloqué en los extremos de la primera. Luego pegué las letras con cuadrados de goma y les adicioné una gema a cada una, para darles brillo. Finalmente, pegué la cartulina blanca a la tarjeta principa, también con cuadrados de goma.
En la última foto pueden ver otras de las tarjetas que hice esta temporada navideña. Es una actividad que encuentro muy relajante y que planeo explorar más despues de las fiestas.
¿Ustedes han hecho tarjetas alguna vez? Si asi lo han hecho, cuentenme ¿cuales son sus materiales y herramientas preferidas? Si no lo han hecho ¿les gustaría hacerlo? ¿ se animan a probar?

Beautiful ! All of them!