Good morning dear friends! It’s day 18 of the advent and here I bring you another edible gift idea: a cake mix for a delicious mocha chocolate chip cake – with recipe included, of course.
This recipe is not my own. It appeared on Hallmark magazine in January 2008, a beautiful publication that, unfortunately, doesn’t exist anymore. I was living in Ivory Coast at the time, working in peacekeeping and was subscribed to the magazine, that I received by post on a bi-monthly basis and this was the last number I received before moving to Cyprus. It was like a breath of fresh air, full of lovely ideas, crafts and delicious recipes.
It was in its pages that I saw this cake for the first time, as well as the way to layer it for a present, which I have adapted below. The article included other recipes as well, but I haven’t tried them yet. I promise to share them with you as soon as I do!
The great thing about this gift is that it takes out all stress from making a cake from scratch. People who hate baking generally hate the precision it requires, the measuring, sifting, scooping…by doing all that work for them, we take away all difficulty. The person who receives this mix only has to add a few ingredients and follow a few simple steps (the same that are required when making a box cake) and in a less than an hour they will have a delicious, preservatives-free cake with fresh ingredients ready to be eaten.
You could also prepare this cake mix for yourself, without the fancy label and packaging, and keep it ready for those times when you want a home baked cake but you don’t feel like going through all the trouble. It is also a great option when travelling for a short time, to the mountains or to the beach, when we don’t feel like bringing all our baking equipment with us. We can just pre-measure all dry ingredients at home, toss them in a Ziploc bag or any other container, and finish baking at our destination. Another advantage? The mix lasts for 6 months!
Here is the recipe and the instructions for layering it as in the pictures
Mocha chip cake (adapted from Hallmark Magazine of January 2008)
Ingredients: (for making the cake at home): 2 cups sifted cake flour, 1 tablespoon espresso, 2 teaspoons baking powder, 1 teaspoon baking soda, 1/2 teaspoon salt, 1/2 cup unsweetened cocoa, 2/3 cup brown sugar, 2/3 cup granulated sugar, 1/4 cup powdered milk , 1/2 cup mini chocolate chips, 170 grs or 3/4 cup butter or margarine, 3/4 cup water, 3 eggs, 2 tablespoons vanilla extract (the last four are the ingredients to be added by the recipient of the cake mix jar)
Note: If you don’t have cake flour, you can make it at home. For each of all purpose flour, remove 2 tablespoons from it and add 2 tablespoons cornstarch. Sift together several times, to integrate.
Preparation of the cake mix: I am detailing below how to layer the mix, as described by Hallmark magazine. You can also put each ingredient as an individual layer, it doesn’t affect the final outcome, but make sure to sift together flour,baking powder and baking soda before adding them for better results.
Layer 1: 3/4 cup cake flour, espresso, baking powder and baking soda
Layer 2: 1 cup cake flour and cocoa
Layer 3: 1/4 cup cake flour and brown sugar
Layer 4: granulated sugar and powdered milk
Layer 5: chocolate chips
Instructions (to be included with the cake mix):
1) Pour all contents of the jar in a bowl and mix briefly
2) Add 170 grs of soft butter and ½ cup of water and beat on medium speed for 3 minutes
3) In another bowl, beat 3 eggs with ¼ cup of water and 2 teaspoons vanilla extract
4) Add egg mixture to cake batter in 3 times, mixing well after each addition.
5) Divide the batter in two and pour it in two 9 inch/20 cms round cake pans, previously greased and dusted with cocoa or flour (cocoa doesn’t leave a white trace and adds to the chocolatey flavor)
6) Bake at 175C or 350 F for 20 to 30 minutes, or until a stick inserted in the middle comes out clean
7) Let cool and frost with vanilla, mocha or chocolate frosting, if desired.
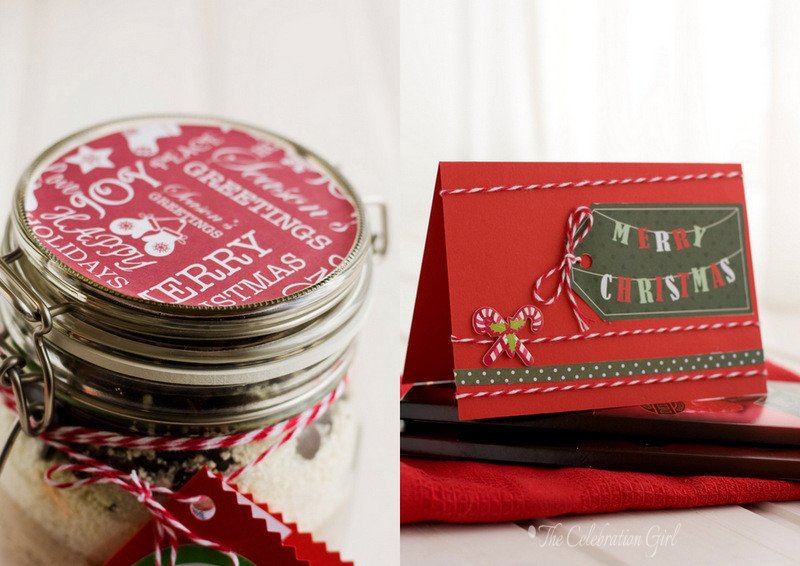
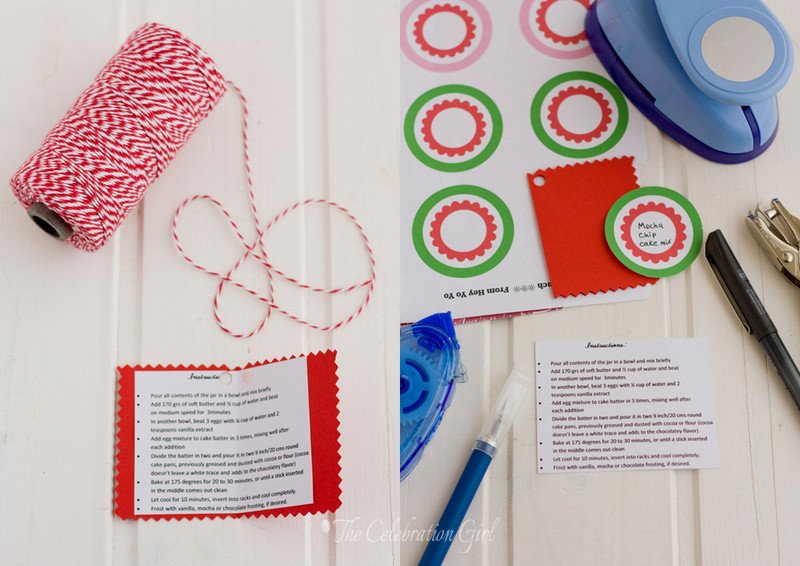
Once I had measured, mixed and layered all ingredients, it was time to beautify the present. I cut a circle of Christmas paper (which came with a crafts magazine) and glued it to the top of the jar. I prepared a small card, containing the instructions, with a small piece of red cardboard paper, zig zag scissors, a hole punch and party circles that I downloaded for free from catch my party (I will show you other uses of those free printables in posts to come). I also copied the instructions in a word document (using calibri font, size 8), printed it, cut it and glued it to the inside of the card. Then, I punched a hole and attached it to the jar with red and white baker’s twine.
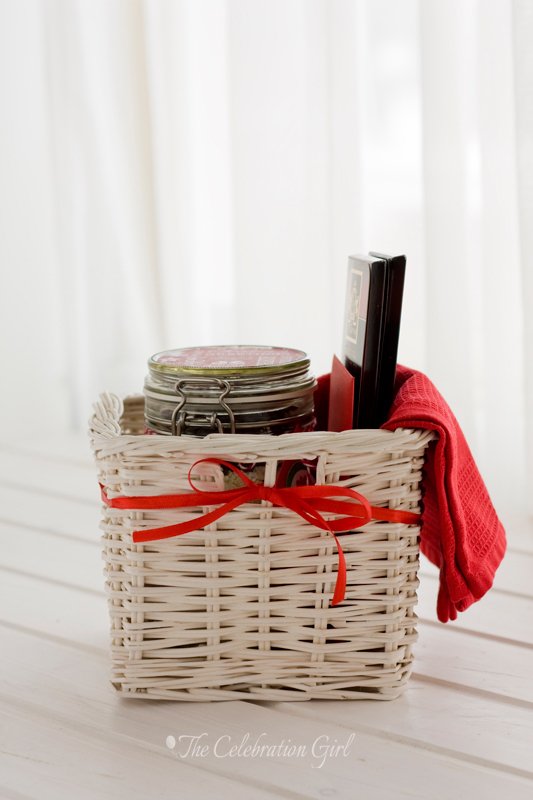
The whole present also included a red kitchen towel, a home made greeting card, two bars of good quality chocolate and recipes for my favorite vanilla, mocha and chocolate frostings, as well as recipes for making hot chocolate. Everything was placed in a white straw container, and tied with red ribbon. I truly hope the persons I am giving it to will like it!
Do you like it?
Con sabor latino…
Buenos días queridos amigos! Hoy es el día 18 del adviento y aquí les traigo otra idea de regalo comestible: una mezcla casera para una torta moca de chocolate (o sea, con café), con receta incluida, por supuesto.
Esta receta no es de mi autoría, la ví en el número de enero de 2008 de una revista que lamentablemente ya no existe, Hallmark Magazine. Este número en particular lo recibí por medio de una suscripción, justo antes de venir a vivir a Chipre. Era una revista preciosa, llena de manualidades, recetas deliciosas e ideas creativas. En sus páginas encontré esta receta que hoy comparto con ustedes, y la idea de regalar mezclas pre hechas. El artículo incluía otras receta que no incluyo porque aún no las he probado, pero tengan seguro que, en cuanto lo haga, las compartiré aquí con ustedes!
Este es un regalo que me encanta hacer porque quita todo el stress que mucha gente siente al preparar una torta casera. La mayor parte de la gente que conozco a la que no le gusta la repostería, suele tenerle miedo y hasta odiarla por la precisión que ésta requiere, por cómo hay que medir, cernir y pesar los ingredientes. Con este regalo, nosotros hacemos todos esos pasos por ellos, y quien lo recibe sólo tiene que actuar como con una torta de caja: agregar ingredientes húmedos y mezclar. Unos pocos pasos despues y en menos de una hora tendrán una torta casera, sin conservantes y con ingredientes frescos, lista para ser disfrutada.
Tambien pueden usar esta idea para preparar mezclas para ustedes mismos, y dejarlas listas para esos días cuando tenemos ganas de comer algo caserito pero no tenemos ganas de tomarnos todo el trabajo que ello implica. Tambien es una buena idea para cuando salimos de vacaciones por un dias, al campo o a la playa, y no queremos trasladar todo nuestro equipo de reposteria (cucharas medidoras, balanzas y demases). Sólo tendremos que medir y pesar todo en casa, ponerlo en una bolsa Ziploc o en otro recipiente y terminar la preparación donde sea que vayamos. Otra ventaja más? La mezcla dura 6 meses!
Aqui les dejo la receta y las instrucciones para que las capas queden como en la foto:
—————————-
Torta moca de chocolate (adaptada de la edicion de enero 2008 de Hallmark Magazine)
Ingredientes (para hacer la torta en casa): 2 tazas de harina de reposteria, 1 cucharada de espresso en polvo, 2 cucharaditas de polvo de hornear, 1 cucharadita de bicarbonato sodico, 1/2 cucharadita de sal, 1/2 taza de cacao amargo, 2/3 taza de azucar moreno, 2/3 taza de azucar comun, 1/4 taza de leche en polvo, 1/2 taza de chispas de chocolate, 170 grs de manteca o margarina, 3 huevos, 3/4 taza de agua, 2 cucharadas de extracto de vanilla (estos últimos cuatro ingredientes deberán ser agregados por la persona que recibe el regalo, si es para regalar).
Nota: si no tienen harina de reposteria, pueden hacerla casera de la siguiente manera: Por cada taza de harina común, retiren 2 cucharadas soperas y reemplacenlas por maizena (fécula de maiz). Tamicen varias todo para que se integre bien, y listo!
Preparación de la mezcla pre hecha: La forma de presentación que les detallo a continuación es la sugerida por Hallmark magazine. Tambien pueden colocar los ingredientes uno a uno, de manera individual, pero asegurense de tamizar harina, polvo de hornear y bicarbonato antes de hacerlo, para que la torta quede perfecta.
1er capa: 3/4 taza de harina, espresso, polvo de hornear y bicabonato sódico
2da capa: 1 taza de harina y cacao amargo
3er capa: 1/4 taza de harina y azucar moreno
4ta capa: azucar comun y leche en polvo
5ta capa: chispas de chocolate
Instrucciones (deben acompañar el frasco con la mezcla):
1) Coloque el contenido del frasco en un bowl amplio y mezcle brevemente
2) Agregue 170 grs de manteca y 1/2 taza de agua y bata con batidor electrico a velocidad media por 3 minutos
3) En otro bowl, bata los huevos con 1/4 taza de agua y 2 cucharadas de vainilla
4) Agregue la mezcla de huevos al resto de la masa en tres tiempos y bata bien luego de cada adición.
5) Divida la mezcla en dos y coloque en dos moldes de torta de 20 cms, enmantecados y espolvoreados con cacao o harina (yo prefiero cacao para tortas de chocolate porque no deja pelicula blanca y hace que el sabor sea aun mas chocolatoso)
6) Cocine en horno a 175 grados por 20 a 30 minutos
7) Retire, deje enfriar, rellene con crema de vainilla, moca o de chocolate (si asi lo desea) y espolvoree con azucar impalpable.
———
Una vez que mezclé los ingredientes y los coloqué en el frasco, llegó la hora de arreglarlo para que quedara bonito para regalo. Corté un círculo de papel navideño (que había venido de regalo con una revista de manualidades) y lo adherí a la tapa del frasco. Preparé una tarjetita con cartulina roja, tijera de puntas, un troquel individual y unos printables gratis que encontré en catch my party. Copié las instrucciones en word (con letra calibri, tamaño 8), las imprimí, recorté y pegué a la tarjeta. Luego usé el troquel para hacer un agujero y adjunté la tarjeta al frasco con hilo rojo y blanco.
El regalo tambien incluía un repasador rojo, dos tabletas de chocolate de buena calidad, una tarjeta hecha a mano, recetas para mis cremas de vainilla, moca y chocolate preferidas, y recetas para preparar chocolate caliente. Coloqué todo en una cajita de paja de color blanco y finalicé la presentación con un moño rojo.
Espero que este regalo le guste a quienes pienso entregarselo! Y a ustedes ¿les gusta?


Me encanta 🙂