Good evening dear friends! Here is finally day 10 of our advent calendar…only 14 days until Christmas’ eve!
As I mentioned in THIS post, last Friday I finished our Christmas stockings, and by ours I mean my husband’s and mine. Last year, Luka and Zoe received a beautiful stocking each as presents from their baby sitter, and I had not planned to make some for ourselves, being adults and all… but when Zoe saw theirs, she started asking about ours, and the rest is history!
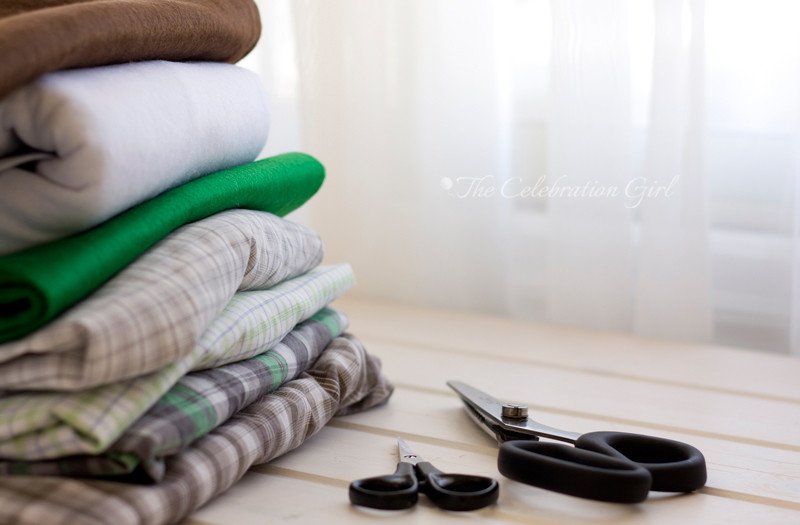
I made our stockings using scraps of felt from our felt board and fabric from some of my husband’s old shirts, which he wasn’t using anymore (he gave them to me for crafting purposes, I didn’t take them from his closet!). At first, I had planned to make them using the sewing machine,but it got broken half way, so I ended up making them by hand. They are far from perfect, because I am not a skilled sewer at all, but I had a lot of fun in the process, so I thought I would share the process with you, in case you want to make some for yourself and your family. It is a really fun craft project for a lazy afternoon with friends and, as you can see from the picture in this past post, which shows my unorthodox stocking from years ago, you can pretty much chose any design that you like best.
Let me walk you through every step:
1) I started by making the template.I wanted to make sure that their size matched Luka and Zoe’s stockings, so I placed one of them on top of the felt and traced around it with a marker pen, then cut two pieces of each color (brown for my husband’s, white for me).
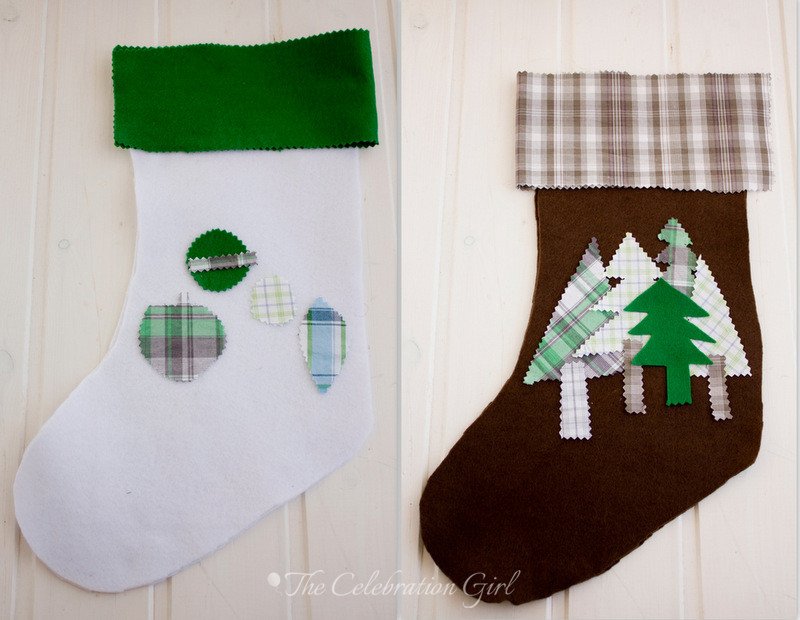
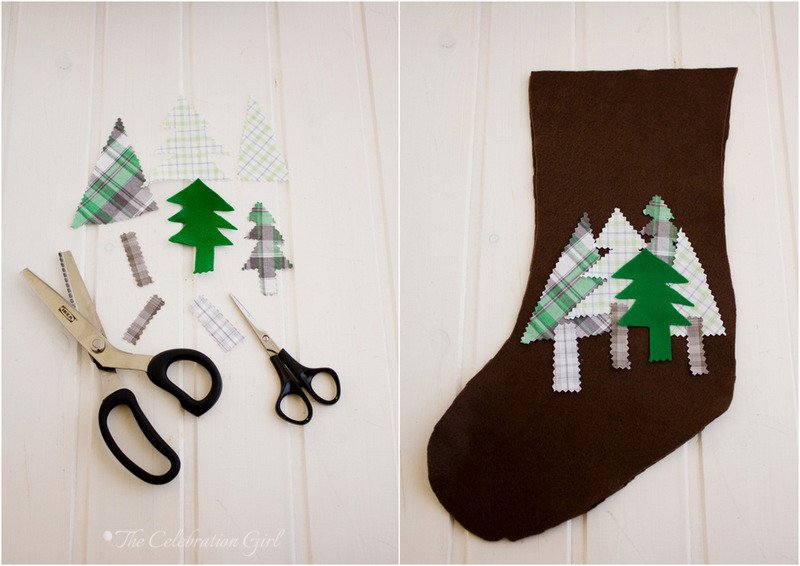
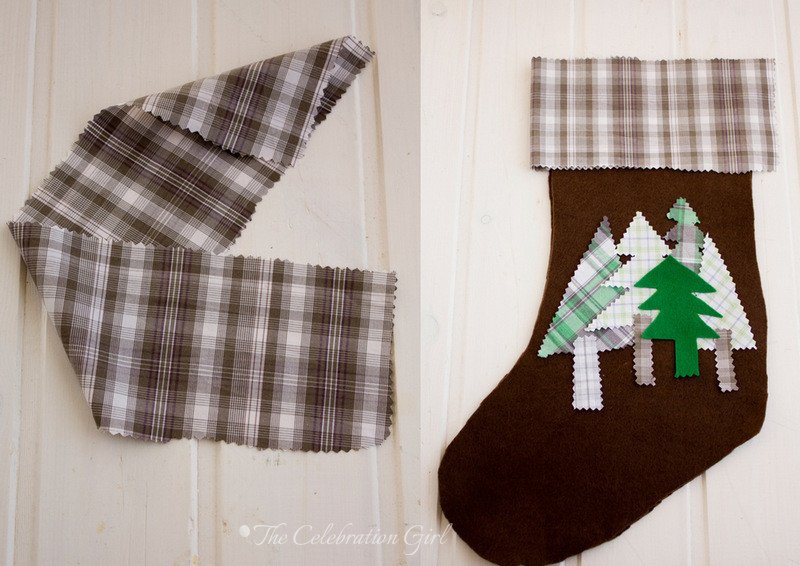
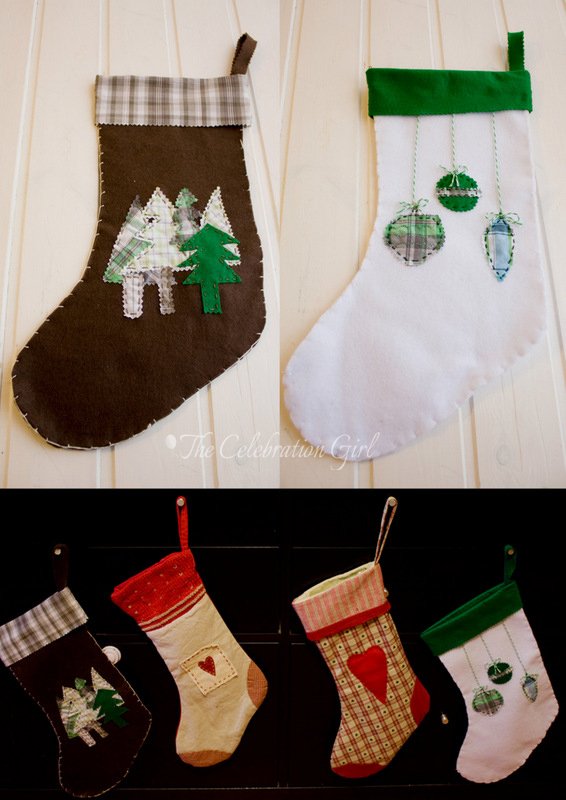
2) Then I took all of my husband’s old shirts and started thinking about the design itself. I settled for the ones in green fabric for both stockings (so that there would be some unity between them all), and made pine trees for my husband’s (to give it a masculine, lumberjack feeling), and baubles for myself. I cut the different parts using zig zag scissors, placed them on top of one side and played with different combinations until I found one that I liked.
3) I then cut another piece of fabric to make the cuff: brown tartan for my husband’s and green felt for myself, and added it to the mock design to see whether I liked it. I did, so it was time to start stitching.
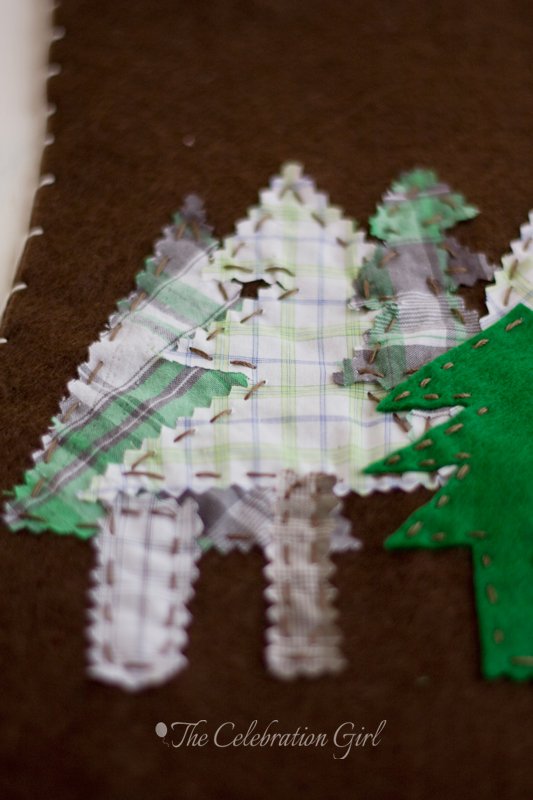
4) First I added the appliques to the fabric, starting by the ones at the bottom. I held each piece of fabric in place with pins, and sew them in place with a very simple running stitch . I did one tree at a time, taking my time, but it was done in no time because my design was not complicated at all.
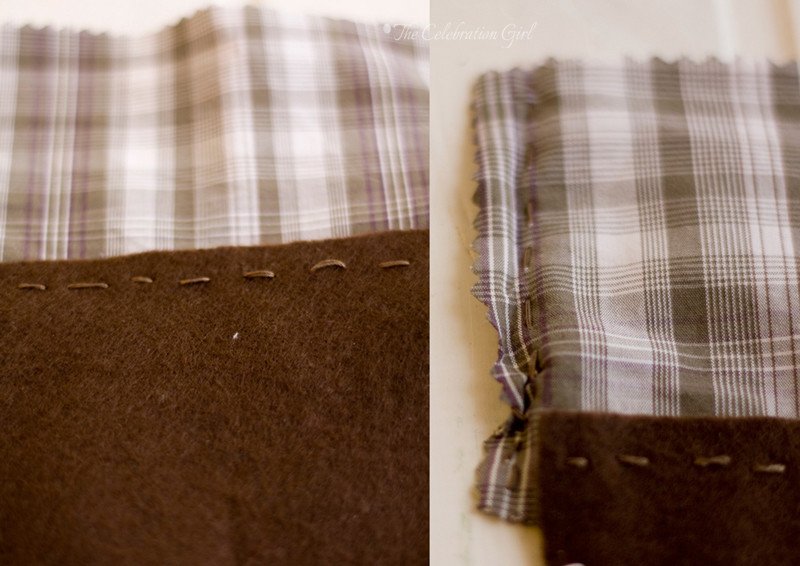
5) Then I attached the cuff to the felt (one side at a time) and then joined the cuff, as seen in the pictures above. As you can see, I used a running stitch here as well because it doesn’t show, but you can attach it in a more proper way by using a sewing machine, or a back stitch (they do look better).
6) Then it was time to attach the two pieces of felt, to create the stocking. I did so with a blanket stitch. I used a contrasting thread color for my husband’s stocking, but kept the same one for mine.
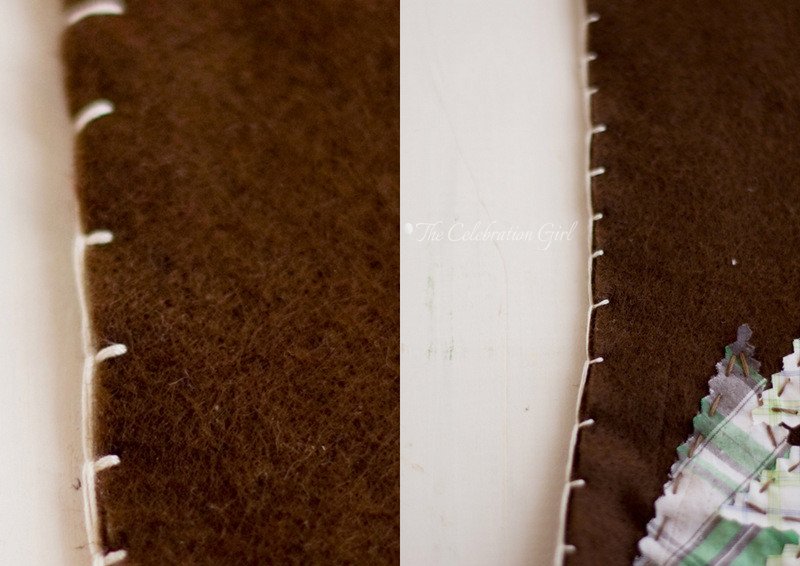
7) Finally, I added a loop, so as to be able to hang the stocking. I did this in the end, because I forgot to do it before, but ideally it should be done before attaching the cuff to the boot, so that the union remains invisible.
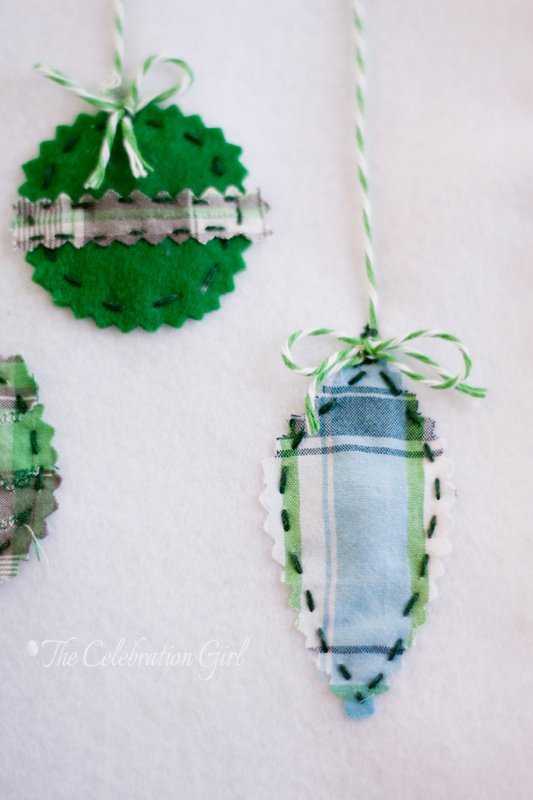
The procedure for making my own stockings was pretty much the same, but instead of starting a adding the appliques, I first made some designs in them with the embroidery stitches of my sewing machine, before it got broken. Then, I attached the appliques to the felt.
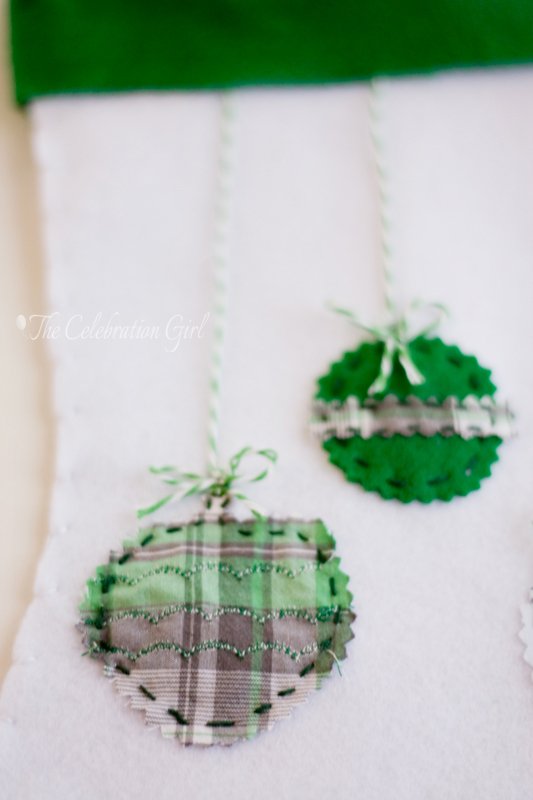
In order to make them look as if they were hanging, I made a bow with a piece of green twine and attached it to the bauble’s body with a few stitches. I then attached a long thread of twine to it, stitching it in two places only: a couple of stitched almost below the bow, and a couple of stitches on the other extreme, which remains unseen when the cuff is folded.
That was all! Overall, it took about 2 hours to finalize each stocking and they are now hanging in our living room, next to Luka and Zoe’s. I am planning to fill theirs with arts and crafts material (play dough, pencils, crayons, coloring pages) and, as for ours…I don’t know yet!
Do you hang stockings in your home? What do you fill them with, at Christmas?
Con sabor latino…
Buenas noches, queridos amigos! Aquí está, finalmente, el 10mo día de nuestro calendario de adviento,y ya faltan apenas 14 días para la nochebuena!
En ESTE post les mencionaba el otro día que el viernes pasado había estado cosiendo nuestras medias navideñas, y cuando digo nuestras quiero decir las de mi marido y mía propia. Ni había planeado hacer ninguna este año, porque Luka y Zoe ya tenian las suyas, que había sido regalo de su baby sitter de la navidad pasada, y no creía necesario hacer una para nosotros, siendo adultos y todo…pero cuando Zoe vió las de ellos y se dió cuenta que nosotros no teníamos empezó a preguntar por qué…y el resto es historia: a coser y hacerlas!
Hice nuestras medias usando retazos de tela que habian sobrado de nuestra felt board y tela de camisas viejas de mi marido, que él me había dado hace un tiempo para mis manualidades. Al comienzo había pensado coserlas a máquina, pero ésta se rompió a mitad de camino así que terminé haciendolas a mano. No son perfectas en absoluto y posiblemente haga nuevas en años sucesivos, porque no soy una costurera experta en lo más mínimo, pero hacerlas fue tan divertido que se me ocurrió compartir el proceso con ustedes, por si tienen ganas de animarse y hacer unas para ustedes y su familia. Es un proyecto muy divertido para una tarde con amigos y, como pueden ver en esta foto del post anterior, no es siquiera necesario hacerlas con motivos tradicionales, sino que pueden elegir cualquier diseño que les plazca!
Yo las hice de la siguiente manera:
1) Comencé por hacer el molde. Como mi objetivo era que tuvieran más o menos el mismo tamaño que las de Luka y Zoe, porque iban a estar colgadas al lado de ellas, lo que hice fue colocar una de sus medias sobre el paño y tracé el contorno con fibra. Luego corté dos medias iguales de cada color (elegí marrón para mi marido y blanco para mí)
2) Paso seguido, tomé todas las camisas viejas de mi marido y empecé a pensar en diseños. Me decidí por telas en tonos verdes para ambos, para que hubiera un poco de unidad, y recorté pinos para la media de mi marido (para darle un estilo más masculino, como de leñador), y adornos navideños para mí, con una tijera de zig zag. Luego coloqué las piezas sobre cada una de las medias y jugué con ellas hasta encontrar un diseño que me gustara.
3) Luego, corté un pedazo de tela en tono contrastante para hacer el puño. Lo agregué al modelo de la bota para ver si me gustaba el color y el tamaño, modifiqué lo que hacía falta, y luego comencé a coser.
4) Lo primero que cosí fueron los apliques, usando un punto bastilla, o de hilván, muy sencillo, comenzando por las piezas que iban en la parte de abajo del diseño. Sostuve cada pieza con alfileres,para que lograr que permaneciera en su lugar mientras la cosía, de a una por vez y tomandome mi tiempo, pero les aviso que estuvo todo listo en un dos por tres, porque no elegí un diseño complicado.
5) Luego uní el puño al cuerpo de la media, primero un lado y luego el otro, y finalmente uní los costados del puño.Como pueden ver aquí tambien usé el punto bastilla, porque no se iba a ver luego, pero la verdad es que queda más prolijo con otros punto más invisibles, o bien con un punto atrás de puntadas muy pequeñitas.
6) Finalmente, uní las dos partes del cuerpo de la media usando el punto de festón, que es el que se usa para mantas y botones. Para la media de mi marido elegí un color de hilo contrastante, pero para la mía decidí usar blanco, como el cuerpo de mi media.
7) Por último, agregué un lazo para poder colgarla. Debo aclarar que hice esto como último paso porque olvidé hacerlo antes, pero lo ideal es coserlo al cuerpo de la media antes de coser el puño, así no es visible la costura.
El procedimiento para hacer mi media fue básicamente el mismo, pero antes de pegar los apliques bordé unos detalles en los mismos con la máquina de coser (antes que se rompiera). Luego los pegué con el punto bastilla. Asimismo, como mi diseño eran decoraciones navideñas, agegué una cinta y un moño de hilo bicolor, para que pareciera que estaban colgando. Hice el moño con los hilos por separado y los pegué con un par de puntadas sobre cada adorno, y luego tomé un pedazo más largo de hilo, y lo pegué tambien con un par de puntadas invisibles en cada extremo (el extremo superior quedó debajo del puño).
Y eso fue todo! En total no debe haber llevado más de 2 horas por media y, ahora estan ambas colgadas del mueble de nuestro living-comedor, junto a las de Luka y Zoe. Estoy pensando llenar las de los niños con material de arte, como lápices, crayones, plastilina y hojas para colorear…y aún no sé qué poner en las nuestras!
¿Ustedes tienen la costumbre de colgar medias navideñas? ¿ Con qué regalos las rellenan?

We do have stockings… always had. The first ones were made by my mom who is super crafty, they were made of felt and decorated with sequins and pailletes.
Last year she sent us one for each of us, for our new home-family. They are cross-stitched.
We would normally put the letter to Santa and the 3 Kings there, after which it would mysteriously disappear. We would get all worried if after a few days the letters were still there.
Sometimes if we were lucky they were filled with candy on christmas morning or on the 6th of January, but not every time. They mainly acted as a magic mailbox.
Pero que bonitas! Son pequeñas obras de arte!
Me encantaron